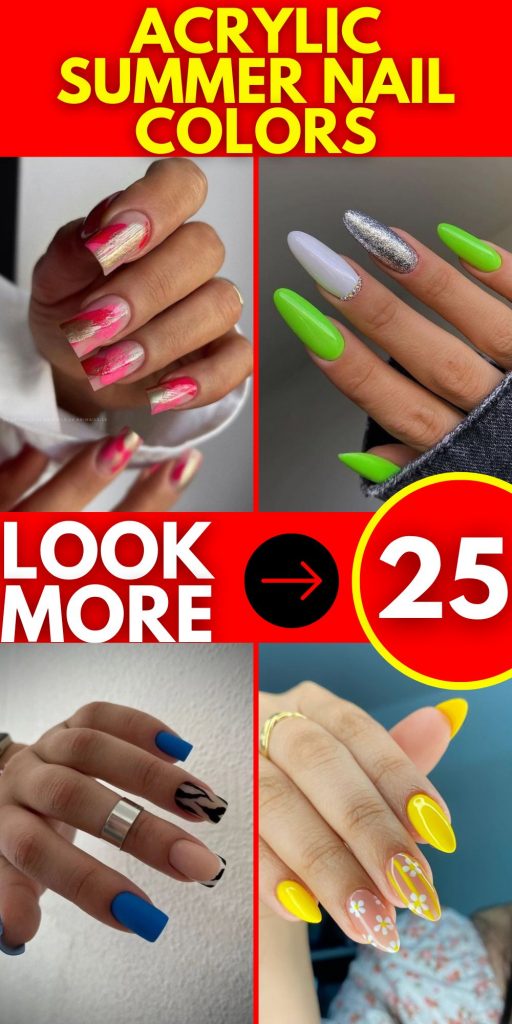
Acrylic Summer Nail Colors 25 Ideas: Your Ultimate Guide
Summer is knocking at the door with its promise of fun and flair, and what better way to welcome it than with a fresh set of acrylic summer nail colors 2024? As a professional manicurist, I’m here to give you the scoop on the hottest nail trends that will have your hands making a statement all season long. So, are you ready to dive into a world of vibrant hues and dazzling designs? Let’s get started!
Deep Burgundy Elegance
As a seasoned nail artist, I can’t help but admire the sophisticated allure of a deep burgundy. This color speaks volumes about the wearer’s confidence and timeless style. The rich, wine-colored hue perfectly encapsulates the transition from the boldness of spring to the deeper tones of summer nights.
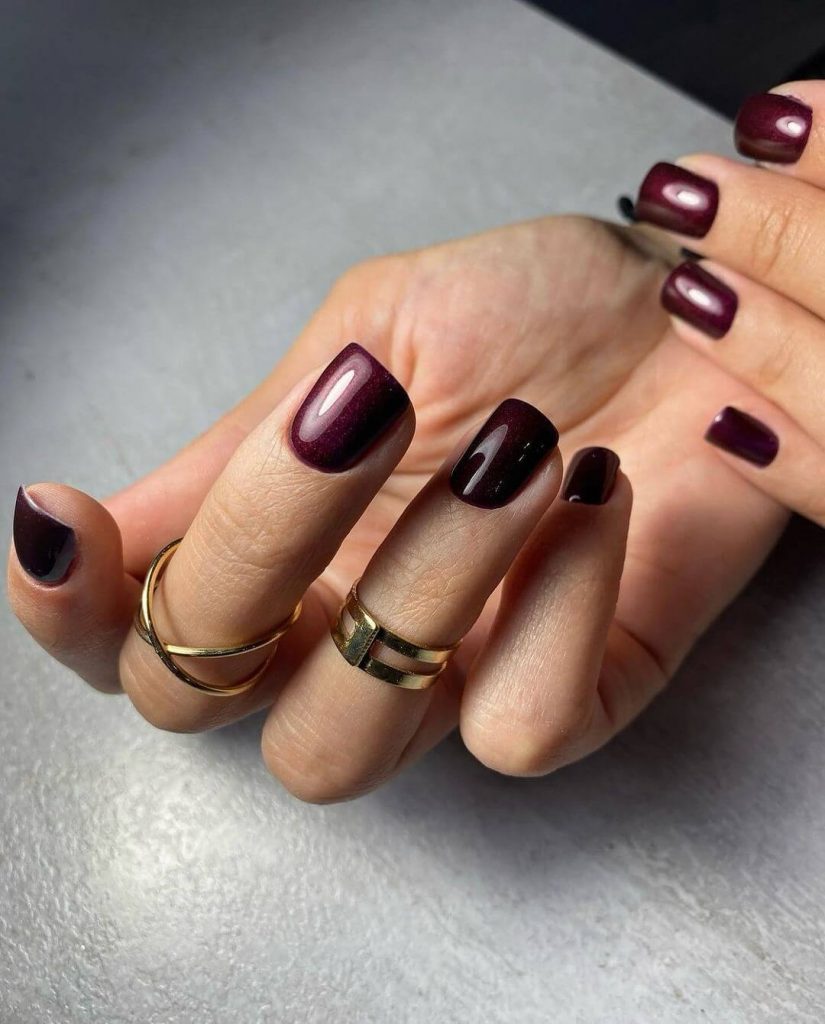
- Acrylic Powder: Luxe Burgundy Blend
- Base Coat: Strong Adhesion Primer
- Top Coat: High-Gloss Finisher
Creating this look is like painting a masterpiece. Start with a solid base coat to protect your natural nail. Carefully apply the burgundy acrylic powder, and sculpt to your desired shape and length. Finish with a high-gloss top coat for a stunning shine that lasts.
Classic Red Sophistication
Nothing says classic chic quite like a glossy red acrylic nail. It’s the quintessential choice for those who embrace both tradition and glamour. This shade of red has a warmth that compliments all skin tones and transitions effortlessly from daytime grace to evening elegance.
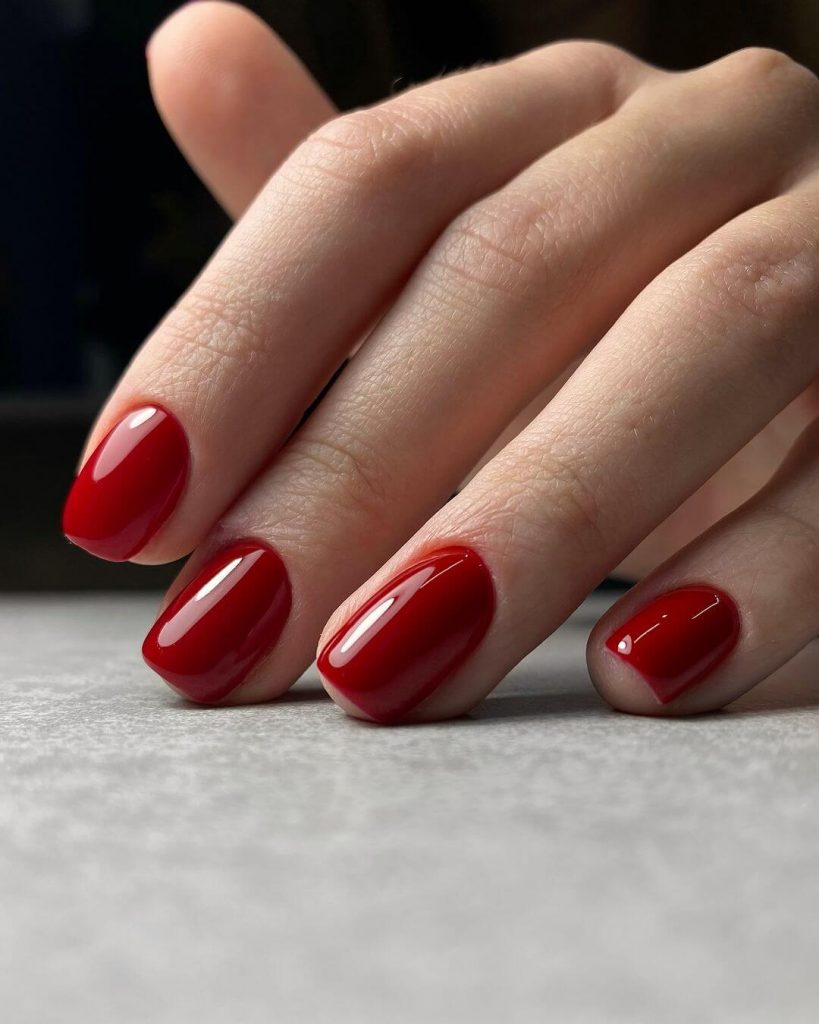
- Acrylic Powder: Ruby Radiance
- Base Coat: Bonding Base
- Top Coat: Diamond Shine Sealer
To achieve this timeless look, ensure your nails are clean and prepped. Apply the bonding base, then mold the ruby red acrylic to your nails, refining the shape as you go. Seal the deal with a diamond shine top coat for an exquisite finish.
Summer Citrus Fizz
Summer calls for fun, and what’s more playful than a citrus-inspired French tip? This look takes the traditional and turns it on its head with a pop of zesty lime. It’s refreshing, unconventional, and absolutely perfect for beach days and summer soirees.
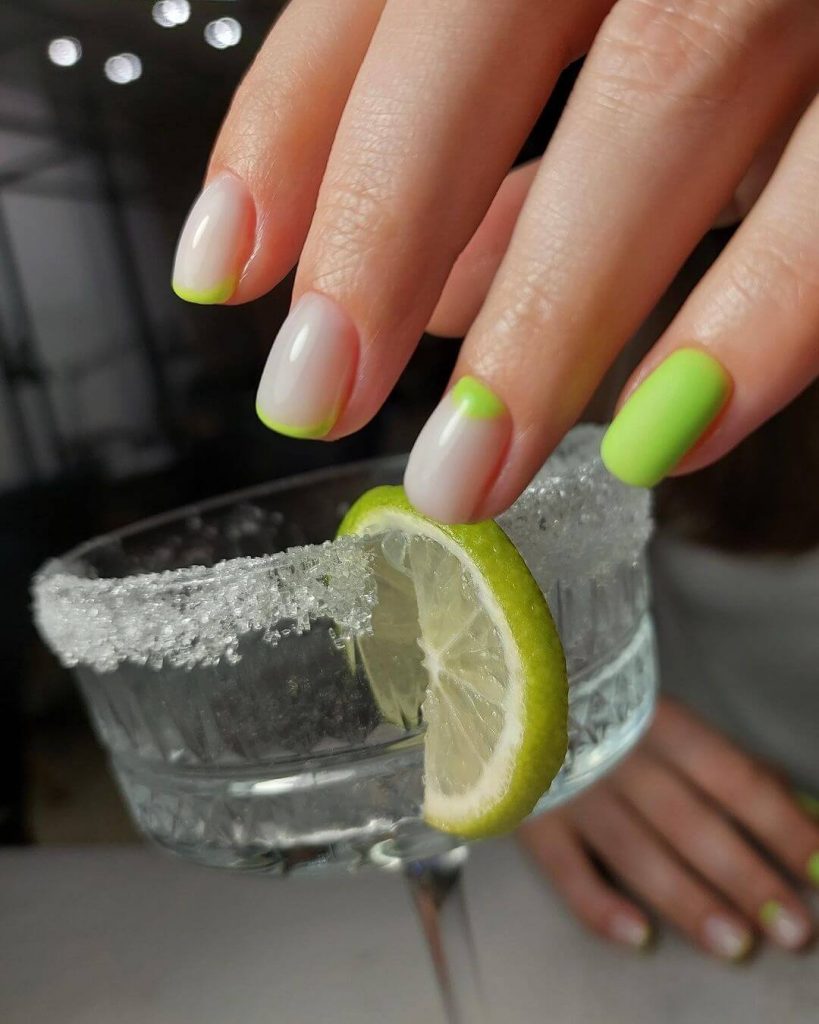
- Acrylic Powder: Lemon-Lime Zest
- Base Coat: Natural Nail Foundation
- Top Coat: UV-Protectant Seal
Begin with a natural base, followed by a precise application of the lime-colored acrylic on the tips. It’s a delicate process that requires a steady hand and a keen eye for detail. Once set, protect your design with a UV top coat to prevent fading.
Hot Pink Passion
Embrace the vivacious spirit of summer with a hot pink that can’t be ignored. This hue is for the bold, the daring, and the ones who walk into a room and own it. Hot pink nails are a conversation starter and an instant mood booster.
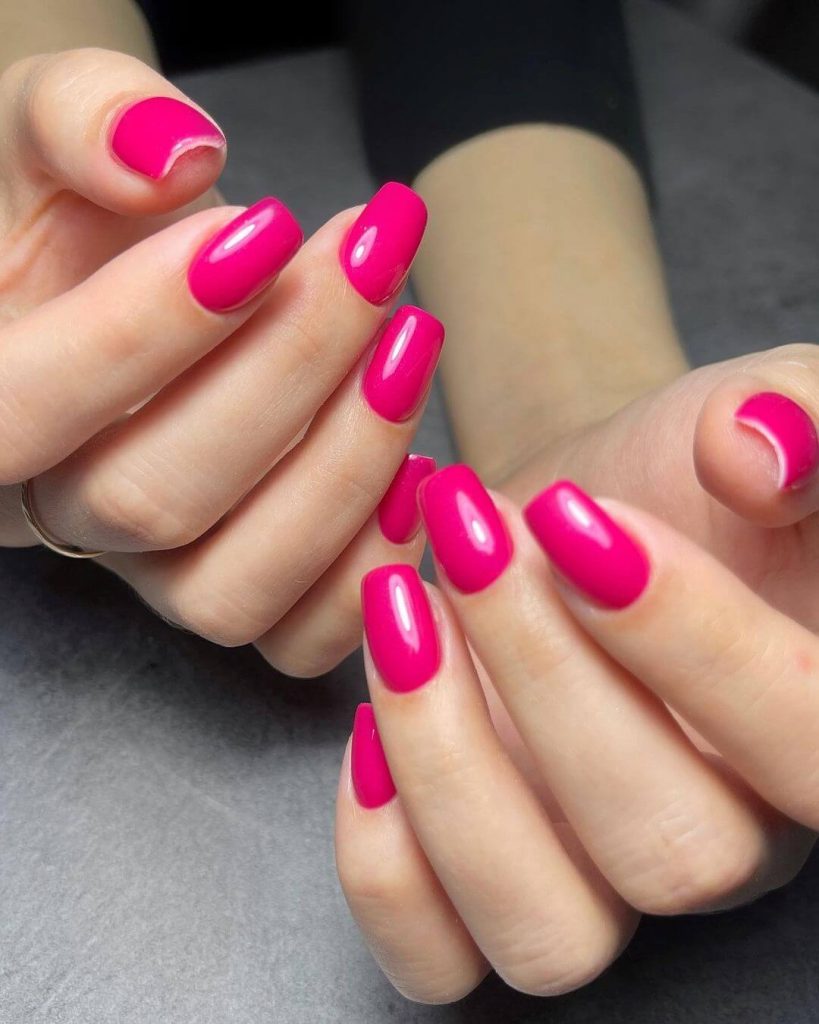
- Acrylic Powder: Electric Pink Blaze
- Base Coat: Adhesion Pro
- Top Coat: Gel-Like Gloss
Start with an adhesive base to ensure your color pops. Apply the electric pink acrylic, shaping it to a flawless finish. A gel-like gloss top coat will give your nails that enviable salon-fresh look.
Mystic Olive Green
For those who prefer a dash of mystery with their style, this olive green with a hint of sparkle is the way to go. It’s subtle yet intriguing, perfect for anyone who enjoys a touch of enigma with their aesthetic.
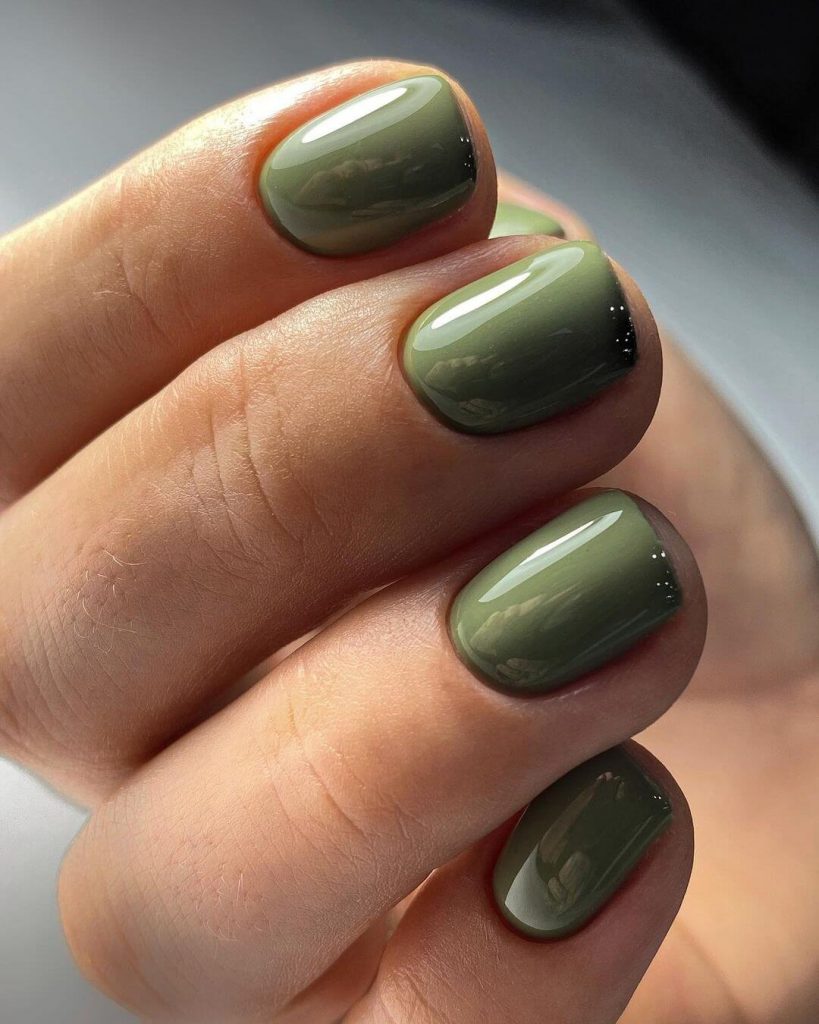
- Acrylic Powder: Enchanted Forest
- Base Coat: Fortifying Herbal Primer
- Top Coat: Matte Magic
Prep your nails with a fortifying base, apply the enchanted forest acrylic for that mystical touch, and opt for a matte top coat to modernize this classic shade.
Solid Square Elegance
As a manicurist, the first look that caught my eye was the timeless solid square. This look isn’t just about the shape, but the impeccable application of color that defines the summer mood.
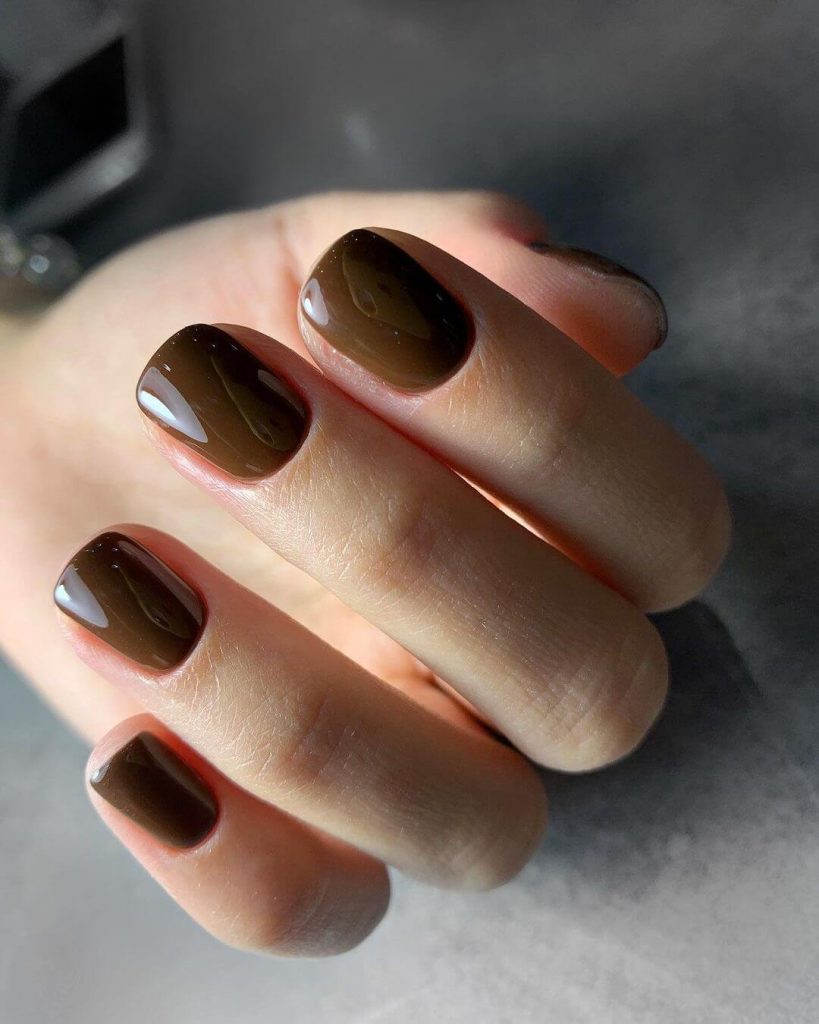
- OPI Classic Nail Lacquer
- CND Vinylux Weekly Polish
- Essie Gel Setter Top Coat
To recreate this look, start with a clean, buffed nail. Apply a base coat, two layers of your chosen solid color, and seal with a high-shine top coat.
Mesmerizing Blue Waves
Dive into the depths of the ocean with these swirling blue tides. This design evokes the rhythmic movement of the waves, with natural undulations of dark and light blues. It’s a maritime dream on your fingertips, perfect for a beachy vibe.
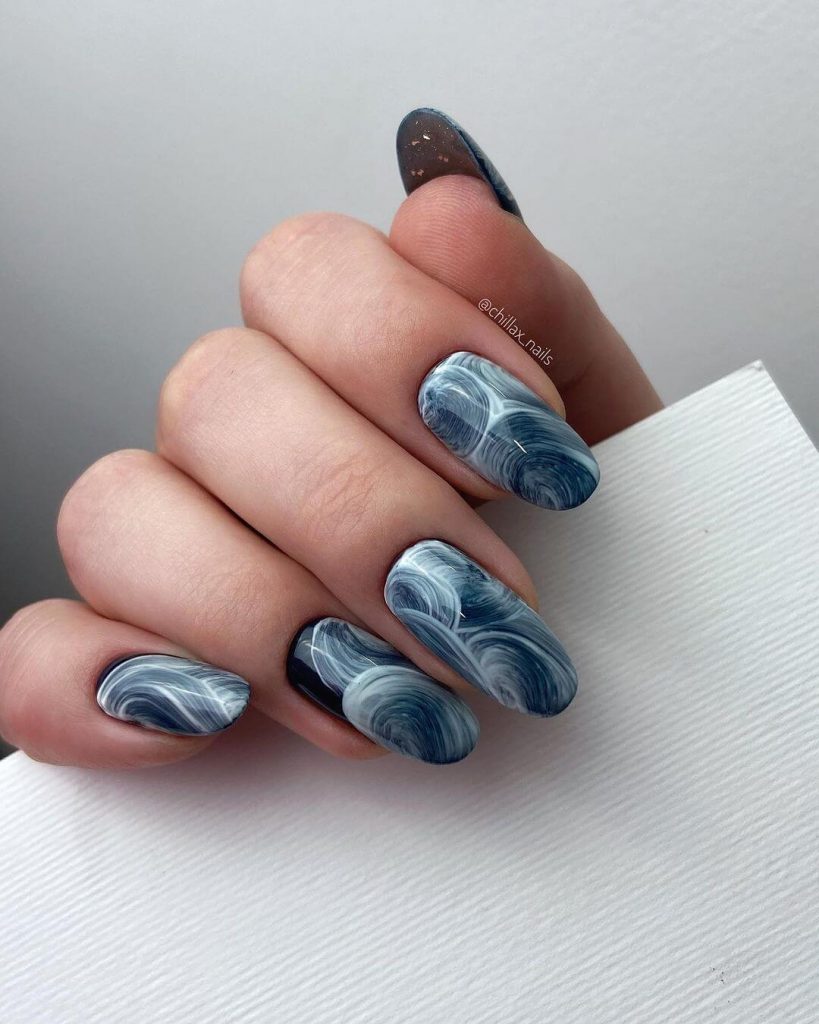
- Acrylic powder: Ocean Deep Blue, Skyline Baby Blue
- Base coat: Sea Bed Adhesive
- Topcoat: Crystal Clear Finish
To recreate this aquatic fantasy, begin with a solid base coat. While still wet, gently swirl together your chosen shades of blue acrylic powder. Finish with a top coat for that bright and enduring shine.
Elegant Neutral Tones with a Twist
We see a harmony of neutral tones, blending a natural look with a modern flair. The touch of simple almond artistry is visible in the clear tips adorned with a subtle sprinkle of gold – a short french with a luxurious twist.
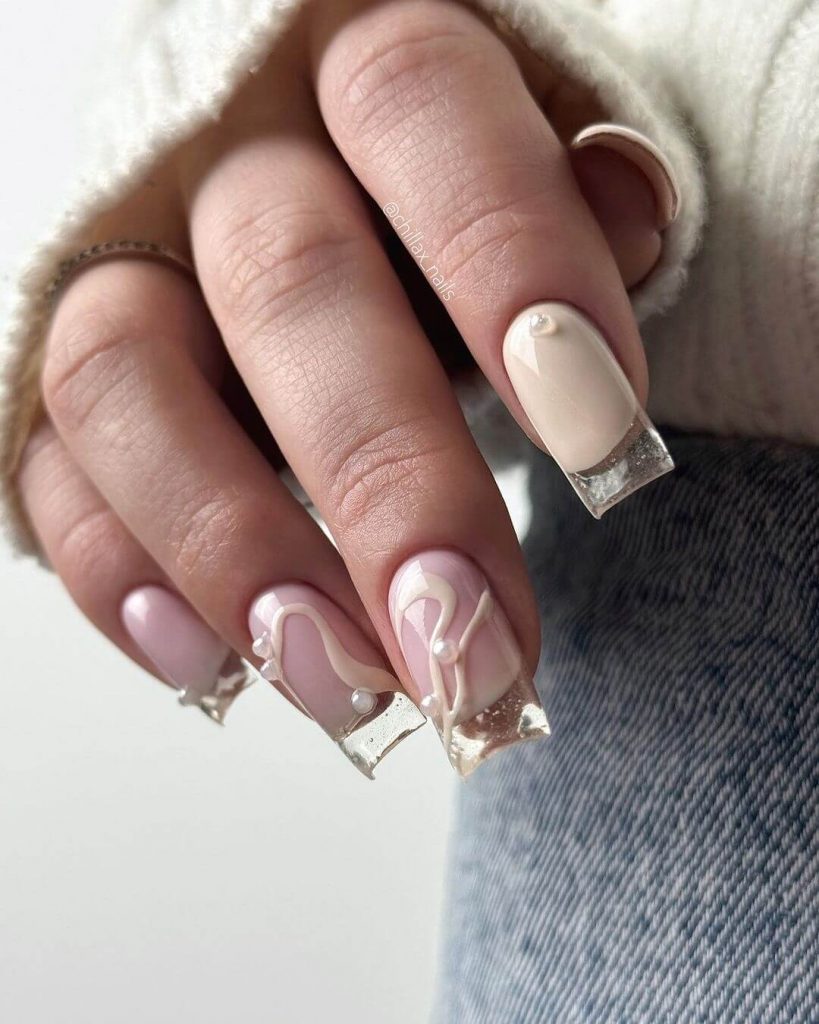
- Acrylic powder: Classic Nude, Gold Fleck Sparkle
- Base coat: Strong Foundation
- Topcoat: Glass-like Sealant
- Gold leaf flakes
Begin with a nude acrylic base. Once set, apply gold leaf flakes to the tips and encase with a clear acrylic.
Waves in Motion
Features a playful and bright twist on abstract art. Bold blue waves cascade over a translucent base, reminiscent of the ocean’s frothy crests. It’s a design that’s both colorful and cheerful, perfect for any summer adventure.
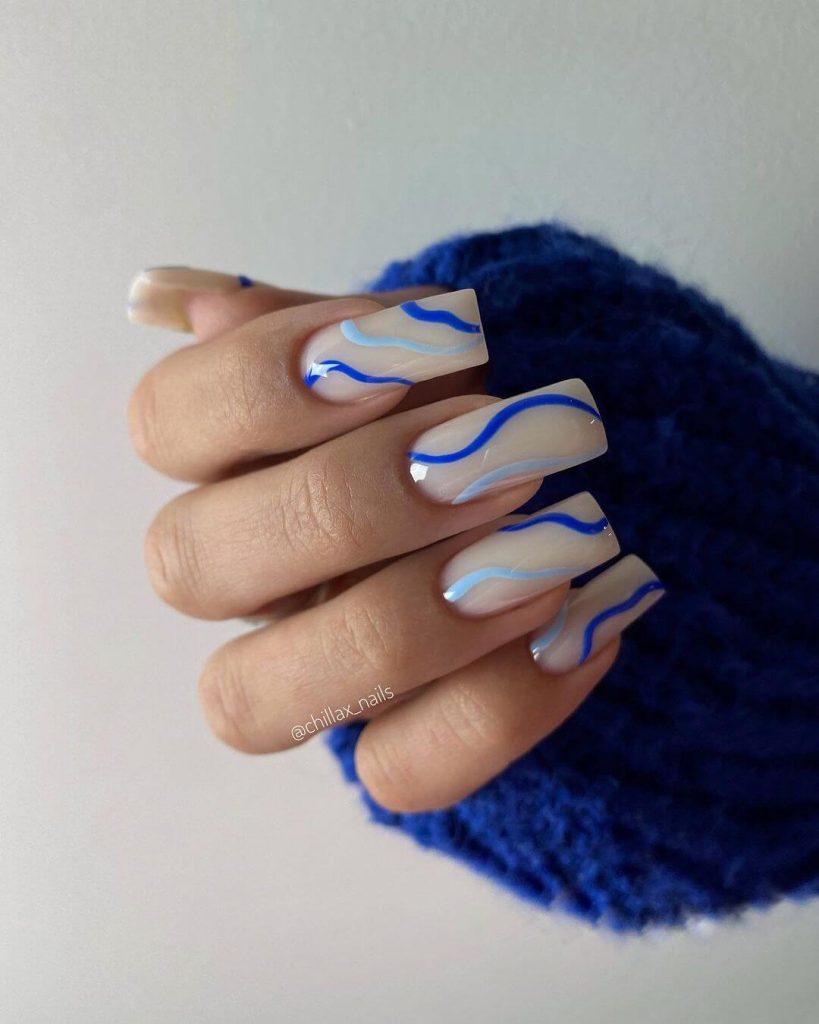
- Translucent acrylic base coat
- Blue acrylic paint for the waves
- Thin brush for detailing
- Matte topcoat for a contemporary finish
Apply a translucent base coat, then with a thin brush, paint your waves in a freehand motion. Opt for a matte topcoat to give a modern touch to this energetic design.
Sunset Gradient Dreams
As the day fades, the nails in 10.jpg capture the soft gradient of a summer sunset. Blending hues from warm peach to rosy pink, this long square design is both neutral and colorful, embodying the serene transition from day to night.
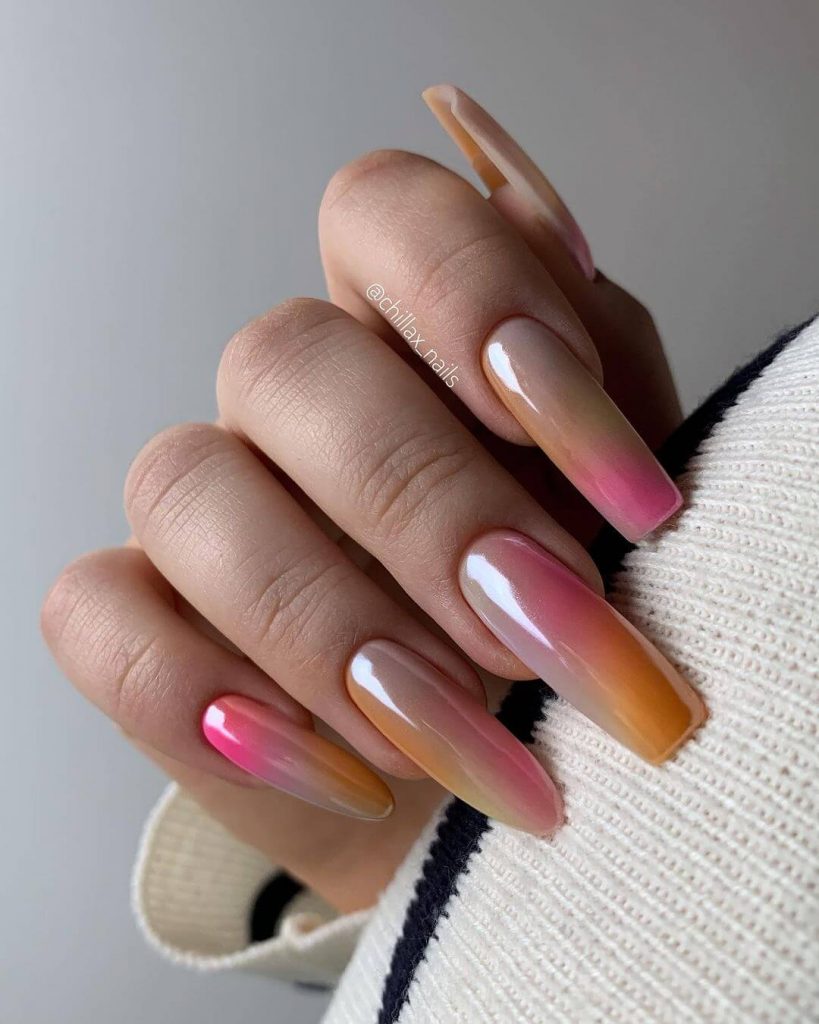
- Gradient sponge
- Acrylic paints in peach, pink, and a hint of yellow
- A glossy topcoat to enhance the colors
With your sponge, create a gradient effect using the acrylic paints. Once satisfied with the blend, apply a glossy topcoat to bring out the vibrancy of your sunset-inspired nails.
Elegant Emeralds
The Professional Touch
Upon first glance, the long square nails presented embody a luxurious ocean depth with their emerald green to black gradient. The solid color at the base transitions to a glossy black, creating a sophisticated yet simple design, perfect for those who love a touch of mystery.
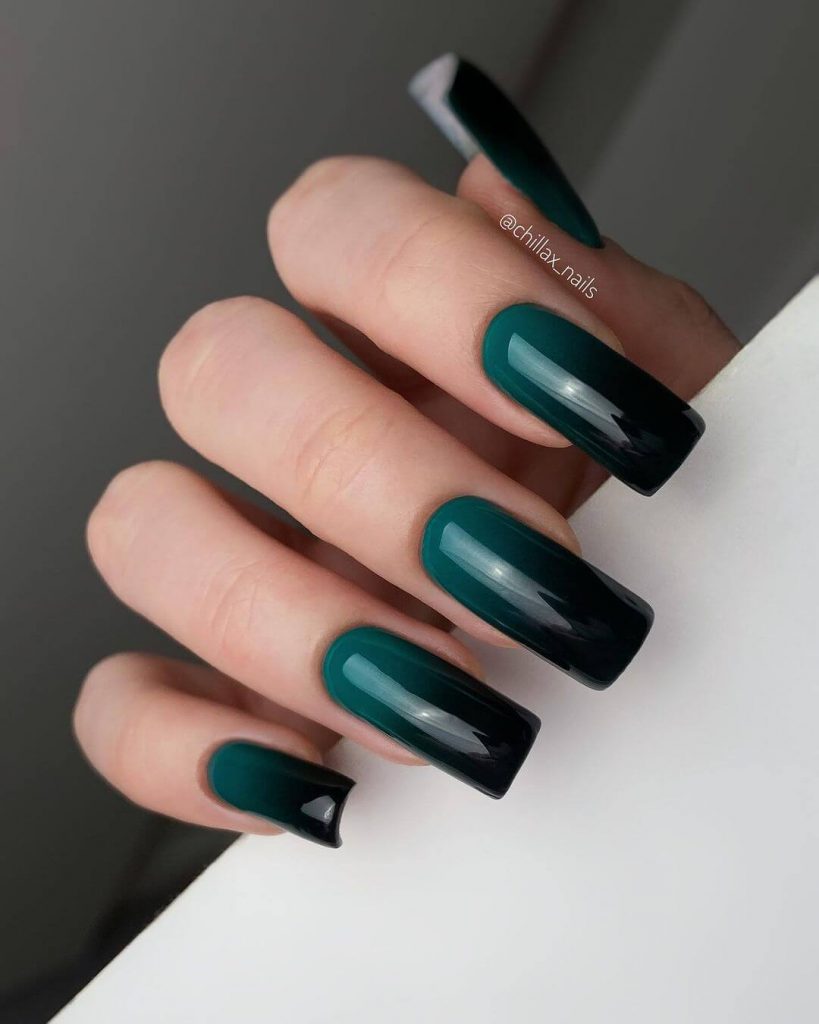
Must-Have Materials
- Deep emerald green acrylic powder
- High-gloss black acrylic paint
- Top-quality base and top coats for a lasting shine
I personally recommend using premium brands for the base and top coats to ensure longevity and a dazzling finish.
Step-by-Step Creation
To achieve this gradient effect, begin with the emerald base, then, while still slightly tacky, blend in the black from the tip, working downwards. A sponge can be a helpful tool for a smooth transition.
Textured Chic
A Closer Look by the Expert
Showcases an inventive short french manicure with textured silver accents on a matte beige background. The combination of simple and short square with the colored french tips gives it a playful yet polished look, suitable for both day and night affairs.
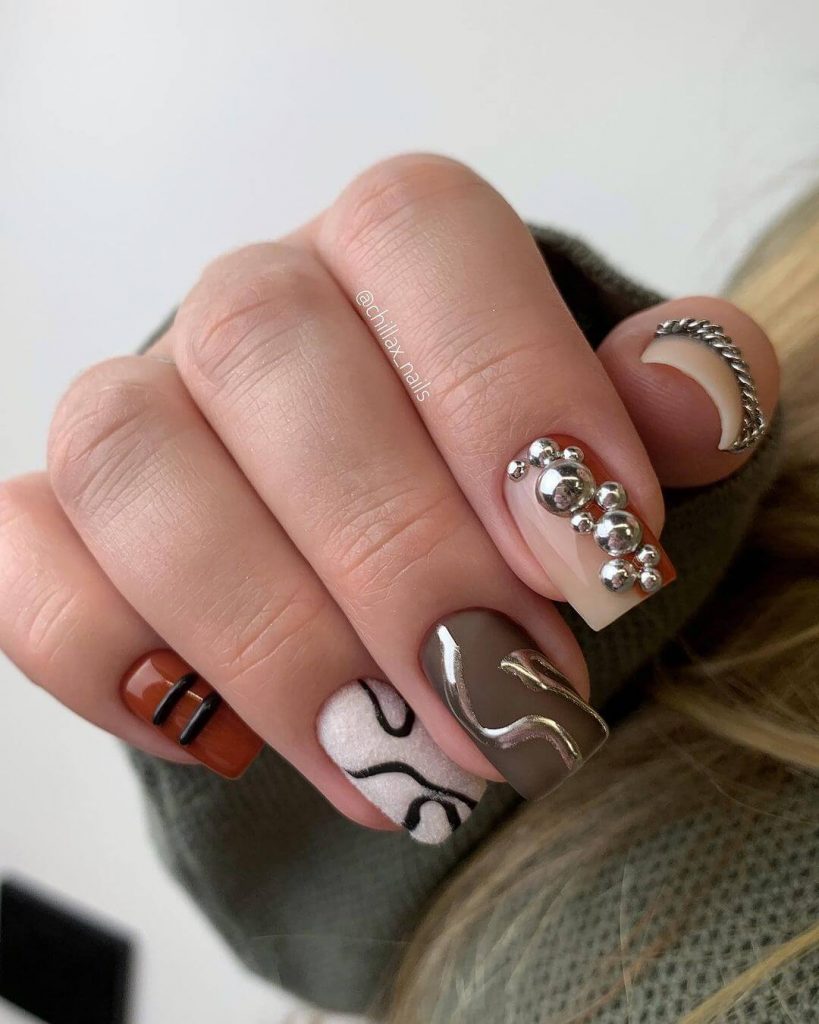
Toolkit Essentials
- Matte beige acrylic base
- Silver glitter strips
- Adhesive for secure placement of embellishments
The silver glitter strips can be found at any specialized nail art supplier, and I find that using a tweezer for placement ensures precision.
Your DIY Guide
Start with a flawless matte base. Once dry, carefully apply the silver strips at the tips, securing them with a dab of adhesive. Remember, less is more for a chic look.
Pastel Perfection
From the Manicurist’s Table
Radiates with a natural and neutral base adorned with delicate yellow and grey floral patterns. This almond nail design is the epitome of bright and simple almond sophistication, breathing life into the short and plain acrylic trend.
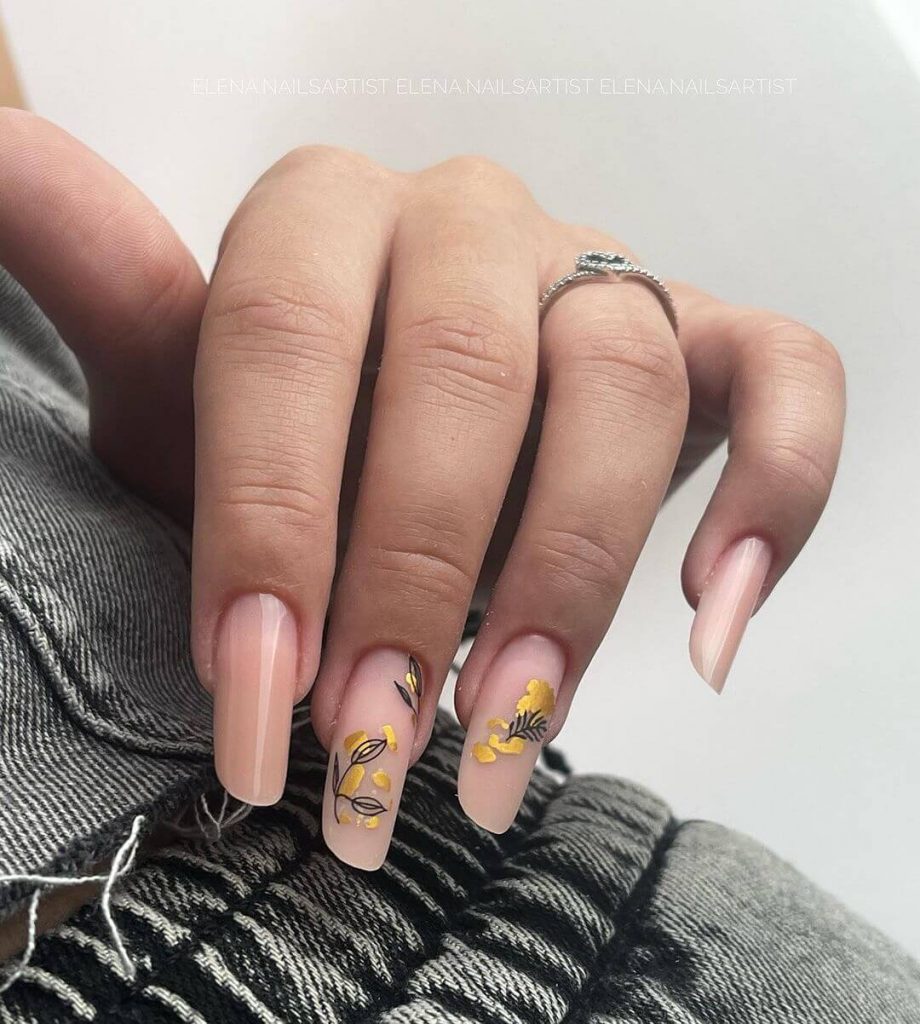
Your Shopping Basket
- Soft pastel yellow and grey acrylic paint
- Fine detail brush for intricate designs
- Sealant for a durable matte finish
Opt for pastel colors that are pigmented yet sheer for that translucent, delicate look.
At-Home Artistry
After preparing your base, take your fine brush to gently paint on the floral patterns. Working with a light hand is key to achieving the graceful lines and petals.
Summer Florals on Long Coffin
Lastly, we have long coffin nails that present a summer garden in full bloom. A bold green meets a pastel pink, united by gold-accented floral art.
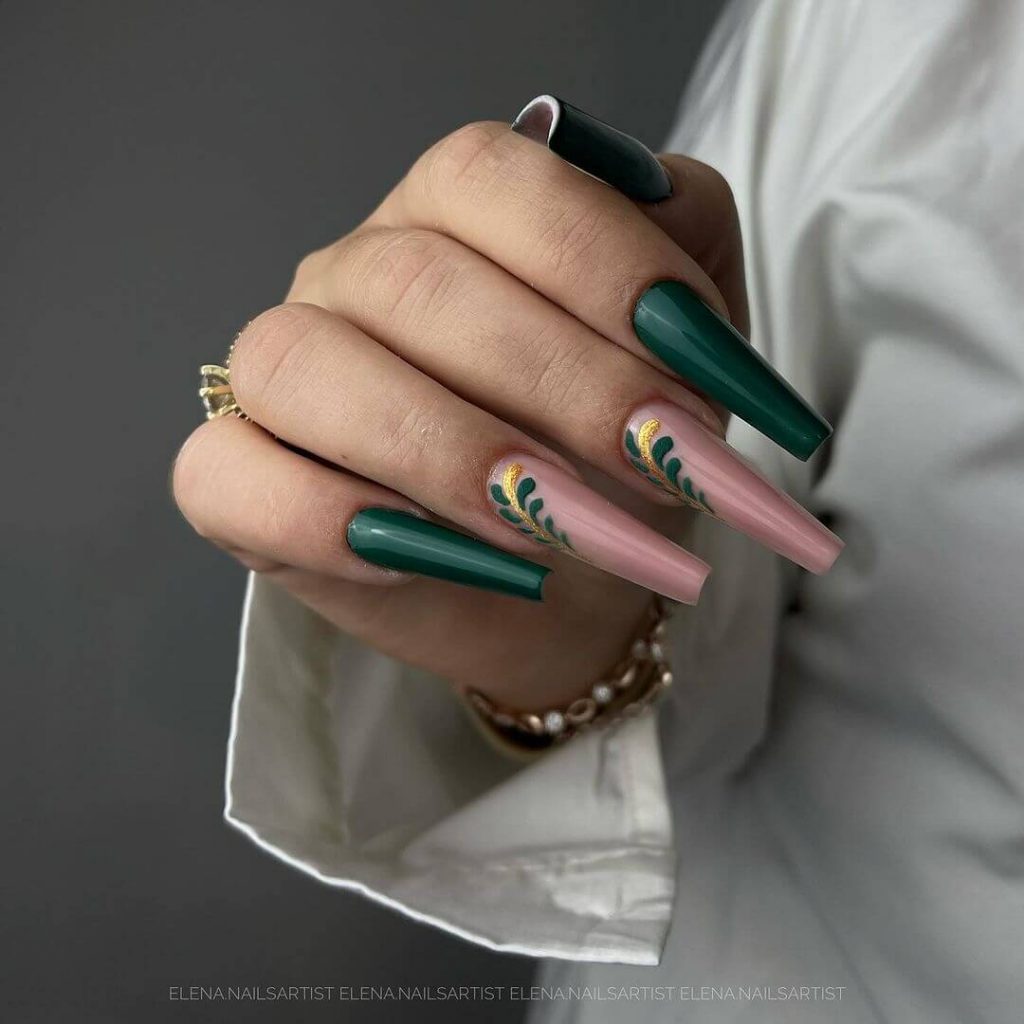
- Zoya Nail Polish in “Hunter”
- OPI Nail Lacquer in “Mod About You”
- Gold foil for detailing
- Glisten & Glow Top Coat
Start by painting the base green on the thumb, index, and pinky fingers, and pink on the others. With gold foil, add floral accents. Apply Glisten & Glow top coat to protect the artistry and add a stunning shine.
Sunny Gradient with Floral Art
Drenching your nails in the sunniest shades of orange and yellow, this long square manicure simmers with summer’s essence. The white floral art on the ring fingers adds an elegant touch to the fiery gradient.
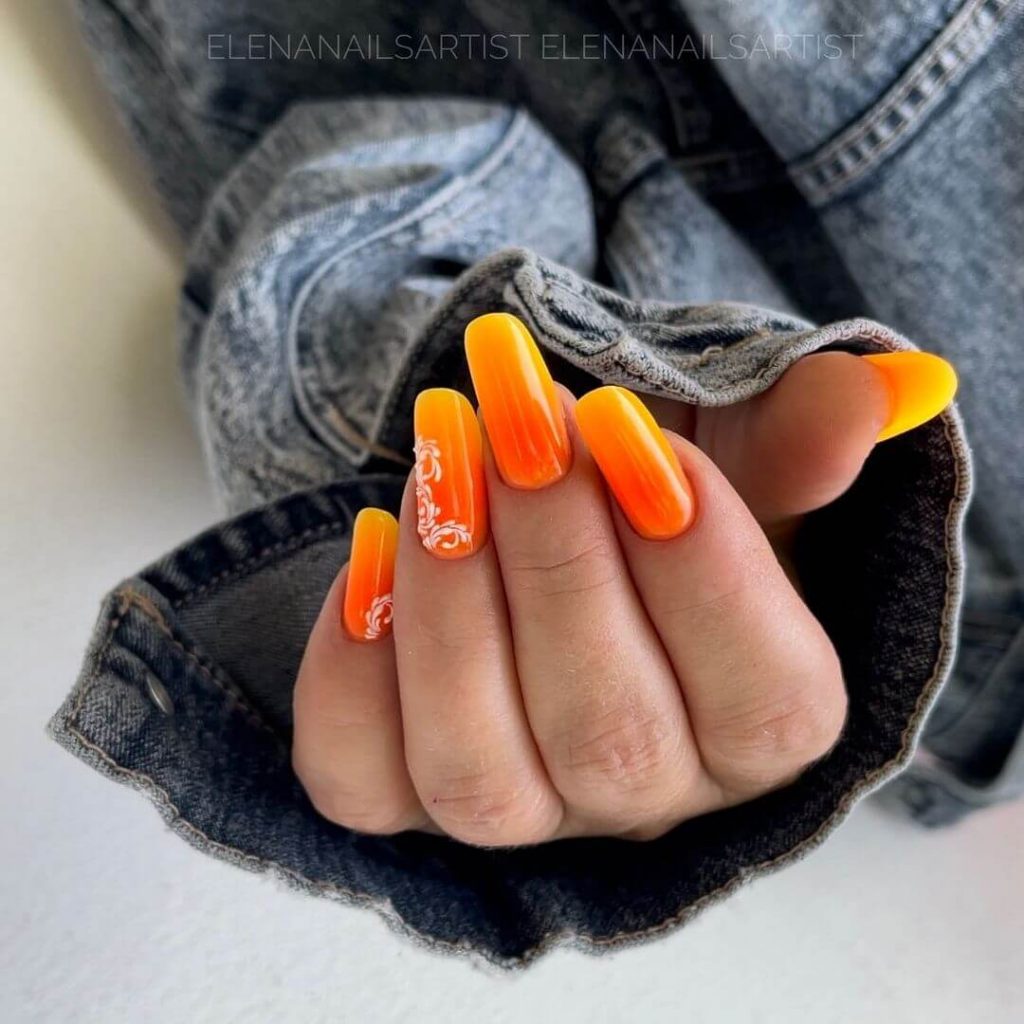
- Orly Nail Lacquer in “Melt Your Popsicle”
- China Glaze Nail Polish in “Sun Worshiper”
- White acrylic paint for floral detail
- Seche Vite Dry Fast Top Coat
Begin with a neon yellow base at the cuticle, blending into a vivid orange toward the tip. Use a detail brush and white acrylic paint to delicately add the floral art on the accent nails. Seal with a top coat for a glossy finish that lasts.
Pink Leopard Print Delight
Short and sweet, these nails feature a playful pink base speckled with black leopard spots, combining simple almond and natural elegance with a dash of wildness.
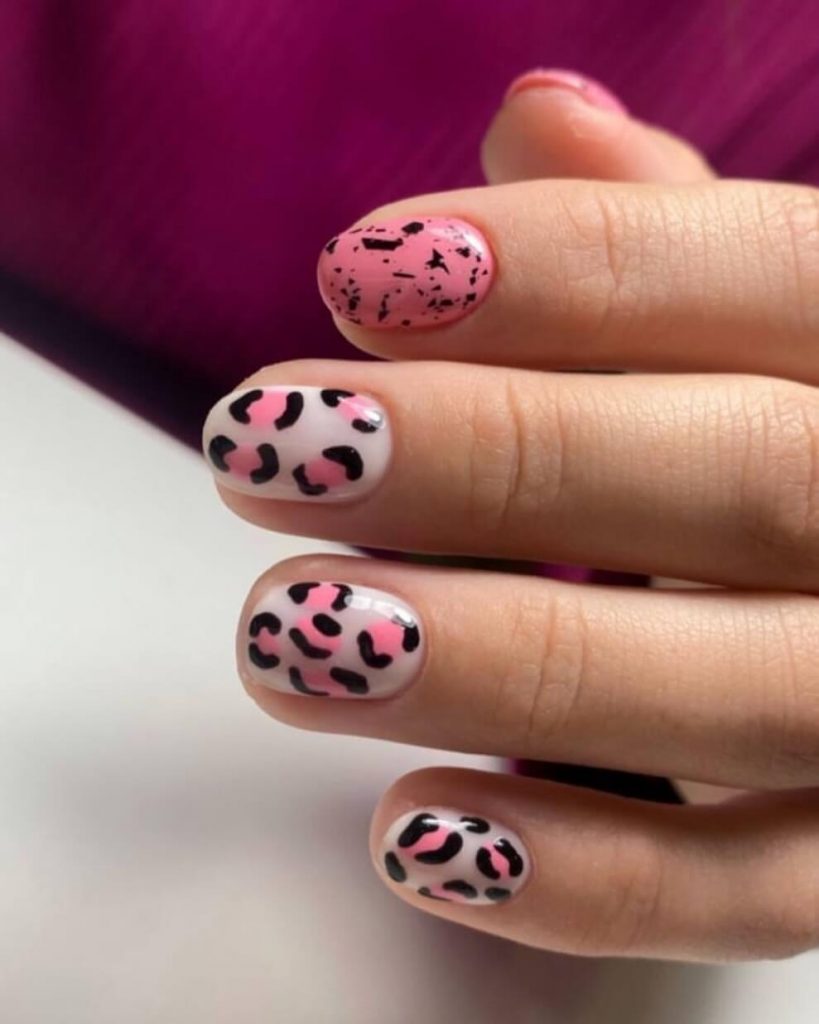
- Essie Nail Polish in “Mod Square”
- Black and white nail art pens for detailing
- Sally Hansen Insta-Dri Top Coat
After the pink base, use nail art pens to draw leopard spots. Aim for uneven shapes and sizes for authenticity. Apply a top coat for a smooth surface and durability.
Golden French on a Nude Base
Medium square nails serve as a canvas for a classic French tip reimagined with a golden twist on a nude base, blending neutral simplicity with a hint of luxury.
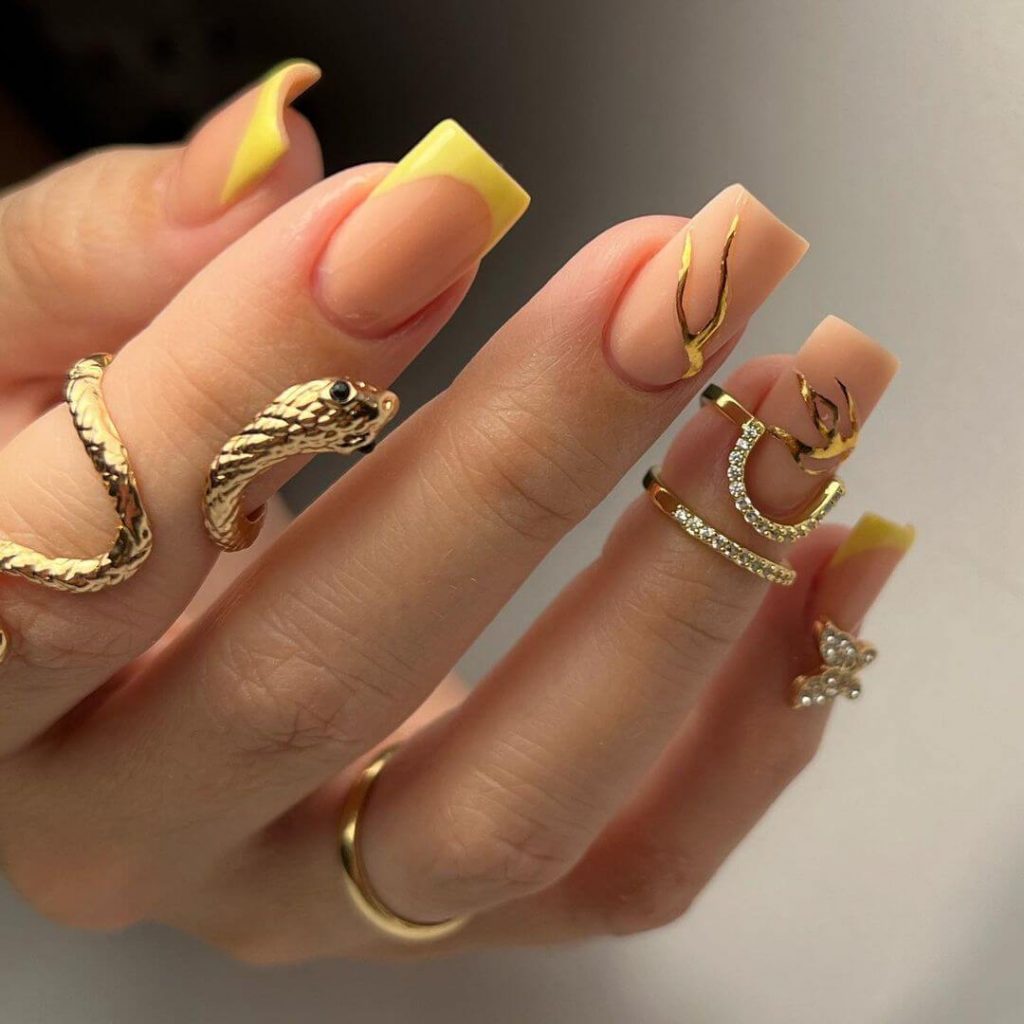
- Zoya Nail Polish in “Avery”
- Gold striping tape
- Glisten & Glow Top Coat
Cover the nails in a nude polish. Once dry, apply gold striping tape at the tips for that bright metallic effect. Finish with a high-shine top coat.
Classic Red Elegance
A timeless color for all seasons, these short square nails are lacquered in a deep red, embodying simple, solid, and classic beauty.
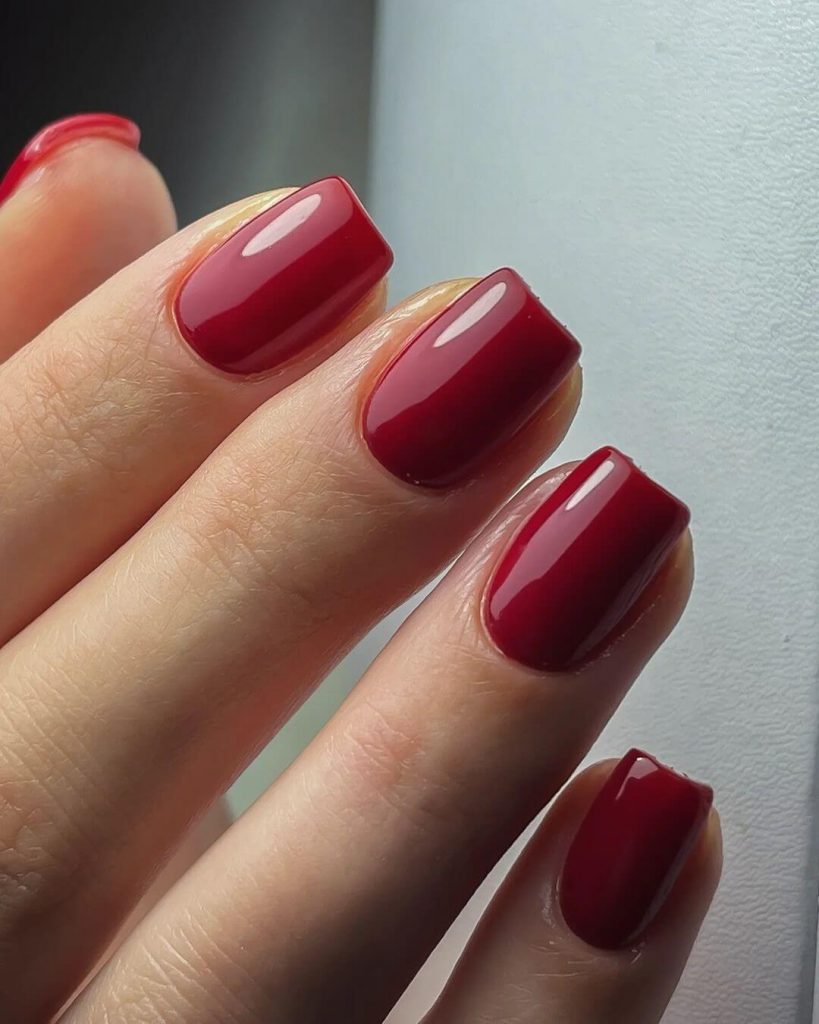
- OPI Nail Lacquer in “Malaga Wine”
- OPI Natural Nail Base Coat
- OPI Top Coat
Prep with a base coat, then apply two coats of “Malaga Wine” for a rich, opaque color. Finish with a top coat to enhance the shine and ensure longevity.
Turquoise Shimmer
The square nails painted in a shimmering turquoise mirror the clear skies of summer. The subtle shimmer in the polish reflects light, reminiscent of gentle ocean waves.
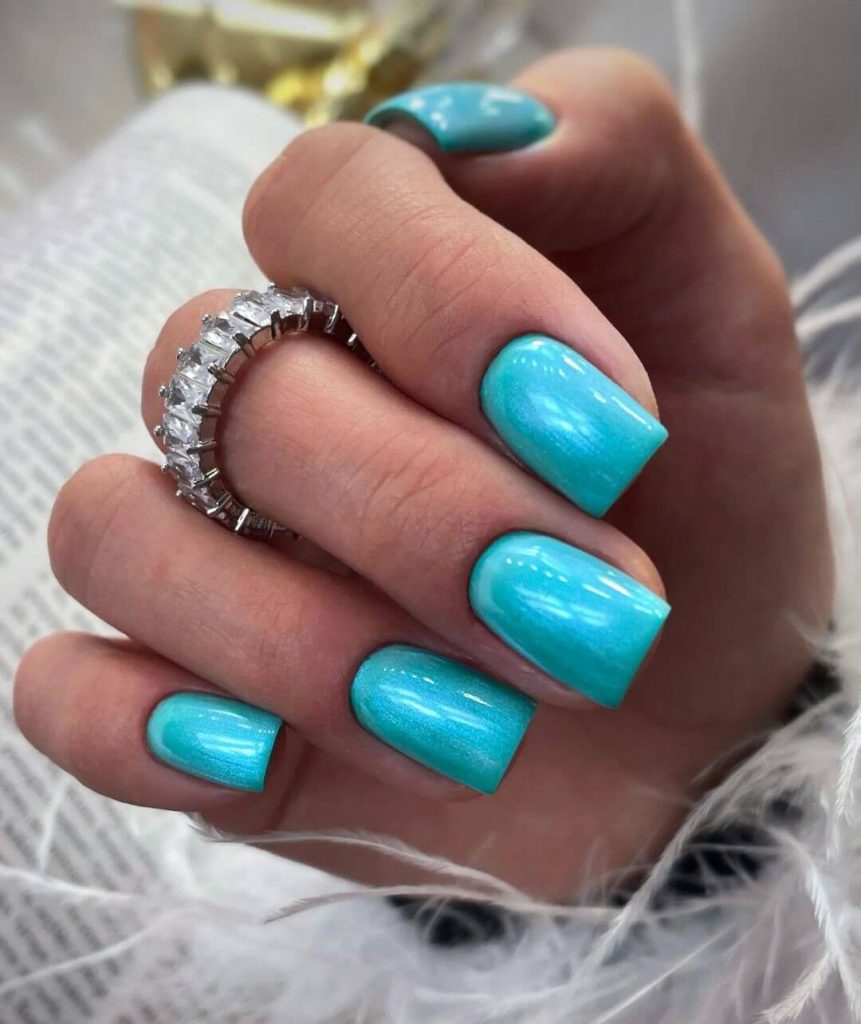
- Essie Nail Polish in “Naughty Nautical”
- Essie Gel Setter Top Coat
Apply two coats of “Naughty Nautical” for full coverage. Once dry, apply a gel setter top coat for a smooth, glossy finish that brings out the shimmer.
The Elegant Short French
When simplicity meets elegance, you get the perfect summer look. Behold the short French manicure, where natural bases flirt with bright tips for a sunny upgrade to a classic style.
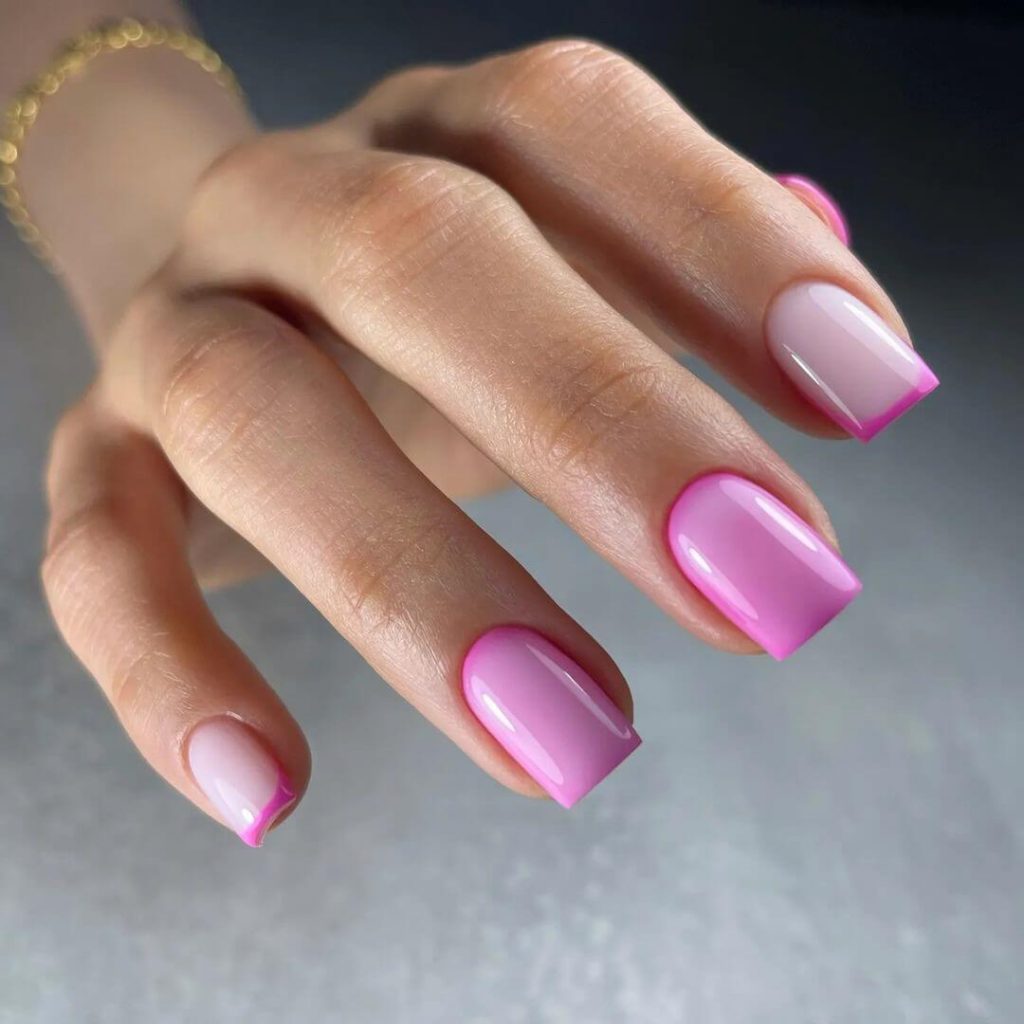
Professional Opinion: The short French manicure presents a lovely contrast with its natural nail bed and hot pink tips. It’s a refreshing twist to the French tip design that exudes a simple almond shape, making it versatile for both casual and formal wear.
Consumables:
- Base coat: OPI Natural Nail Base Coat
- Pink polish: Essie’s “Fiesta”
- Top coat: Seche Vite Dry Fast Top Coat
- My expert tip: For a seamless French tip, use adhesive stencils to get that crisp line.
DIY Instructions: Begin with a clean, buffed nail. Apply the base coat followed by two layers of a sheer nude polish. Once dry, position the stencil and paint the tips with your chosen bright hue. Finish with a fast-drying top coat for a lasting summer look.
The Refreshing Square Solid
Summer is synonymous with freshness, and what’s fresher than a cool mint on your fingertips? Shows off square solid nails in a soothing mint shade, adorned with a hint of metallic art.
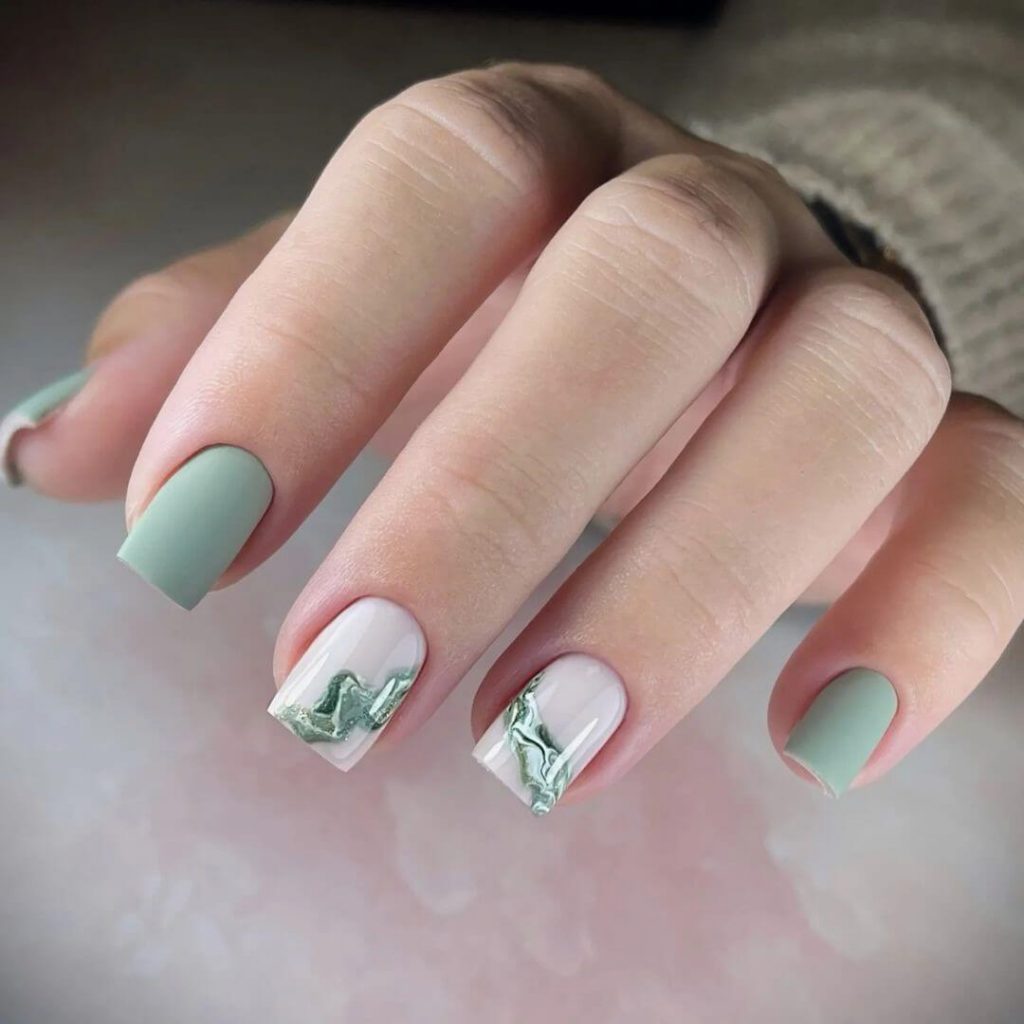
Professional Opinion: The square shape combined with a solid mint color offers a neutral, yet eye-catching look. The metallic art adds a creative twist, making these medium square nails a canvas for expression.
Consumables:
- Acrylic powder: CND Perfect Color in ‘Cool Mint’
- Metallic polish: Sally Hansen Color Foil in ‘Sterling Silver’
- My expert tip: Use a fine brush to apply the metallic polish and create abstract designs.
DIY Instructions: After applying acrylics, choose a mint-colored powder and buff to perfection. Use a fine brush with metallic polish to create your design. Seal it with a top coat for a dazzling finish.
The Swirling Neon Art Ideas
Who says acrylics can’t be a work of art? Captures the essence of summer with swirling patterns of neon art ideas that are both bold and beautiful.
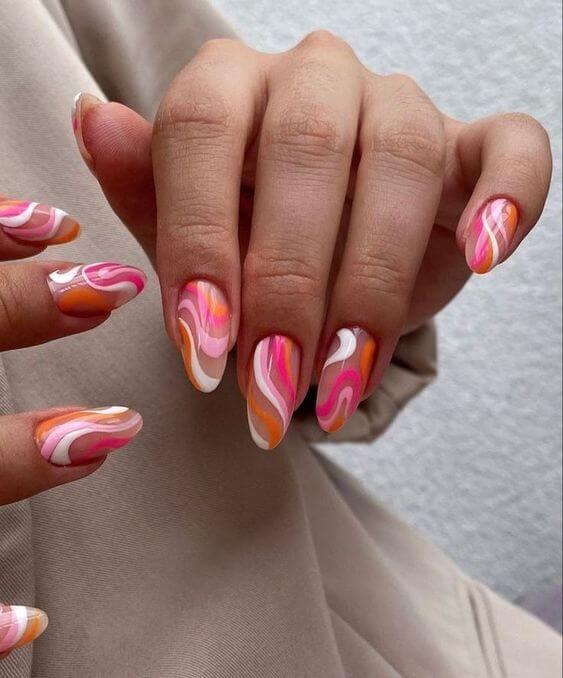
Professional Opinion: The interplay of neon shades in a marbleized design makes this long square set a bold statement piece. The use of white space accentuates the colorful swirls, making each nail a unique masterpiece.
Consumables:
- Neon polishes: China Glaze Electric Nights Collection
- Detailing brush: Winstonia Fine Line Brush
- My expert tip: Dilute your neon polishes with a clear base to make them more fluid for marbleizing.
DIY Instructions: Drop spots of varied neon polishes onto the nail. Use a thin brush to swirl the colors together. Work quickly as the polish dries, and seal with a top coat for vibrant longevity.
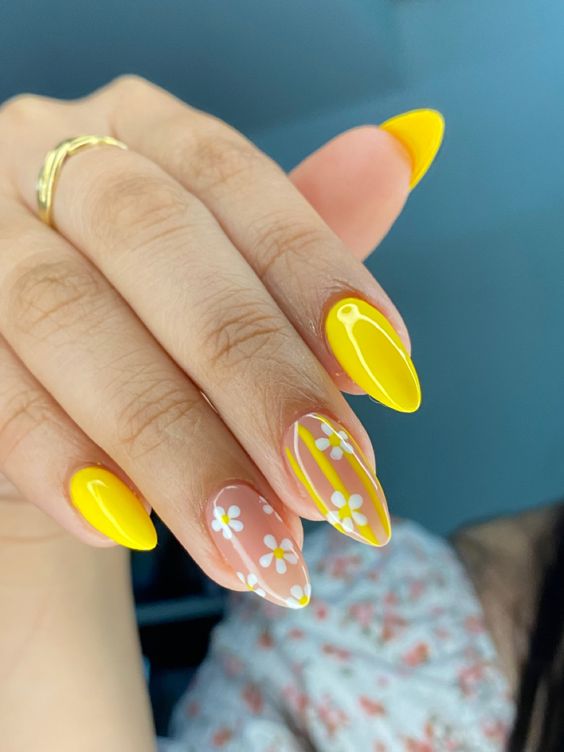
Solid Sunshine
Professional’s Take
As a professional manicurist, brings to life the quintessence of solid sunshine. These long square nails boast a radiant yellow that’s bold yet surprisingly versatile, perfect for those long, beachy days or casual summer evenings. The finish is glossy, reminiscent of a sunbeam’s kiss, making it a standout choice for those who prefer a simple yet colorful statement.
Consumables Needed
- Base Coat: OPI Natural Nail Base Coat
- Acrylic Powder: Glam and Glits Bright Yellow
- Acrylic Liquid Monomer: Mia Secret Professional
- Top Coat: Seche Vite Dry Fast Top Nail Coat
- My professional recommendation: For a lasting shine and to prevent yellowing, never skip the top coat.
DIY Instructions
- Prep your nails with a good base coat to protect them and ensure adhesion.
- Dip your brush into the liquid monomer then into the yellow acrylic powder to form a bead.
- Apply the bead to the nail, smoothing it from the cuticle to the free edge.
- Once dry, shape the nails into a long square and apply a glossy top coat for that sun-kissed sheen.
Electric Lime Fantasy
Professional’s Take
The is a bold expression with its neon art ideas coming to life in a vibrant electric lime. The medium square nails are accented with a silver chrome and adorned with rhinestones, symbolizing a playful yet professional design. The neon french tips are not just a design; they are a statement, a rebellion against the mundane, beckoning the bright and adventurous heart.
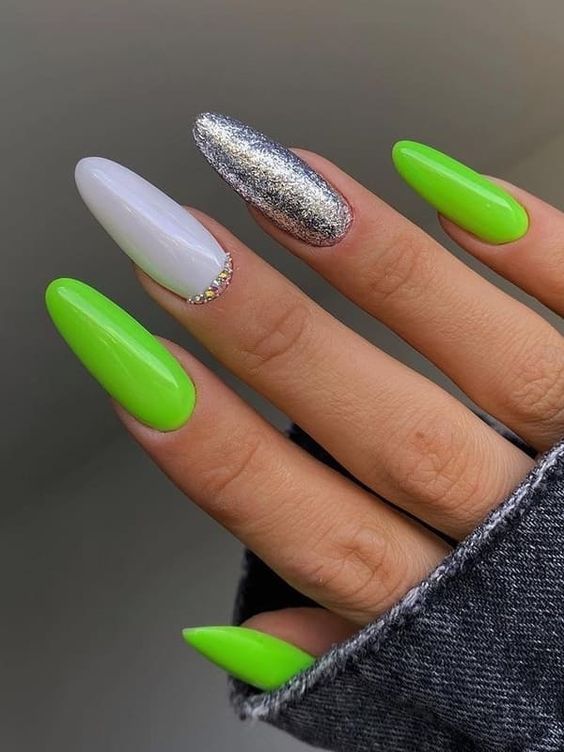
Consumables Needed
- Base Coat: Essie Here To Stay Base Coat
- Neon Acrylic Powder: Kiara Sky Neon Green
- Silver Chrome Powder: Born Pretty Mirror Nail Powder
- Rhinestones: Swarovski Clear Crystal Mix
- My professional recommendation: The contrast between the matte and chrome finish can create a mesmerizing effect. Use a matte top coat on the neon sections to enhance this.
DIY Instructions
- After the base coat, apply the neon acrylic powder.
- For the accent nail, apply silver chrome powder with a sponge applicator after a no-wipe gel topcoat.
- Place rhinestones while the topcoat is tacky.
- Seal everything with a top coat, matte on neon, and glossy over chrome and stones.
Cobalt Creativity
Professional’s Take
This look is a tribute to the deep cobalt blue color that draws the eye. These almond-shaped nails feature a bold monochromatic blue color with a creative black and white abstract design on the ring finger. This manicure is for those who like to play with dark yet expressive tones, combining artistic flair with sophistication.
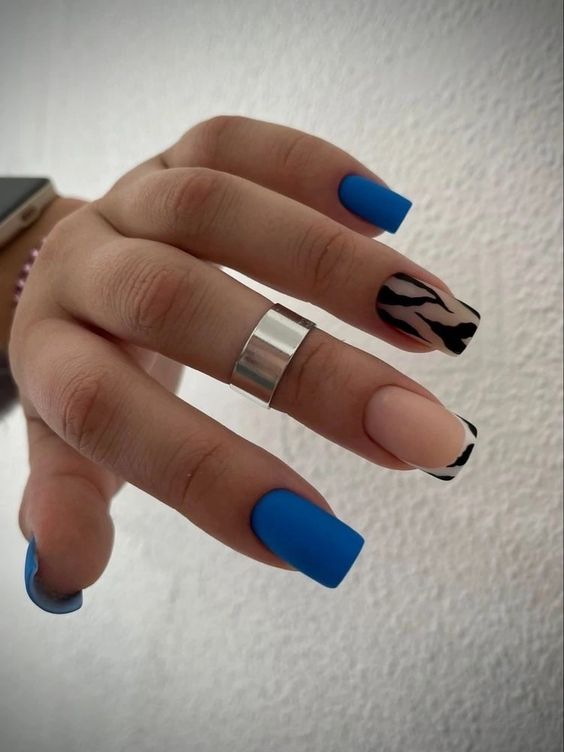
Consumables Needed
- Base Coat: Sally Hansen Double Duty
- Cobalt Blue Acrylic Powder: CND Retention Pure Cobalt
- Black and White Acrylic Paint: Acrylic Art Paint Set
- Fine Detail Brush: Winstonia Fine Line Nail Art Brush
- My professional recommendation: Using a fine detail brush for the abstract design will give you more control and precision.
DIY Instructions
- Start with the base coat and then sculpt your nails with cobalt blue acrylic.
- Paint your abstract design on the ring finger using black and white acrylic paint.
- Finish with a clear top coat to seal in your design.
- Remember, abstract art has no rules, so let your creativity flow!
Save Pin
