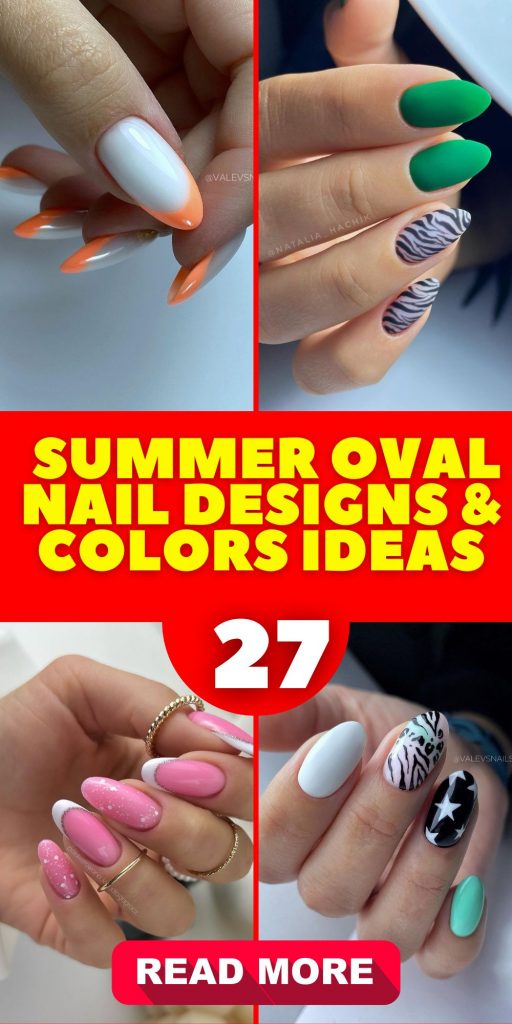
Embrace the Sunshine: Chic Summer Oval Nail Designs & Colors 27 Ideas
As the mercury rises, so does the penchant for embracing the vibrancy of summer in our style choices. But have you ever wondered how you can encapsulate the essence of summertime on the very tips of your fingers? This season, summer oval nail designs & colors ideas are the quintessential way to whisper tales of sunny escapades and balmy evenings. Let’s delve into an array of designs that can carry the ocean’s calm and the sun’s fiery passion, all on your nails.
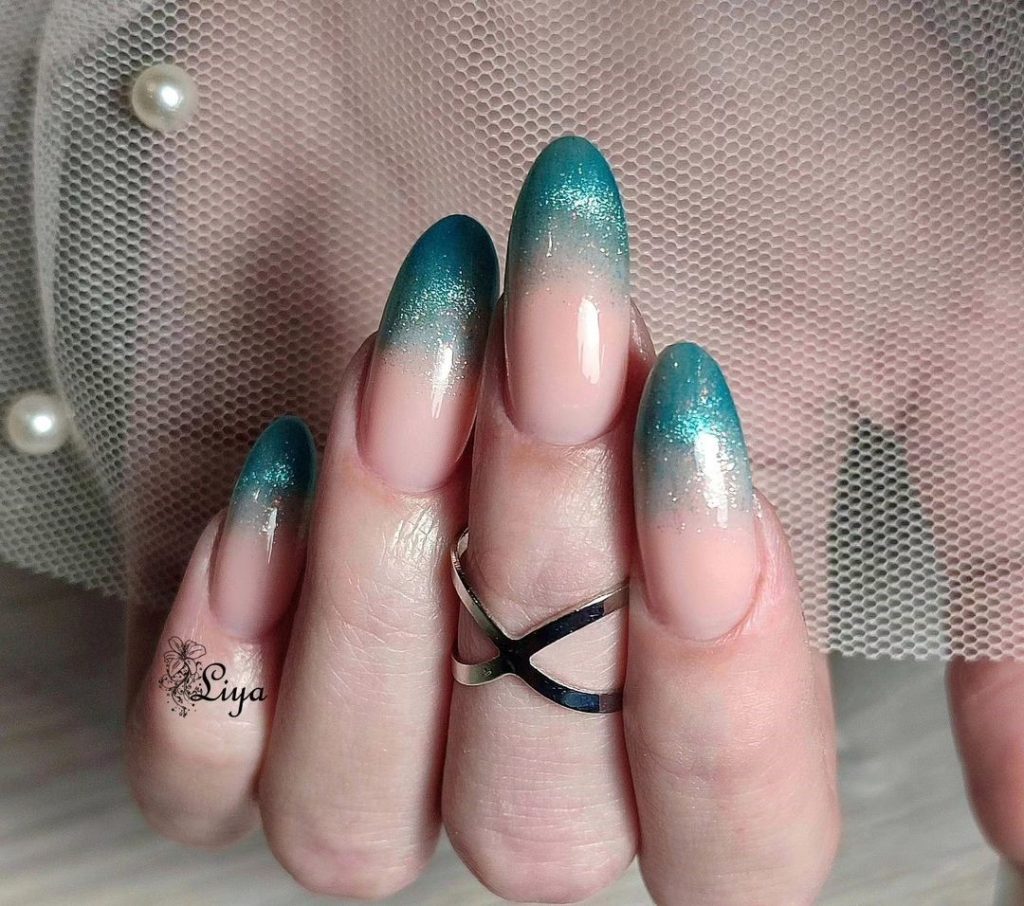
Tiffany Blue Elegance
There’s something undeniably refreshing about the coolness of Tiffany blue, especially when it graces the curvature of a perfectly shaped oval nail. It’s the hue that whispers of clear skies and crystalline waters, ideal for beach-goers and fashionistas alike. The subtle ombre transition from a frosted matte finish at the cuticle to a dazzling sparkle towards the tips captures the playfulness of summer break.
Consumables List:
- Base coat: OPI Natural Nail Base Coat
- Tiffany blue polish: Essie Gel Couture in “Borrowed & Blue”
- Sparkle overlay: Sally Hansen Xtreme Wear in “Strobe Light”
- Top coat: Seche Vite Dry Fast Top Coat
DIY Creation Guide: Kick off with a clean slate, applying the base coat to protect your natural nails. Layer on two coats of “Borrowed & Blue”, letting each coat dry thoroughly. For that summer sparkle, dab “Strobe Light” from the mid-nail to the tip, allowing for a gradient effect. Seal the deal with a glossy top coat for a lasting summer fling on your fingertips.
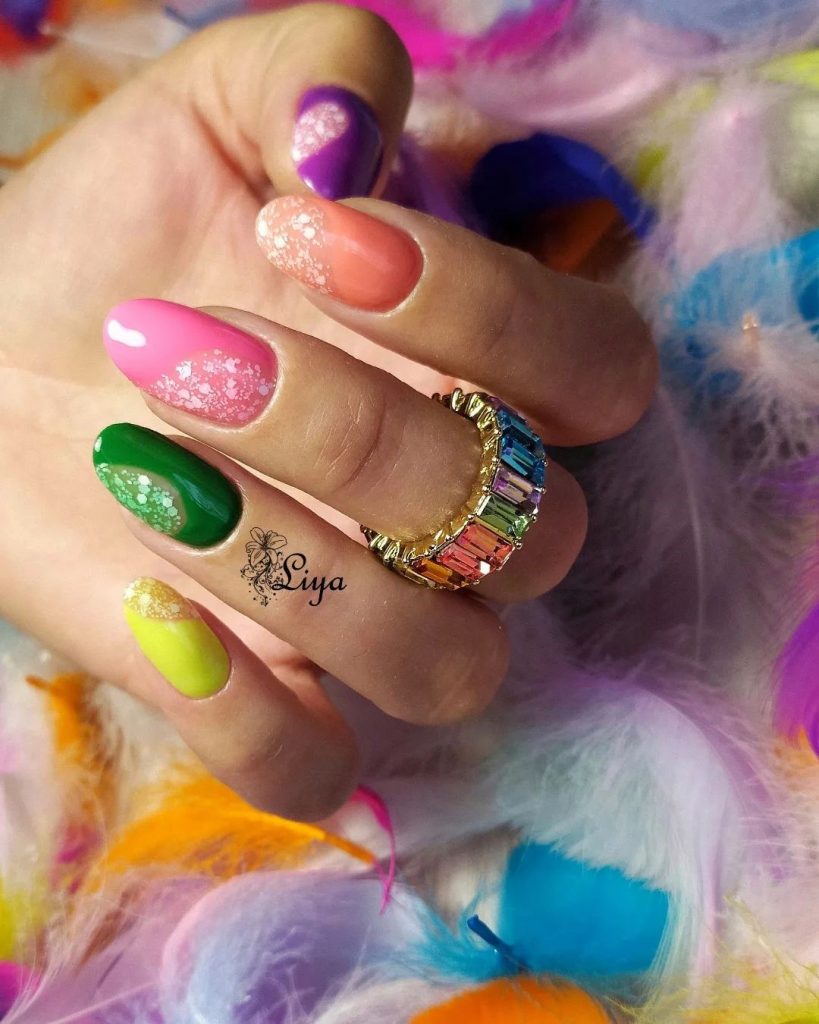
Neon Ombre Fantasy
Embrace the bold and colorful spirit of summertime with this neon ombre creation that’s nothing short of a masterpiece. Transitioning from a sunny yellow to a zesty green, these nails scream neon fun. It’s a look that’s not only unique but also surprisingly simple to achieve, with a flair that’s perfect for bright toe days and neon nights.
Consumables List:
- Base coat: ORLY Bonder Rubberized Basecoat
- Neon yellow polish: China Glaze in “Celtic Sun”
- Neon green polish: Essie in “The More the Merrier”
- Sponge for ombre effect
- Top coat: INM Out the Door Fast Drying Top Coat
DIY Creation Guide: Start with your trusty base coat for longevity. Apply a pale yellow as the base color. Then, using a sponge, dab on a blend of “Celtic Sun” and “The More the Merrier” to create the gradient effect. Repeat until you achieve the desired intensity. Finish with a swift application of top coat to keep your nails shining brighter than the summer sun.
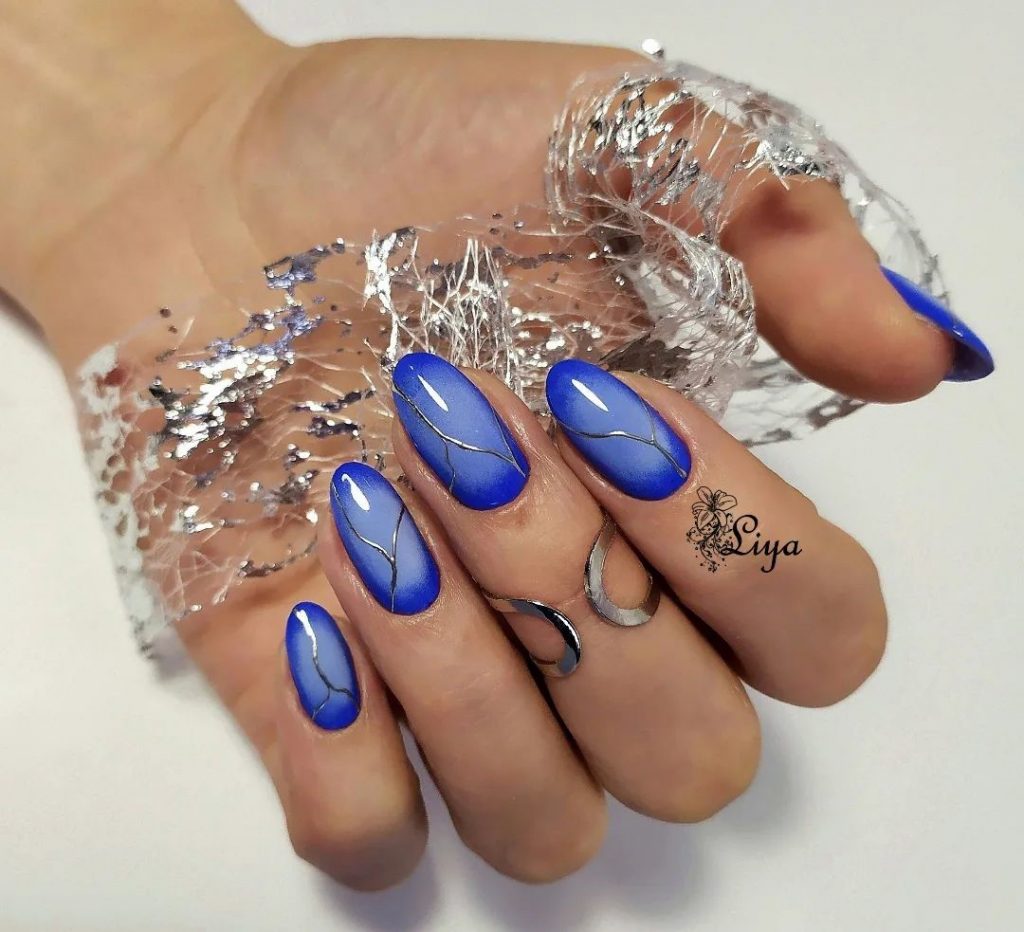
Royal Blue Sophistication
Sophistication meets vibrancy in this deep royal blue set that exudes classy allure. The shimmering leaf-like accents add an elegant touch, creating a unique yet simple design that pairs seamlessly with a summer wardrobe. It’s an acrylic bright embodiment of a starry summer night sky.
Consumables List:
- Base coat: Gelish Foundation Base Gel
- Royal blue gel polish: Gelish in “My Midnight Swim”
- Silver leaf accents: Sally Hansen I Heart Nail Art Pen in “Silver”
- Top coat: Gelish Top It Off Gel Polish
DIY Creation Guide: Prepare your nails with the base gel and cure under a UV lamp. Apply “My Midnight Swim” for that enchanting blue and cure again. To add the metallic leaf accents, gently use the nail art pen to draw on each nail. A steady hand brings the best results here. Finish with the top gel and one final cure for a set of nails ready for any summer soirée.
Pastel Daydreams
These nails are a delicate whisper of pastel perfection, featuring a soft ombre blend of baby blue and white, adorned with tiny floral accents that speak to lazy days spent at the beach. It’s a neutral design with just enough whimsy to make a subtle statement during a summer break.
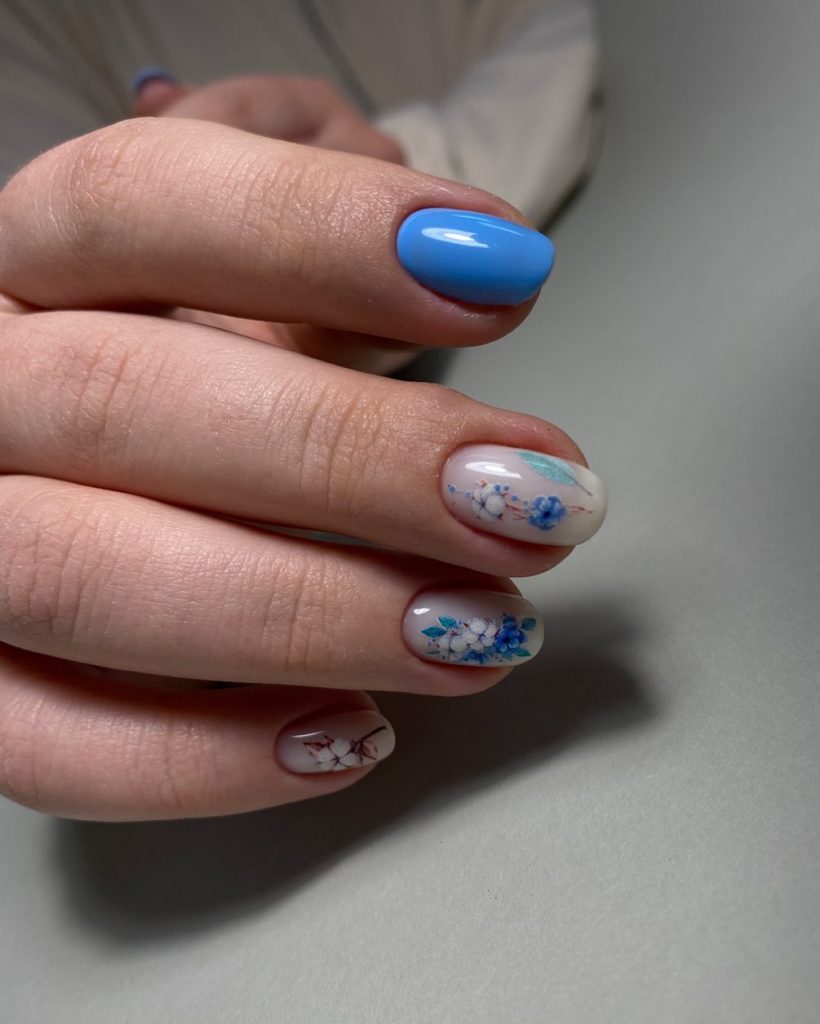
Consumables List:
- Base coat: Zoya Anchor Base Coat
- Pastel blue polish: OPI in “It’s a Boy!”
- White polish for ombre and accents: OPI in “Alpine Snow”
- Mini floral decals
- Top coat: Zoya Armor Top Coat
DIY Creation Guide: After the base coat, apply a layer of “It’s a Boy!” as your background color. For the ombre, use a sponge to dab a mixture of the blue and “Alpine Snow” toward the nail tips. Once you’re satisfied with the blend, add the floral decals for a touch of summer romance. Seal with the top coat to protect your wearable piece of art.
Purple Passion Play
Delve into the dark and mysterious allure of this purple leopard print design. The deep purple base sets a sultry summer night tone, while the black spotted details add an edge of untamed elegance. This bold look is both unique and daring, perfect for adding a wild twist to your summertime adventures.
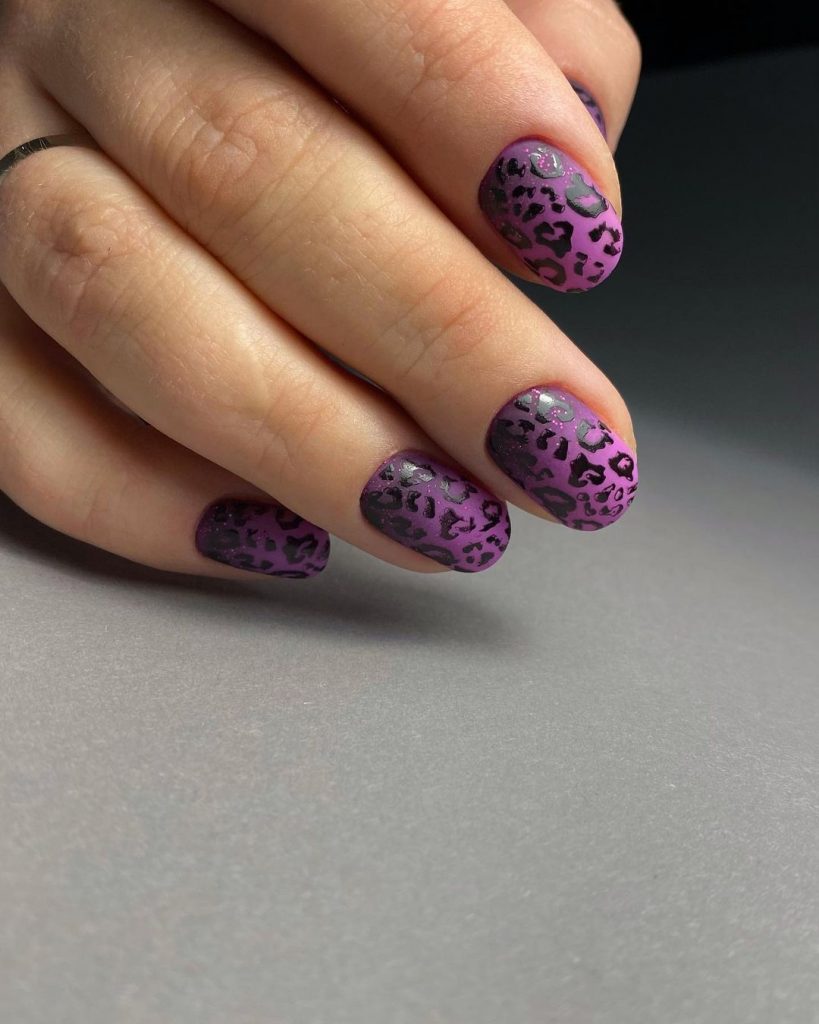
Consumables List:
- Base coat: Essie Strong Start
- Purple polish: OPI “Purple Palazzo Pants”
- Black detail polish: Sally Hansen “Black Out”
- Top coat: Revlon Extra Life No Chip Top Coat
DIY Creation Guide: Prep your nails with the base coat. Once dry, apply two coats of “Purple Palazzo Pants”. With a fine brush, create leopard spots using “Black Out”. Don’t aim for perfection; the beauty lies in the irregularity of the spots. Seal your design with a top coat for a fierce finish that lasts.
Silvery Moonlight Glimmer
This design captures the ethereal beauty of a moonlit summer sky with its hard gel translucent base and a soft solid silvery overlay. The singular pop of neon near the cuticle is the perfect unexpected twist, akin to the first glimmer of a summer night’s star. It’s a simple, yet classy statement that shines best on tan skin.
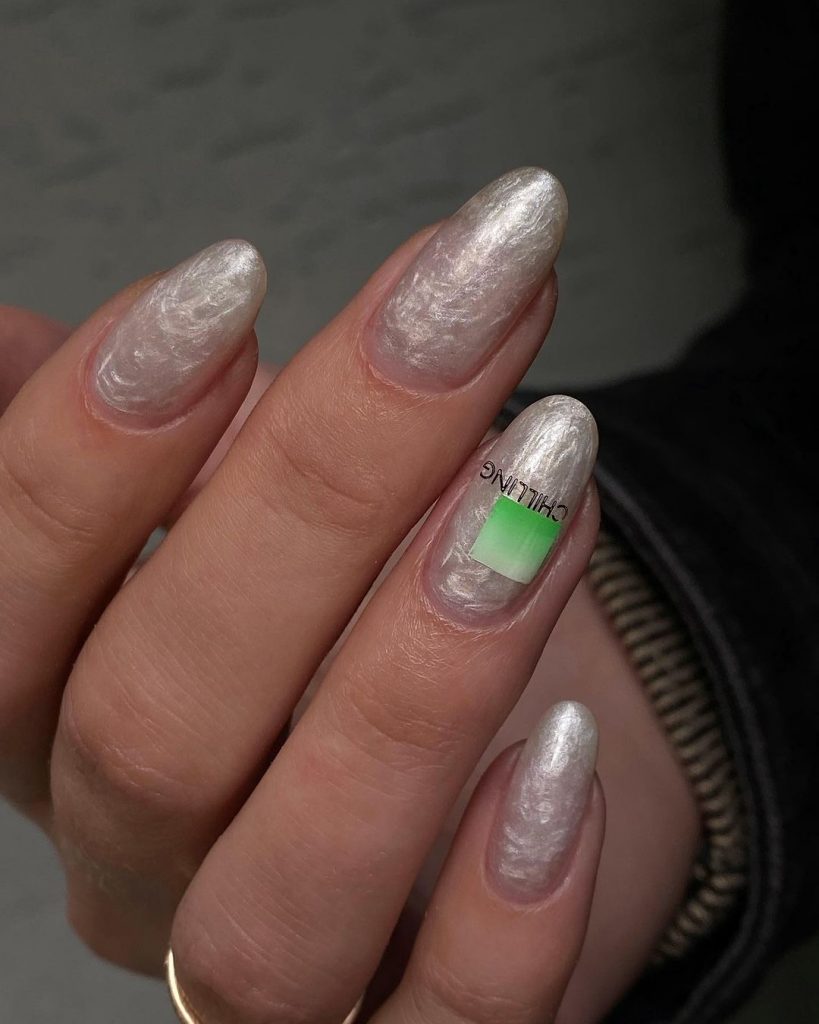
Consumables List:
- Base coat: Gelish Foundation Base Coat
- Silver polish: China Glaze “Fairy Dust”
- Neon green sticker: Dashing Diva Gloss Palette
- Hard gel overlay: IBD Builder Gel
- Top coat: Gelish Top It Off
DIY Creation Guide: Begin with a base coat for protection, then apply a thin layer of IBD Builder Gel for structure. Paint a sheer layer of “Fairy Dust” for that mystical sheen. Adhere a strip of neon green from the Dashing Diva Palette for a slice of bright contrast. Cure and cap it off with the Gelish Top It Off for a lasting gleam.
Lavender Whisper
In this design, the softness of lavender meets the modernity of metallic lines, creating a unique and elegant fusion perfect for a neutral summer palette. It’s a solid but subtly classy choice that would suit any summer occasion, from a casual day at the beach to a sophisticated evening event.
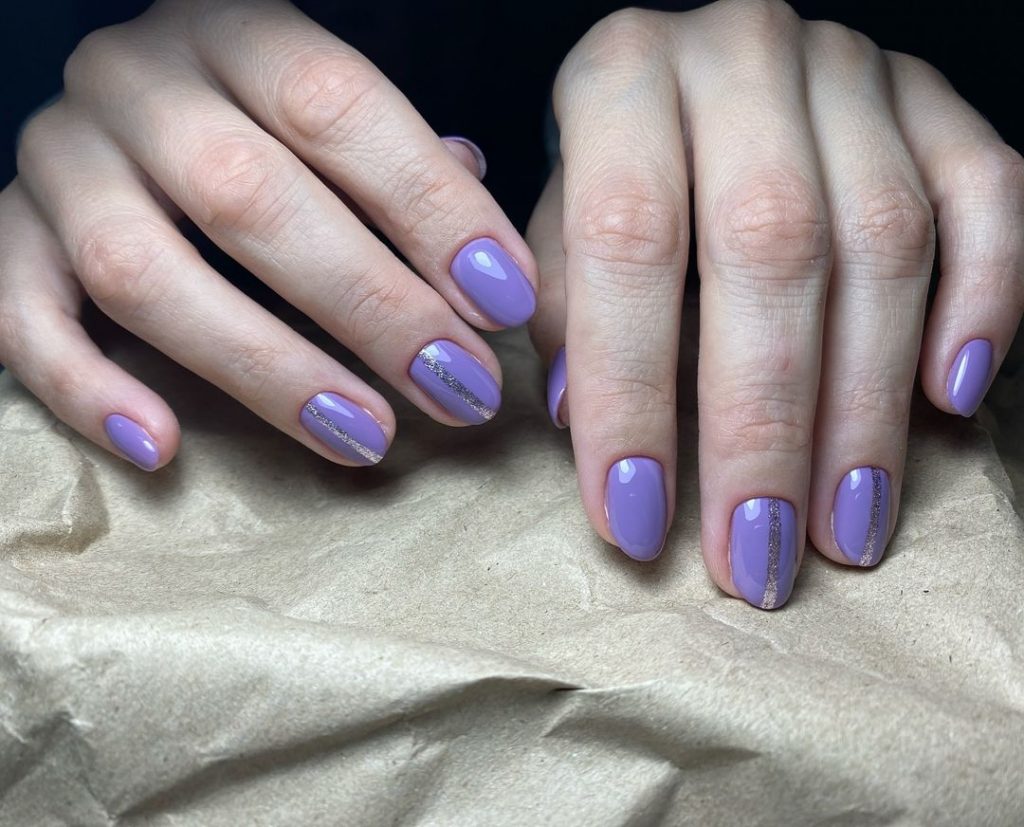
Consumables List:
- Base coat: ORLY Bonder
- Lavender polish: Essie “Go Ginza”
- Metallic striping tape
- Top coat: ORLY Glosser
DIY Creation Guide: Apply ORLY Bonder for a firm foundation. Layer on two coats of “Go Ginza”, letting each coat dry thoroughly. Use metallic striping tape to create clean, thin lines across each nail for a touch of shimmer. Finish with ORLY Glosser for a glossy, protective seal.
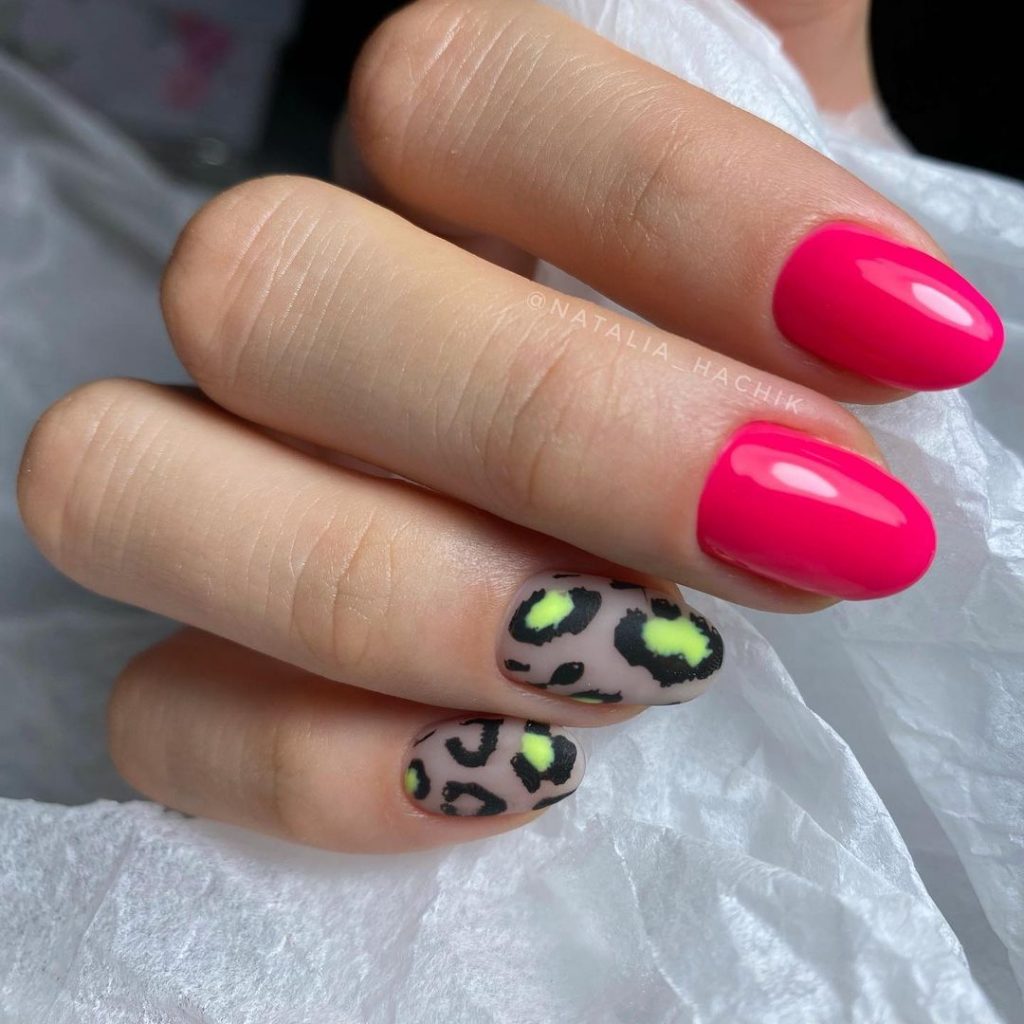
Neon Leopard Luxe
This design is the epitome of neon fun with its vibrant hot pink base contrasted by a playful leopard pattern. It’s a fearless summer statement that marries bright pink enthusiasm with a touch of the wild. This manicure screams summer acrylic bright with every glance.
Consumables List:
- Base coat: Sally Hansen Double Duty
- Hot pink polish: ORLY “Beach Cruiser”
- Black detail polish: China Glaze “Liquid Leather”
- Neon yellow polish: Neon by OPI “Pants on Fire!”
- Top coat: Sally Hansen Insta-Dri
DIY Creation Guide: Kick things off with a solid base coat. Next, paint on “Beach Cruiser” for a neon canvas. Using a thin brush, outline incomplete circles with “Liquid Leather” to form the leopard spots. Fill in select areas with “Pants on Fire!” to add dimension. Top it all off with a coat of Insta-Dri for a quick and shiny finish.
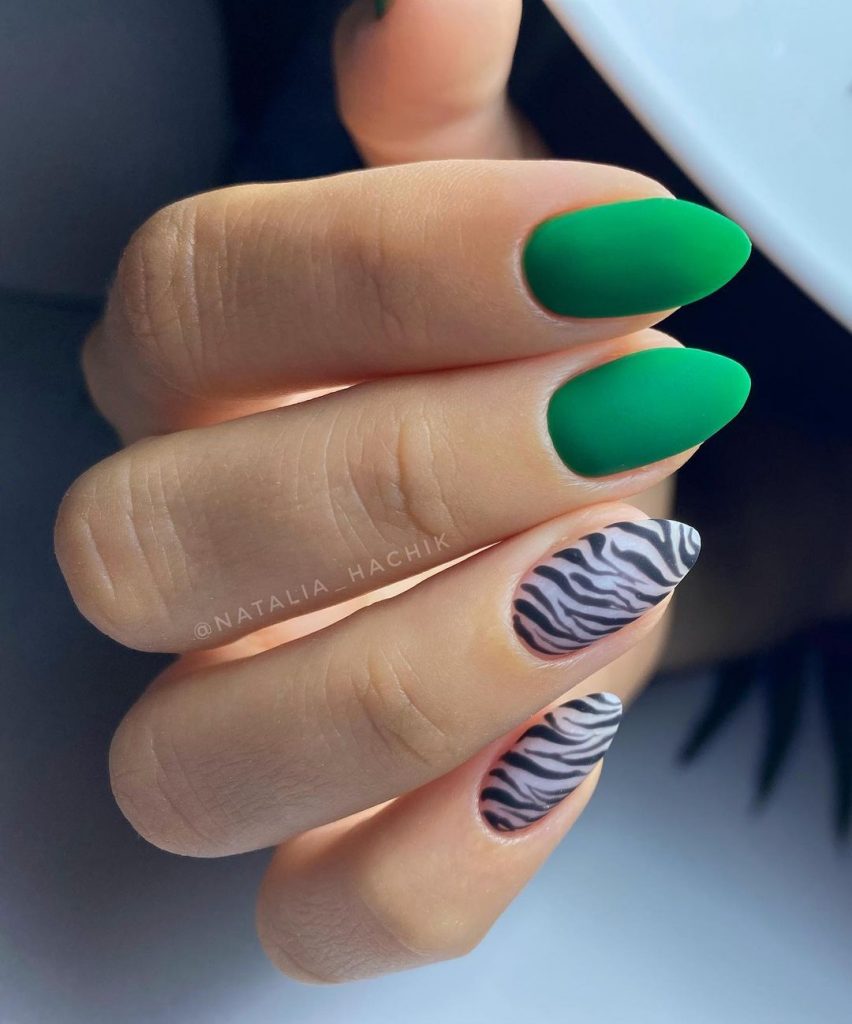
Emerald Zest
Bold and beautiful, this bright emerald design with contrasting zebra stripes epitomizes the colorful and bright energy of summer. It’s perfect for someone looking to make a statement with a pop of colorful vibrancy on their nails, encapsulating the neon fun of summer days.
Consumables List:
- Base coat: ORLY Bonder
- Emerald green polish: Essie “Off Tropic”
- White for zebra stripes: OPI “Alpine Snow”
- Detailing brush
- Top coat: ORLY Glosser
DIY Creation Guide: Lay down your ORLY Bonder to prime the nails. Sweep on two layers of “Off Tropic” for that lush emerald foundation. Dip your detailing brush in “Alpine Snow” and artistically draw zebra stripes on select nails for an animalistic flair. Be free with your strokes—perfection is not the goal here. Once dry, apply ORLY Glosser for a durable and shiny finish.
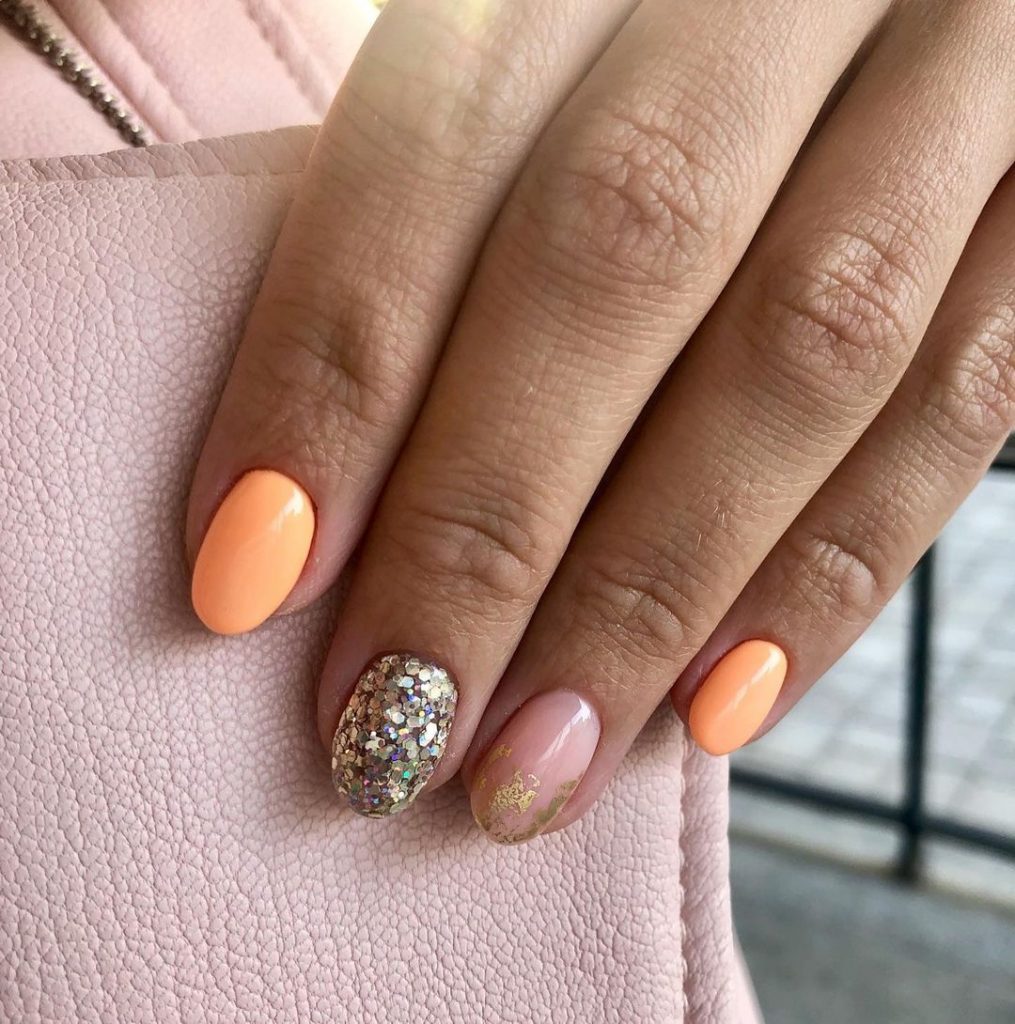
Sunset Sparkle
Imagine the serene hues of a sunset captured on your nails—this design does just that with its warm peach base and a statement nail that shines like a treasure trove of summer’s best moments. The golden accent adds a touch of summertime magic, making for a unique yet classy summer staple.
Consumables List:
- Base coat: OPI Natural Base Coat
- Peach polish: Essie “Tart Deco”
- Glitter polish for statement nail: Deborah Lippmann “Boom Boom Pow”
- Gold leaf accent: Sally Hansen 18K Gold Hardener
- Top coat: Seche Vite Dry Fast Top Coat
DIY Creation Guide: Apply the base coat to protect your nails. Paint all but one nail with “Tart Deco” for that peachy perfection. For the statement nail, go generous with “Boom Boom Pow”, layering until you achieve full coverage. Use a fine brush to apply gold leaf accents on the ring finger for a subtle yet sparkling touch. Lock in the design with a fast-drying top coat for a long-lasting summer look.
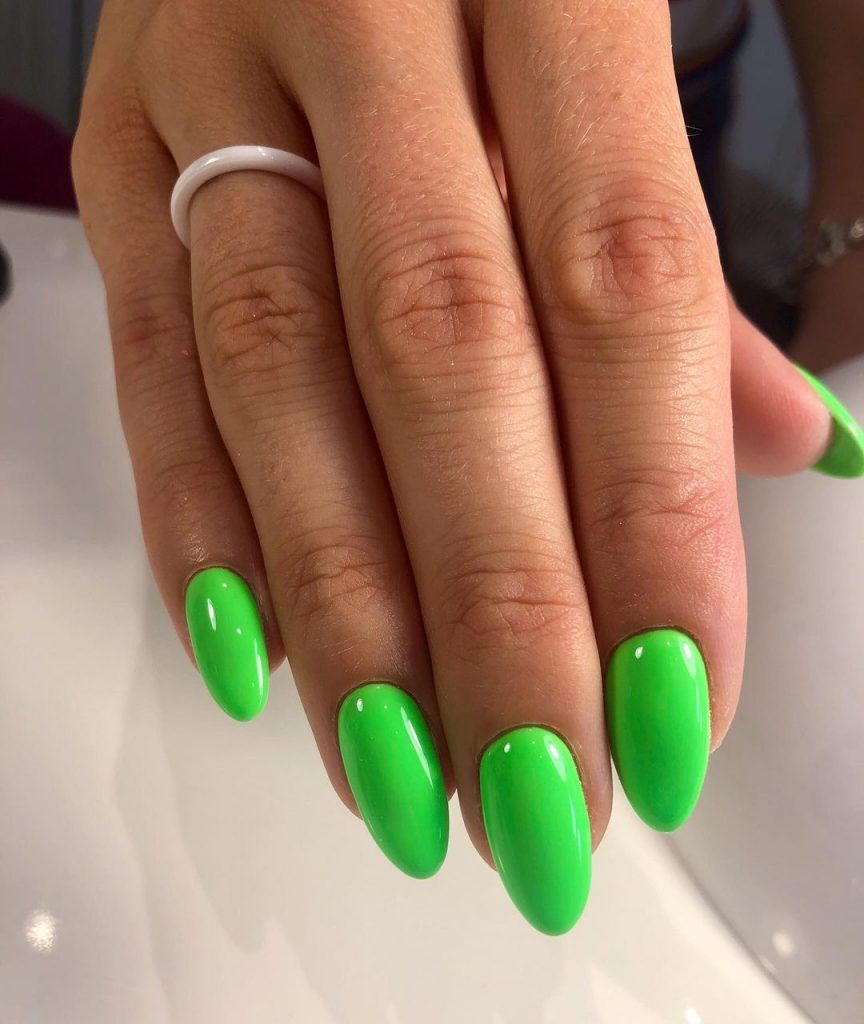
Neon Lime Fizz
A burst of neon is sometimes all you need to kickstart the summer vibes, and this neon green shade is as fizzy and refreshing as a lime soda on a hot day. Perfect for anyone who loves to stand out with a bright and colorful statement, this manicure is the essence of neon fun for your summer break.
Consumables List:
- Base coat: China Glaze Strong Adhesion Base Coat
- Neon green polish: Orly “Glowstick”
- Top coat: INM Out the Door Super Fast Drying Top Coat
DIY Creation Guide: Prep your nails with a base coat to ensure the neon pops. Apply two coats of “Glowstick” for that electric neon look. Be bold and let your nails do the talking. Finish with “Out the Door” top coat for a quick-dry finish, so you can be poolside-ready in no time.
Blush and Black Elegance
This design plays with a soft pastel pink base and artistic black accents for a manicure that speaks of elegance with an edge. The simple blush tone paired with the intricate floral design captures a summer garden at twilight, ideal for those looking to blend neutral tones with a hint of drama.
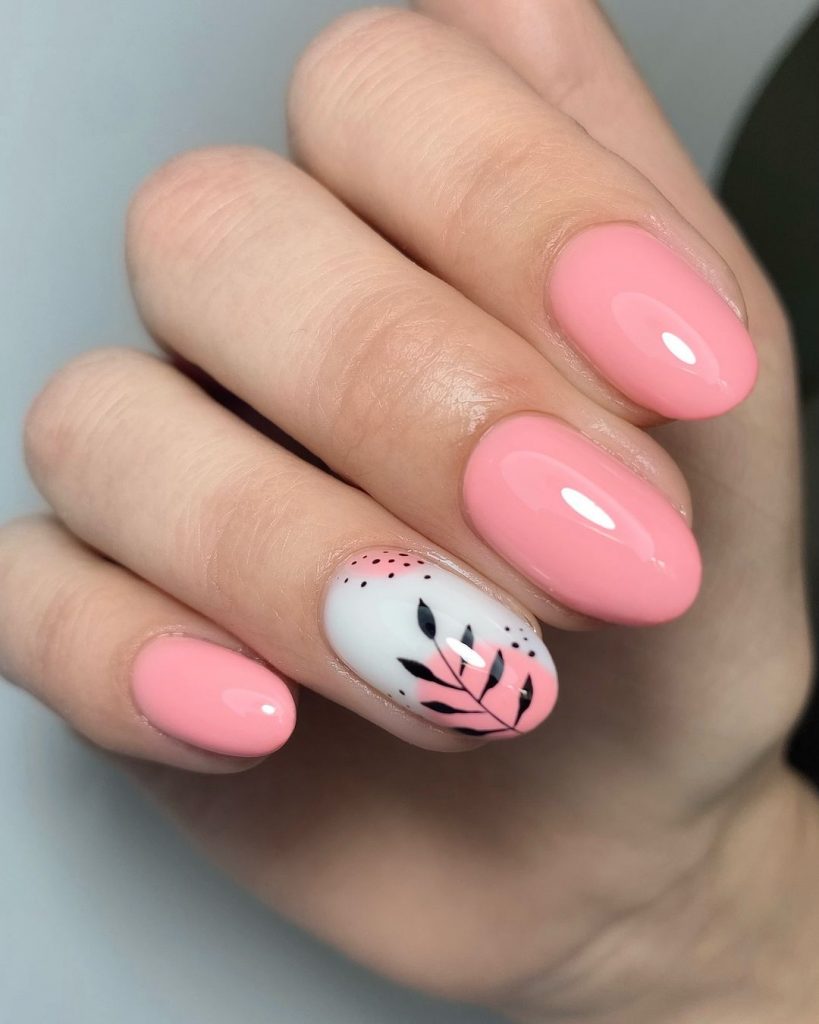
Consumables List:
- Base coat: Butter London Nail Foundation Priming Basecoat
- Blush pink polish: Essie “Muchi, Muchi”
- Black detail polish: OPI “Black Onyx”
- Detailing brush
- Top coat: Essie Gel Setter Top Coat
DIY Creation Guide: Begin with a priming basecoat. Once dry, lay down two coats of “Muchi, Muchi” for that creamy blush backdrop. With “Black Onyx” and a detailing brush, gently paint on the floral accents, letting your creativity bloom. Seal with the Gel Setter Top Coat for a glossy and durable finish.
Tropical Punch
The vibrant palette of this design takes you straight to the tropics. The bright coral base paired with playful teal and pink patterns channels the spirit of an island getaway. It’s a colorful, multi-tonal look that’s perfect for anyone looking to make a splash with their summer nail art.
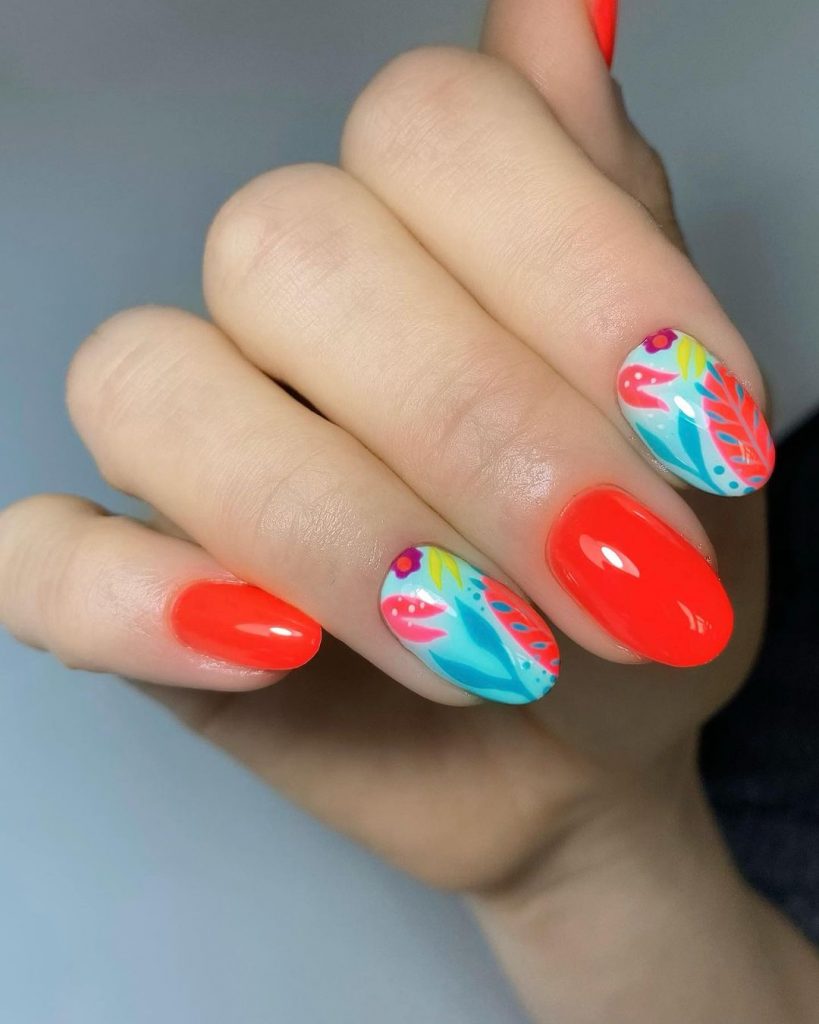
Consumables List:
- Base coat: Sally Hansen Double Duty
- Coral polish: OPI “Cajun Shrimp”
- Teal and pink polish for details: Essie “Turquoise & Caicos” and “Mod Square”
- Detailing brush
- Top coat: Sally Hansen Insta-Dri
DIY Creation Guide: Start with a protective base coat. Color your nails with “Cajun Shrimp” for that zesty coral hue. Take “Turquoise & Caicos” and “Mod Square” to create bold patterns that speak of tropical flora and fauna. Each stroke adds to the narrative of a summer escape. Finalize with Insta-Dri top coat for a quick set.
Lavender Swirls
This delightful design features a pastel lavender base swirled with white and deep purple, creating a mesmerizing effect reminiscent of summer’s whimsical skies.
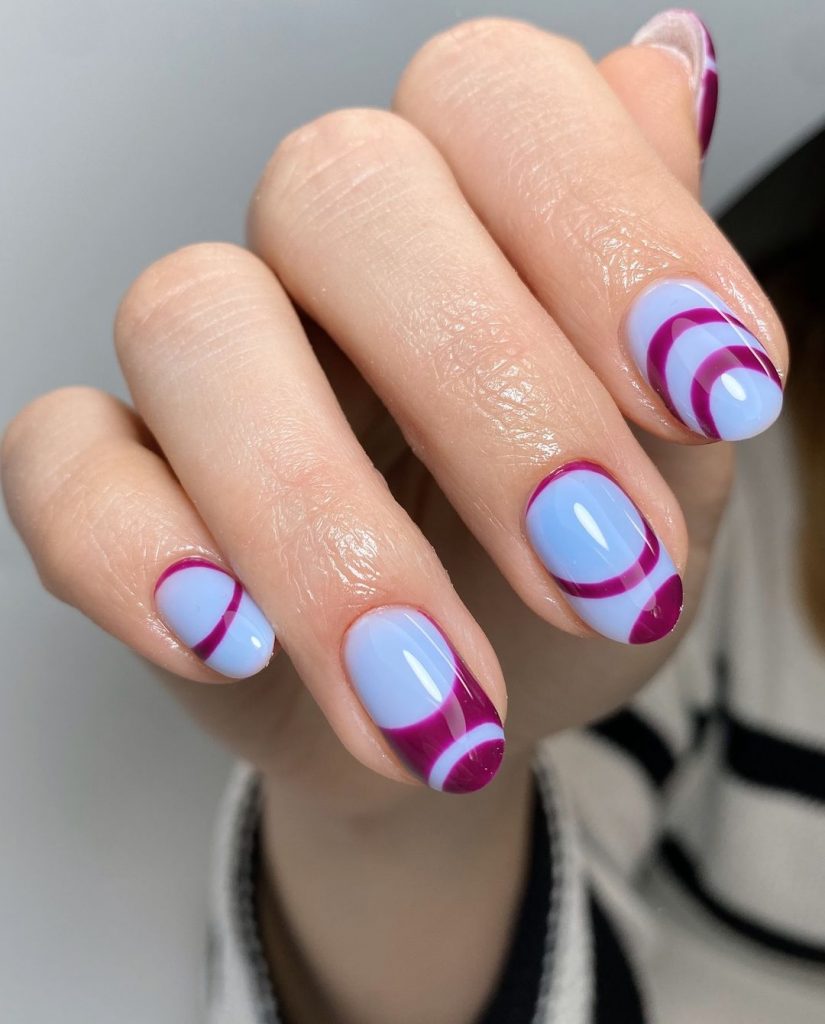
Consumables List:
- Base coat: Zoya Anchor Base Coat
- Lavender polish: Essie “Lilacism”
- White polish: Essie “Blanc”
- Deep purple polish: Essie “Play Date”
- Striping tool
- Top coat: Zoya Armor Top Coat
DIY Creation Guide: First, lay down your Zoya Anchor Base Coat for a firm base. Apply a couple of coats of “Lilacism” to achieve a smooth, pastel lavender canvas. Then, with a steady hand, use a striping tool dipped in “Blanc” and “Play Date” to create the swirling patterns. Let your creativity lead the way as you spin these colors into a whimsical design. Finish with Zoya Armor Top Coat to protect and add a beautiful shine to your nails.
Starry Night Serenade
Decorate your nails with the deep bright blue color of a clear summer night sky dotted with delicate white flowers. This design will bring a touch of celestial romance to your look and is perfect for summer evenings spent under the stars. It is a unique and colorful expression of the endless beauty of summer.
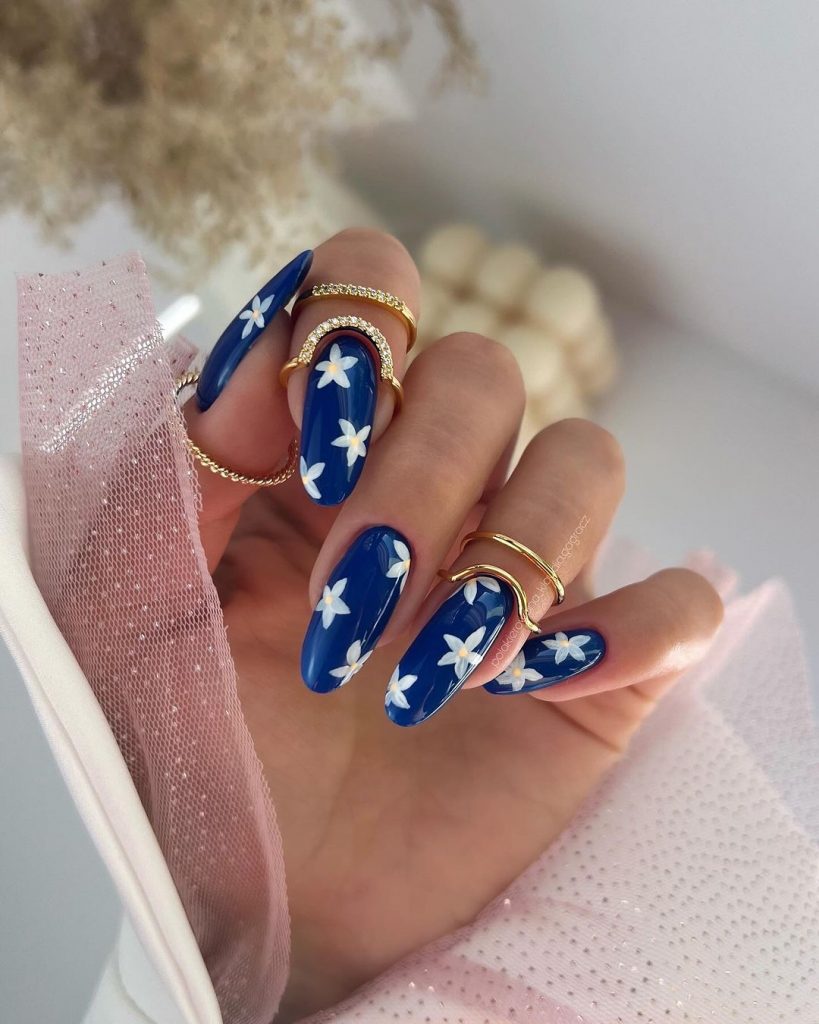
Consumables List:
- Base coat: OPI Natural Base Coat
- Bright blue polish: Essie “Butler Please”
- White flower polish: Essie “Blanc”
- Detailing brush or dotting tool
- Top coat: Seche Vite Dry Fast Top Coat
DIY Creation Guide: Begin with OPI Natural Base Coat for an even foundation. Apply two coats of “Butler Please” for a vivid blue base. Using “Blanc” and a fine detailing brush or dotting tool, create small stars and dots to mimic the night sky. Finish with Seche Vite Dry Fast Top Coat for lasting wear and a glossy sheen.
Pink Sprinkle Fantasy
The playful bright pink base accented with white French tips and a sprinkling of glitter evokes the sweet delight of sugared candy—perfect for those bright summer days. This look blends simple charm with a sprinkle of fun, ideal for adding a dash of whimsy to your summer wardrobe.
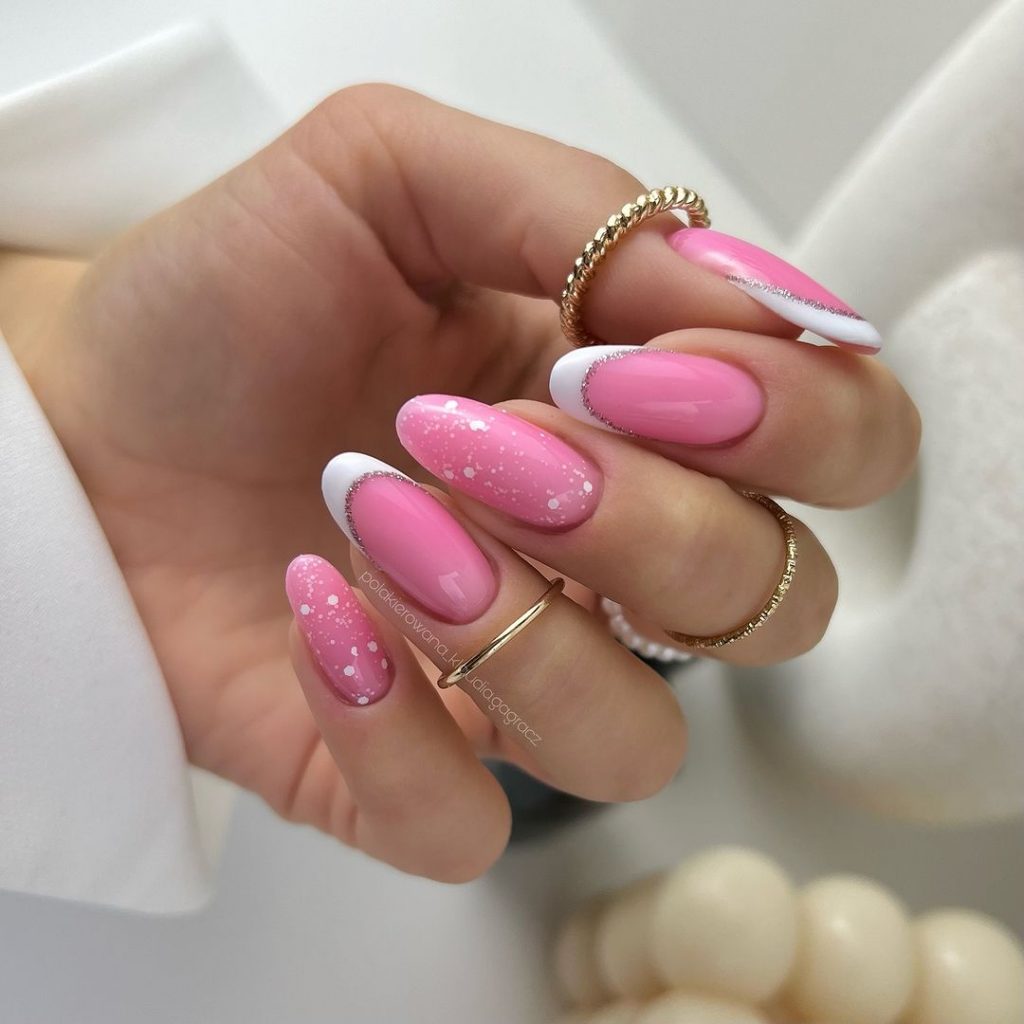
Consumables List:
- Base coat: ORLY Bonder Rubberized Basecoat
- Pink polish: OPI “Mod About You”
- White polish for tips: OPI “Alpine Snow”
- Glitter overlay: China Glaze “Fairy Dust”
- Top coat: Essie Good to Go Top Coat
DIY Creation Guide: Apply ORLY Bonder as a base coat. Coat nails with “Mod About You”, then carefully paint the tips with “Alpine Snow” to create a classic French tip with a twist. While the tips are still tacky, apply “Fairy Dust” for a glittery effect. Seal the design with Essie Good to Go Top Coat for a fast-drying finish.
Burgundy Bliss
This solid burgundy design is a nod to the deep hues of summer berries, offering a sophisticated yet simple elegance. Its glossy finish and solid color present a classy and mature look, perfect for a summer evening event or a day in the office.
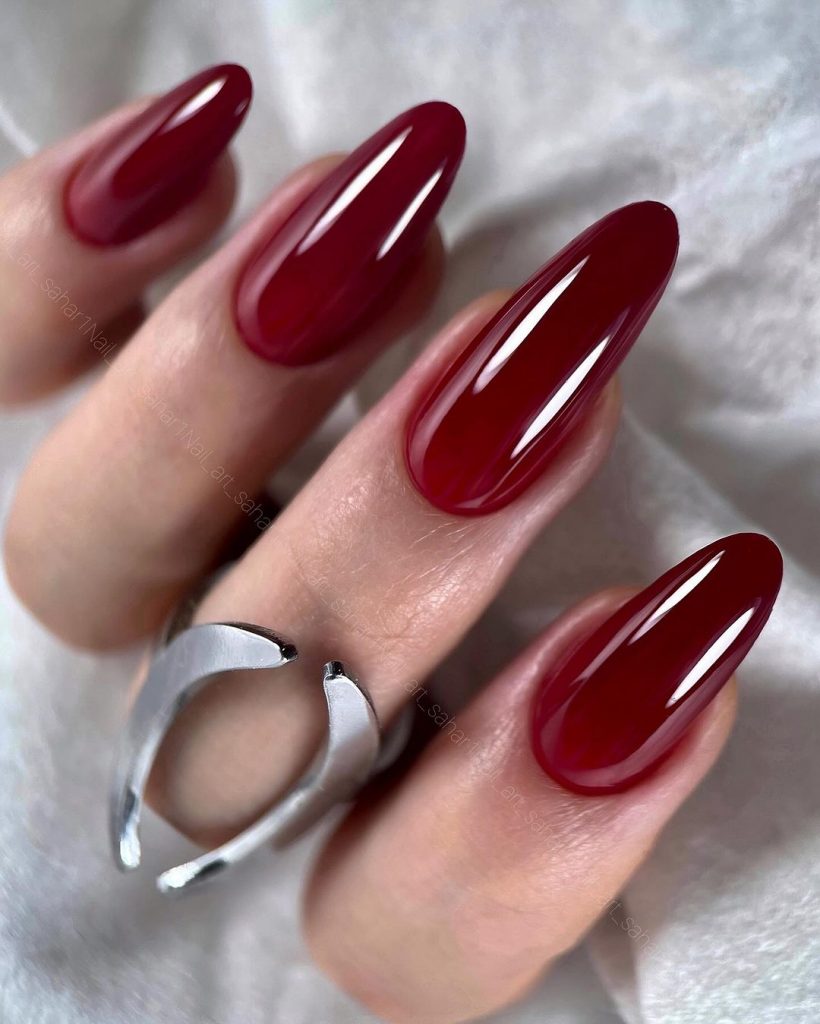
Consumables List:
- Base coat: Deborah Lippmann Gel Lab Pro Base Coat
- Burgundy polish: CND Vinylux in “Oxblood”
- Top coat: Deborah Lippmann Gel Lab Pro Top Coat
DIY Creation Guide: Protect your nails with a layer of Deborah Lippmann Gel Lab Pro Base Coat. Paint two even coats of “Oxblood” for that rich, deep color. Conclude with Deborah Lippmann Gel Lab Pro Top Coat to achieve a high-gloss, cushiony finish without the need for a lamp.
Modern Artistry
Embrace modern art on your fingertips with this contemporary take on nail design. The neutral pink base serves as a canvas for bold black strokes, creating an abstract piece that’s both unique and classy. It’s an artistic expression that complements a modern, minimalist summer look.
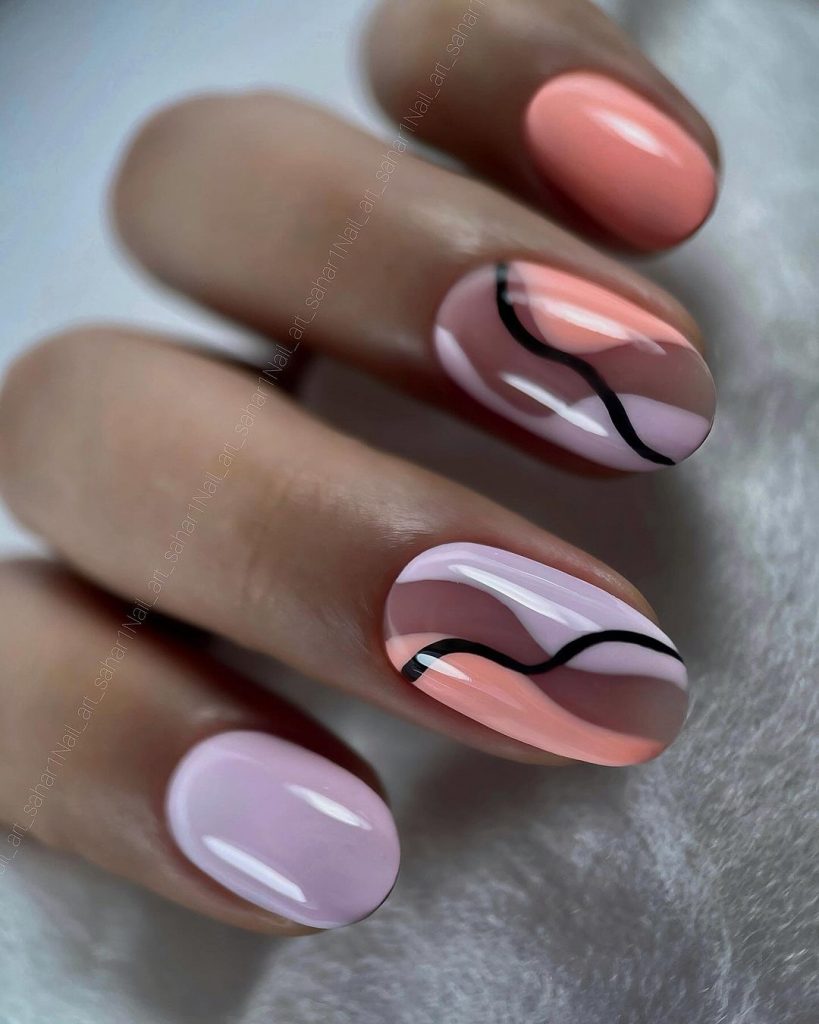
Consumables List:
- Base coat: Essie Here to Stay Base Coat
- Neutral pink polish: Zoya “Madeline”
- Black polish for art: Sally Hansen “Black Out”
- Thin brush for detail work
- Top coat: OPI Top Coat
DIY Creation Guide: Prepare your nails with Essie Here to Stay Base Coat. Apply two coats of “Madeline” for a muted pink background. Dip your thin brush in “Black Out” and sweep across the nail with fluid, abstract motions. Each nail is your canvas; let the black lines flow organically. Finish with OPI Top Coat for a glossy seal.
Lemonade Ombre Dream
Sip on the sweet zest of summer with this refreshing lemonade-inspired ombre. The gradient from pastel yellow to soft lilac captures the essence of a summer sunset. With a glitter accent nail reminiscent of sparkling lemonade, this look is perfect for those who adore colorful and bright summer days.
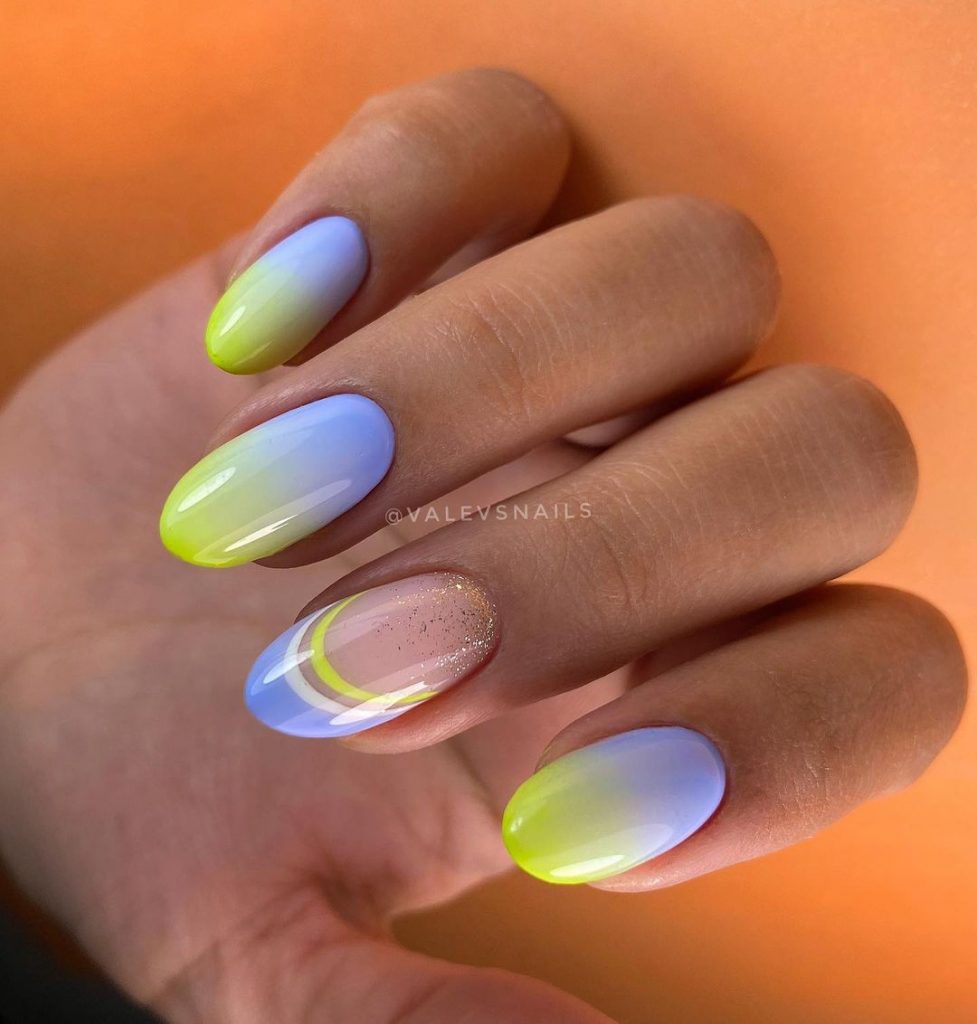
Consumables List:
- Base coat: China Glaze Strong Adhesion Base Coat
- Pastel yellow polish: China Glaze “Lemon Fizz”
- Lilac polish: Essie “Lilacism”
- Sponge for ombre effect
- Glitter polish for accent: OPI “I Pull the Strings”
- Top coat: INM Out the Door Fast Drying Top Coat
DIY Creation Guide: Begin with a layer of China Glaze Strong Adhesion Base Coat to prep your nails. Apply “Lemon Fizz” at the base of your nails, and then gently blend “Lilacism” towards the tips using a sponge to create the soft ombre effect. For the accent nail, add a layer of “I Pull the Strings” to give the illusion of sunlit, sparkling lemonade. Complete your design with INM Out the Door Fast Drying Top Coat for a durable and glossy finish.
Eclectic Elegance
This nail design is a symphony of style, blending the classic sophistication of matte white with the edgy dynamism of animal print and stark black-and-white contrasts. The pop of pastel green on the fingertip adds a playful touch, bringing a multi-tonal summer flair to the composition.
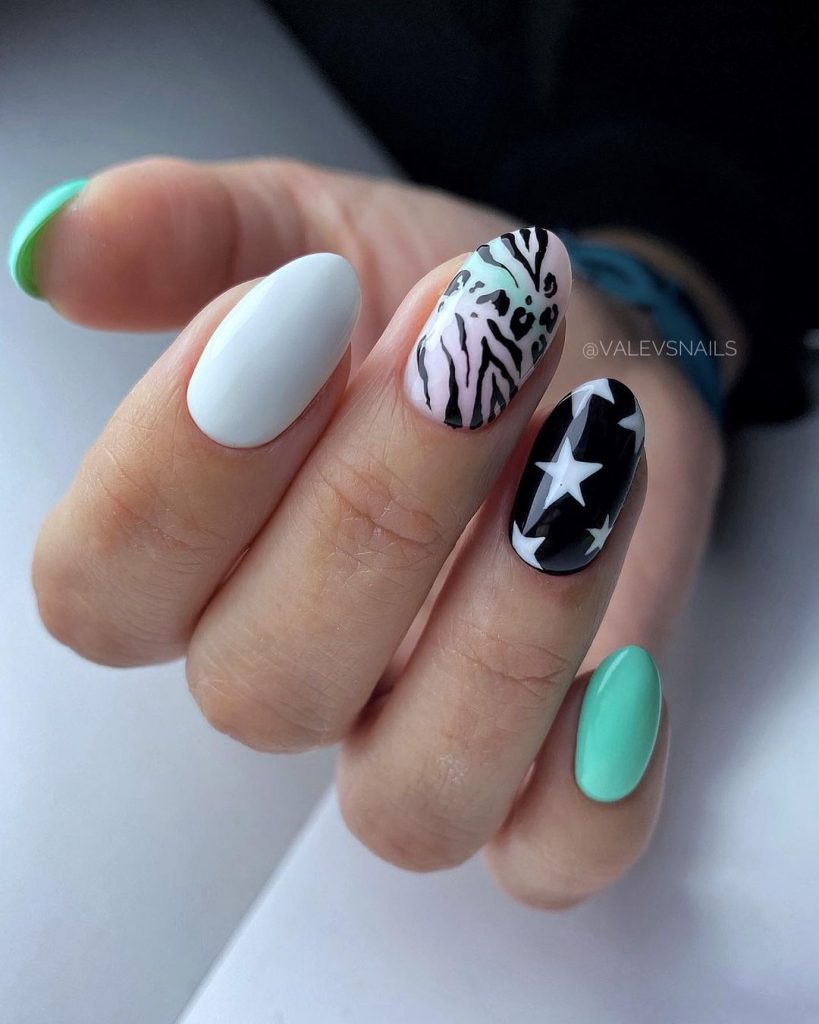
Consumables List:
- Base coat: Zoya Anchor Base Coat
- Matte white polish: Essie “Matte About You”
- Black polish for detail: Essie “Licorice”
- Pastel green polish: China Glaze “Re-fresh Mint”
- Matte top coat: OPI Matte Top Coat
DIY Creation Guide: Start by applying Zoya Anchor Base Coat. Once dry, paint all but the little finger with “Matte About You.” On the ring finger, hand-paint the animal print using “Licorice.” For the little finger, apply two coats of “Re-fresh Mint,” and once it’s dry, cover all nails with OPI Matte Top Coat for that velvety finish.
Sunset Gradient
Evoking the serene gradients of a setting sun, this nail design transitions from pure white to a deep coral, reflecting the spectrum of a summer sunset sky. The matte finish on the coral provides a contemporary twist, making for a bright, colorful statement on any summer occasion.
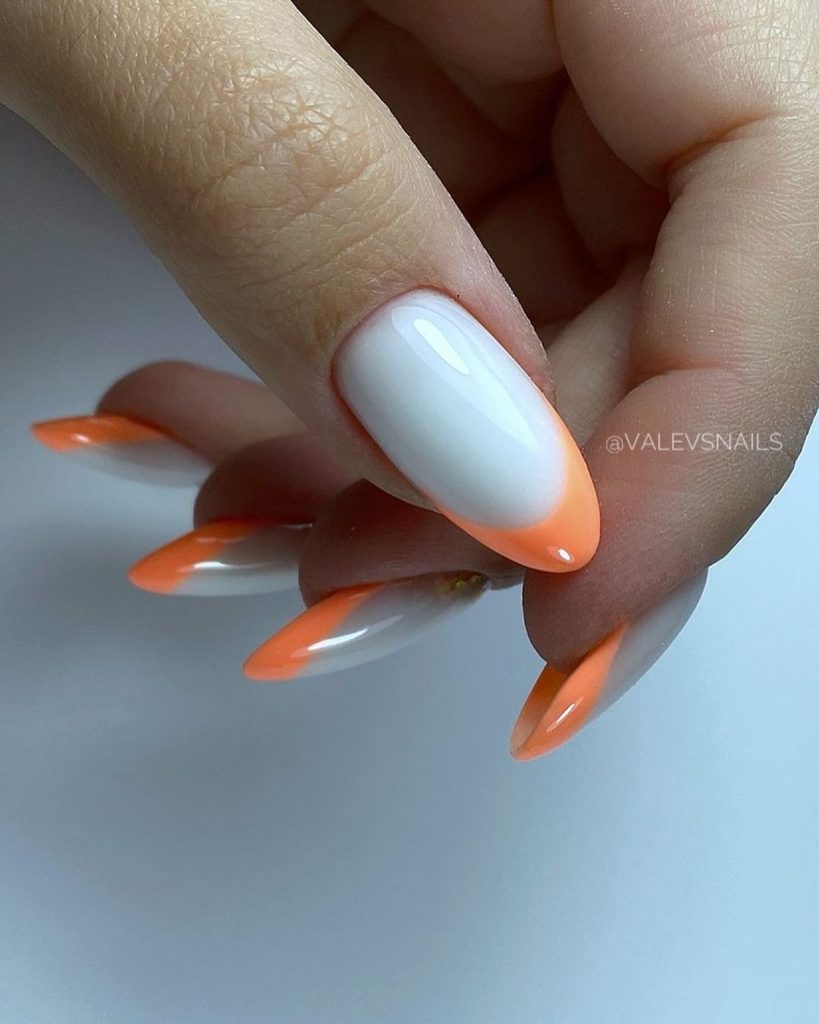
Consumables List:
- Base coat: ORLY Bonder Rubberized Basecoat
- White polish: OPI “Alpine Snow”
- Coral polish: ORLY “Melt Your Popsicle”
- Sponge for gradient effect
- Matte top coat: Essie Matte About You
DIY Creation Guide: Begin with ORLY Bonder Rubberized Basecoat for staying power. Apply “Alpine Snow” as the base color. Then, with a sponge, dab “Melt Your Popsicle” onto the tips, gradually blending towards the middle to achieve the gradient effect. Finish with Essie Matte About You top coat to give that modern, flat finish.
Gold Flecked Azure
Blue skies and golden rays are encapsulated in this design. A vivid azure base provides a stunning backdrop to luxurious gold leaf accents. It’s a unique and classy look that’s sure to turn heads, whether you’re at a summer beach party or a high-class evening event.
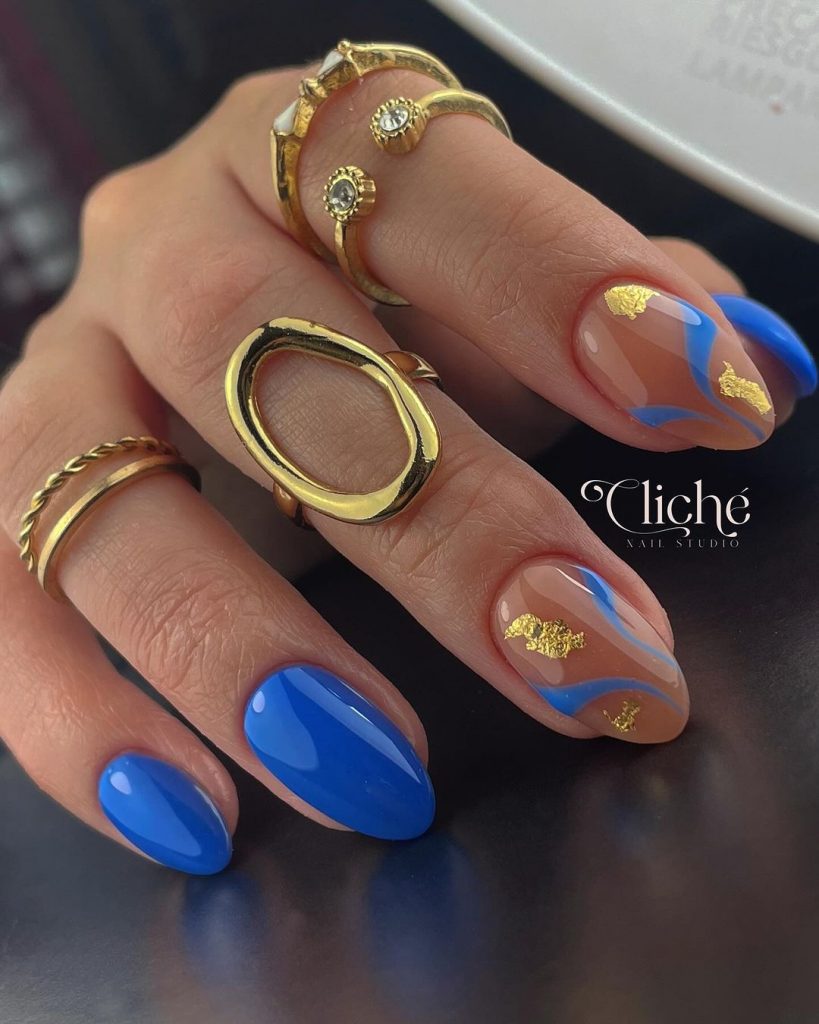
Consumables List:
- Base coat: Deborah Lippmann Gel Lab Pro Base Coat
- Blue polish: Essie “Butler Please”
- Gold leaf flakes
- Top coat: Deborah Lippmann Gel Lab Pro Top Coat
DIY Creation Guide: Prep with Deborah Lippmann Gel Lab Pro Base Coat. Layer on “Butler Please” for a rich blue hue. Gently apply gold leaf flakes to the nails while the polish is tacky, placing them sporadically for an opulent effect. Seal with Gel Lab Pro Top Coat for a glossy and protective finish.
Pink Blossom
This is a sweet ode to the blooms of summer, featuring a vibrant pink polish that exudes femininity and charm. Embellishments and glitter accents add texture and dimension, making this design both playful and colorful—a perfect match for bright summer wardrobes.
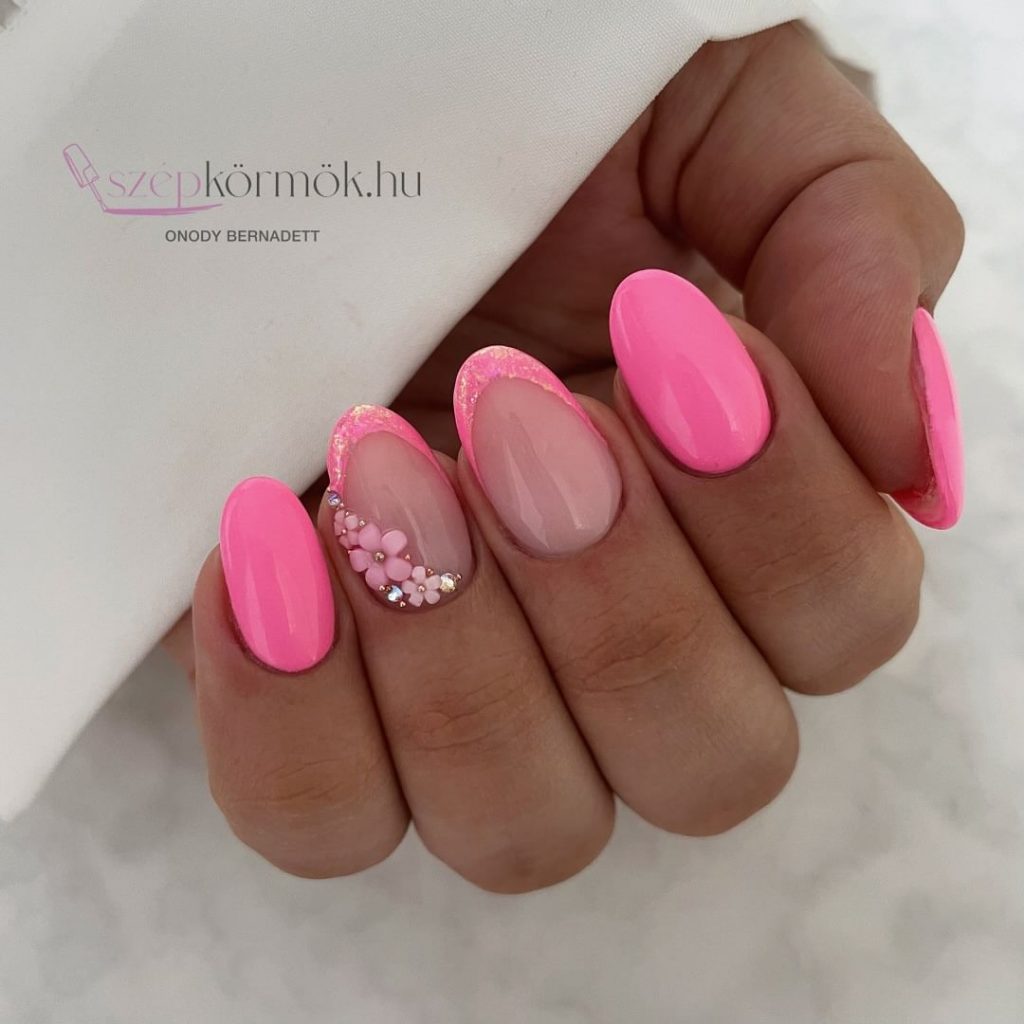
Consumables List:
- Base coat: Sally Hansen Double Duty Base & Top Coat
- Vibrant pink polish: OPI “Shorts Story”
- Glitter polish for accent: OPI “Princesses Rule!”
- Rhinestones and pearls for decoration
- Top coat: Sally Hansen Double Duty Base & Top Coat
DIY Creation Guide: Apply Sally Hansen Double Duty Base & Top Coat as your foundation. Paint “Shorts Story” on all nails, then layer “Princesses Rule!” on the tips for a gradient effect. On the ring finger, create a feature nail by attaching rhinestones and pearls while the polish is still wet. Complete with another layer of Double Duty as a top coat for a durable, shiny finish.
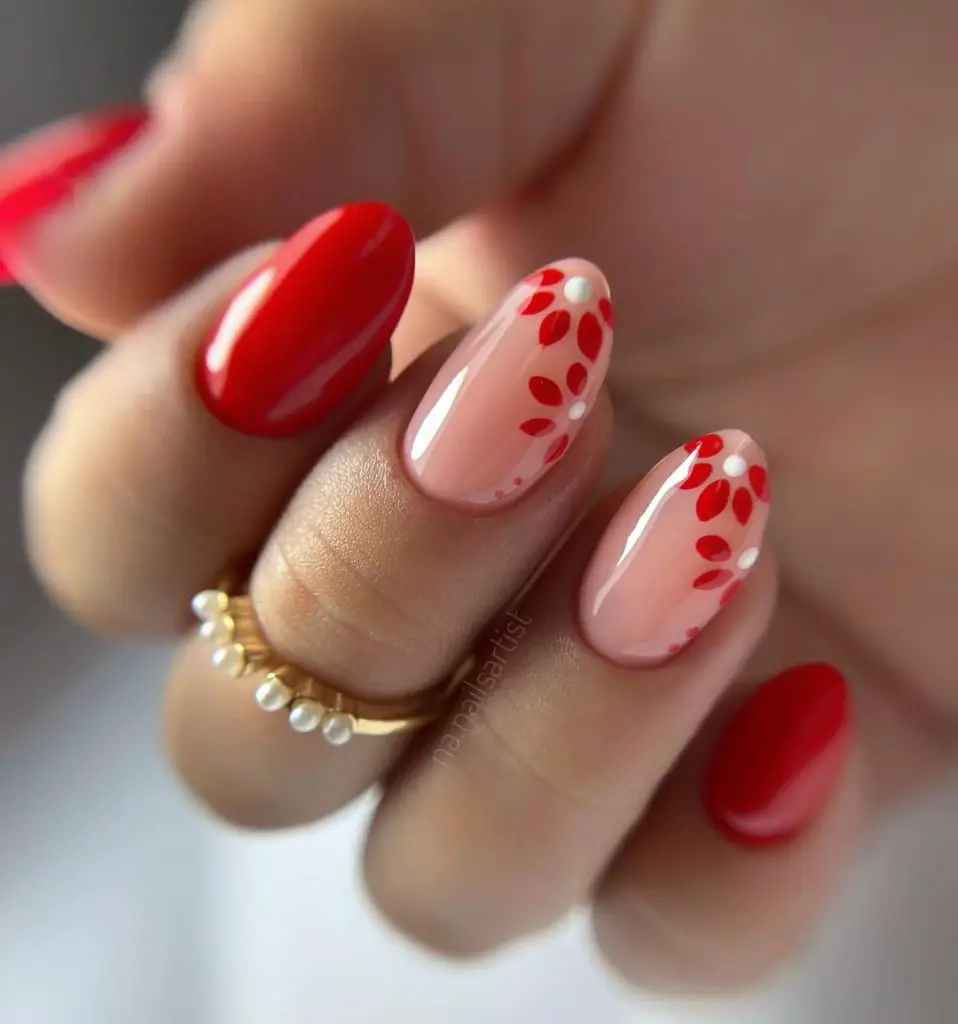
Cherry Dots
A playful yet simple design that marries the timeless elegance of sheer pink with the joyful expression of cherry red dots. It’s an effortlessly classy and bright look that’s suited for both casual outings and more formal summer festivities.
Consumables List:
- Base coat: Essie Grow Stronger Base Coat
- Sheer pink polish: Essie “Ballet Slippers”
- Cherry red polish: Essie “Russian Roulette”
- Dotting tool or toothpick
- Top coat: Essie Gel Setter Top Coat
DIY Creation Guide: Begin by applying Essie Grow Stronger Base Coat to fortify your nails. Next, apply two coats of “Ballet Slippers” for a clean, sheer pink base. Dip your dotting tool or the end of a toothpick into “Russian Roulette” and gently dot onto the nails to create a playful pattern. Allow your dots to dry and finish with Essie Gel Setter Top Coat for a smooth, long-lasting sheen.
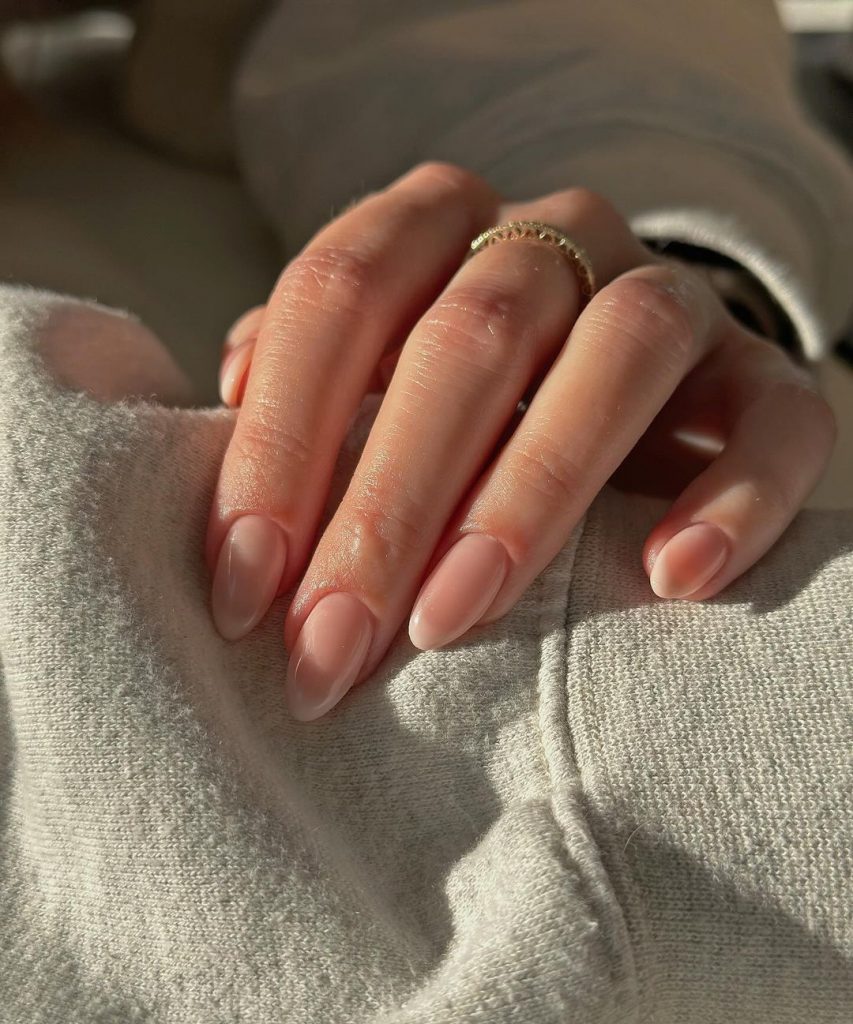
Subtle Sheen
The natural look of these nails speaks volumes of elegance in simplicity. The translucent pink base mimics the soft, warm glow of a serene summer dawn. This understated style is perfect for those who favor a neutral palette but still demand a polished, classy finish.
Consumables List:
- Base coat: Sally Hansen Miracle Cure
- Translucent pink polish: OPI “Bubble Bath”
- Top coat: Essie “Good To Go” Top Coat
DIY Creation Guide: After applying Sally Hansen Miracle Cure as a strengthening base coat, layer on OPI “Bubble Bath” for a healthy, natural sheen. This hue provides a hint of color while keeping the nails looking clean and cared for. Finish with Essie “Good To Go” to seal in the color with a protective, high-gloss shine.
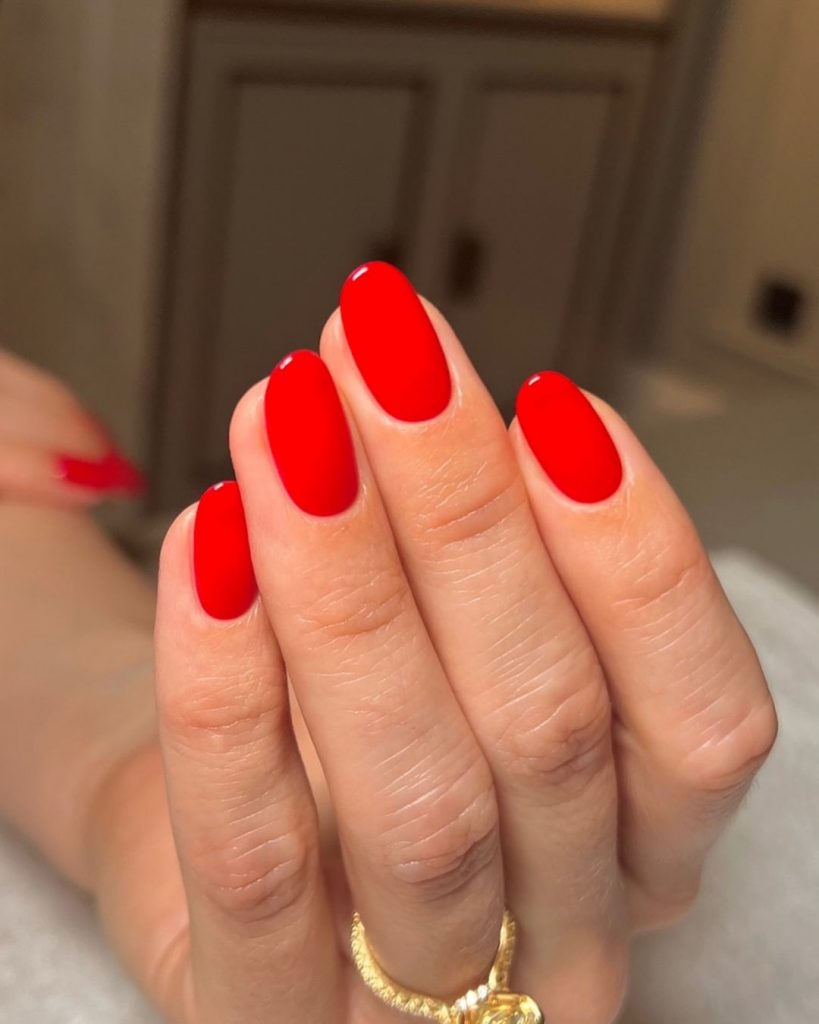
Crimson Confidence
There’s something about a classic red nail that exudes confidence. This deep, glossy bright red is like the perfect summer dress, making a statement without saying a word. It’s an all-time favorite for a reason—it’s simple, it’s bright, and it’s undeniably classy.
Consumables List:
- Base coat: OPI Natural Nail Base Coat
- Red polish: China Glaze “Red-y To Rave”
- Top coat: INM Out The Door Fast Drying Top Coat
DIY Creation Guide: Starting with OPI Natural Nail Base Coat to prevent staining, apply two coats of “Red-y To Rave” for that vivid, statement red. This color is summer in a bottle, ready to accompany any look. Top it off with INM Out The Door for a long-lasting, super glossy finish.
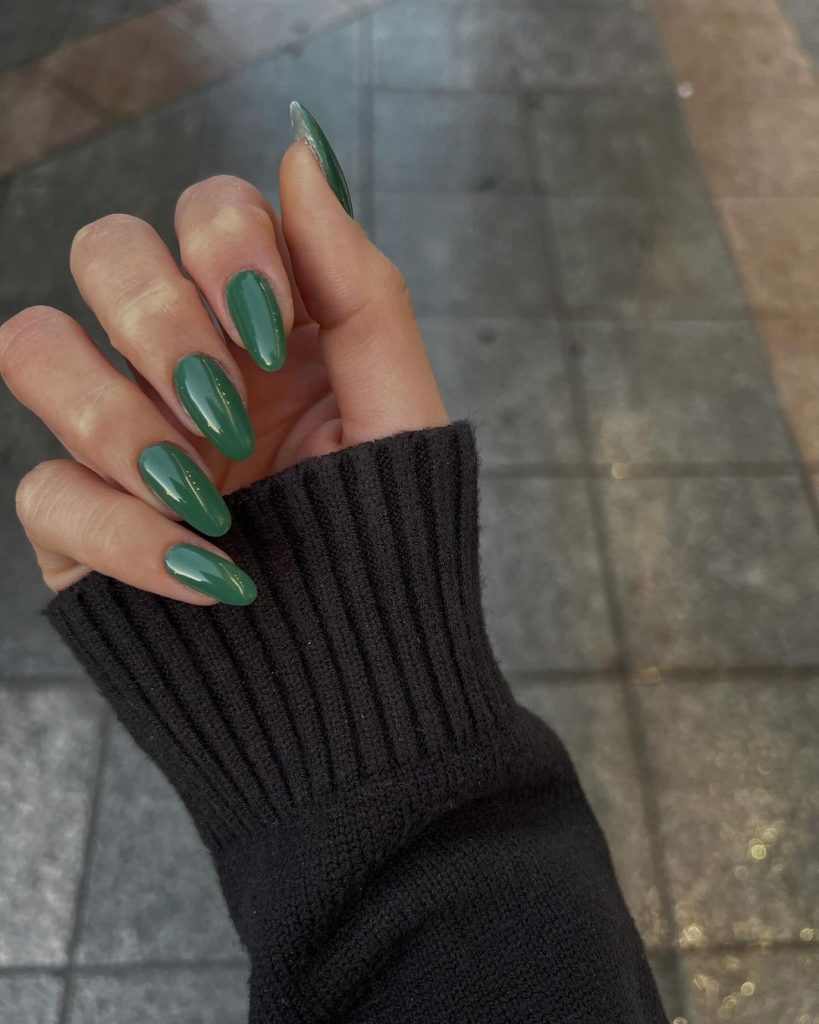
Emerald Elegance
The richness of this dark emerald polish is reminiscent of lush summer foliage. It’s a sophisticated choice for someone looking to wear a bit of nature’s luxury on their fingertips. This shade is as versatile as it is classy, fitting for both day-to-day wear and special summer nights out.
Consumables List:
- Base coat: Butter London Nail Foundation Priming Basecoat
- Emerald polish: Essie “Off Tropic”
- Top coat: Butter London Hardwear Shine UV Top Coat
DIY Creation Guide: Prep your nails with Butter London’s priming basecoat. Coat them with “Off Tropic” to achieve this deep, luxurious shade. Whether you’re attending a summer soiree or simply love a touch of drama, this color will not disappoint. Finish with Butter London Hardwear Shine UV Top Coat for a lasting gleam.
Save Pin
