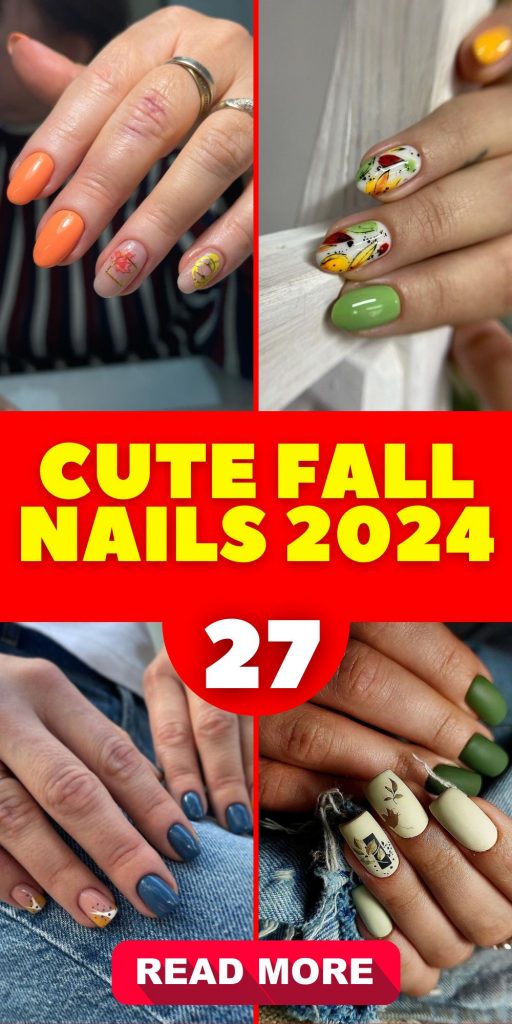
Cute Fall Nails 2024: Trendy 27 Ideas and Designs for the Season
Fall is upon us, and it’s the perfect time to refresh your nail game with some of the cutest trends of 2024. Whether you prefer short, long, acrylic, or gel nails, there’s something for everyone. This season, we’re seeing a mix of vibrant colors, intricate designs, and sophisticated art that caters to various occasions and personal styles. Ready to dive into the latest color trends and designs for fall? Let’s explore some fabulous nail ideas that will keep your nails looking trendy and chic all season long.
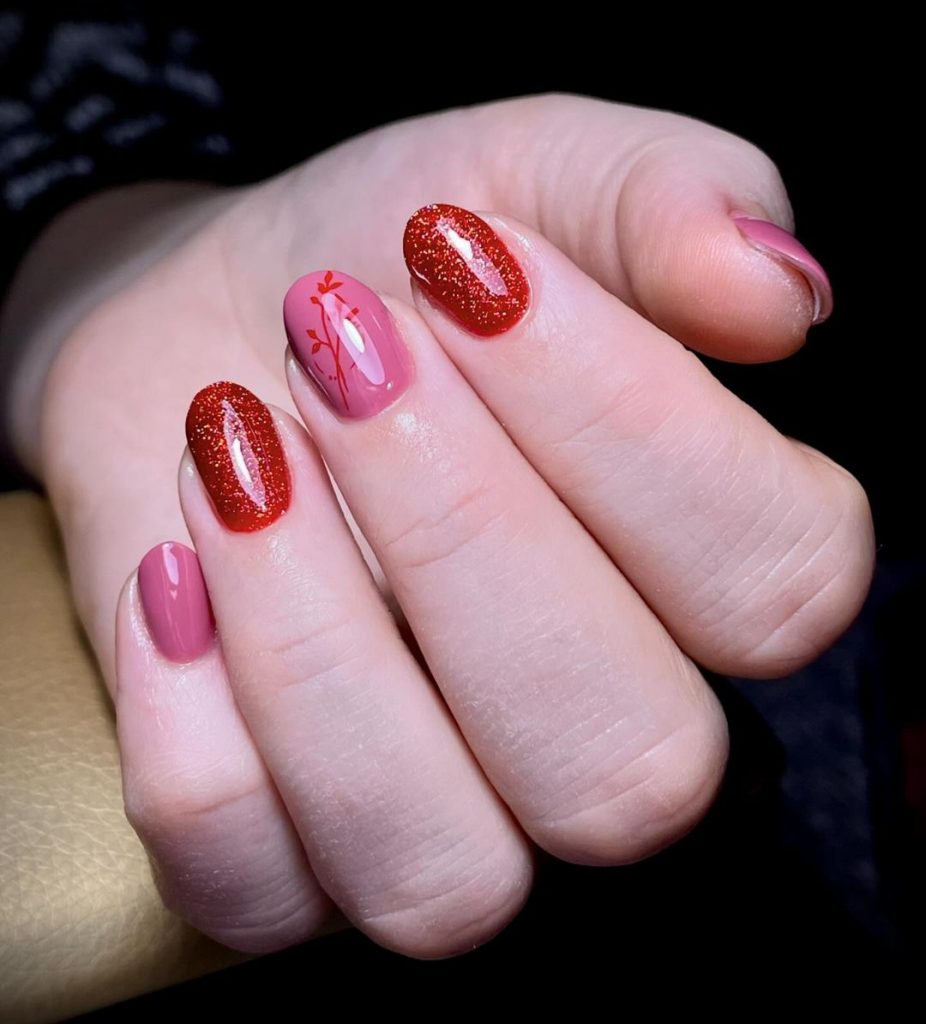
Sparkling Red and Pink Elegance
This design combines deep red glitter and soft pink shades, exuding sophistication and charm. The glittery red nails are perfect for making a statement, while the subtle pink nails with delicate branch accents add a touch of nature-inspired beauty. This design is ideal for both everyday wear and special occasions, offering a balance of boldness and simplicity.
Consumables List
- Red Glitter Polish: OPI Nail Lacquer in “Let’s Celebrate!”
- Soft Pink Polish: Essie Nail Polish in “Ballet Slippers”
- Branch Nail Stickers: Born Pretty Nail Art Stickers
- Top Coat: Seche Vite Dry Fast Top Coat
- Base Coat: Orly Bonder Base Coat
How to Create at Home
- Prep Your Nails: Start with clean, filed nails and apply a base coat to protect them.
- Apply the Base Colors: Paint two nails with the red glitter polish and three with the soft pink polish. Let each coat dry thoroughly before applying the next.
- Add the Branch Accents: Carefully apply the branch nail stickers to the pink nails. Use tweezers for precise placement.
- Seal the Design: Finish with a top coat to add shine and extend the life of your manicure. Ensure the top coat covers the stickers completely to prevent peeling.
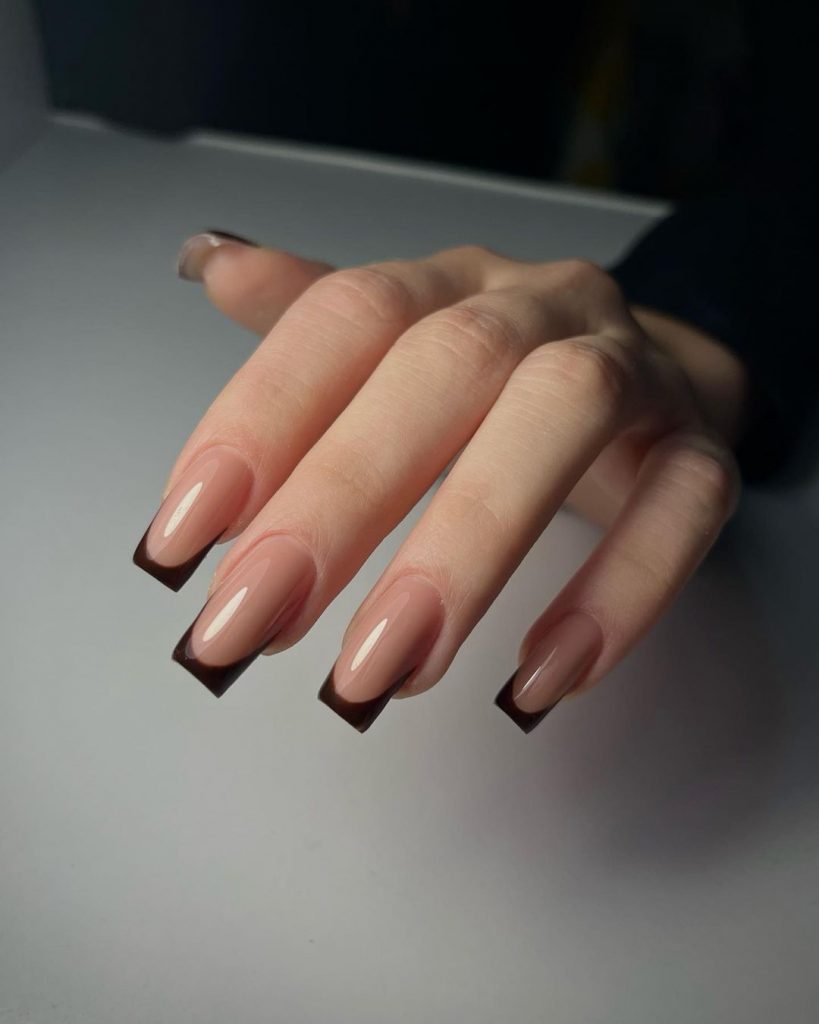
Minimalist Brown French Tips
Embrace the chic elegance of acrylic coffin short nails with this minimalist brown French tip design. This simple yet sophisticated look is perfect for those who love a classy and understated manicure. The neutral nude base paired with the dark brown tips offers a modern twist on the classic French manicure, making it perfect for both professional settings and casual outings.
Consumables List
- Nude Polish: OPI Nail Lacquer in “Dulce de Leche”
- Brown Polish: Essie Nail Polish in “Wicked”
- Top Coat: Seche Vite Dry Fast Top Coat
- Base Coat: Orly Bonder Base Coat
- French Tip Guides: Sally Hansen French Manicure Tip Guides
How to Create at Home
- Prep Your Nails: Ensure your nails are clean and filed, then apply a base coat.
- Apply the Nude Base: Paint your nails with the nude polish, allowing each coat to dry completely.
- Create the French Tips: Use French tip guides to create a crisp line, then paint the tips with the brown polish. Remove the guides before the polish dries.
- Finish with a Top Coat: Seal your design with a top coat to add shine and protect your manicure.
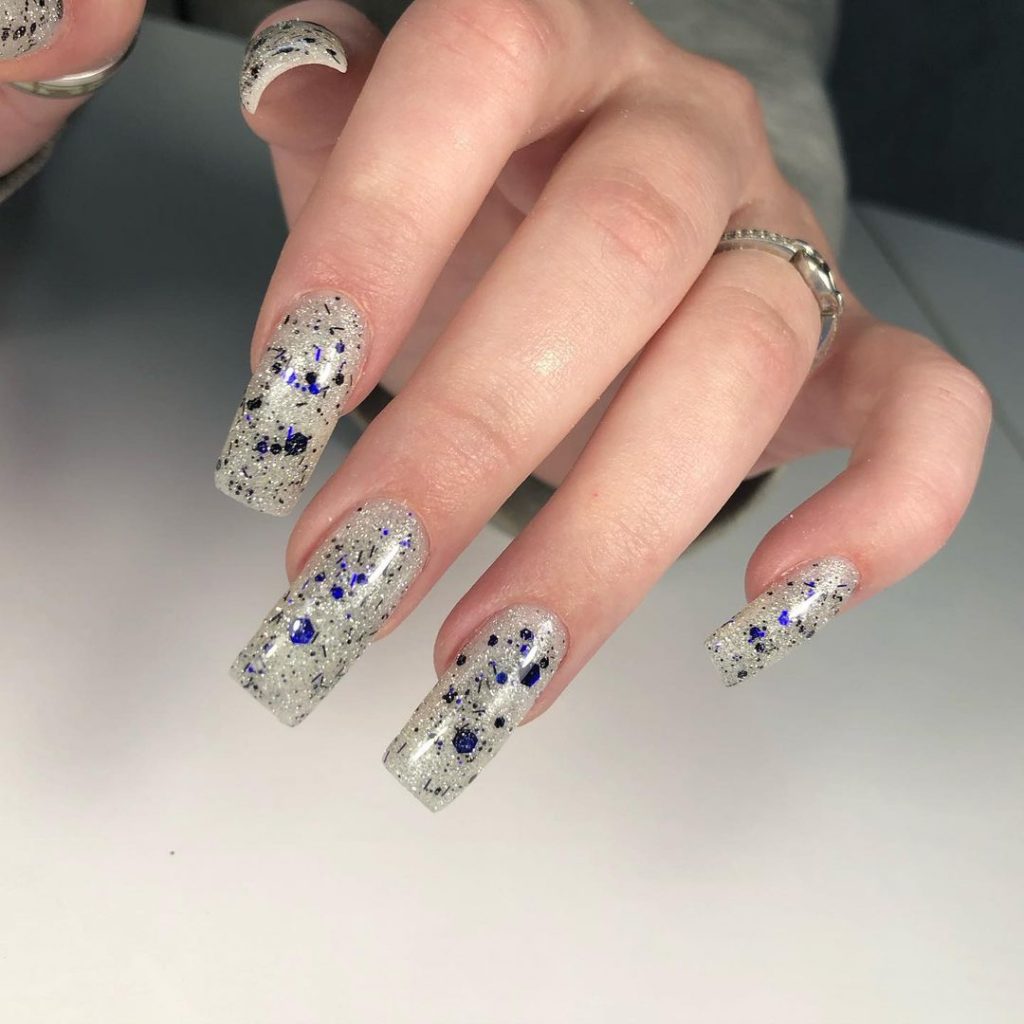
Glittery Silver and Blue Nails
For a dazzling look, these glittery silver and blue nails are perfect. The combination of silver glitter and blue accents creates a fun and festive vibe, ideal for parties or special events. This design is eye-catching and sure to draw compliments.
Consumables List
- Silver Glitter Polish: China Glaze Nail Lacquer in “Fairy Dust”
- Blue Polish: OPI Nail Lacquer in “Blue My Mind”
- Top Coat: Seche Vite Dry Fast Top Coat
- Base Coat: Orly Bonder Base Coat
- Loose Glitter: NYK1 Secrets Holographic Glitter
How to Create at Home
- Prep Your Nails: Clean and file your nails, then apply a base coat.
- Apply the Silver Glitter Base: Paint your nails with the silver glitter polish, ensuring an even coat.
- Add Blue Accents: Use a detail brush to add blue accents over the glitter base. You can create dots, lines, or other patterns as desired.
- Seal with a Top Coat: Apply a top coat to protect your design and add shine.
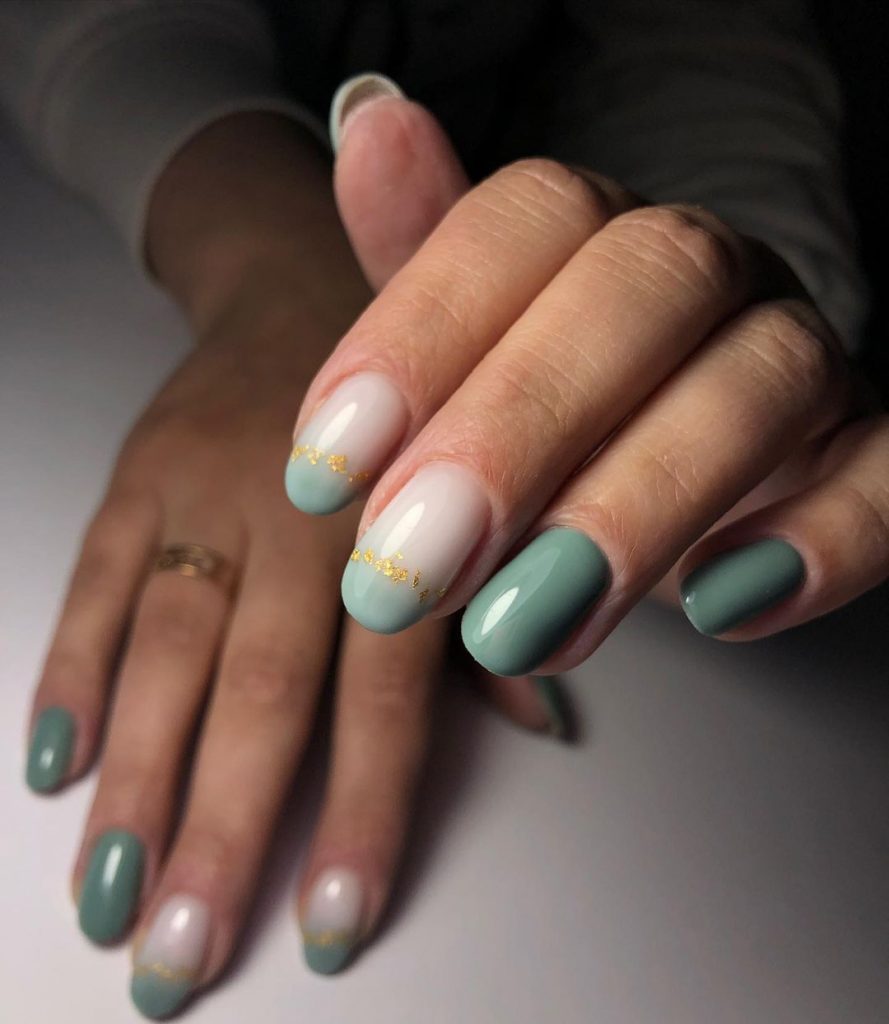
Elegant Green and Gold French Tips
These nails feature a beautiful green shade with delicate gold accents, perfect for those who love a touch of elegance. The green base is complemented by gold leaf detailing, making this design sophisticated and unique.
Consumables List
- Green Polish: Essie Nail Polish in “Going Incognito”
- Gold Leaf: Gold Nail Art Foil
- Top Coat: Seche Vite Dry Fast Top Coat
- Base Coat: Orly Bonder Base Coat
- Nail Art Brush: Modelones Nail Art Brush Set
How to Create at Home
- Prep Your Nails: Start with clean, filed nails and apply a base coat.
- Apply the Green Base: Paint your nails with the green polish, letting each coat dry thoroughly.
- Add Gold Leaf Accents: Use a nail art brush to apply gold leaf accents to the tips of your nails.
- Seal with a Top Coat: Apply a top coat to protect your design and add a glossy finish.
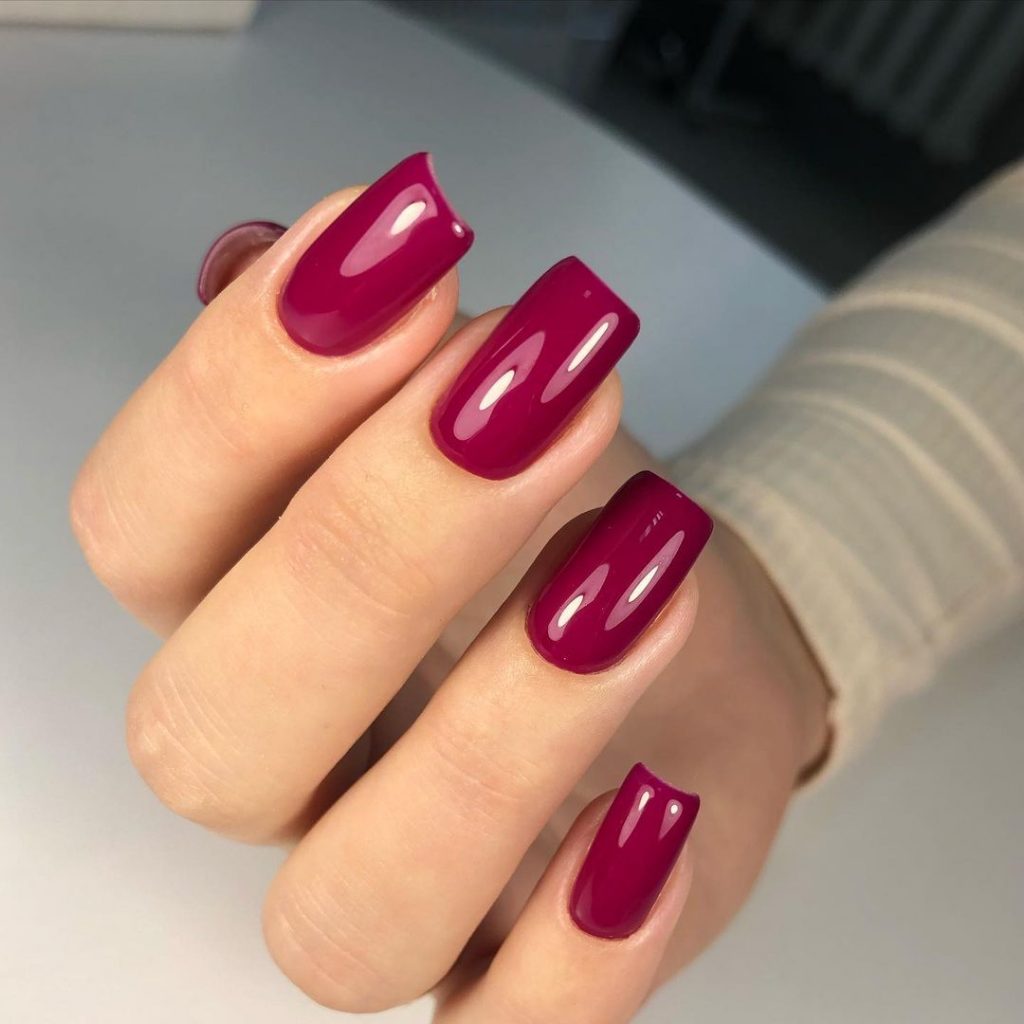
Bold Burgundy Nails
These bold burgundy nails are perfect for making a statement this fall. The rich, deep color is both classic and trendy, making it a great choice for any occasion. This design is simple yet striking, ideal for those who love a bold look.
Consumables List
- Burgundy Polish: OPI Nail Lacquer in “Malaga Wine”
- Top Coat: Seche Vite Dry Fast Top Coat
- Base Coat: Orly Bonder Base Coat
How to Create at Home
- Prep Your Nails: Ensure your nails are clean and filed, then apply a base coat.
- Apply the Burgundy Polish: Paint your nails with the burgundy polish, allowing each coat to dry completely.
- Seal with a Top Coat: Apply a top coat to add shine and protect your manicure.
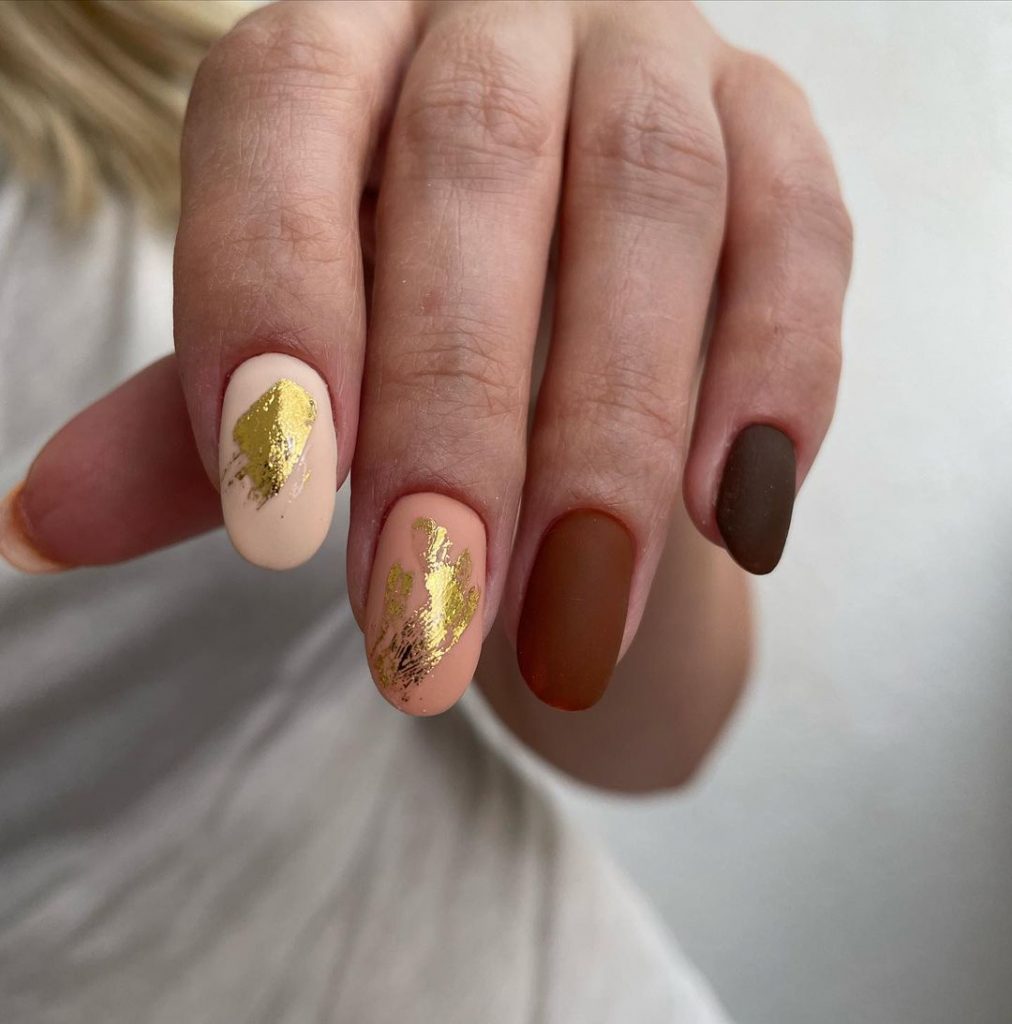
Matte Neutrals with Gold Accents
This nail design showcases a stunning mix of matte neutrals paired with gold leaf accents. The combination of creamy beige, soft peach, and rich brown creates a warm and inviting palette perfect for fall. The gold leaf details add a touch of luxury and sophistication, making this design both stylish and elegant.
Consumables List
- Beige Polish: OPI Nail Lacquer in “My Vampire is Buff”
- Peach Polish: Essie Nail Polish in “Peach Side Babe”
- Brown Polish: OPI Nail Lacquer in “You Don’t Know Jacques!”
- Gold Leaf: Gold Nail Art Foil
- Matte Top Coat: Essie Matte About You Top Coat
- Base Coat: Orly Bonder Base Coat
How to Create at Home
- Prep Your Nails: Clean and file your nails, then apply a base coat.
- Apply the Base Colors: Paint each nail with one of the neutral shades, allowing each coat to dry completely.
- Add Gold Leaf Accents: Use a nail art brush to apply the gold leaf accents to the nails. Gently press the gold leaf onto the tacky polish for best adherence.
- Finish with Matte Top Coat: Seal your design with a matte top coat to achieve the desired matte finish and protect your nails.
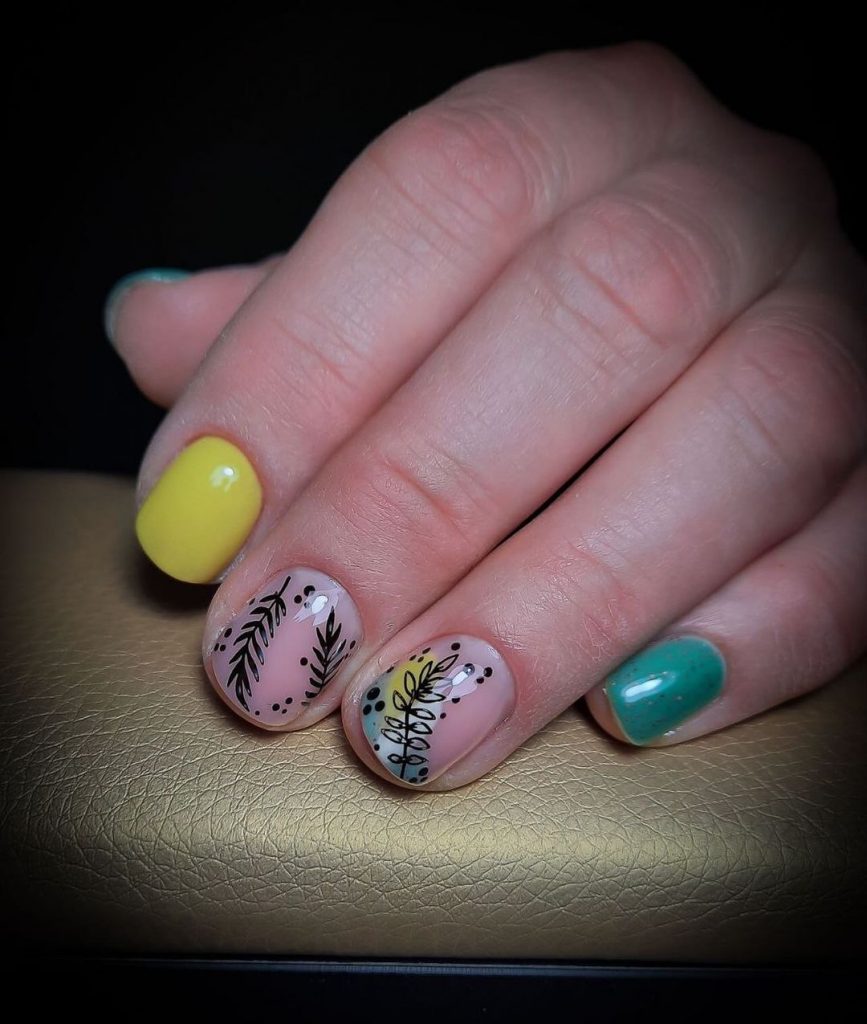
Playful Yellow and Green with Black Leaf Designs
This fun and playful design combines bright yellow and teal nails with intricate black leaf designs on a nude base. The contrast between the vibrant colors and the delicate black art makes this manicure perfect for those who love to experiment with bold looks.
Consumables List
- Yellow Polish: OPI Nail Lacquer in “Exotic Birds Do Not Tweet”
- Teal Polish: Essie Nail Polish in “In the Cab-ana”
- Nude Polish: OPI Nail Lacquer in “Samoan Sand”
- Black Nail Art Pen: Sally Hansen I Heart Nail Art Pen in Black
- Top Coat: Seche Vite Dry Fast Top Coat
- Base Coat: Orly Bonder Base Coat
How to Create at Home
- Prep Your Nails: Start with clean, filed nails and apply a base coat.
- Apply the Base Colors: Paint some nails with the yellow polish, others with the teal, and leave two nails with just the nude base. Let each coat dry thoroughly.
- Create the Leaf Designs: Use the black nail art pen to draw leaf designs on the nude base nails. Be creative with the patterns and shapes.
- Seal with a Top Coat: Apply a top coat to protect your design and add shine.
Navy Blue and Yellow Accents
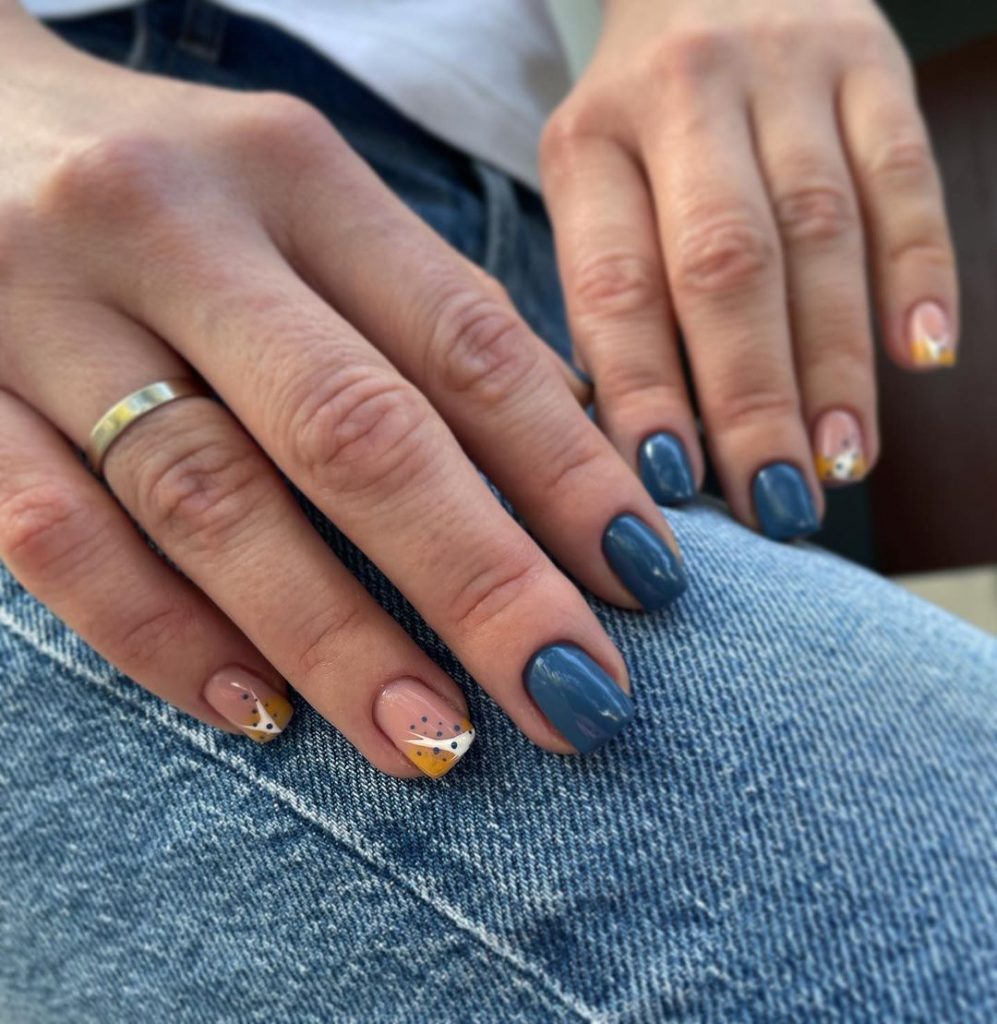
This chic design features a combination of solid navy blue nails with accent nails that have delicate yellow and white dot patterns. The navy blue adds a sophisticated touch, while the yellow and white accents keep the design playful and fresh.
Consumables List
- Navy Blue Polish: Essie Nail Polish in “After School Boy Blazer”
- Yellow Polish: OPI Nail Lacquer in “Sun, Sea, and Sand in My Pants”
- White Polish: Essie Nail Polish in “Blanc”
- Dotting Tool: Winstonia Dotting Tool Set
- Top Coat: Seche Vite Dry Fast Top Coat
- Base Coat: Orly Bonder Base Coat
How to Create at Home
- Prep Your Nails: Clean and file your nails, then apply a base coat.
- Apply the Base Colors: Paint most nails with the navy blue polish, leaving a couple of nails for the accent design.
- Create the Dot Patterns: Use a dotting tool to apply yellow and white dots in a pattern on the accent nails.
- Finish with a Top Coat: Seal your design with a top coat to add shine and protect your nails.
Black and Gold Glitter
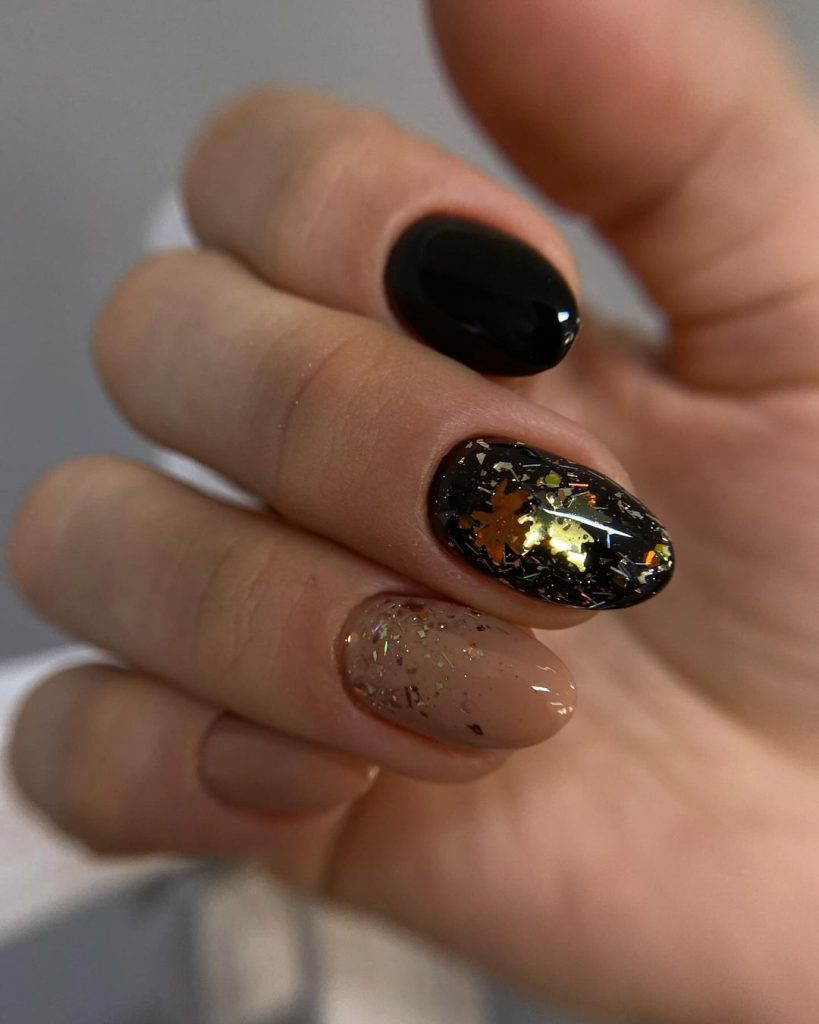
This striking design features black and nude nails with bold gold glitter accents. The combination of solid black, glitter, and nude creates a dramatic and eye-catching look, perfect for evening events or a glamorous night out.
Consumables List
- Black Polish: OPI Nail Lacquer in “Black Onyx”
- Nude Polish: Essie Nail Polish in “Sand Tropez”
- Gold Glitter: NYK1 Secrets Holographic Glitter
- Top Coat: Seche Vite Dry Fast Top Coat
- Base Coat: Orly Bonder Base Coat
How to Create at Home
- Prep Your Nails: Ensure your nails are clean and filed, then apply a base coat.
- Apply the Base Colors: Paint some nails with the black polish and others with the nude polish. Let each coat dry thoroughly.
- Add Gold Glitter Accents: Use a small brush to apply gold glitter to the nude nails, creating a gradient effect.
- Seal with a Top Coat: Apply a top coat to protect your design and add shine.
Deep Green Elegance
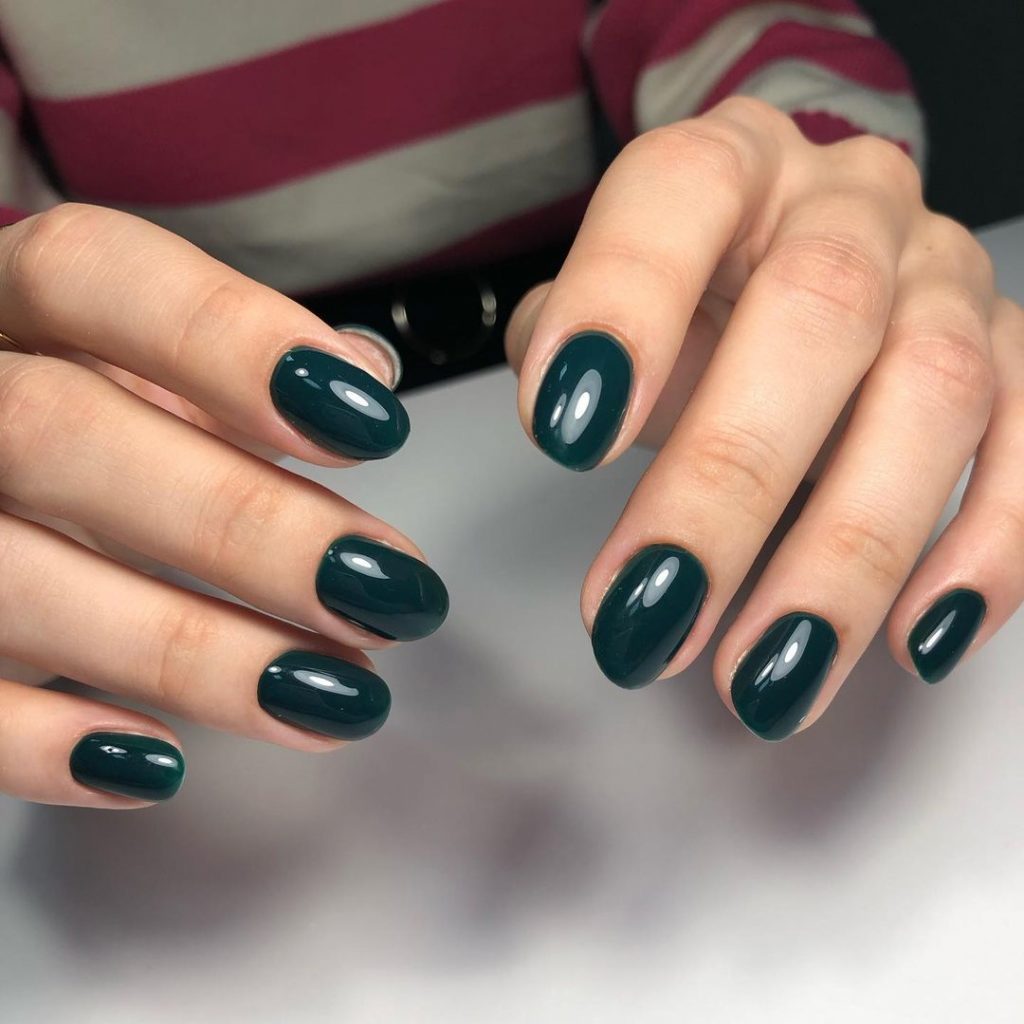
This elegant design features deep green nails, perfect for the fall season. The rich, dark green shade is sophisticated and versatile, making it suitable for both casual and formal occasions. This simple yet chic design is a must-try for those who love classic styles with a modern twist.
Consumables List
- Deep Green Polish: Essie Nail Polish in “Stylenomics”
- Top Coat: Seche Vite Dry Fast Top Coat
- Base Coat: Orly Bonder Base Coat
How to Create at Home
- Prep Your Nails: Start with clean, filed nails and apply a base coat.
- Apply the Green Polish: Paint your nails with the deep green polish, allowing each coat to dry completely.
- Seal with a Top Coat: Apply a top coat to add shine and protect your manicure.
Glossy Chocolate Brown
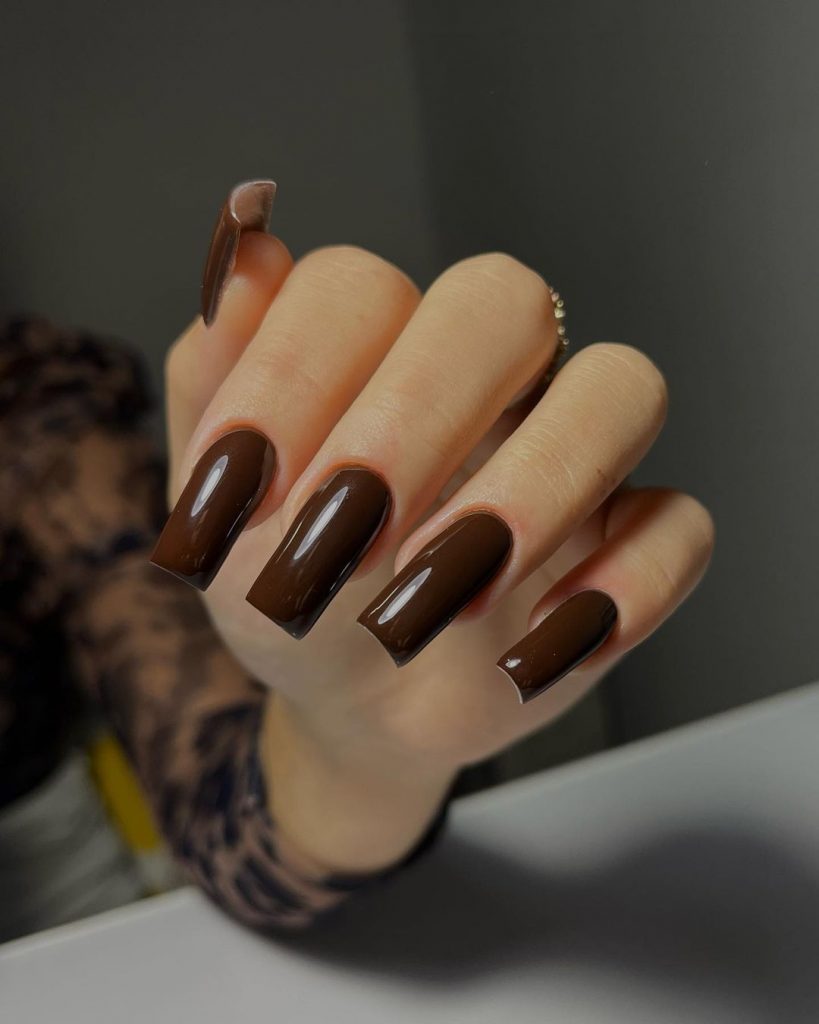
This design features a rich, glossy chocolate brown that exudes elegance and sophistication. The deep brown shade is perfect for the fall season, providing a warm and cozy feel while still looking incredibly chic. This simple yet bold look is ideal for those who want a classic style with a modern twist.
Consumables List
- Chocolate Brown Polish: OPI Nail Lacquer in “Espresso Your Inner Self”
- Top Coat: Seche Vite Dry Fast Top Coat
- Base Coat: Orly Bonder Base Coat
How to Create at Home
- Prep Your Nails: Start with clean, filed nails and apply a base coat.
- Apply the Brown Polish: Paint your nails with the chocolate brown polish, ensuring each coat is even and fully covers the nails. Allow each coat to dry completely before applying the next.
- Finish with a Top Coat: Seal your design with a top coat to add shine and protect your manicure.
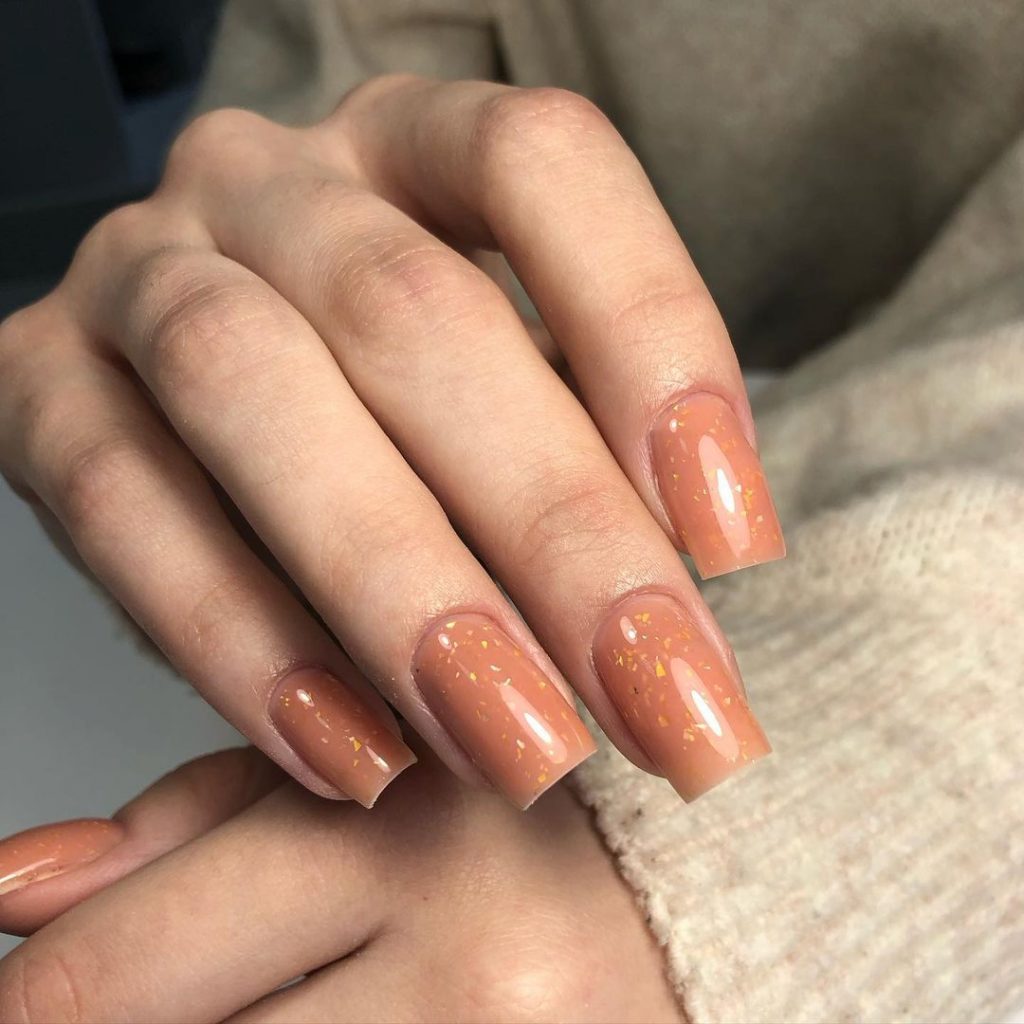
Peach with Gold Flakes
This elegant design features a soft peach base with delicate gold flakes scattered throughout. The peach color adds a subtle, feminine touch, while the gold flakes bring in a hint of glamour. This look is perfect for both everyday wear and special occasions.
Consumables List
- Peach Polish: Essie Nail Polish in “A Touch of Sugar”
- Gold Flakes: Gold Nail Art Foil
- Top Coat: Seche Vite Dry Fast Top Coat
- Base Coat: Orly Bonder Base Coat
How to Create at Home
- Prep Your Nails: Clean and file your nails, then apply a base coat.
- Apply the Peach Polish: Paint your nails with the peach polish, letting each coat dry thoroughly.
- Add Gold Flakes: Use a small brush to apply gold flakes to the nails, creating a scattered effect.
- Seal with a Top Coat: Apply a top coat to protect your design and add a glossy finish.
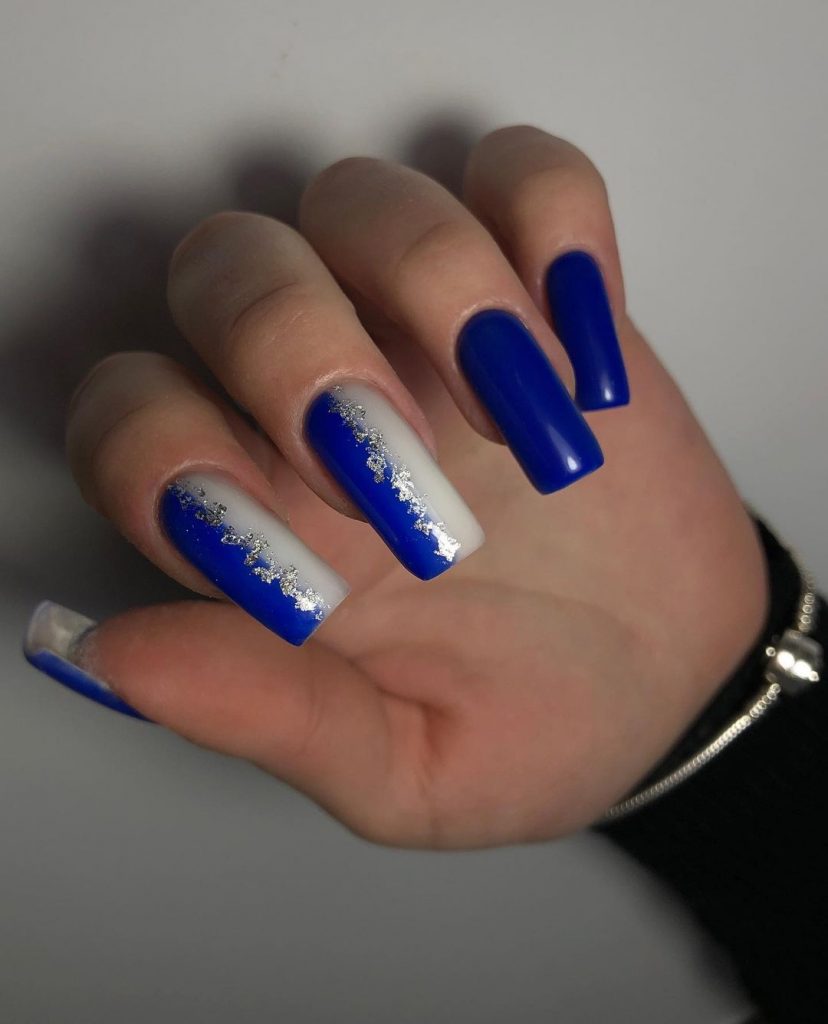
Blue and Silver Gradient
This eye-catching design features a striking blue and white gradient with silver accents. The bold blue color transitions seamlessly into white, creating a stunning ombre effect. The addition of silver accents adds a touch of sparkle and elegance.
Consumables List
- Blue Polish: OPI Nail Lacquer in “My Car Has Navy-gation”
- White Polish: Essie Nail Polish in “Blanc”
- Silver Glitter: NYK1 Secrets Holographic Glitter
- Top Coat: Seche Vite Dry Fast Top Coat
- Base Coat: Orly Bonder Base Coat
- Sponge: Nail Art Gradient Sponge
How to Create at Home
- Prep Your Nails: Clean and file your nails, then apply a base coat.
- Create the Gradient: Apply blue and white polish to a sponge and gently dab onto the nails to create a gradient effect. Repeat until the desired look is achieved.
- Add Silver Accents: Use a small brush to apply silver glitter along the gradient line.
- Finish with a Top Coat: Seal your design with a top coat to add shine and protect your nails.
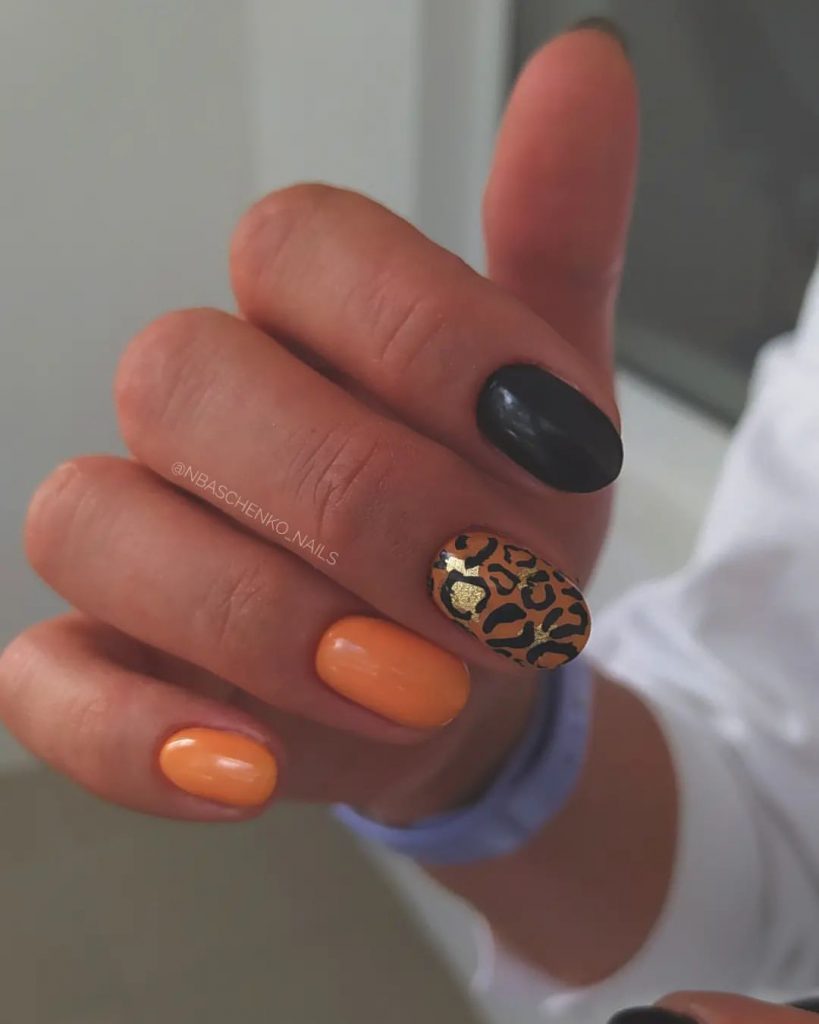
Leopard Print with Black and Orange
This fun and bold design features a mix of black, orange, and leopard print nails. The combination of solid black and orange nails with a leopard print accent nail creates a playful and trendy look, perfect for those who love to experiment with their nail art.
Consumables List
- Black Polish: OPI Nail Lacquer in “Black Onyx”
- Orange Polish: Essie Nail Polish in “Clambake”
- Leopard Print Decals: Born Pretty Leopard Nail Stickers
- Top Coat: Seche Vite Dry Fast Top Coat
- Base Coat: Orly Bonder Base Coat
How to Create at Home
- Prep Your Nails: Clean and file your nails, then apply a base coat.
- Apply the Base Colors: Paint some nails with the black polish and others with the orange polish. Allow each coat to dry thoroughly.
- Add Leopard Print Decals: Apply the leopard print decals to one or two accent nails.
- Seal with a Top Coat: Apply a top coat to protect your design and add shine.
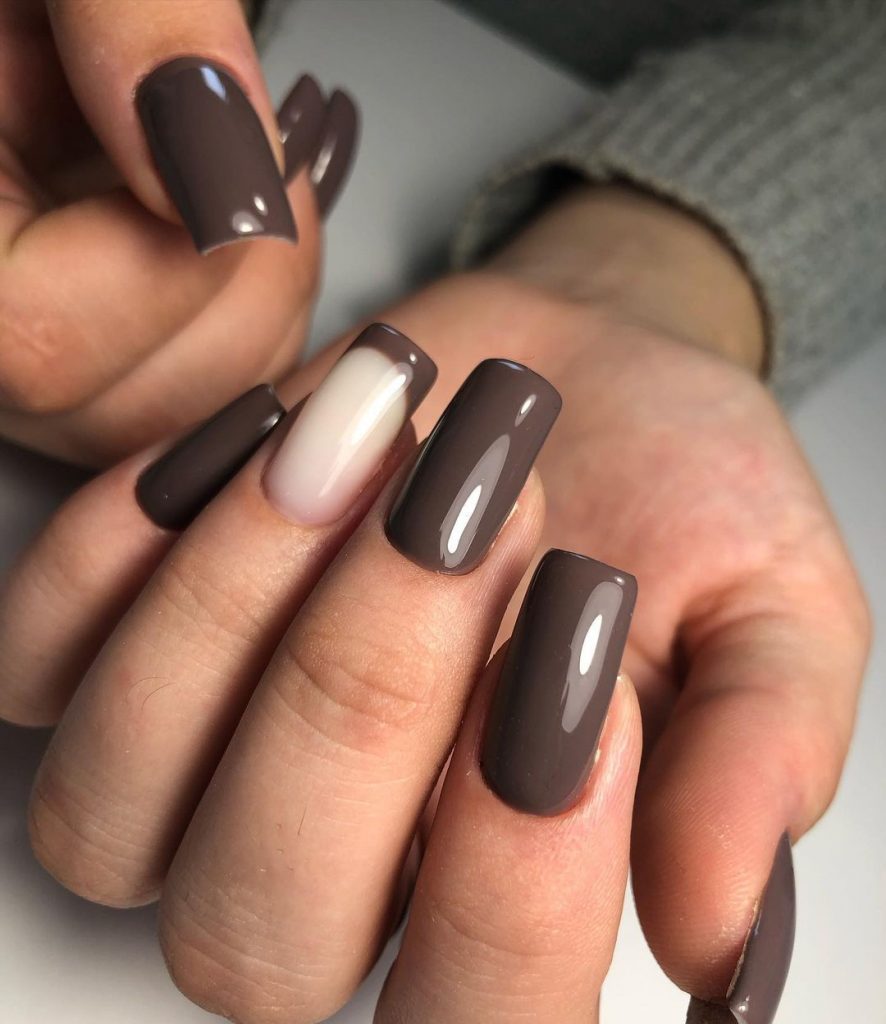
Taupe and Nude Elegance
This sophisticated design features taupe nails with a single nude accent nail. The taupe color is both modern and versatile, while the nude accent adds a touch of elegance. This look is perfect for any occasion, from casual outings to formal events.
Consumables List
- Taupe Polish: OPI Nail Lacquer in “Taupe-less Beach”
- Nude Polish: Essie Nail Polish in “Ballet Slippers”
- Top Coat: Seche Vite Dry Fast Top Coat
- Base Coat: Orly Bonder Base Coat
How to Create at Home
- Prep Your Nails: Clean and file your nails, then apply a base coat.
- Apply the Base Colors: Paint most nails with the taupe polish, and one or two accent nails with the nude polish. Let each coat dry completely.
- Finish with a Top Coat: Seal your design with a top coat to add shine and protect your nails.
Artistic Autumn Colors
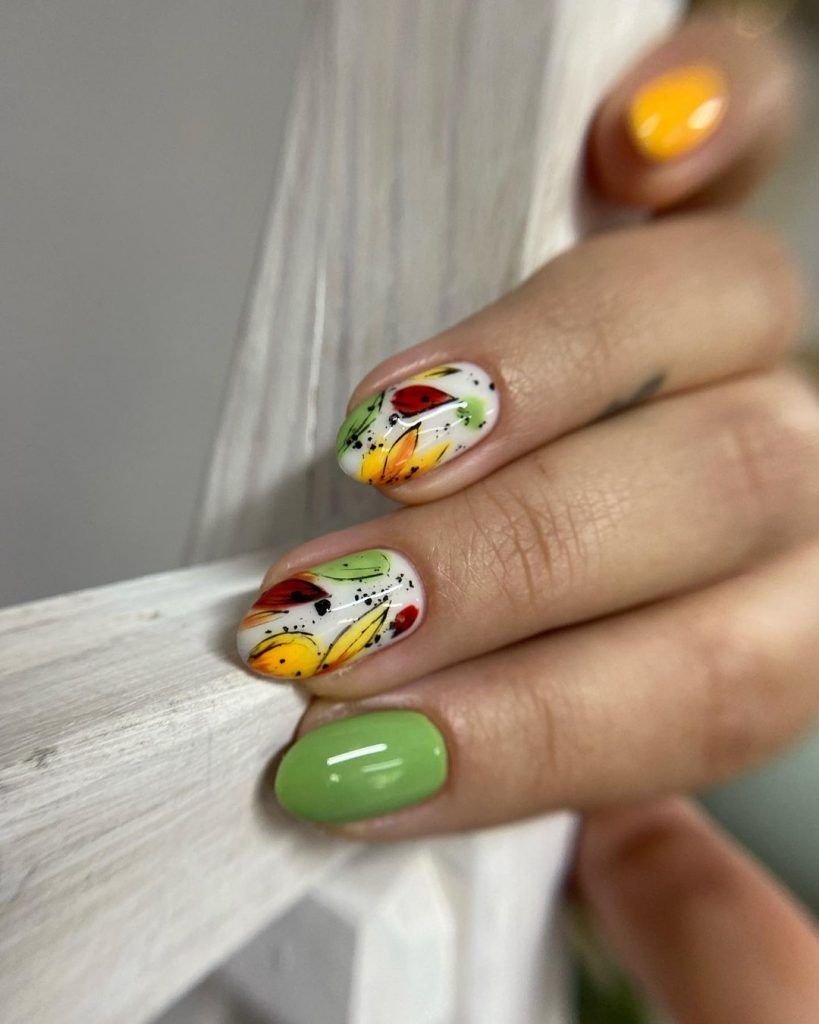
This nail design features a stunning mix of autumn colors with artistic flair. The white base is adorned with splashes of red, orange, yellow, and green, creating a vibrant and eye-catching design. The additional solid green and yellow nails add to the playful nature of this look, making it perfect for those who love creative and colorful designs.
Consumables List
- White Polish: Essie Nail Polish in “Blanc”
- Green Polish: OPI Nail Lacquer in “How Does Your Zen Garden Grow?”
- Yellow Polish: OPI Nail Lacquer in “Exotic Birds Do Not Tweet”
- Nail Art Brushes: Modelones Nail Art Brush Set
- Top Coat: Seche Vite Dry Fast Top Coat
- Base Coat: Orly Bonder Base Coat
How to Create at Home
- Prep Your Nails: Clean and file your nails, then apply a base coat.
- Apply the Base Colors: Paint some nails white, some green, and some yellow. Let each coat dry thoroughly.
- Create the Artistic Design: Use nail art brushes to apply splashes of red, orange, yellow, and green on the white nails. Be creative with the patterns and shapes.
- Seal with a Top Coat: Apply a top coat to protect your design and add a glossy finish.
Classic Black Coffin Nails
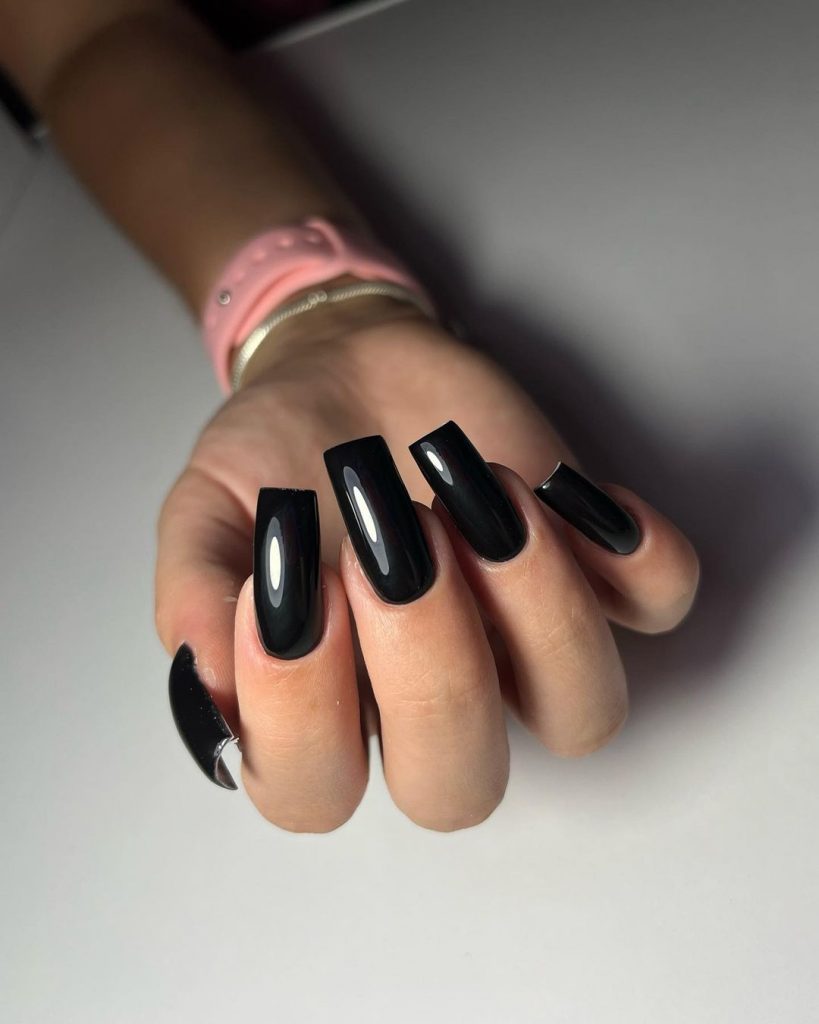
This bold design features glossy black coffin nails that exude sophistication and elegance. The deep, dark shade is perfect for making a statement, whether you’re heading to a formal event or just want a chic everyday look. The sleek, glossy finish adds a touch of modernity to this classic color.
Consumables List
- Black Polish: OPI Nail Lacquer in “Black Onyx”
- Top Coat: Seche Vite Dry Fast Top Coat
- Base Coat: Orly Bonder Base Coat
How to Create at Home
- Prep Your Nails: Start with clean, filed nails and apply a base coat.
- Apply the Black Polish: Paint your nails with the black polish, ensuring each coat is even and fully covers the nails. Allow each coat to dry completely before applying the next.
- Finish with a Top Coat: Seal your design with a top coat to add shine and protect your manicure.
Deep Burgundy Elegance
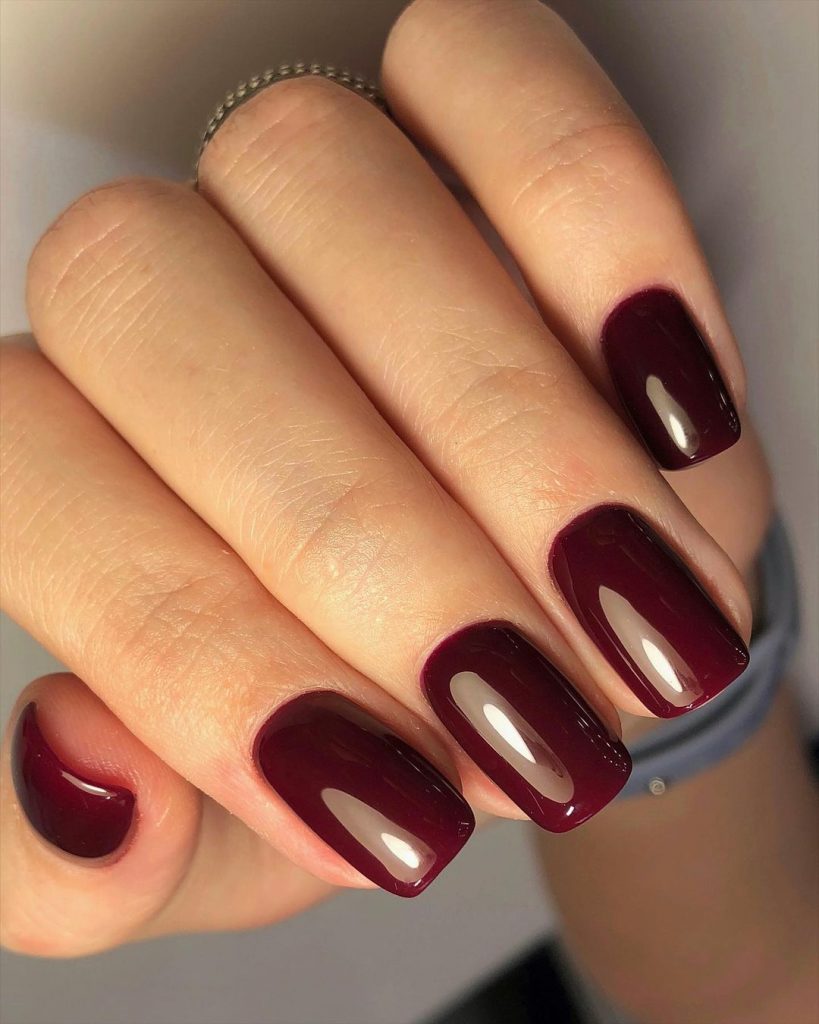
These nails feature a rich burgundy color that is both bold and elegant. The deep red shade is perfect for fall, offering a warm and luxurious feel. This simple yet sophisticated design is ideal for both casual and formal occasions, making it a versatile addition to your nail repertoire.
Consumables List
- Burgundy Polish: OPI Nail Lacquer in “Malaga Wine”
- Top Coat: Seche Vite Dry Fast Top Coat
- Base Coat: Orly Bonder Base Coat
How to Create at Home
- Prep Your Nails: Clean and file your nails, then apply a base coat.
- Apply the Burgundy Polish: Paint your nails with the burgundy polish, allowing each coat to dry completely.
- Seal with a Top Coat: Apply a top coat to add shine and protect your manicure.
Pumpkin Patch Delight
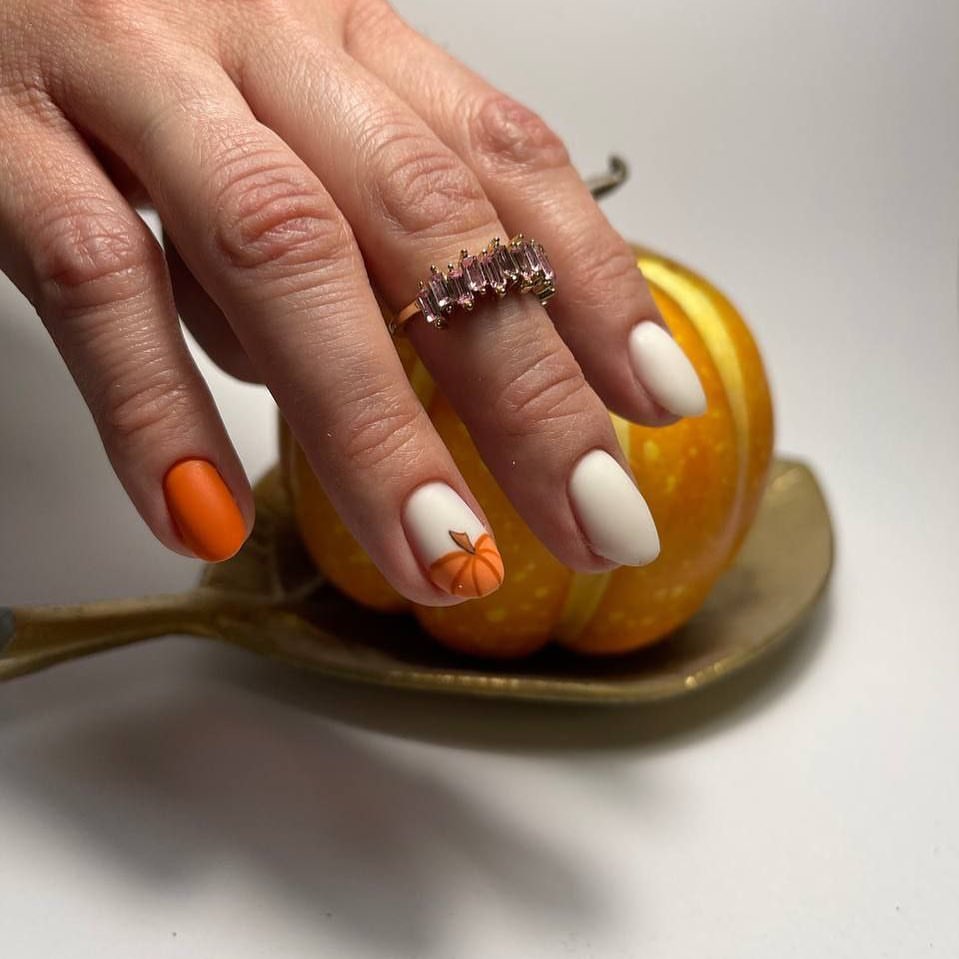
Celebrate the fall season with this cute pumpkin-themed nail design. The white base nails feature a tiny pumpkin accent, while the solid orange nails add a pop of color. This fun and festive look is perfect for autumn gatherings and Halloween celebrations.
Consumables List
- White Polish: Essie Nail Polish in “Blanc”
- Orange Polish: OPI Nail Lacquer in “A Good Man-darin is Hard to Find”
- Pumpkin Decals: Born Pretty Pumpkin Nail Stickers
- Top Coat: Seche Vite Dry Fast Top Coat
- Base Coat: Orly Bonder Base Coat
How to Create at Home
- Prep Your Nails: Clean and file your nails, then apply a base coat.
- Apply the Base Colors: Paint some nails white and some orange. Let each coat dry thoroughly.
- Add Pumpkin Decals: Apply the pumpkin decals to the white nails.
- Seal with a Top Coat: Apply a top coat to protect your design and add a glossy finish.
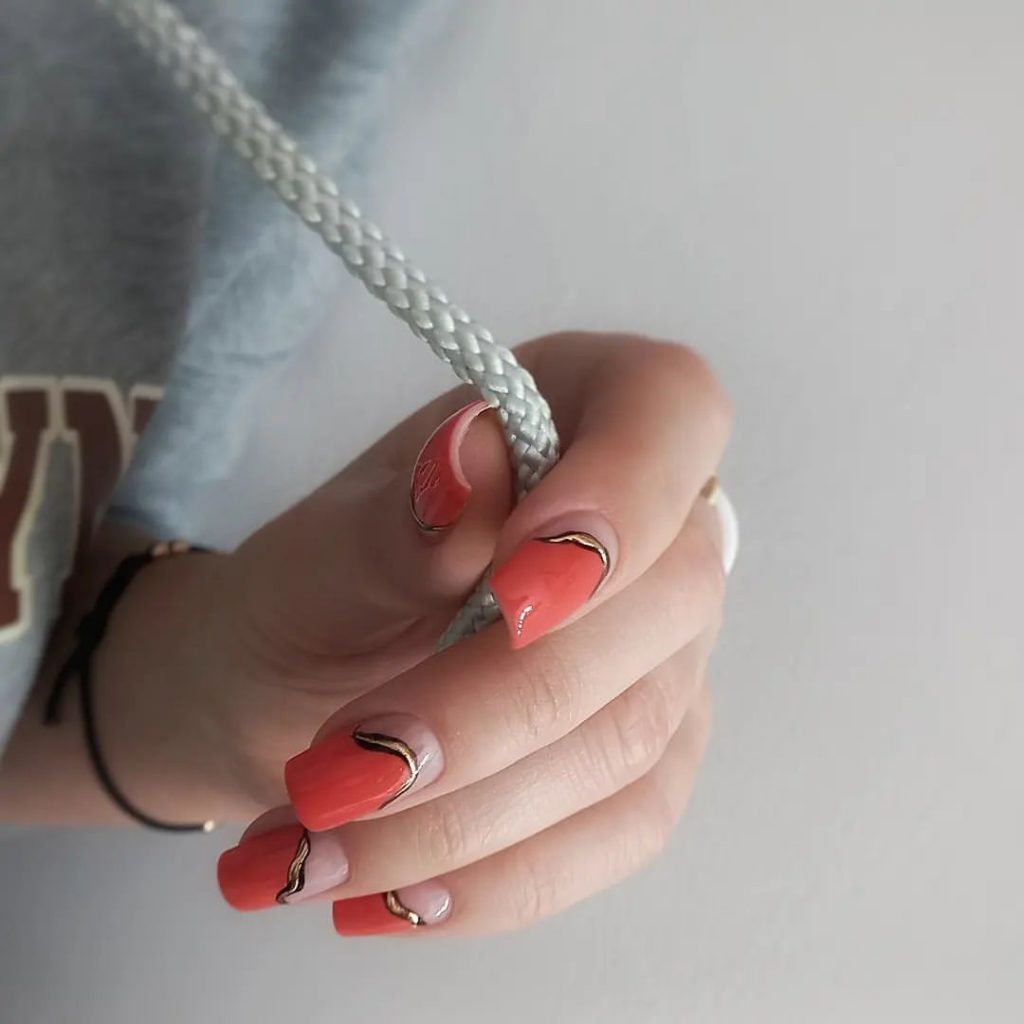
Coral and Gold Accents
This stylish design features a bright coral color with elegant gold accents. The combination of coral and gold creates a sophisticated yet playful look, perfect for adding a pop of color to your fall wardrobe. The gold accents add a touch of luxury and modernity to this chic design.
Consumables List
- Coral Polish: Essie Nail Polish in “Cute as a Button”
- Gold Polish: OPI Nail Lacquer in “Glitzerland”
- Top Coat: Seche Vite Dry Fast Top Coat
- Base Coat: Orly Bonder Base Coat
- Nail Art Brushes: Modelones Nail Art Brush Set
How to Create at Home
- Prep Your Nails: Clean and file your nails, then apply a base coat.
- Apply the Coral Polish: Paint your nails with the coral polish, letting each coat dry completely.
- Add Gold Accents: Use nail art brushes to apply gold accents to your design.
- Finish with a Top Coat: Seal your design with a top coat to add shine and protect your nails.
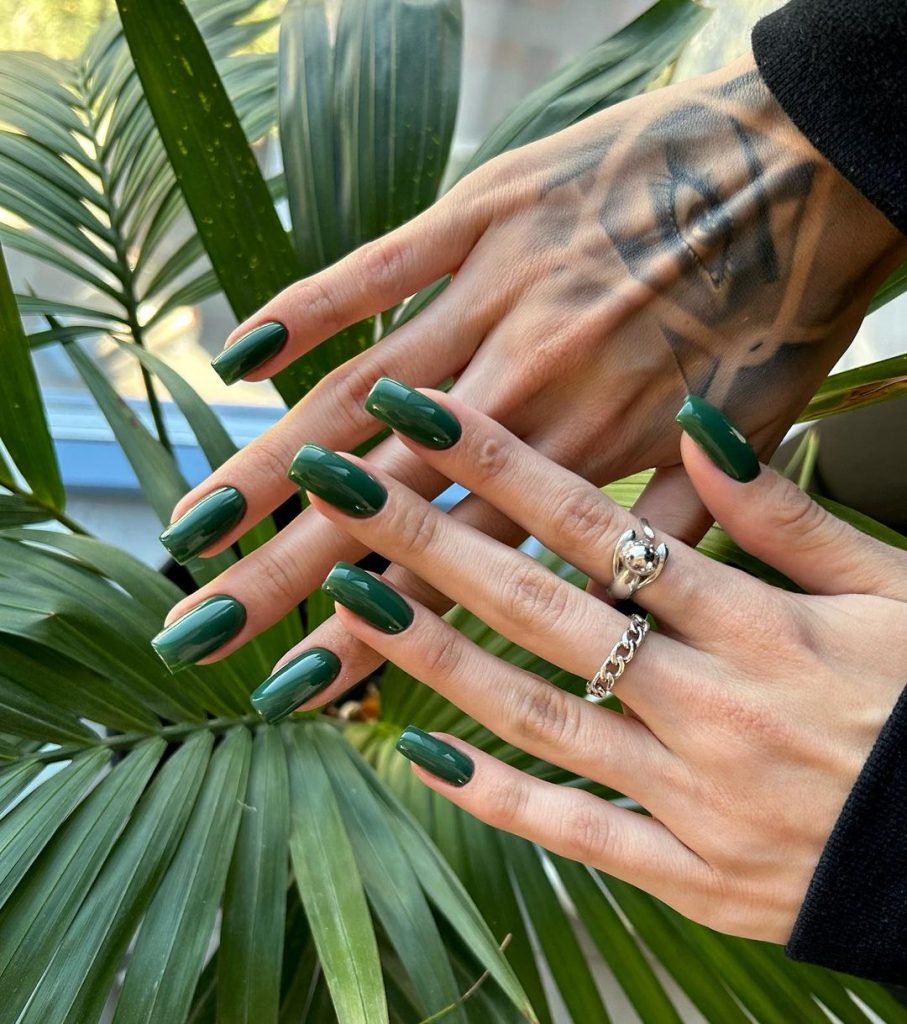
Deep Forest Green
This nail design features a rich, deep forest green that is perfect for the fall season. The glossy finish adds a touch of elegance and sophistication, making these nails suitable for both casual and formal occasions. This versatile green shade is a great way to embrace the fall color palette.
Consumables List
- Forest Green Polish: OPI Nail Lacquer in “Stay Off the Lawn!”
- Top Coat: Seche Vite Dry Fast Top Coat
- Base Coat: Orly Bonder Base Coat
How to Create at Home
- Prep Your Nails: Start with clean, filed nails and apply a base coat.
- Apply the Green Polish: Paint your nails with the forest green polish, ensuring each coat is even and fully covers the nails. Allow each coat to dry completely before applying the next.
- Finish with a Top Coat: Seal your design with a top coat to add shine and protect your manicure.
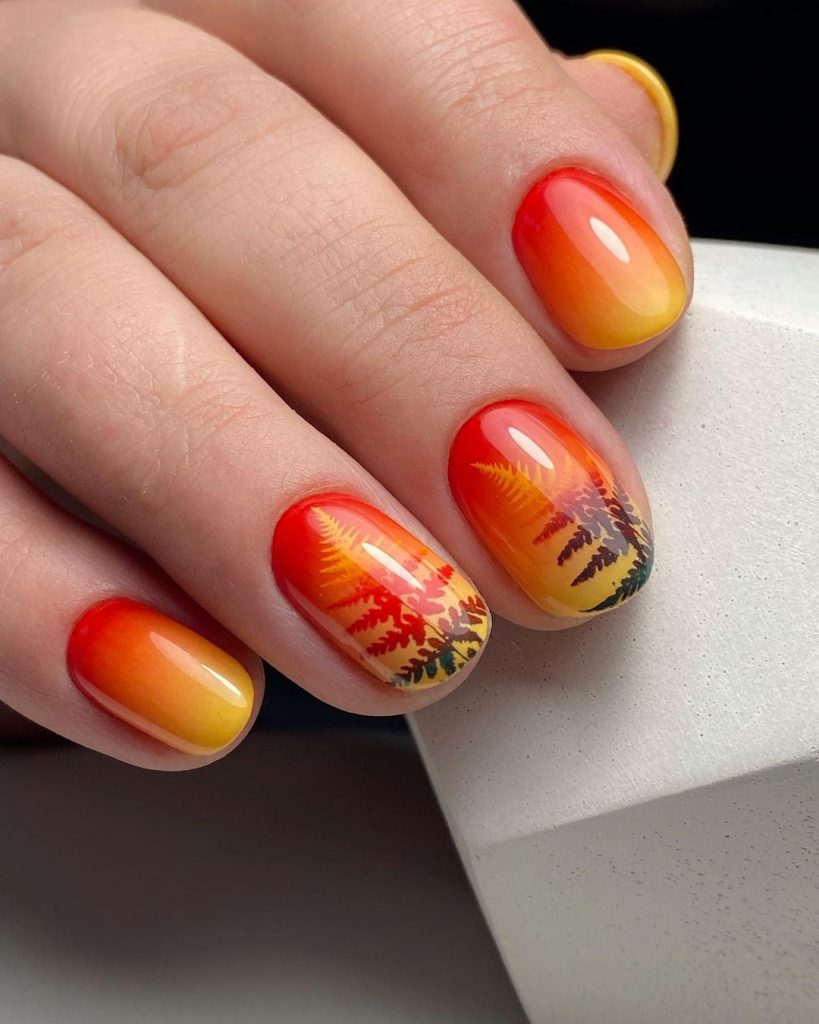
Sunset Ombre with Leaves
This vibrant nail design captures the beauty of a sunset with a stunning ombre effect transitioning from yellow to red. The delicate leaf patterns add an autumnal touch, making this manicure perfect for fall. The gradient effect is both eye-catching and elegant.
Consumables List
- Yellow Polish: Essie Nail Polish in “Hay There”
- Red Polish: OPI Nail Lacquer in “Big Apple Red”
- Leaf Nail Stickers: Born Pretty Autumn Leaf Stickers
- Top Coat: Seche Vite Dry Fast Top Coat
- Base Coat: Orly Bonder Base Coat
- Sponge: Nail Art Gradient Sponge
How to Create at Home
- Prep Your Nails: Clean and file your nails, then apply a base coat.
- Create the Ombre Effect: Apply yellow and red polish to a sponge and gently dab onto the nails to create a gradient effect. Repeat until the desired look is achieved.
- Add Leaf Stickers: Apply the leaf stickers to the nails once the gradient is dry.
- Seal with a Top Coat: Apply a top coat to protect your design and add a glossy finish.
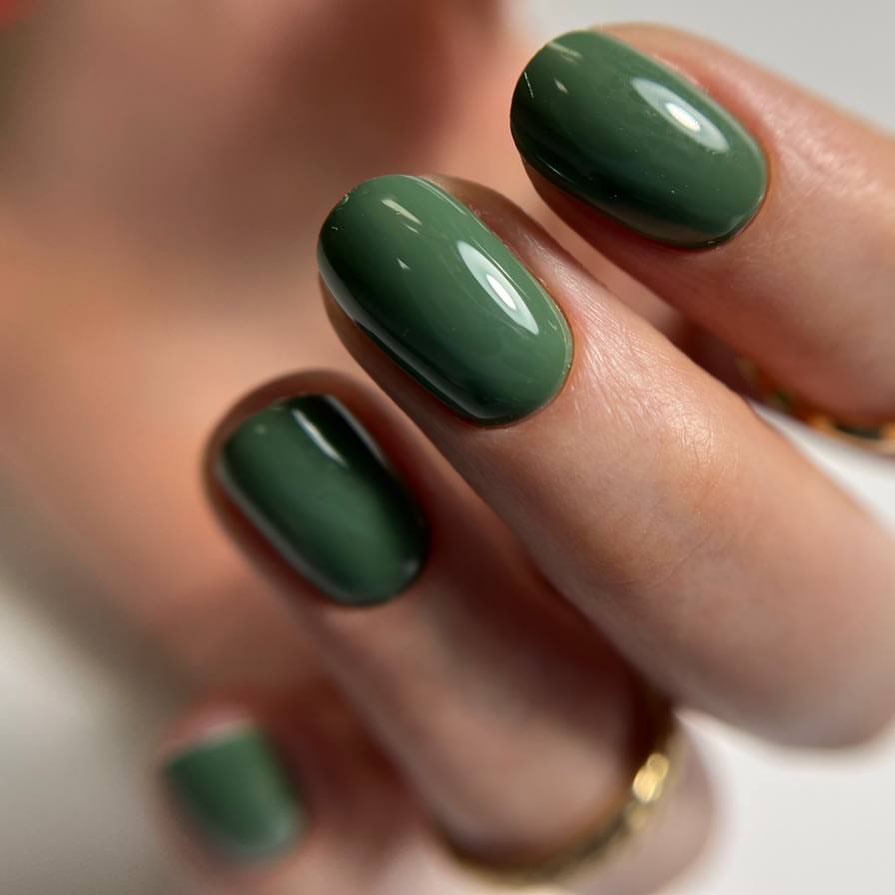
Olive Green Simplicity
These nails feature a beautiful olive green shade that is understated yet stylish. The glossy finish enhances the simplicity of the design, making it perfect for everyday wear. This look is ideal for those who appreciate minimalistic and elegant nail art.
Consumables List
- Olive Green Polish: Essie Nail Polish in “Win Me Over”
- Top Coat: Seche Vite Dry Fast Top Coat
- Base Coat: Orly Bonder Base Coat
How to Create at Home
- Prep Your Nails: Start with clean, filed nails and apply a base coat.
- Apply the Green Polish: Paint your nails with the olive green polish, allowing each coat to dry completely.
- Seal with a Top Coat: Apply a top coat to add shine and protect your manicure.
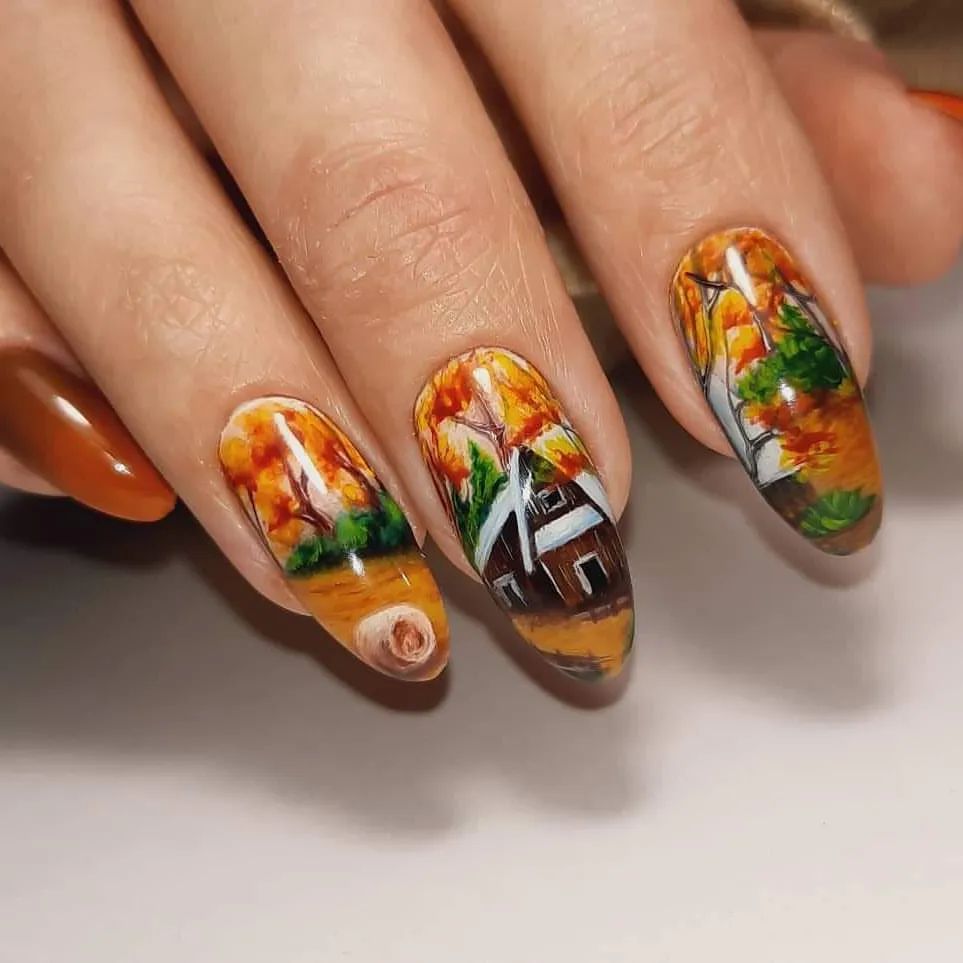
Autumn Landscape Art
This intricate nail design features a detailed autumn landscape with trees, leaves, and a cozy cabin. The warm, vibrant colors capture the essence of fall, making this manicure a true work of art. This design is perfect for those who love unique and creative nail art.
Consumables List
- Base Polish: Essie Nail Polish in “Sand Tropez”
- Acrylic Paints: Arteza Acrylic Paint Set
- Fine Detail Brushes: Modelones Nail Art Brush Set
- Top Coat: Seche Vite Dry Fast Top Coat
- Base Coat: Orly Bonder Base Coat
How to Create at Home
- Prep Your Nails: Clean and file your nails, then apply a base coat.
- Apply the Base Polish: Paint your nails with the base polish, allowing each coat to dry completely.
- Create the Landscape Art: Use fine detail brushes and acrylic paints to paint the autumn landscape on your nails. Take your time to ensure each detail is perfect.
- Seal with a Top Coat: Apply a top coat to protect your design and add a glossy finish.
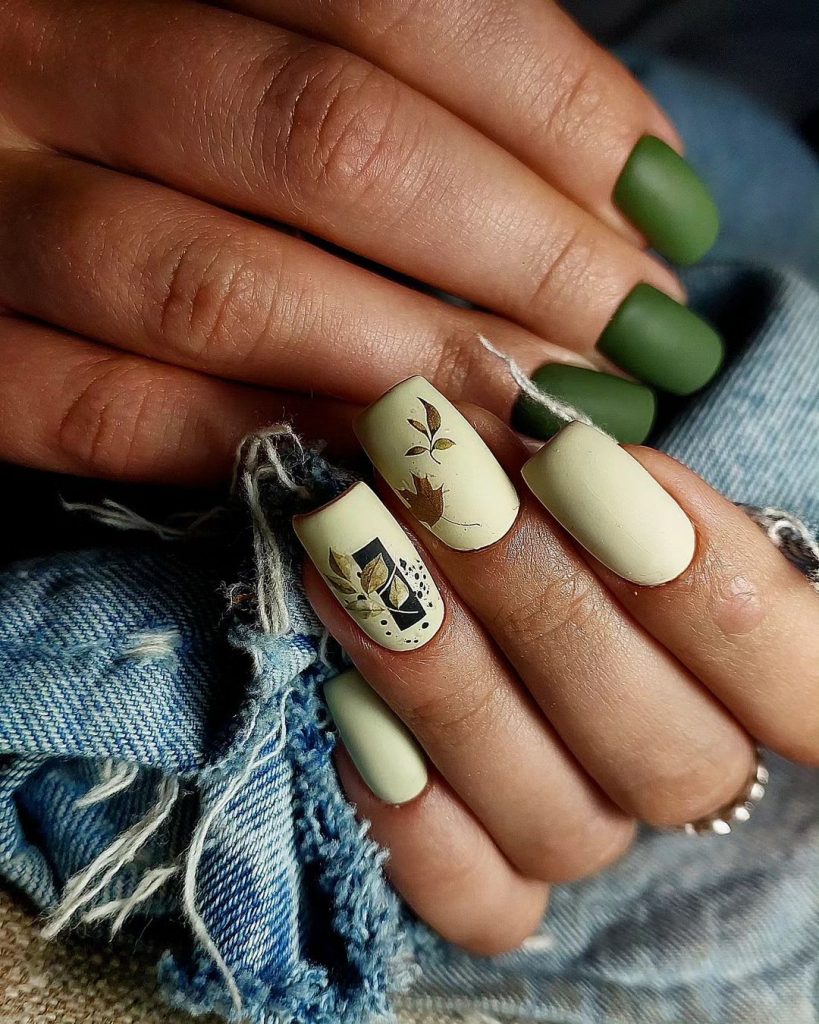
Matte Green with Leaf Accents
This nail design combines matte olive green nails with delicate leaf accents on a neutral base. The contrast between the matte finish and the intricate leaf patterns creates a sophisticated and stylish look, perfect for the fall season.
Consumables List
- Matte Olive Green Polish: Essie Nail Polish in “Win Me Over” with Essie Matte About You Top Coat
- Neutral Polish: OPI Nail Lacquer in “Samoan Sand”
- Leaf Nail Stickers: Born Pretty Leaf Nail Stickers
- Base Coat: Orly Bonder Base Coat
How to Create at Home
- Prep Your Nails: Clean and file your nails, then apply a base coat.
- Apply the Base Colors: Paint some nails with the matte olive green polish and others with the neutral polish. Let each coat dry thoroughly.
- Add Leaf Stickers: Apply the leaf stickers to the neutral base nails.
- Seal with a Top Coat: Apply a matte top coat to the green nails and a glossy top coat to the neutral nails to protect your design.
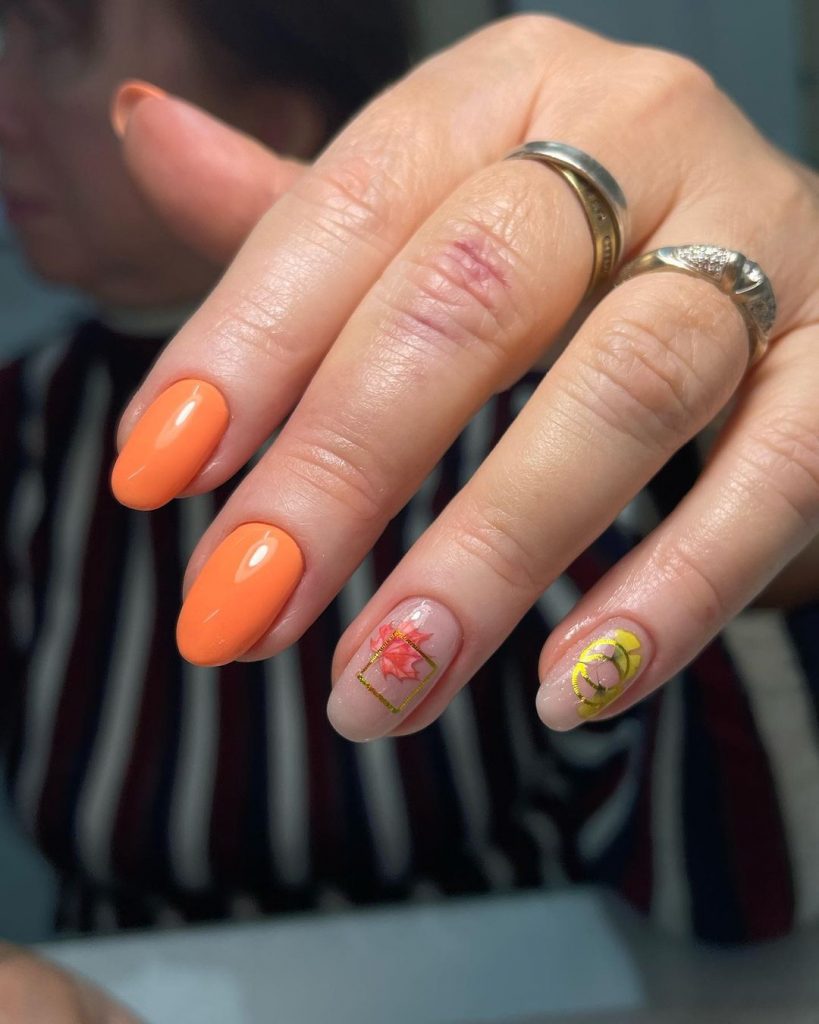
Autumn Leaves and Orange
Celebrate the fall season with this vibrant nail design featuring orange nails and accent nails with autumn leaves. The bright orange color adds a pop of color, while the detailed leaf patterns bring a touch of nature to your manicure.
Consumables List
- Orange Polish: OPI Nail Lacquer in “A Good Man-darin is Hard to Find”
- Neutral Polish: Essie Nail Polish in “Ballet Slippers”
- Leaf Nail Decals: Born Pretty Autumn Leaf Stickers
- Top Coat: Seche Vite Dry Fast Top Coat
- Base Coat: Orly Bonder Base Coat
How to Create at Home
- Prep Your Nails: Clean and file your nails, then apply a base coat.
- Apply the Base Colors: Paint some nails orange and others with the neutral polish. Let each coat dry thoroughly.
- Add Leaf Decals: Apply the leaf decals to the neutral base nails.
- Seal with a Top Coat: Apply a top coat to protect your design and add a glossy finish.
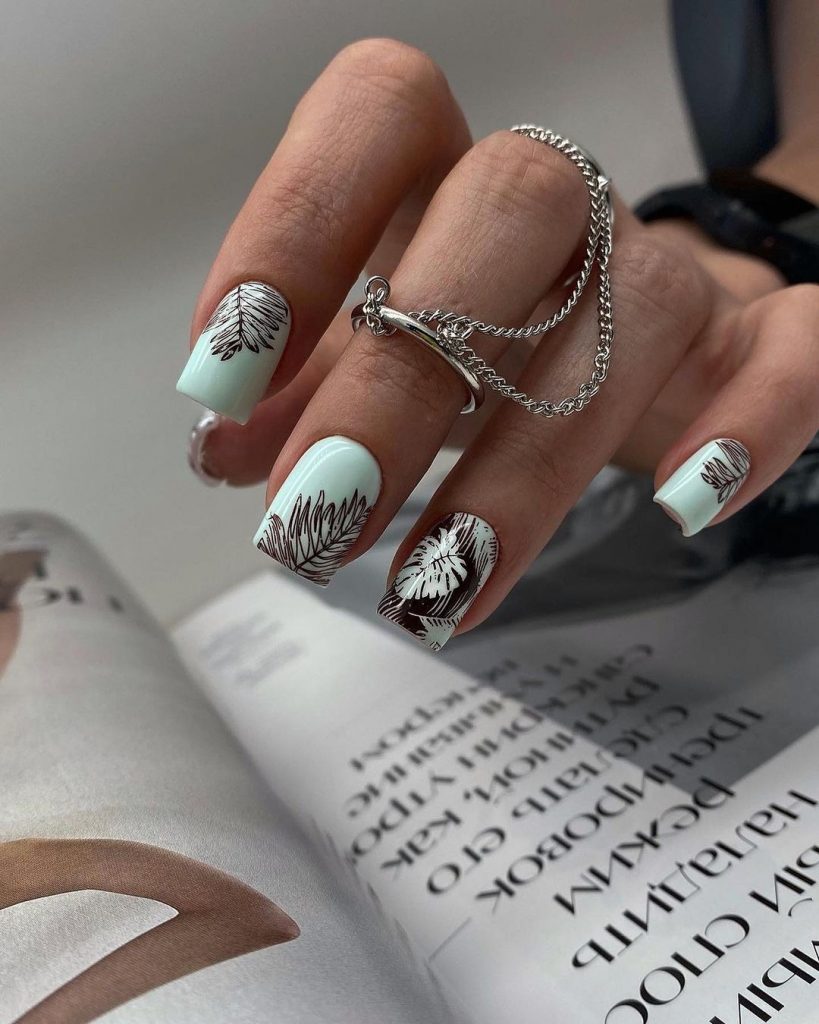
Mint Green with Feather Art
This chic design features mint green nails with intricate feather art. The delicate feather patterns on a mint green base create a fresh and stylish look, perfect for those who love unique and artistic nail designs.
Consumables List
- Mint Green Polish: Essie Nail Polish in “Mint Candy Apple”
- Feather Nail Stickers: Born Pretty Feather Nail Stickers
- Top Coat: Seche Vite Dry Fast Top Coat
- Base Coat: Orly Bonder Base Coat
How to Create at Home
- Prep Your Nails: Clean and file your nails, then apply a base coat.
- Apply the Mint Green Polish: Paint your nails with the mint green polish, allowing each coat to dry completely.
- Add Feather Stickers: Apply the feather stickers to the nails.
- Seal with a Top Coat: Apply a top coat to protect your design and add a glossy finish.
Save Pin
