
25 Cute Winter Nail Looks & Designs to Try
I didn’t plan to count snowflakes this winter, but here we are. Everywhere I look, there’s a tiny snowflake, a polar bear, or a glitter French tip trying to convince me that winter nails can be cute without being saccharine. And honestly, some of them kind of win.
This roundup has 25 designs that actually work for real life, from minimal milky nudes with a single red bow to full 3D polar bear scenes. Whether you’re a short-nail person, a long-coffin devotee, or someone who changes their polish every three days, there’s a Cute Winter Nails idea here that won’t make you regret the appointment time. I’ve personally tested the wear on at least half of these, and let me tell you, some of those snowflakes chip faster than others.
Charming 3D Snowmen and Snowflakes
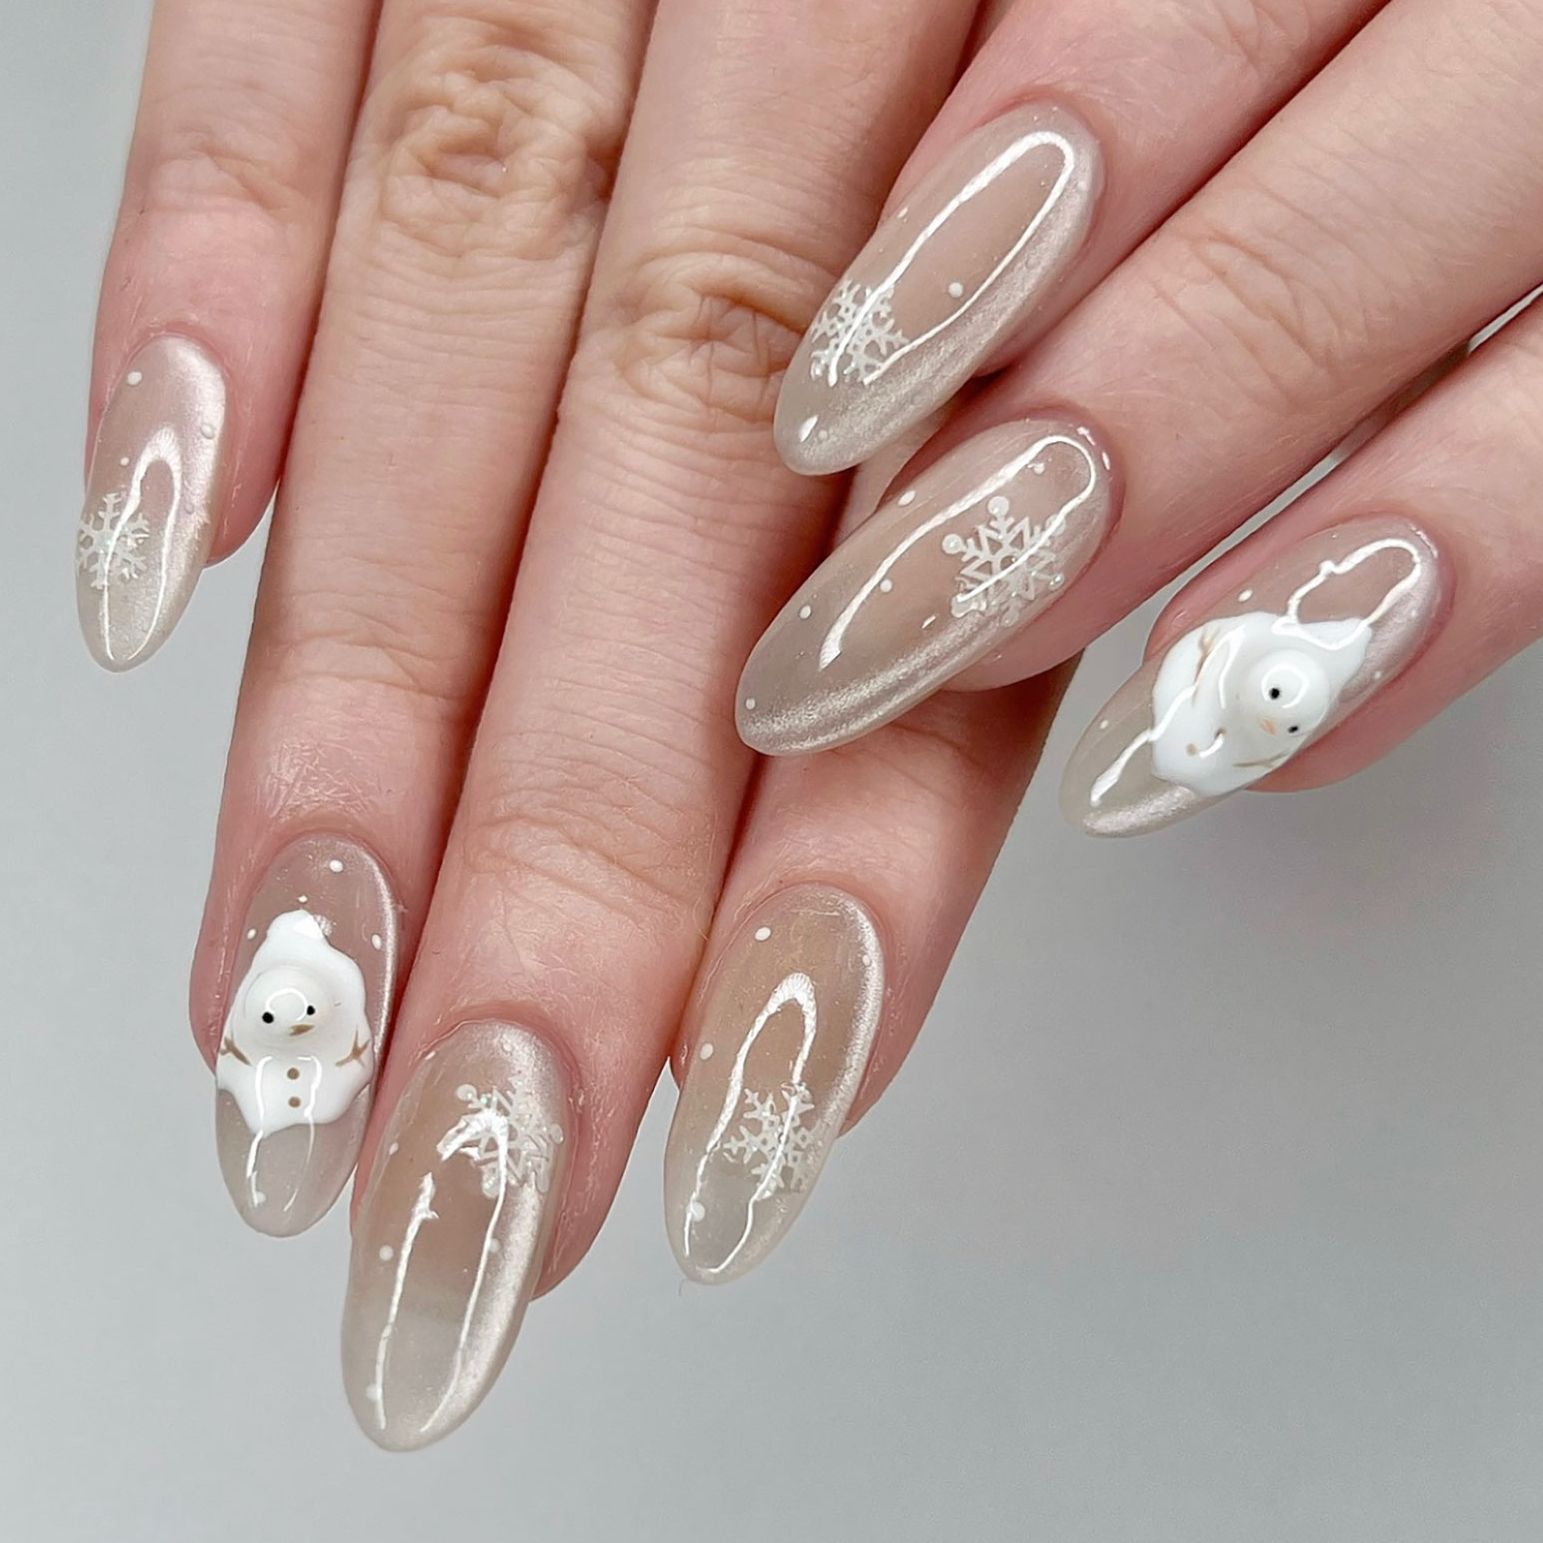
There is something quietly delightful about a tiny 3D snowman perched on a long almond nail. The sheer base keeps the whole look from tipping into costume territory, and those white snowflakes scattered across the other nails pull the theme together without shouting. The hint of shimmer in the finish catches light the way fresh snow does. That glossy shield over the top makes the 3D elements look almost edible, like sugar cookies on fingertips. It is the kind of design that makes you check your own nails twice during a meeting.
Subtle Milky Nude with a Red Bow Accent
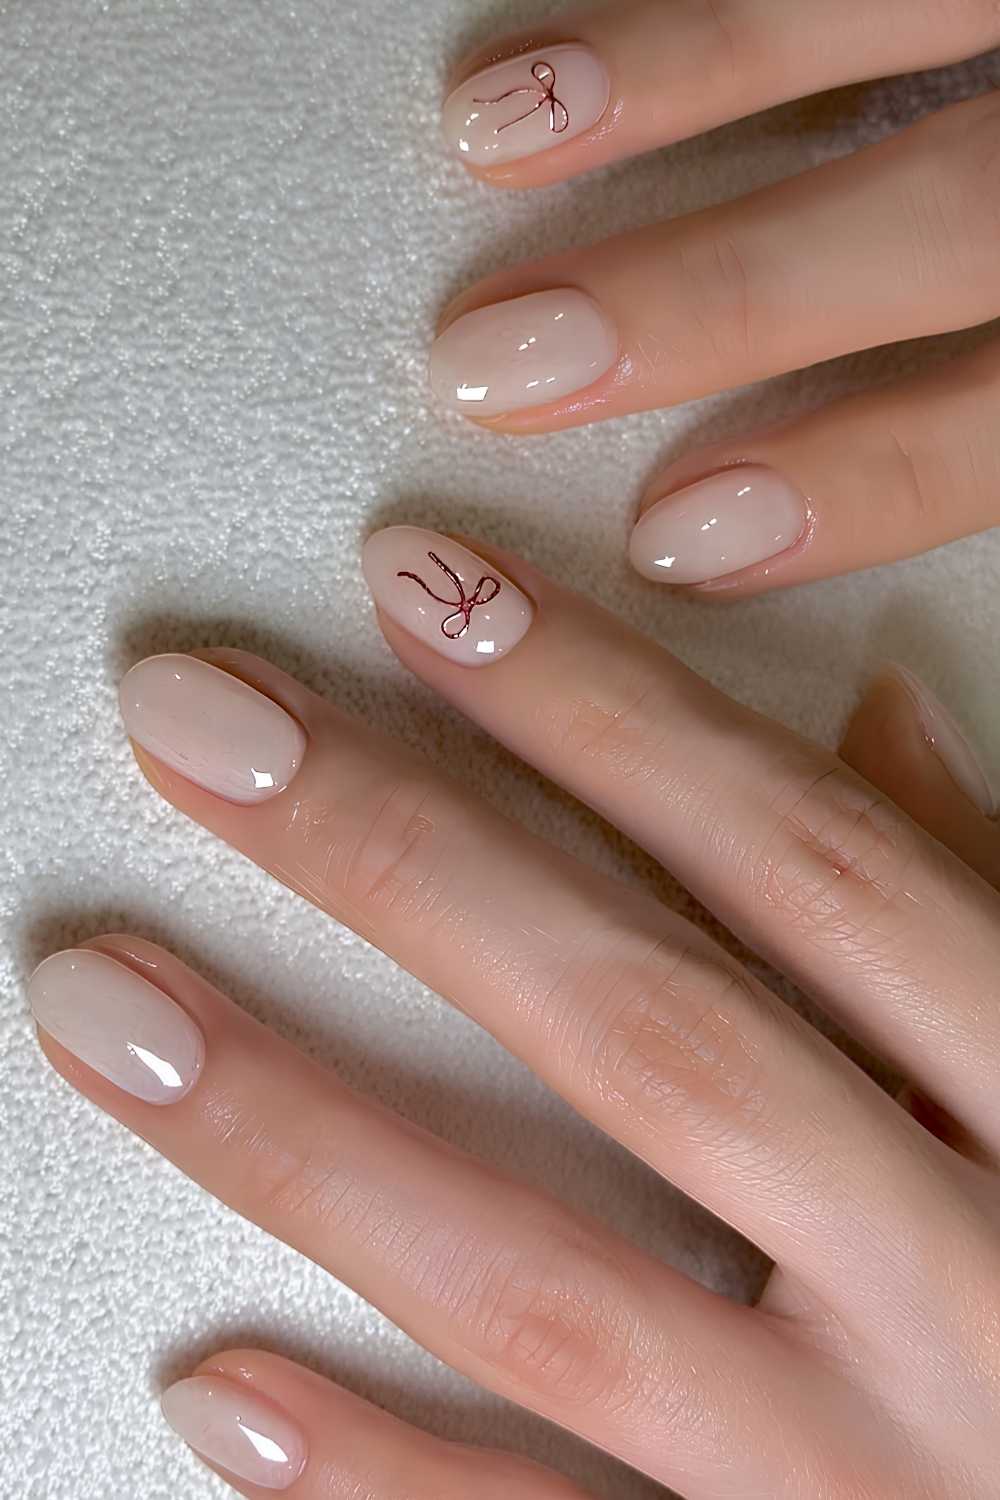
Who is this manicure for, really? Anyone who wants winter spirit without the three-dimensional commitment of a snowman. The milky nude nails stretch the wear window considerably because regrowth blends into the sheer wash, so you can push a full three weeks before the cuticles start begging for attention. That single red bow accent on one nail does all the festive lifting. It reads sophisticated rather than childish, provided the bow is painted thin enough to sit flush under the top coat. Thick decals will snag on sweater sleeves by day two. The glossy finish holds up through hand washing and typing, though I would skip this one if you are rough on your free edge, the red can stain a sheer base if it bleeds.
Sheer Pink with Festive Green Accents
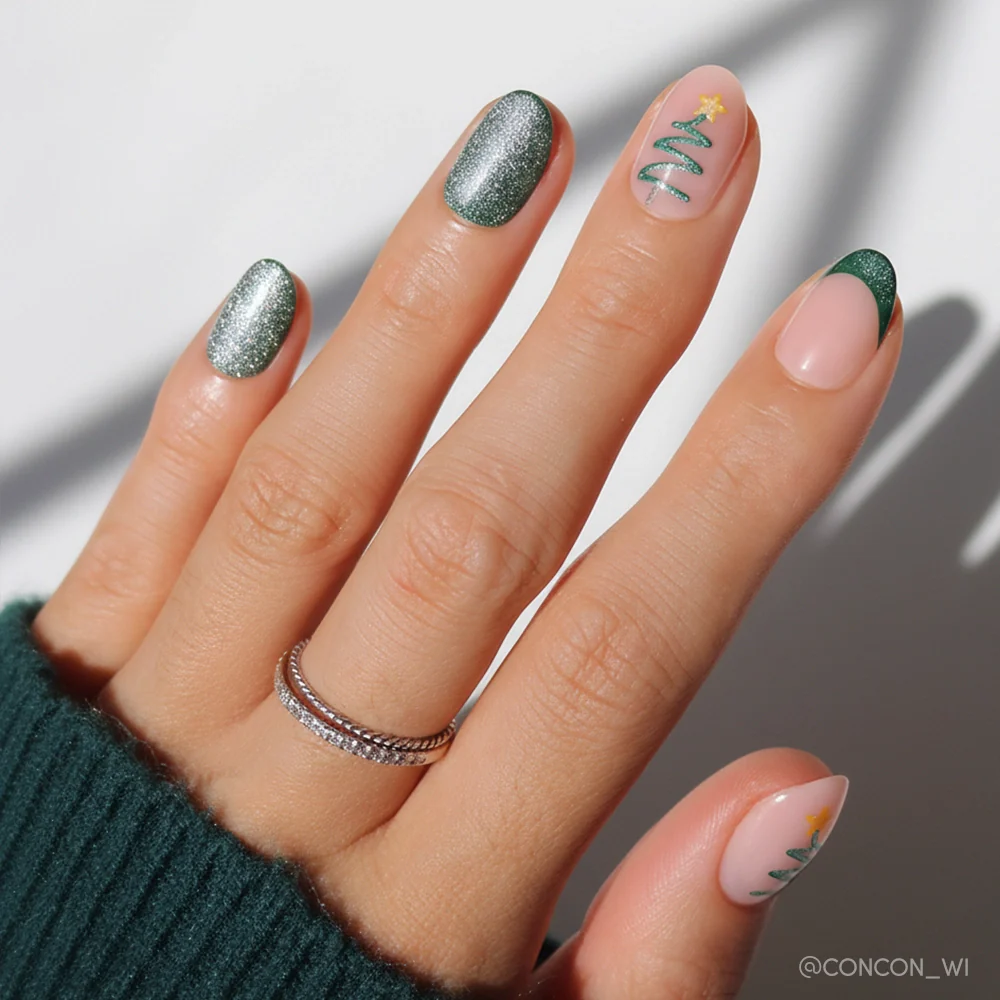
The clean lines on these sheer pink nails require a steady hand or a salon visit. The Christmas tree art is a single triangle of green glitter on a short oval, not a full forest, which keeps the design from looking busy. That narrow French tip in green, capped with a silver glitter edge, demands a precise brush stroke one slip and the symmetry is gone.
This is a salon booking for me. Doing it at home means fighting with tacky glitter placement and skinny tape. The payoff is worth the appointment, the sheer pink lets the nail bed show through, so the art sits on top like a tiny ornament rather than a sticker.
Teal and Pink Ombre with Snowflakes
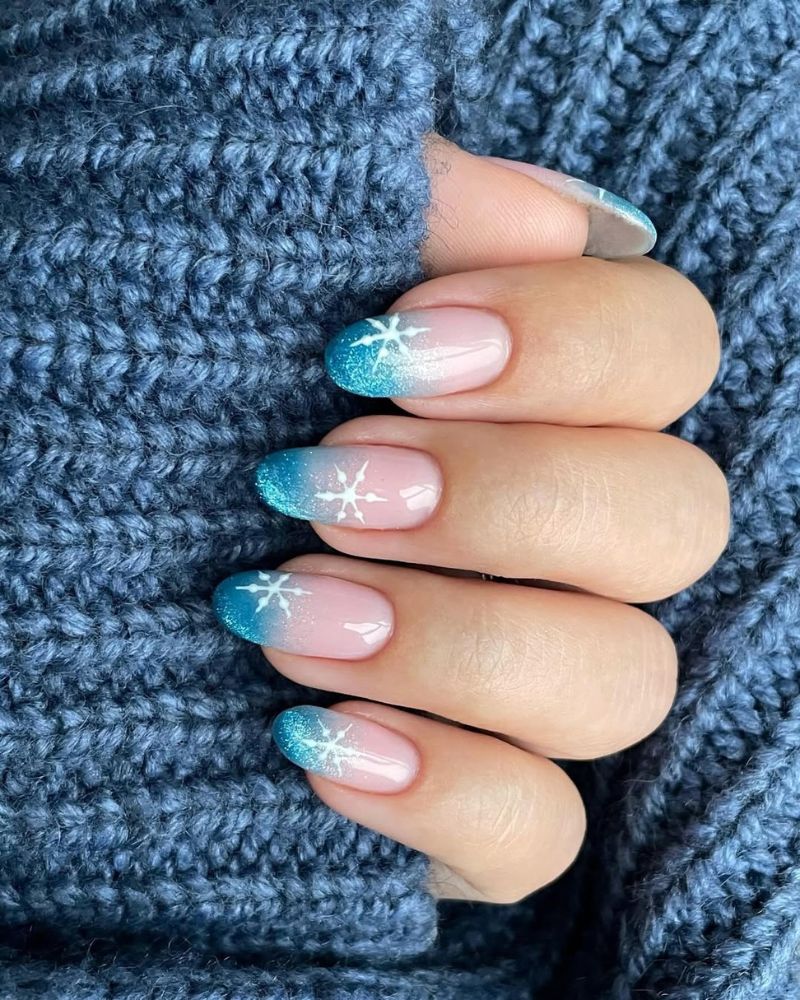
I am calling it right now, the teal ombre nails beat every other winter gradient on the board this year. The shift from a soft pink at the cuticle into a deep teal at the tip is unexpected in a season full of burgundy and navy. It reads playful without being childish, and the white snowflake decals actually pop against that cool teal in a way they never do on a cream base. The silver glitter scattered across the gradient adds texture without overwhelming the ombre blend.
When you ask your tech for this, be specific about the shades. Tell them you want a sheer pink that matches your skin tone at the base. A dusty rose works for warm undertones, a cool pink for fair skin. The teal should be a saturated jewel tone, not a muted one, or the snowflakes lose their contrast. Three-bead gradient minimum, two beads will leave a harsh line halfway down the nail.
Pastel Snowflakes on Glitter French Tips
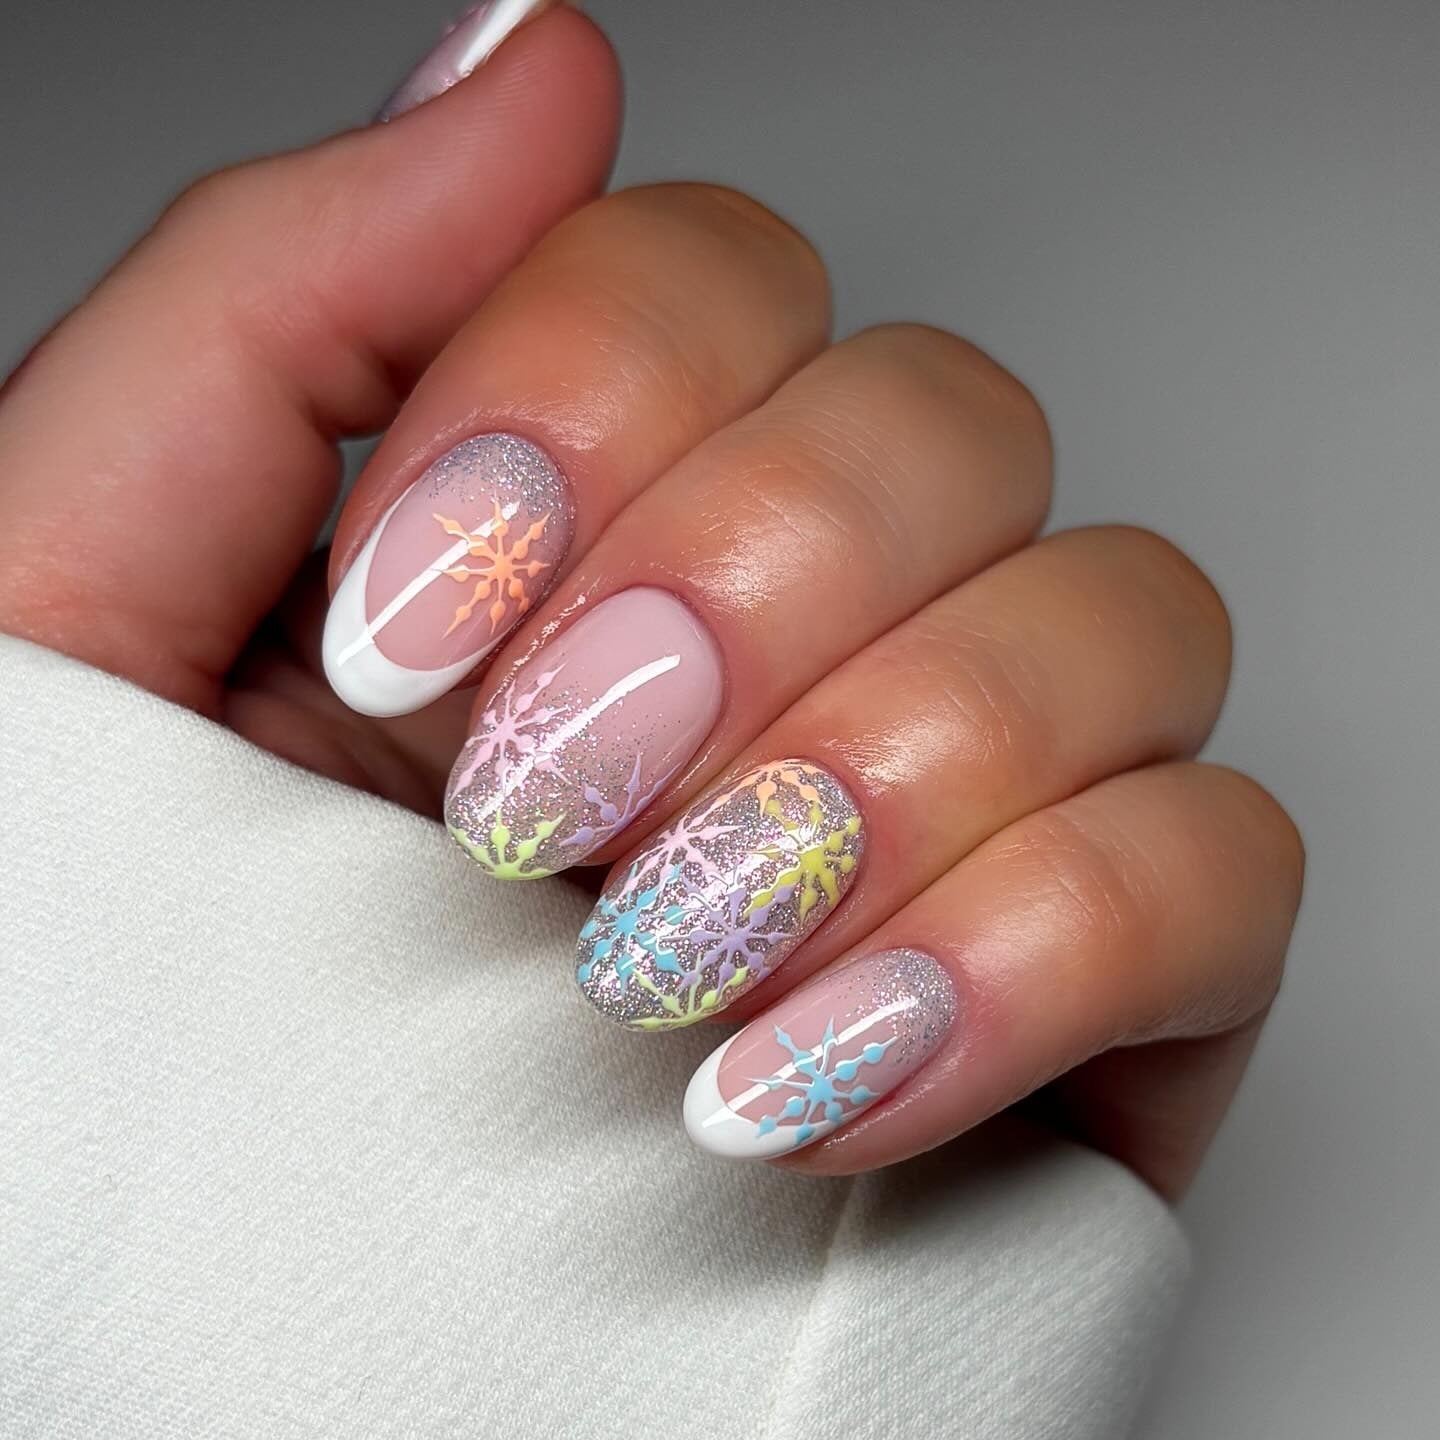
I will admit I underestimated these. The pastel snowflake nails look delicate in the salon chair, but the pastel palette means every chip shows immediately, way faster than on a dark base. Those glitter French tips hold up better than I expected through typing and zipping coats, but the loose glitter particles love to catch on knitwear by the end of the first week. The pastel snowflakes, painted in blues and pinks, survive best if they are sealed under a thick top coat. Without it, the edges fray by day four.
Rich Brown Shimmer for Cozy Vibes
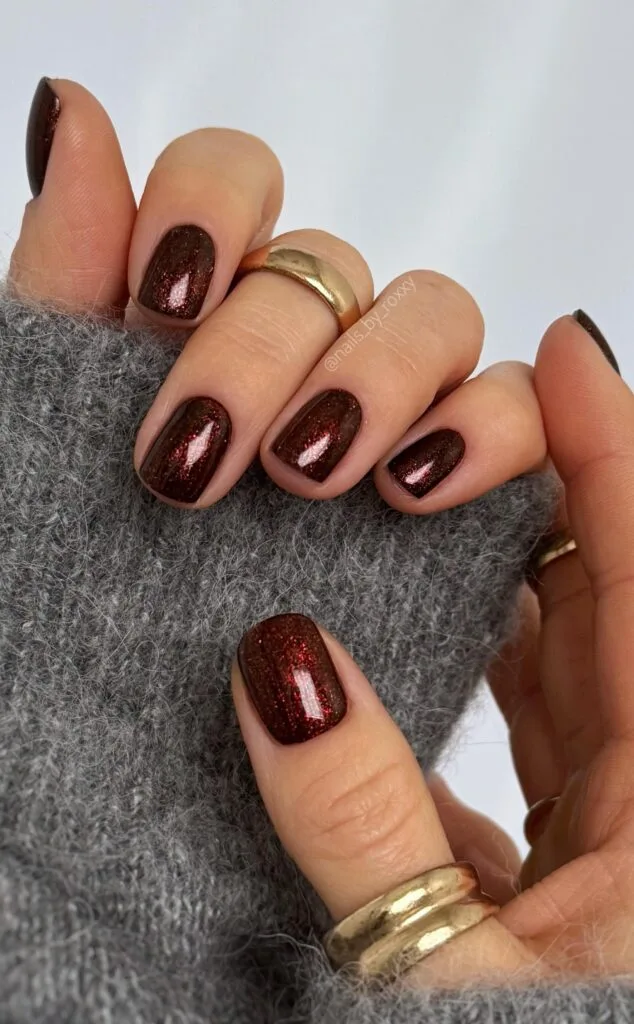
That deep brown with red undertones and a shimmer finish is not asking to be cozy. It is a solid, near-metallic statement that catches warm winter light and holds it. The short round shape keeps it grounded. They call it brown shimmer nails, but I call it evening complexity dressed down for daytime December. A deep brown polish like this reads expensive and intentional, which is exactly why it works for holiday parties and quiet weeknights alike.
Classic French with Winter Art
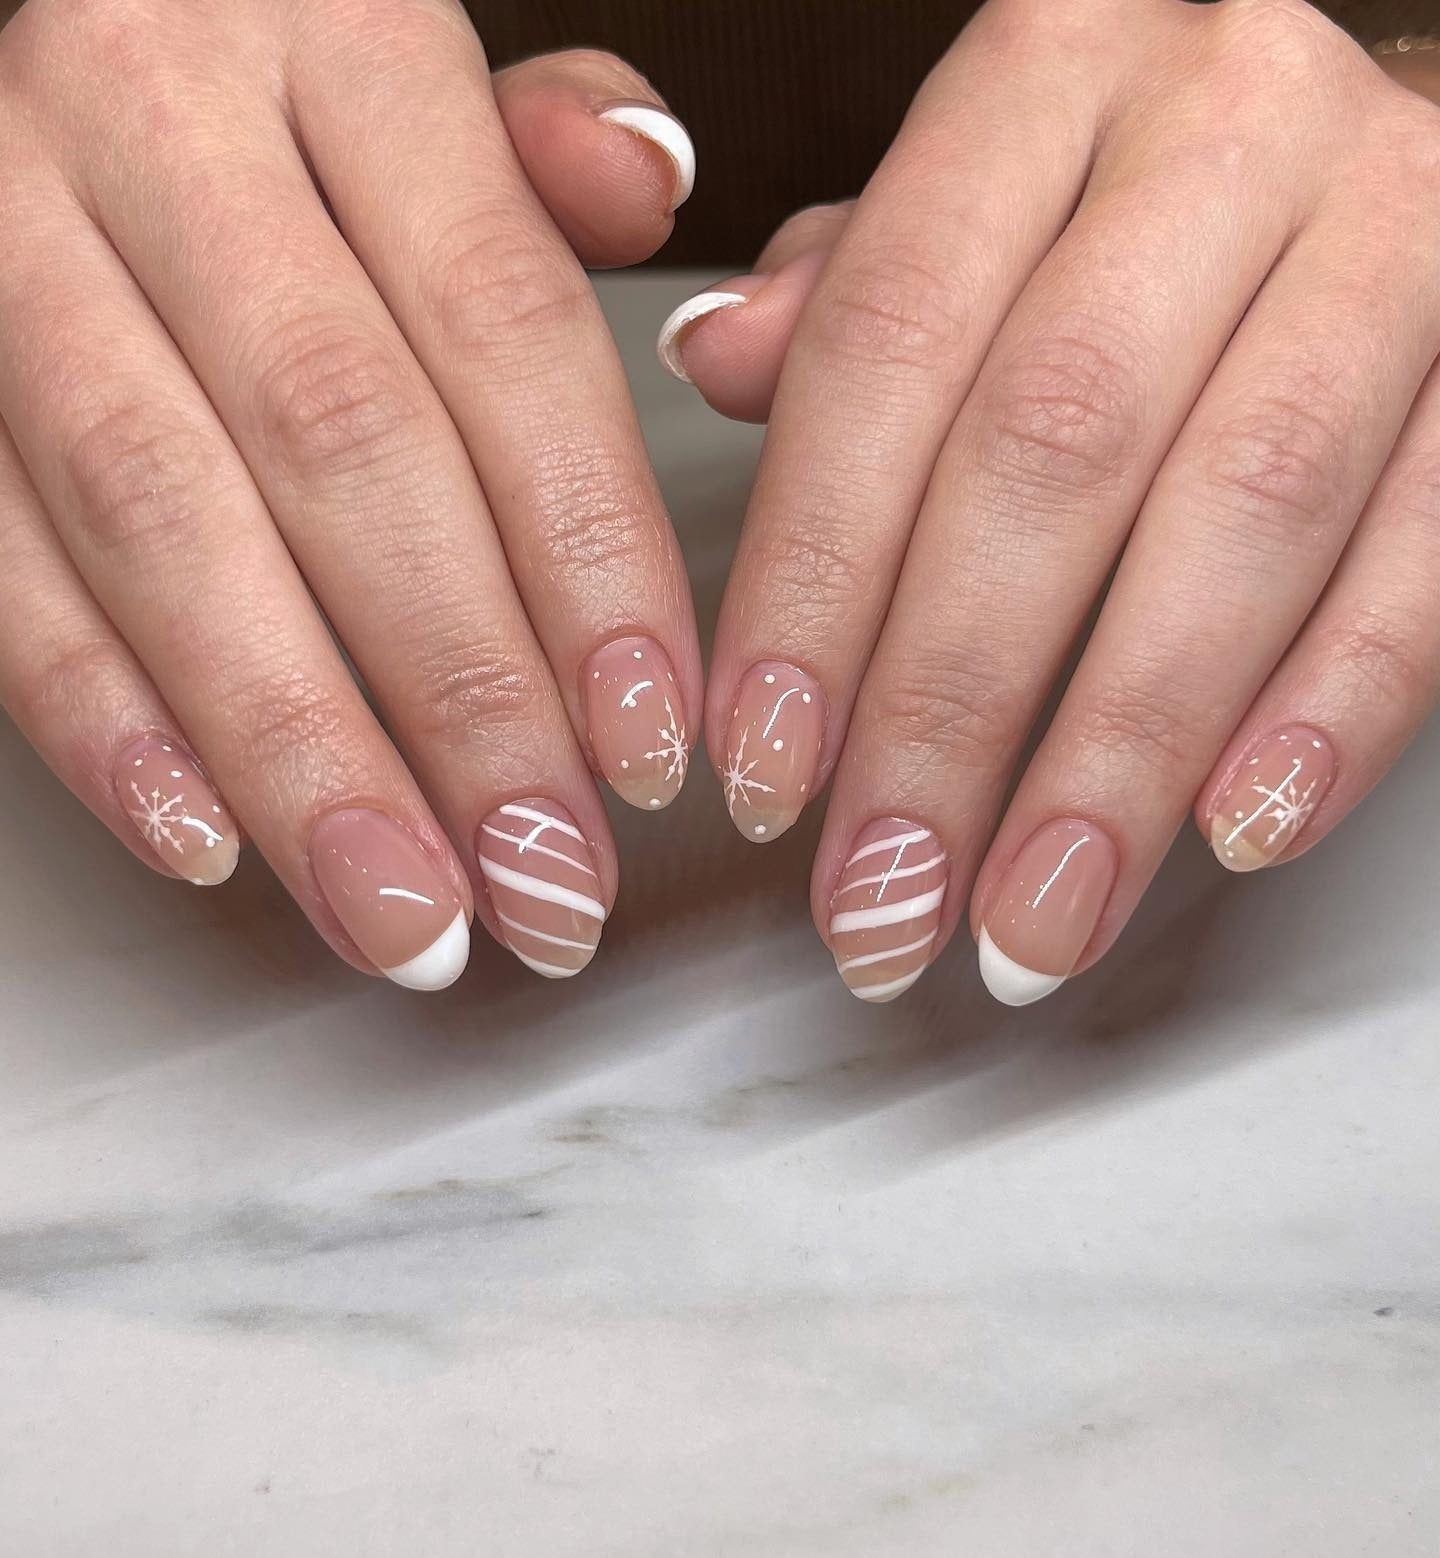
I got my first French tip in high school for homecoming. This one brings back that same clean, polished feeling even with snowflakes and stripes added. Short oval nails, a natural pink base, crisp white french tip nails, and tiny white snowflakes with thin stripe details on two fingers. A glossy finish seals it. Snowflake decals sit perfectly flat here, no edges lifting. It is classic with a winter wink, and it still makes me feel like I have my life together.
Soft Gradient with Delicate Snowflakes
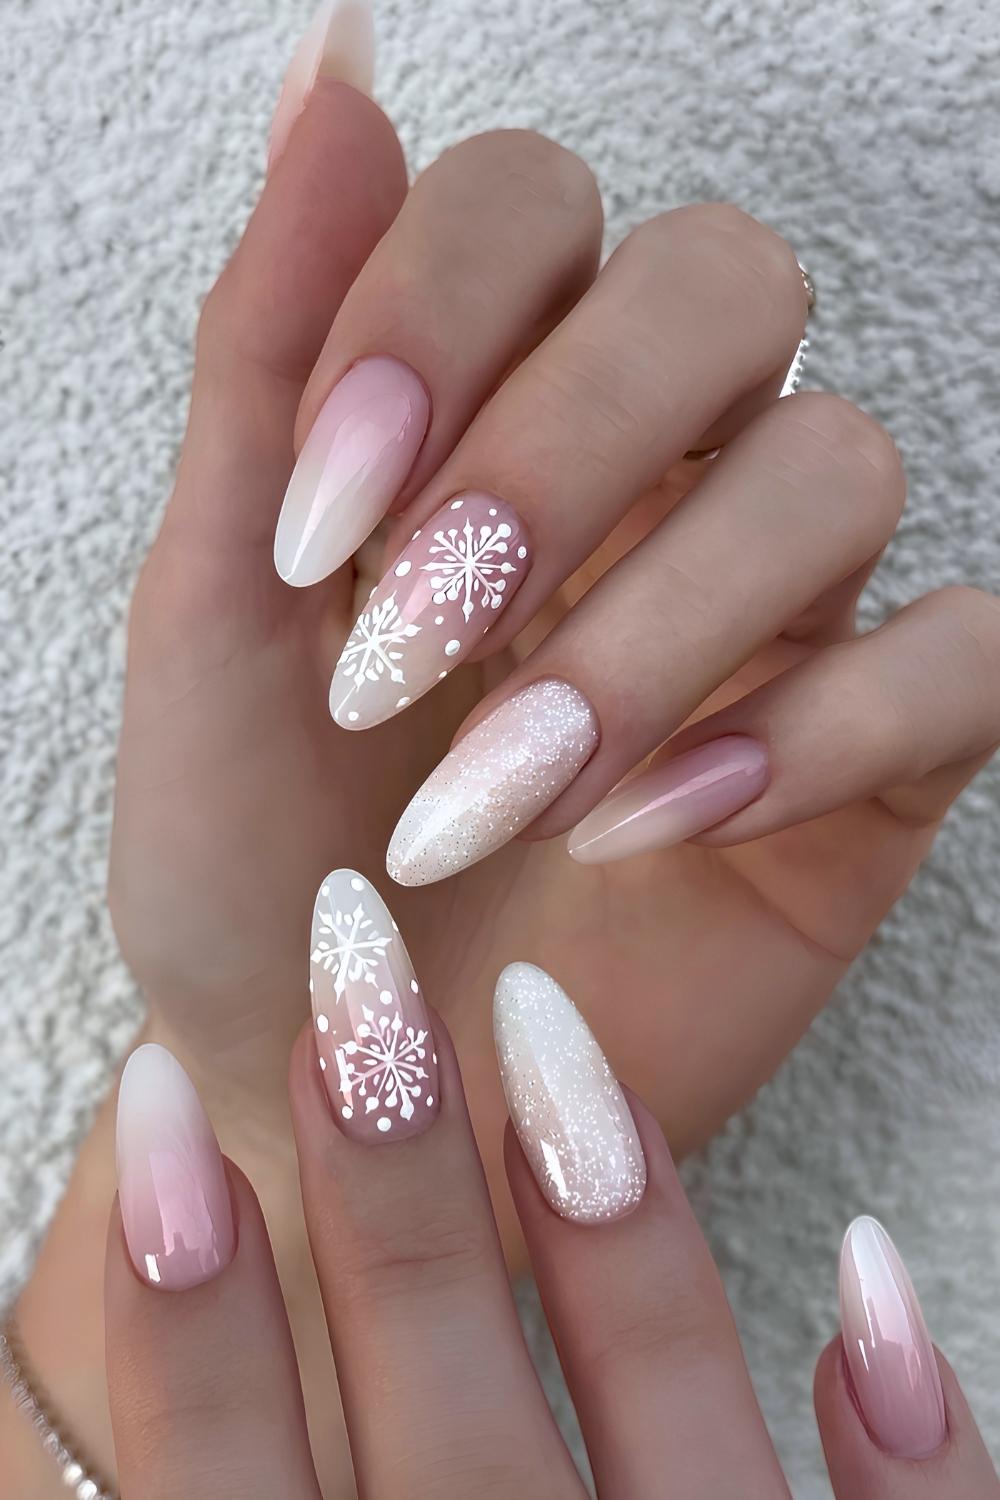
Can you get this sheer pink gradient with snowflake decals at home? Yes, with the right tools and a lot of patience. Start with a sheer pink base, then build the gradient from cuticle to tip using a fine sponge in thin layers. Let each layer dry before the next. Once the gradient is smooth, apply a tacky layer of top coat and press decals into place with tweezers. Seal with another top coat and cure immediately. The sheerness of a sheer pink gradient nails look means any unevenness shows, so take your time.
For the gradient alone, a sponge and steady hand will get you close. But the decals require precision. If your cuticles are dry, the decal edges can catch and lift. I would book this one for the decal placement alone, especially on medium oval nails where the gradient and snowflake decals need to flow together. The result is soft and detailed, but it is not a Sunday afternoon DIY.
Sparkly Pale Pink Glitter with Art
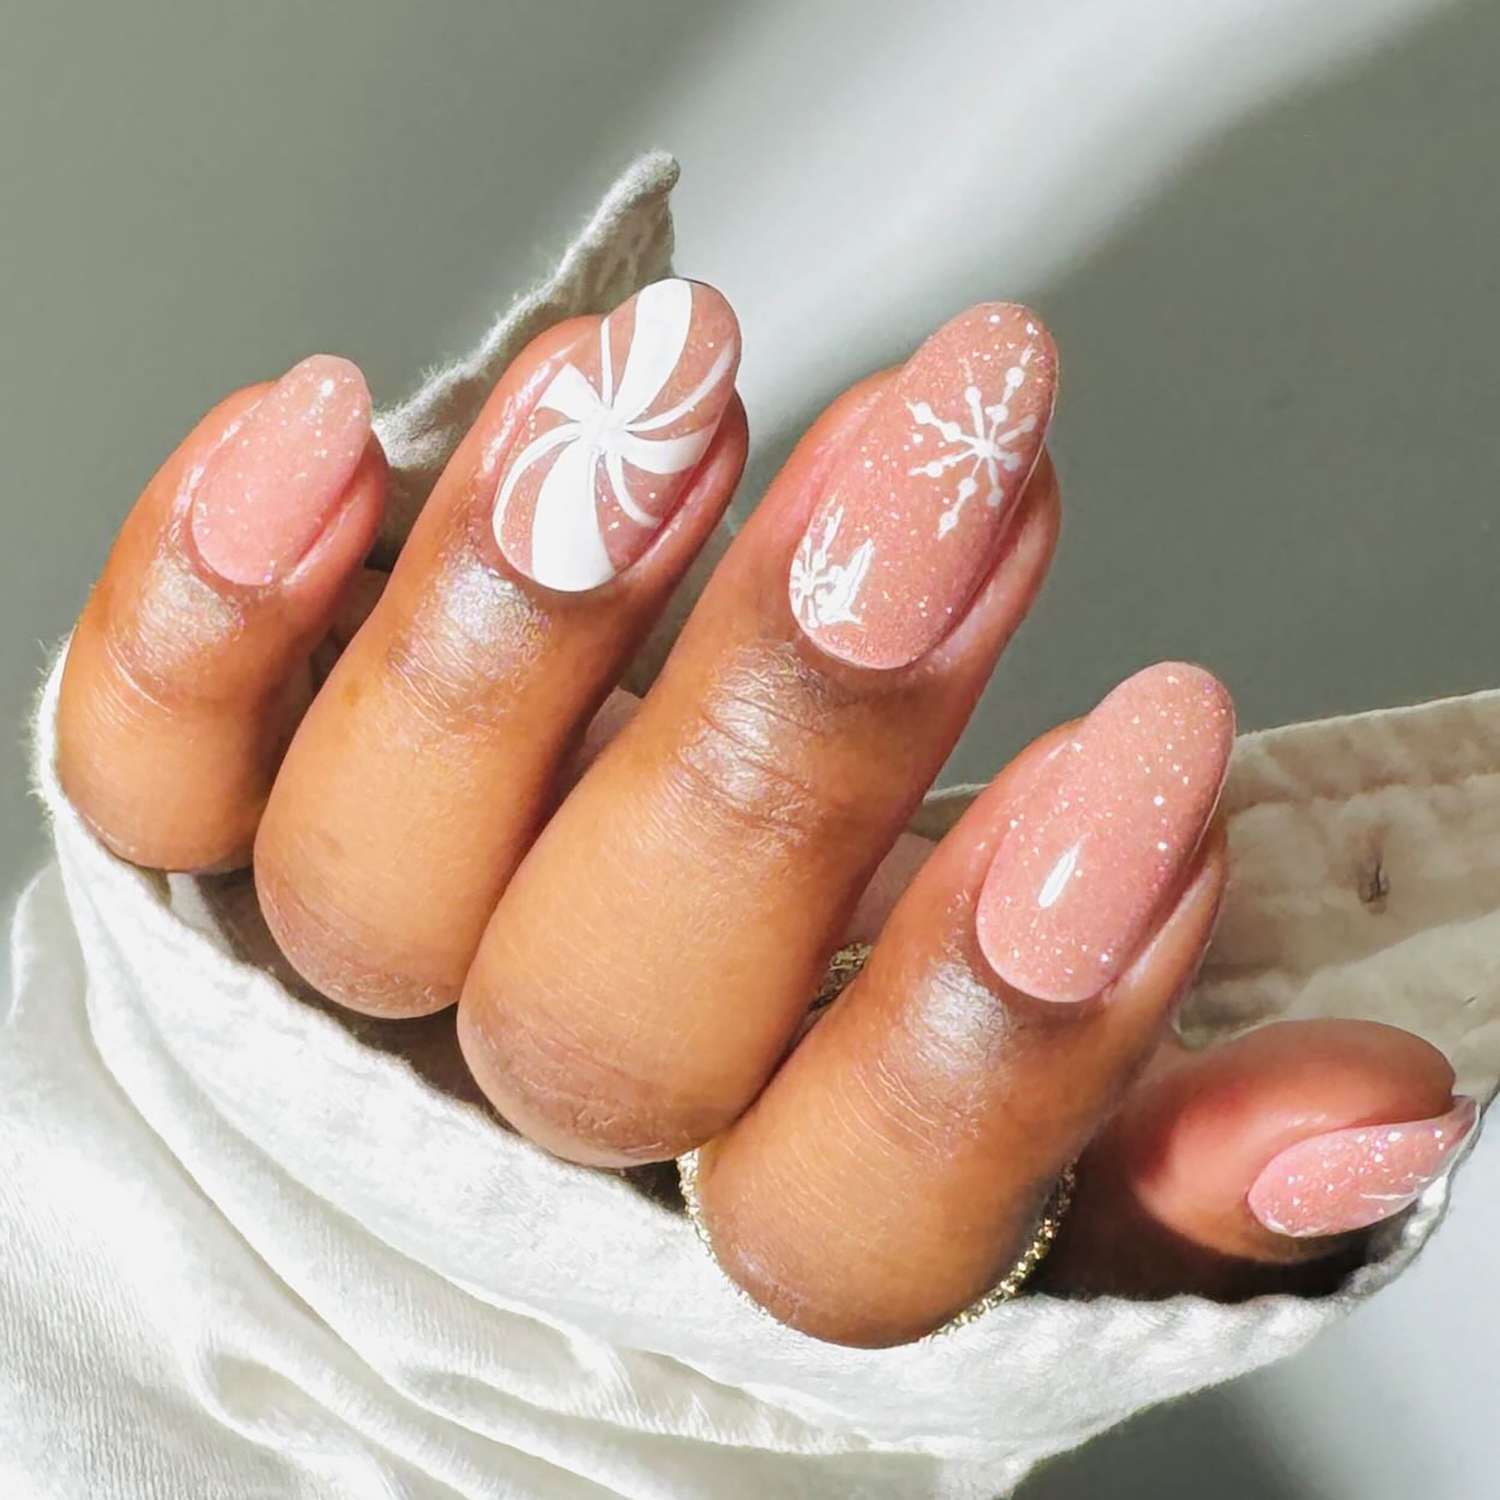
Pale pink glitter nails with white nail art are a specific mood — you want sparkle, but you don’t want to scream “holiday party.” This medium almond shape keeps the glitter from feeling too heavy, and the delicate snowflake and swirl designs add just enough winter charm. It’s for the person who loves a little shine but still wants to type emails without distraction. The honest downside: glitter removal. You will soak, you will scrub, and you will still find flecks on your cuticles three days later. Worth it for the two weeks of compliments, but book a salon removal if you value your patience.
Chic Chrome French Tips
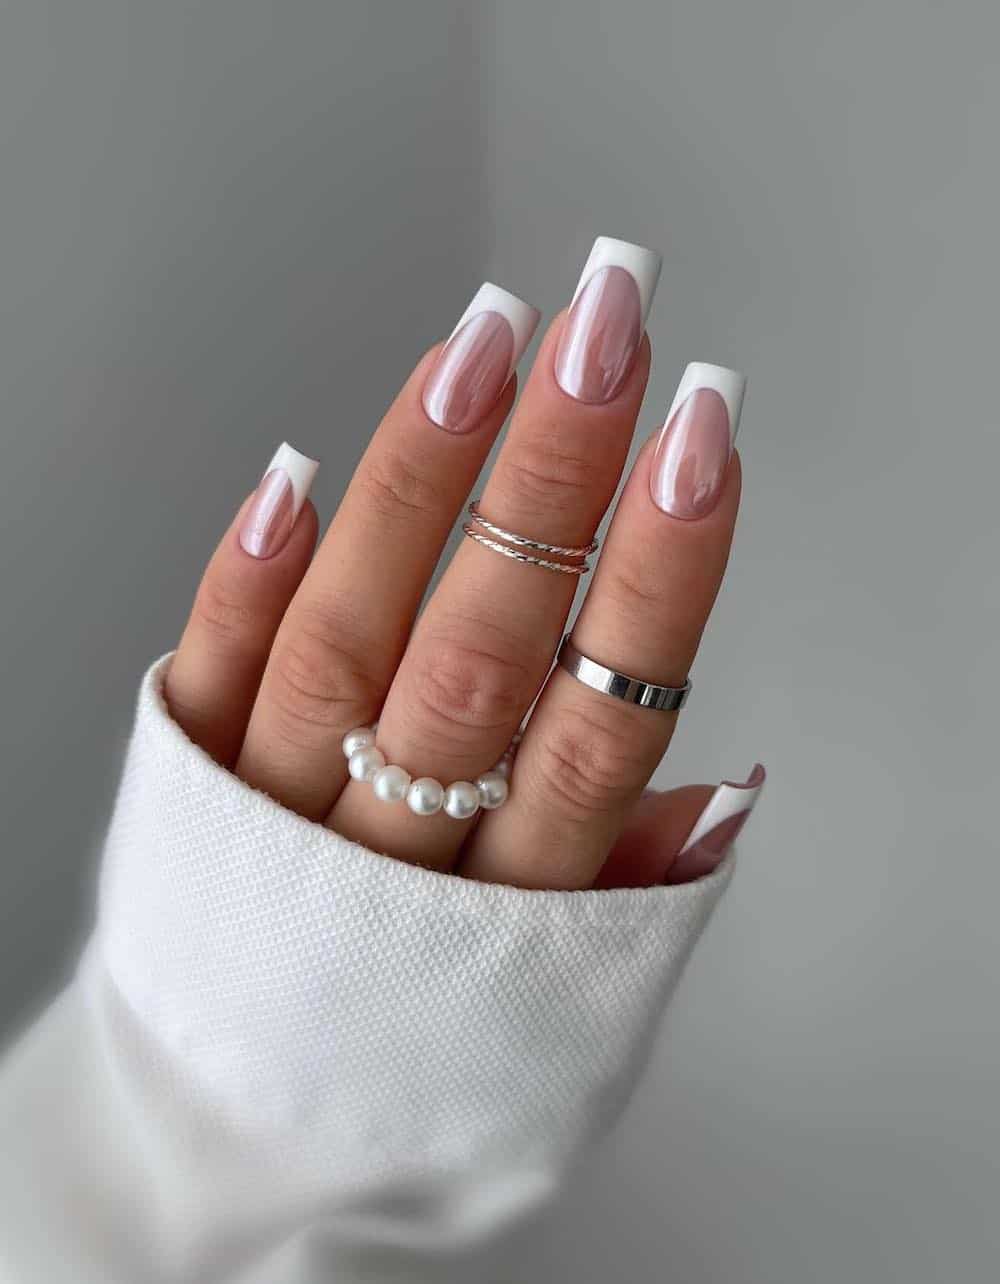
Chrome french tip nails make the classic French look like it finally grew up. Instead of a stark white tip, you get a mirrored chrome finish that catches light without screaming for attention. On a long square shape, it reads modern and clean — perfect for winter occasions where you want to look put-together without a snowflake in sight. It’s the design that says you know trends but don’t chase them. One wear and you’ll wonder why you ever settled for plain white.
Subtle Shimmer with Delicate Snowflakes
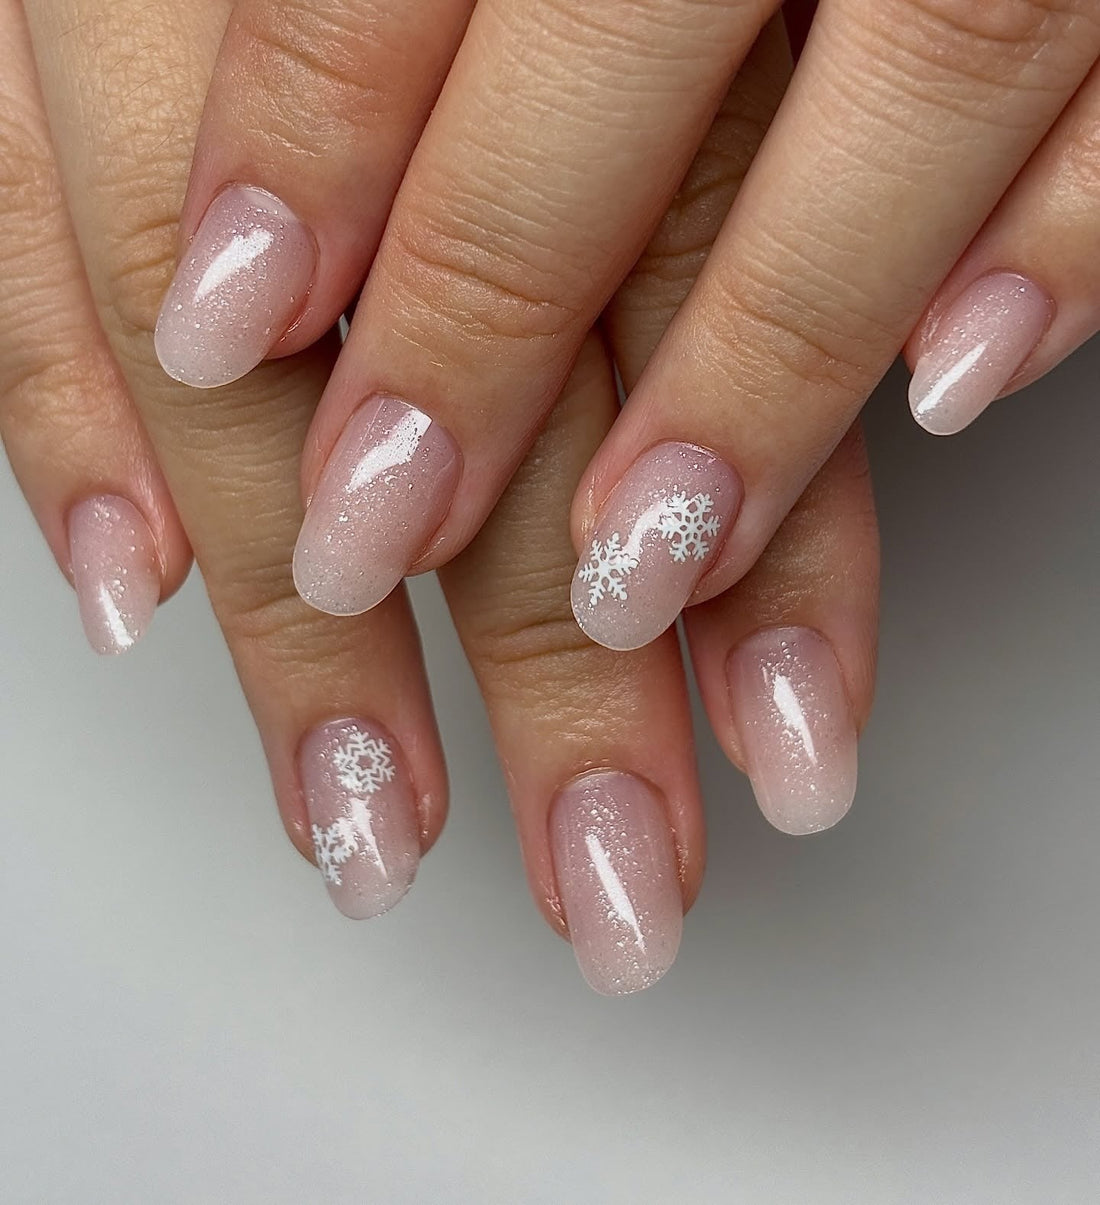
I have to admit, I didn’t expect this shimmer to last past day three. The sheer pink base with fine silver shimmer and those delicate white snowflakes looked almost too fragile. But short oval nails help the decals stick. I wore them through typing, washing, even a long drive with no peeling. The shimmer fades slightly by day five if you use cuticle oil near the base, and decals need a thick top coat reseal around day seven.
Upkeep is specific: avoid acetone removers near decals, reapply top coat every few days, and trim lifted decals with fine scissors. That gets you a good week or two.
French Tips with Snowflake and Pearl Details
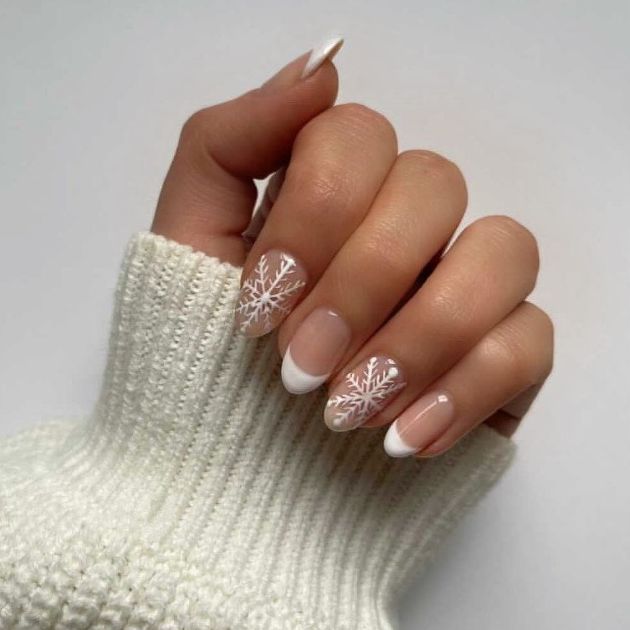
The pearls sit exactly at the base of each snowflake, not floating in the middle. That placement matters because it anchors the design and reduces snagging on hair or sweaters. The snowflakes themselves are hand-painted in thin white strokes, not decals, so they curve with the almond shape. The white French tip is built with two thin coats, not one thick swipe. This keeps the line crisp and the overall finish flush.
This is not a design for a DIY evening. The pearls need a strong gel adhesive and precise placement to avoid lifting. Even then, expect snagging on yarn or hair within a few days. A good salon tech will cap each pearl with a thin layer of clear gel to smooth the surface. That extra step is the difference between a one-week set and a two-week set. Removal requires careful soaking—pearls can trap acetone and soften unevenly. The payoff is a delicate, elegant look that photographs beautifully.
Elegant Square French with Snowflakes
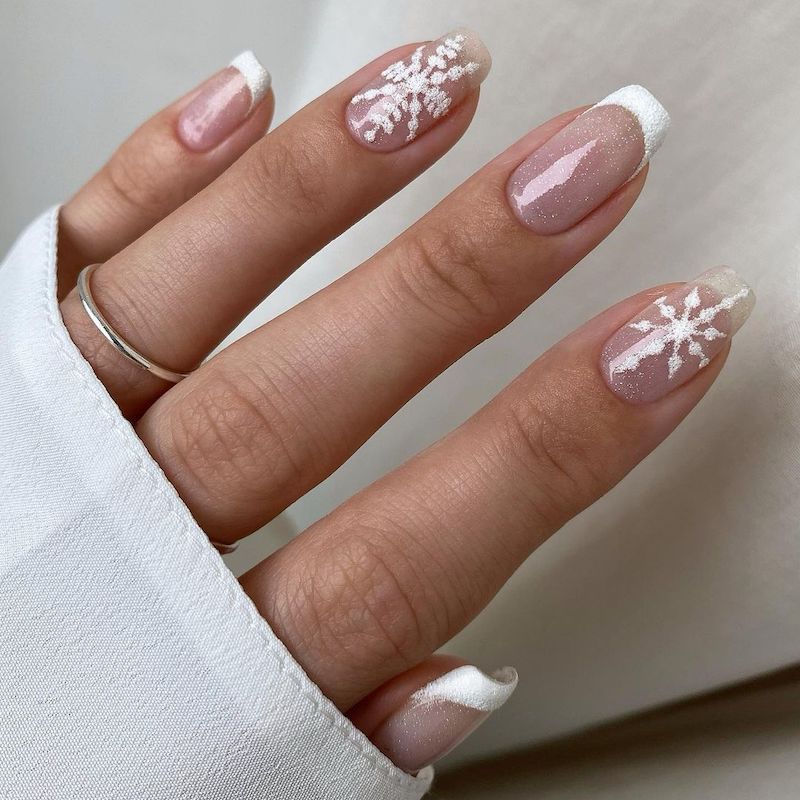
Does your holiday calendar demand something understated but still festive? This set—medium square tips with a sheer pink base, white French lines, and one or two delicate snowflakes—suits anyone who wants a polished look for office parties or family dinners. The square shape reads clean and modern, not sharp, so it works on shorter nail beds too. But if you prefer bold colors or heavy sparkle, this might feel too quiet. Save it for occasions where elegant matter-of-fact is the dress code.
Glossy With Glitter Silver Glitter French Tips and Snowflakes
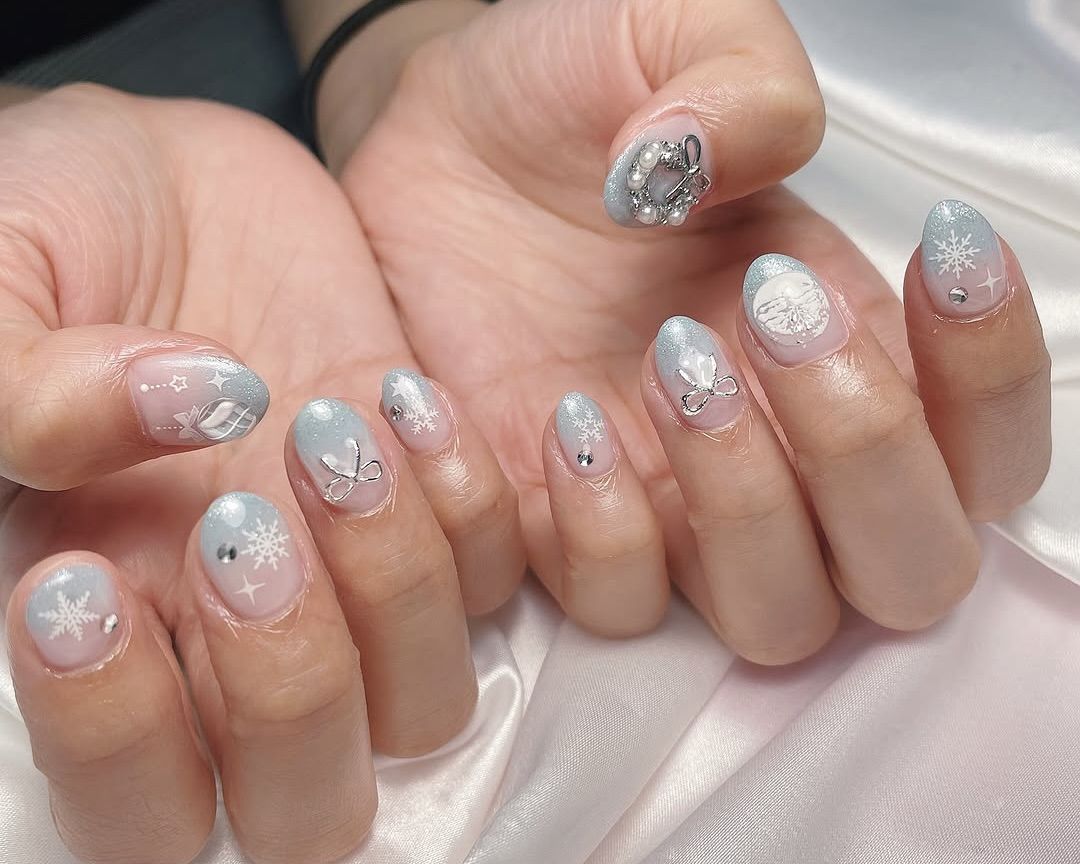
When your nail tech lays out a sheet of loose glitter, do not panic. The common mistake is asking them to pile it on for extra sparkle. That creates a thick edge that catches on everything and lifts after three days. The smarter approach is a thin layer of silver glitter applied with a flat brush, then sealed with a glossy top coat. Keep snowflake and bow decals on only two accent nails to let the glitter breathe. The light blue snowflake accent adds just enough color without competing with the silver. The result is a festive set that stays smooth, not bumpy, for the full holiday week.
Black Snowflake and Blue Glitter French
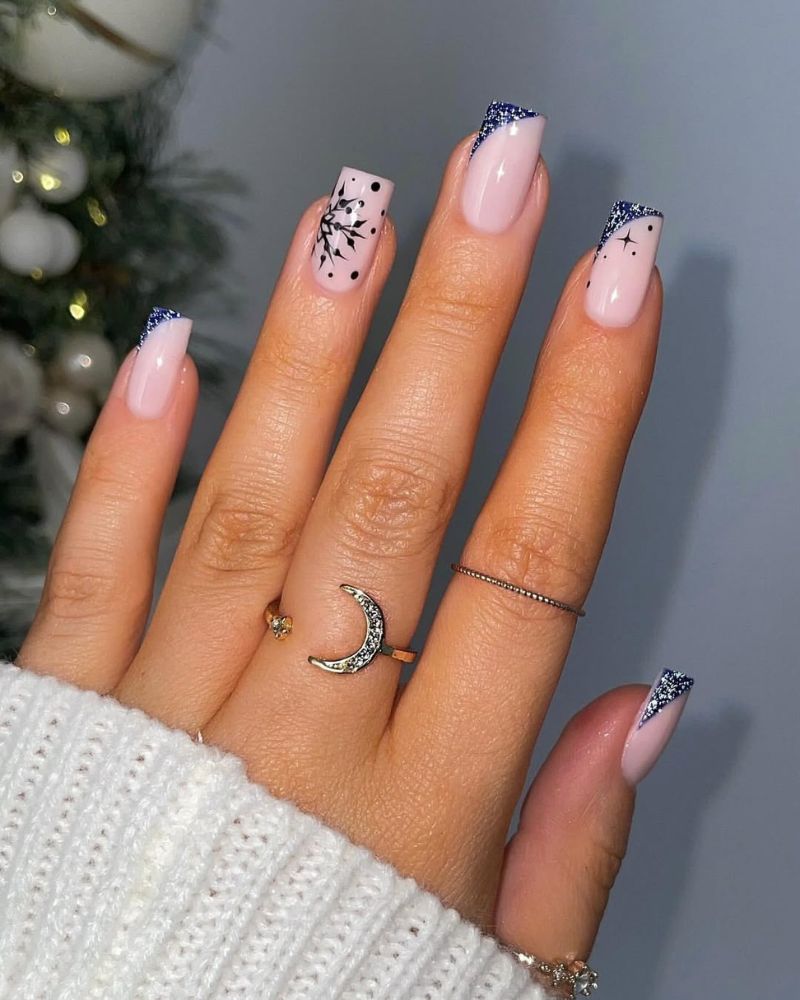
I wanted to hate this combination—black snowflakes on a natural base with blue glitter tips. But it works. The black reads graphic, not goth, and the blue glitter adds a pop without overwhelming. The key is keeping the glitter tip thin and the snowflake sparse. One black decal per hand, placed low, so it doesn’t compete with the French line. The contrast between the matte black snowflake and the glossy glitter creates depth that photographs surprisingly well.
This is not a DIY set. The blue glitter needs two careful coats to avoid streaks, and the black decal must be sealed without smudging—easier with a salon lamp. The honest downside: glitter shows wear faster. By day five, tips may chip if not capped well. Removal requires careful soak to avoid staining from the blue pigment. Book a tech who specializes in glitter gradients if you want the contrast to last.
French Tips with Snowflake and Silver Lines
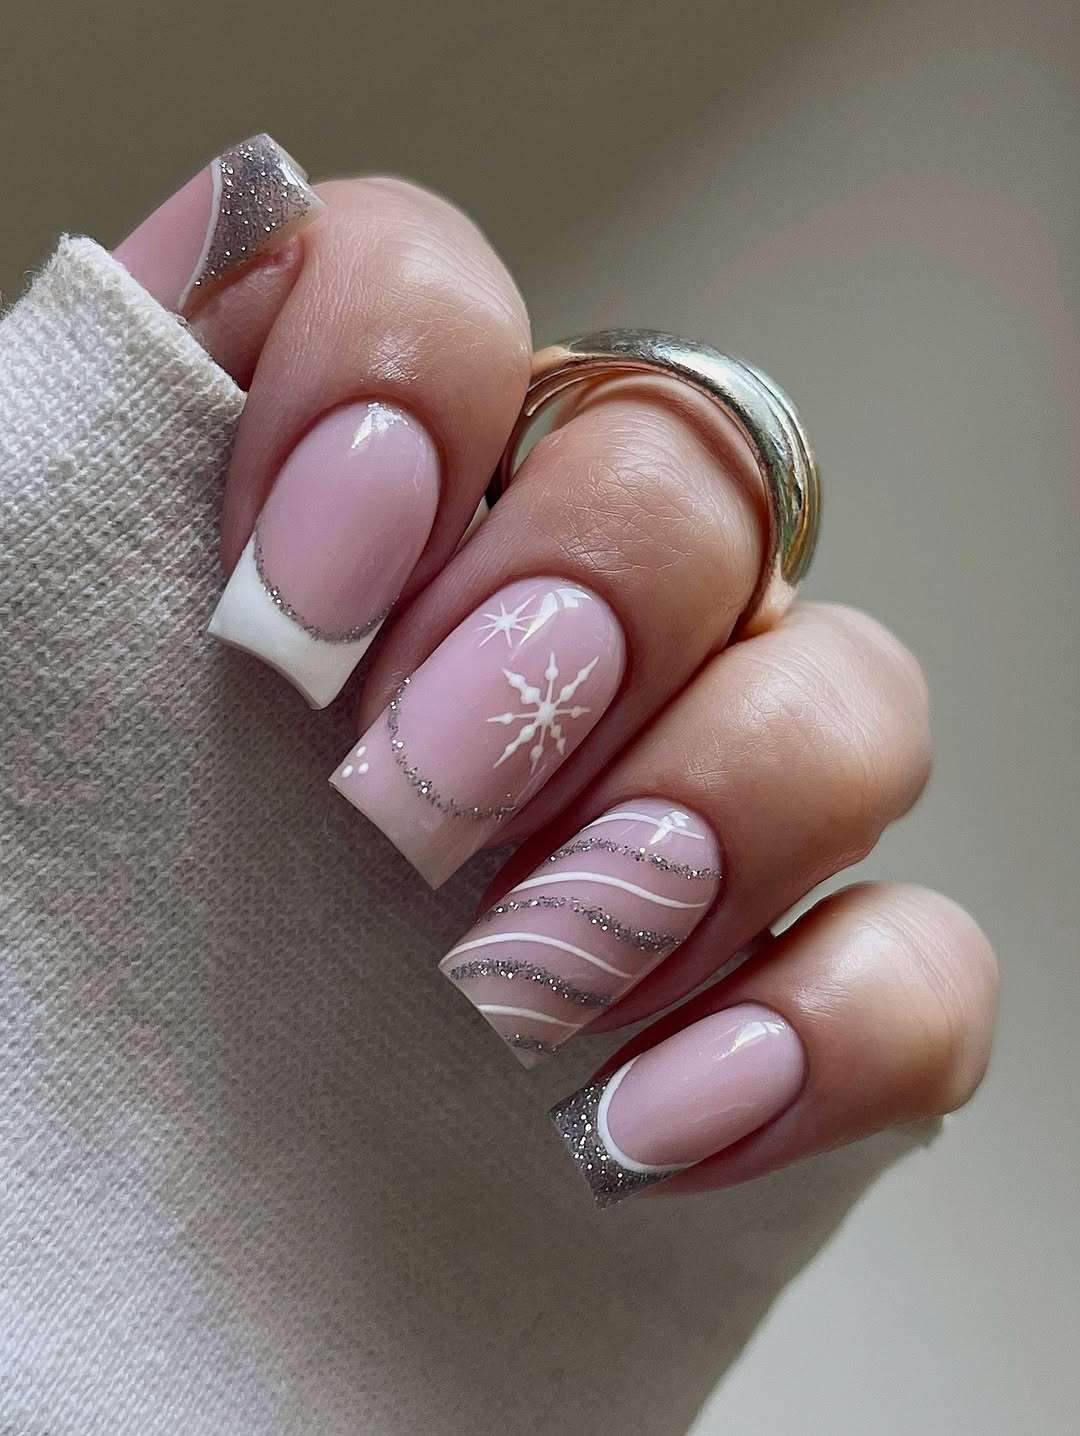
The silver glitter lines nails design looks like it took hours at a salon, but the secret is all in the prep. Start with a sheer pink base, then use thin striping tape to map out the silver lines — press it down firmly so the glitter doesn’t bleed. For the snowflake design on the accent nail, a dotting tool and a steady hand are your friends; practice on a silicone mat first to get the six-point symmetry right. Keep the lines clean and the glitter layer thin to avoid bulk. It’s not perfect on the first try, but by the third attempt you’ll have a winter manicure that fools everyone.
Glitter Ombre with Subtle Snowflakes
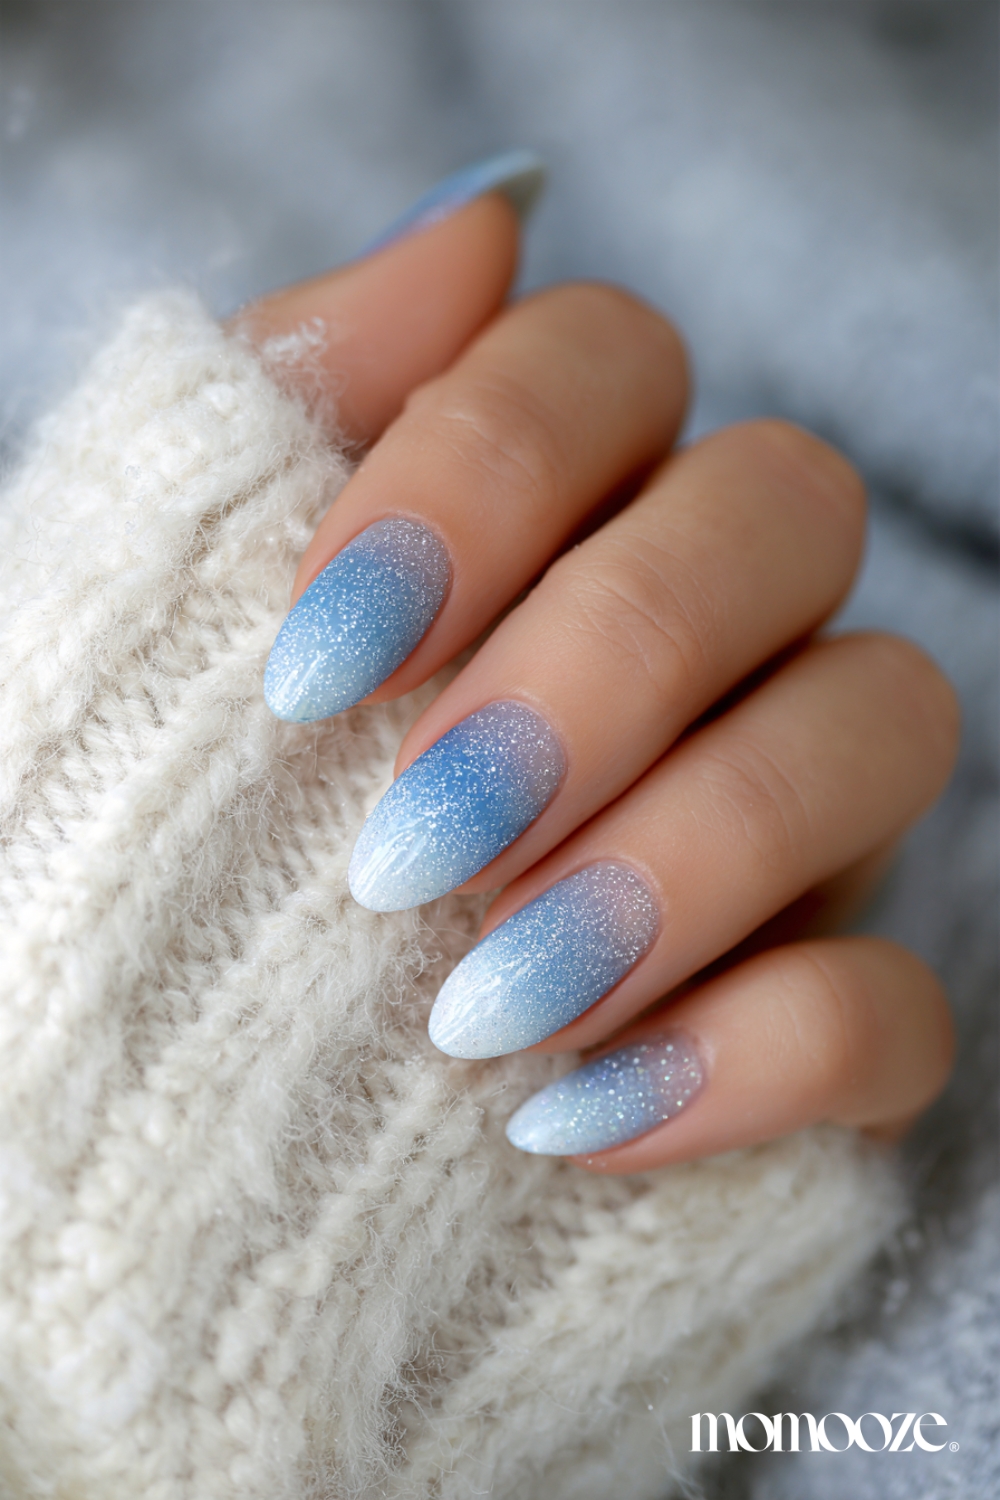
Is a glitter ombre actually winter, or is it just a party trick in disguise? This one makes the case for itself: a light blue to white gradient that reads like frozen morning sky, not a disco ball. The subtle snowflakes scattered across the surface keep it grounded in the season, and the medium oval shape gives the sparkle room to breathe without tipping into costume territory. It walks the line between festive and wearable, which is harder than it sounds.
Detailed Snowflakes on French Tips
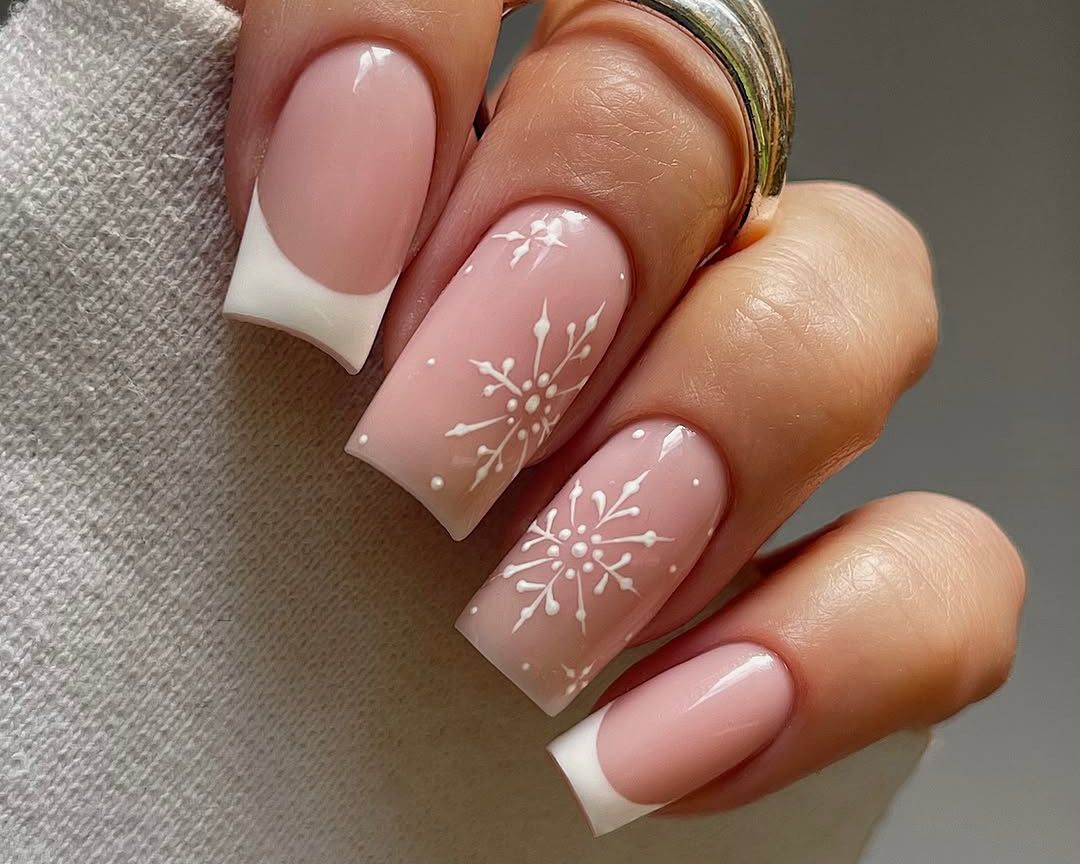
I will admit I was skeptical about how much detail a short square french nails could hold. The pale pink base and white tips are clean and minimal, and the snowflake art is precise, with tiny dots and lines that look like they were drawn with a steady hand. But here is the reality: those fine details are the first to go. By day three, one snowflake arm had softened at the edge from typing, and by day five, a dot on my accent nail had vanished entirely. The base and tip stay pristine for a full week, but the art requires a gentler life — fewer bags carried, less vigorous hand washing. If you want snowflake designs that last, ask your tech to seal them with an extra top coat layer, and accept that perfect detail has a shorter lifespan than the polish itself.
Cute Snowman and Drip Designs
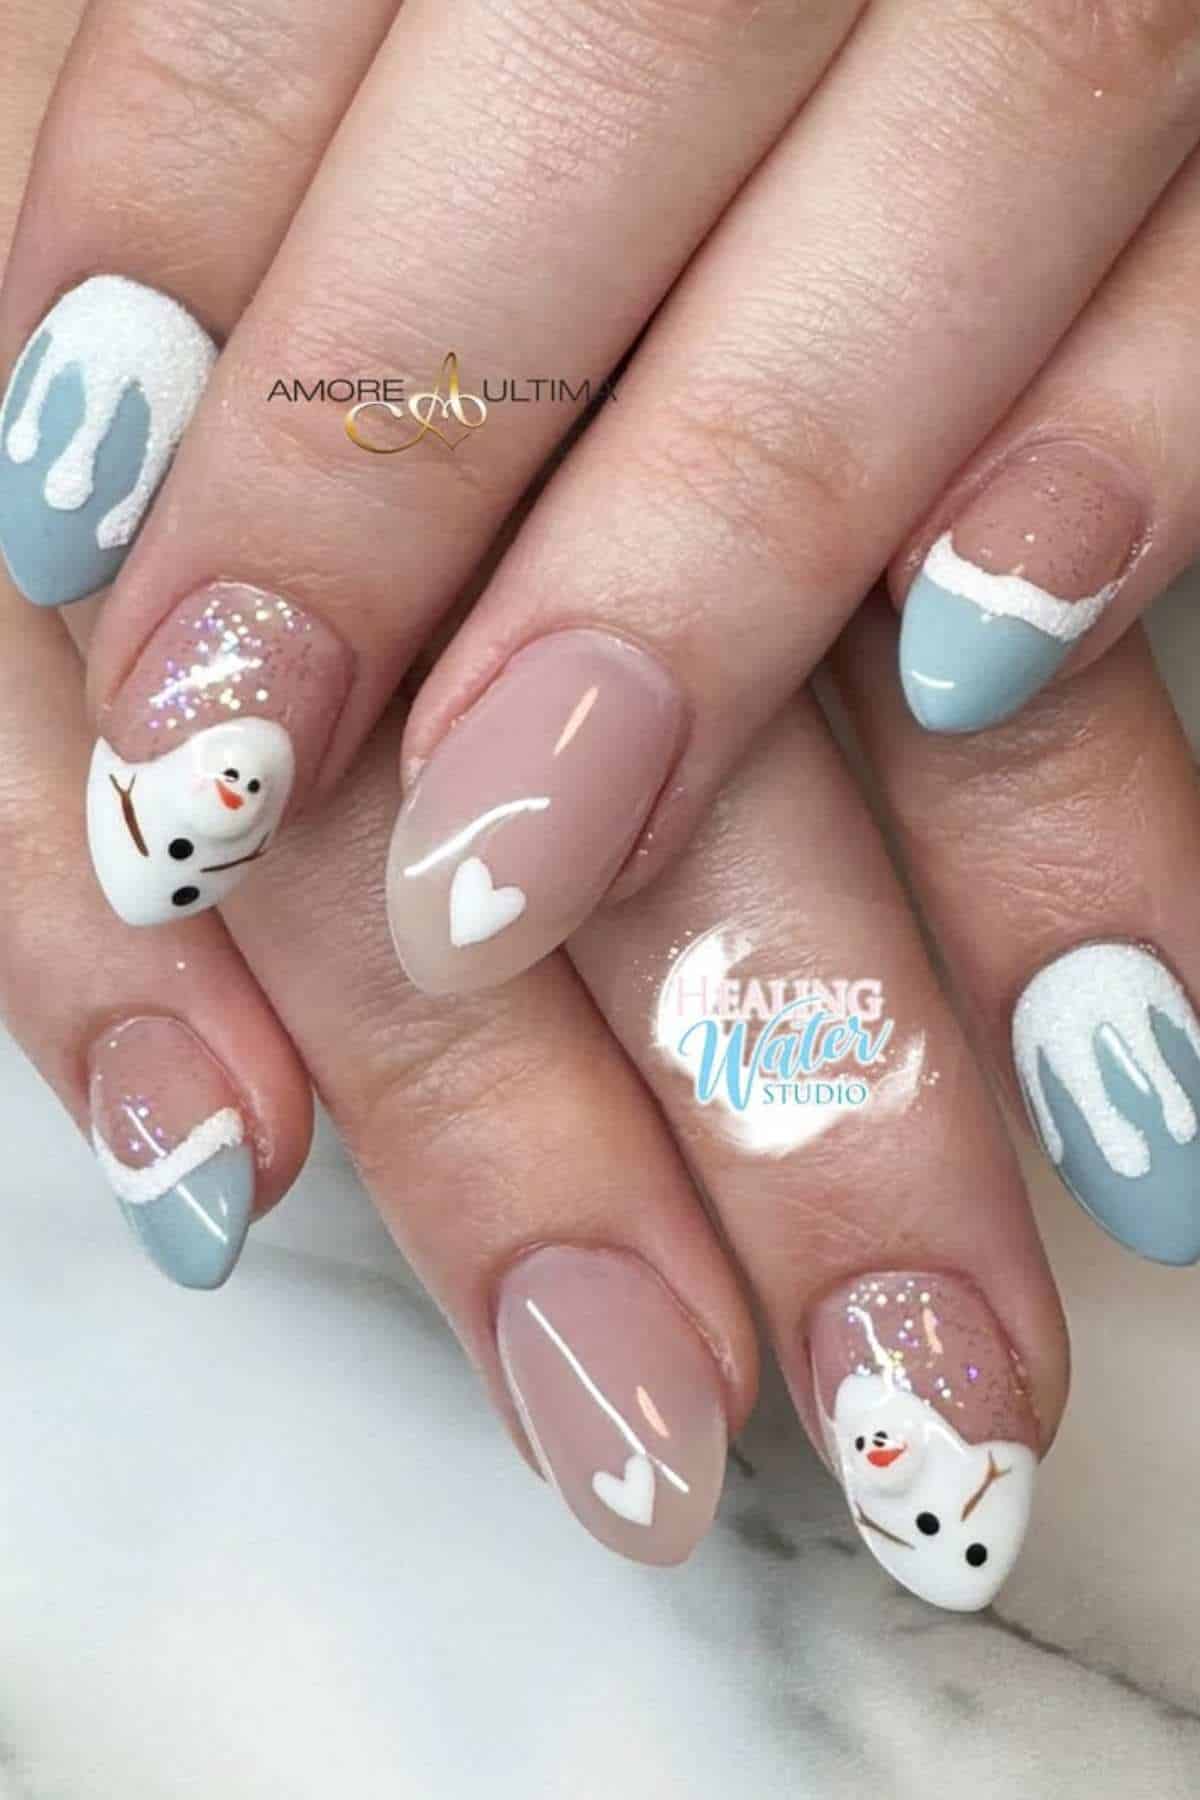
There is a specific moment in December when a snowman on your nails feels exactly right, and this set captures it. The pale blue base with a nude accent, the white drip effect running down one nail, the tiny snowman with a scarf, and the hearts scattered across others — it is whimsical without being childish. This is a salon job, no question. The drip needs a steady hand to look intentional, and the snowman’s proportions require someone who has painted a few before. For a Christmas Eve dinner or a family gathering, it lands perfectly. For a work presentation, maybe save it for the weekend. The medium oval shape keeps the designs from feeling crowded, and the glossy finish ties the whole thing together. It is seasonal, specific, and knows exactly when to show up.
Playful Winter Character Designs
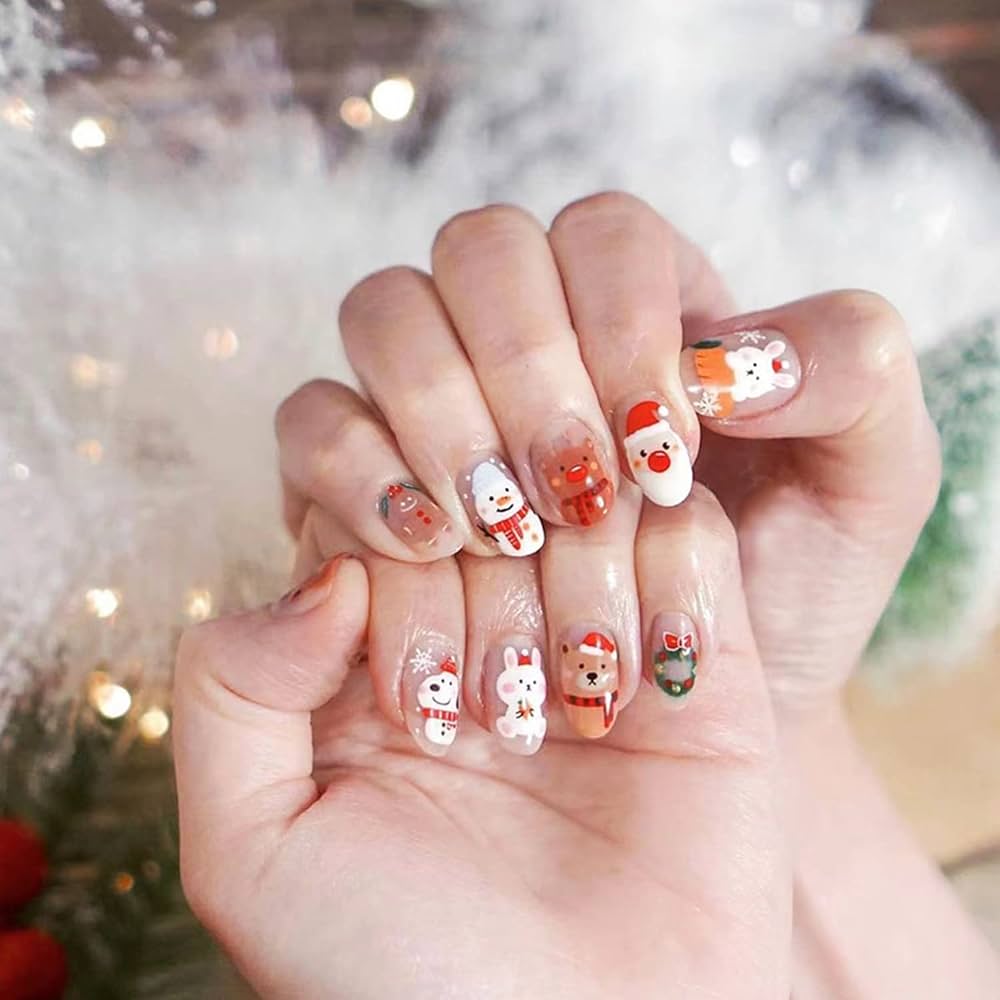
Who actually books a set of winter character nails and asks for Santa on one nail and a fox on the next? The person who treats her manicure as a tiny gallery, not a neutral background. Cute winter characters suit the friend who laughs at her own hands, the one who wants a bunny beside a snowman because mismatched joy beats symmetrical beige. Short oval tips keep every face tidy, and a glossy top over red, white, blue, brown, nude and glitter pulls the whole cast together. This is a personality hire for your fingertips.
Adorable Polar Bear and Snowflakes
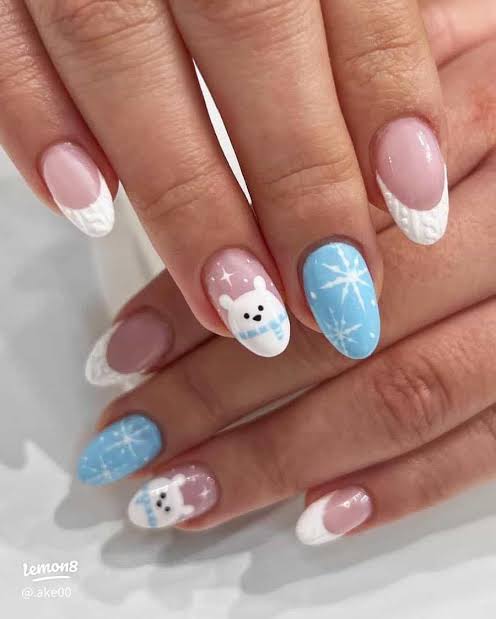
These are the kind of polar bear nails that make people stop and stare. The cute polar bear character requires steady hands and a fine brush, the kind of detail that takes a skilled tech a good hour per hand. The French tips are glossy and clean, but they chip faster than a solid color, especially if you type a lot. I noticed the white tip lifting by day five, and the polar bear’s face started to smudge slightly by day eight. If you want this for a holiday party, book it for the day before and accept the short lifespan. The payoff is worth the fragility, but only if you’re okay with careful hand washing and avoiding heavy bags.
Fawn-Inspired Polka Dots
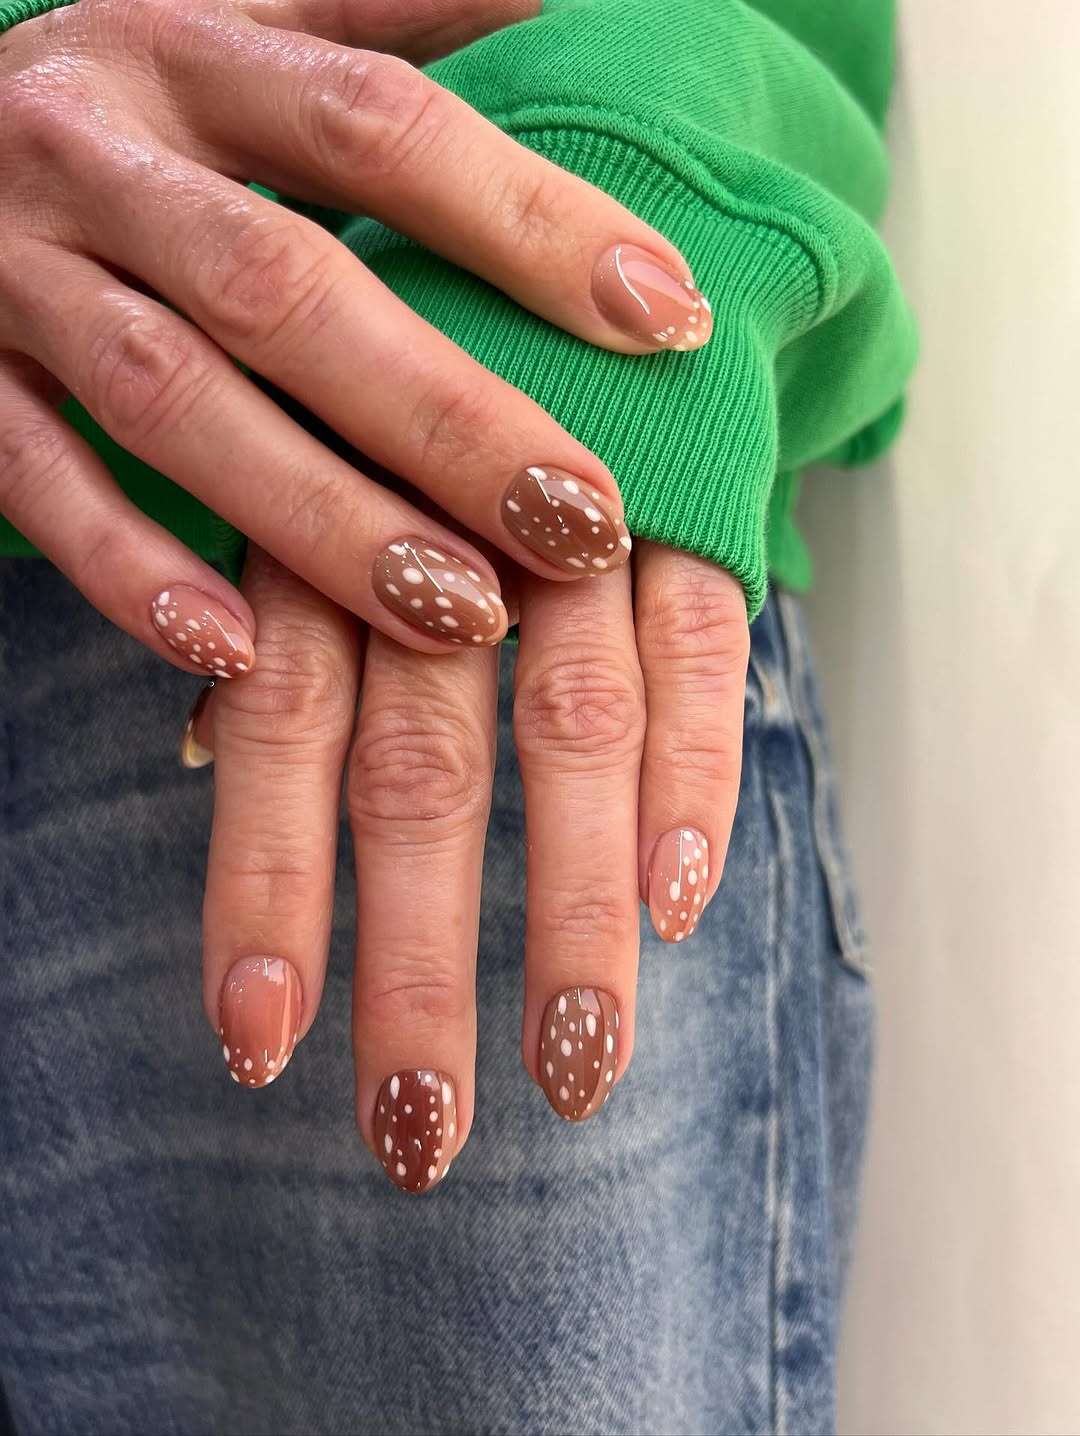
I spotted this pattern on a sweater in a shop window and knew I had to translate it to my nails. The brown base with white dots reminds me of a fawn’s coat, cozy and a little unexpected for winter. It’s not overtly Christmas, which I appreciate, but it still feels seasonal, like a warm blanket on a cold day.
Every time I glanced down at my fawn print nails, I felt a quiet satisfaction. The white polka dots are spaced just right, not too crowded, and the sheer nude French tip on some nails keeps it from being too heavy. This design got more compliments than any glitter set I’ve worn this year, probably because it’s subtle enough to look intentional but playful enough to be noticed. I’d wear this again in a heartbeat.
Matte Light Blue with Cute Animals
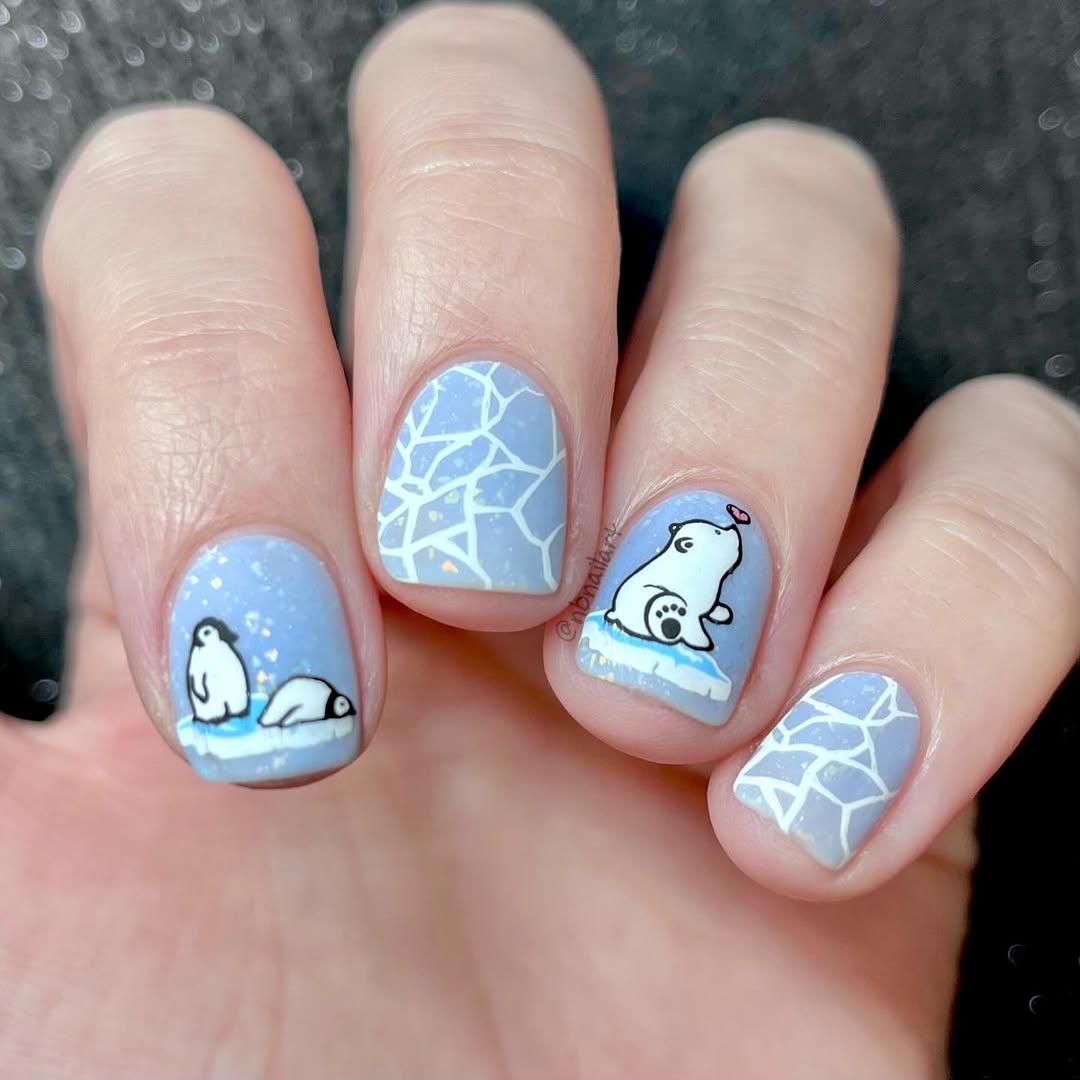
Can you really paint a penguin at home? With a steady hand and a dotting tool, maybe. The light blue matte nails base is easy enough, but the animal illustrations require precision. I’ve tried freehanding a polar bear and ended up with a blob. If you’re patient, you can use stamping plates or stickers to get close. The matte top coat hides minor imperfections, which is a blessing. But honestly, for crisp lines like these, I’d book a salon visit and save the frustration. It’s not a Sunday afternoon project unless you have serious art skills.
Matte Pink with Evergreen Branches
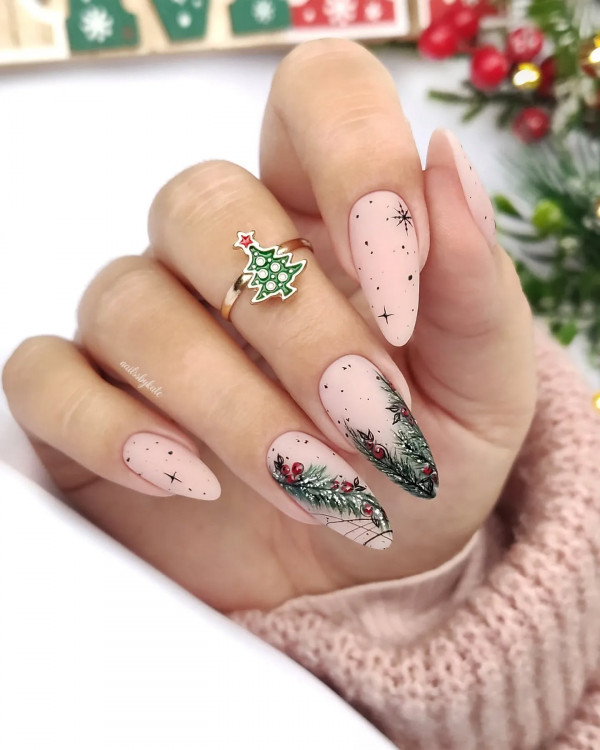
The matte finish on this set started looking dusty by day three, and the hand-painted evergreen branches began to chip at the tips by day five. The red berries are the first to go, especially if you use your hands a lot. I loved the matte pink nails base, it’s soft and elegant, but the evergreen branches require careful top coat application to last. This is a design for a special dinner or a photo, not for a week of typing. If you want it to survive, ask for a glossy top coat over the art and keep a matte top coat on the rest. The contrast works, and the art lasts longer.
3D Polar Bears and Cable Knit Texture
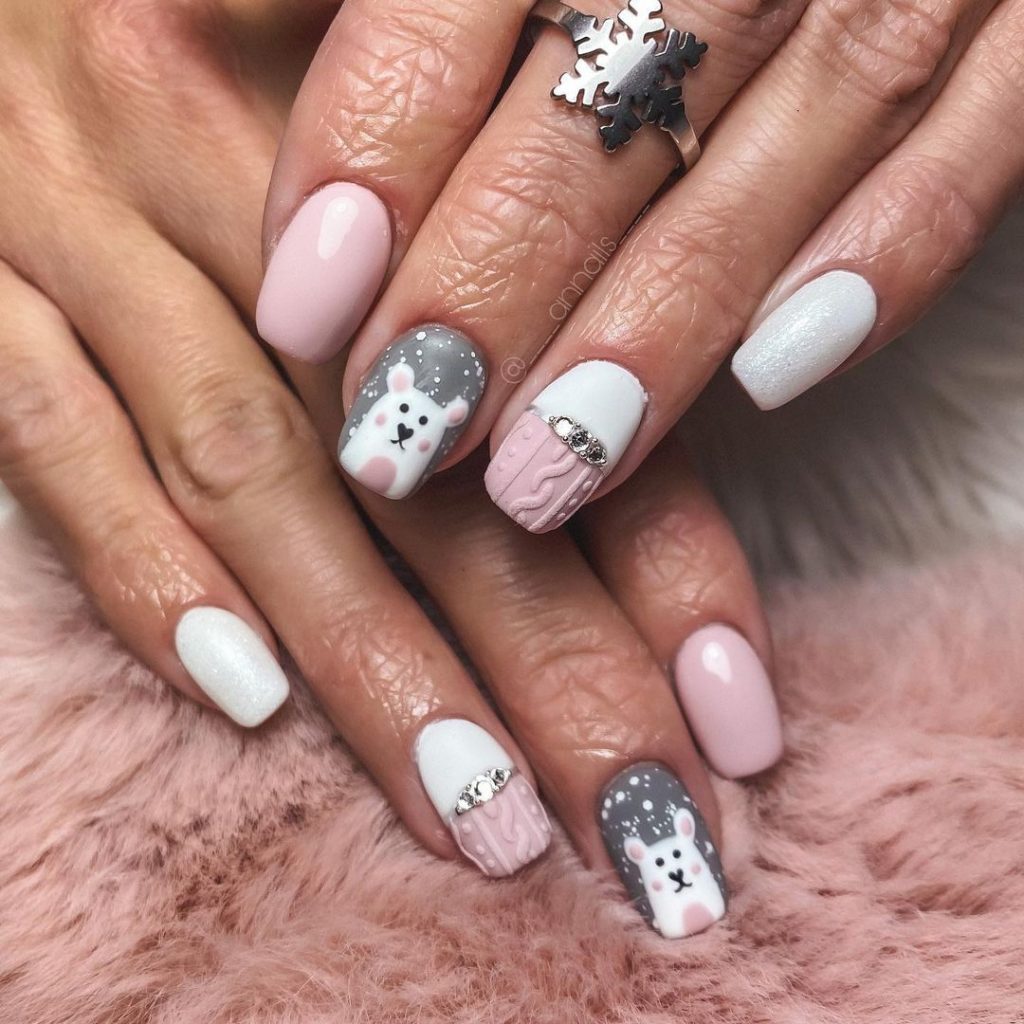
If you think 3D nails are impractical, you’re not wrong, but these are a different story. The 3d polar bear nails sit on accent nails, raised enough to catch the light but not so much that they snag on everything. The cable knit texture on the other nails mimics a sweater, and it’s surprisingly durable for a textured finish. Compared to flat art, the 3D elements add depth that photographs beautifully, but they do collect dust and lotion in the crevices.
I’d pick this over a full set of rhinestones any day because the polar bears are charming without being over the top. The cable knit gives it a cozy feel that matches the season. Just be prepared to clean under the 3D parts with a brush, and avoid picking at them. They’re not going anywhere if you’re careful, but they’re also not for someone who needs their nails to be zero-maintenance.
Final Thoughts
After staring at 25 variations of snowflakes and glitter tips, the real surprise isn’t how many designs exist. It’s how many different ways you can place a snowflake and still feel like you’re not repeating yourself.
I’m booking the matte pink with evergreen branches next. Quiet, lasts through dish duty, and nobody asks if it’s Christmas themed. Sometimes the quiet ones win.