
Polka Dot Nails Trend 2027: 23 Airy Manicures
The polka dot nails trend is persuasive when a small circular mark changes the pace of a color without covering it completely. A sheer base, a narrow French edge, or a single contrast nail leaves air around the motif, which is why the result can look considered rather than busy. Dot size and spacing matter more than piling on extra shades.
Before choosing a version, decide whether the nail shape should carry the drama or simply support it. Long almond tips can hold a crisp border and more detail, while short rounded nails benefit from a single accent or a tighter edge placement. Leaving some bare-looking center space is often the simplest way to keep a playful pattern visually calm.
Blush Almonds With Mixed Tiny Dots
Long pale pink almond nails use black, soft pink, and dark tiny dots in uneven clusters, so the pattern feels airy instead of mechanically repeated. The blush base is still visible between the marks, and that negative space keeps the scattered placement from turning heavy. A few pink accents soften the darker dots without making the palette overly sweet.
Varying dot density is the useful decision here. Some nails carry more pattern while others give the eye a pause, which creates a gentler rhythm across the hand. For a quieter version, use only black dots on two accent nails and leave the remaining nails sheer blush; the same idea will read much more lightly at a shorter length.
The tradeoff with an all-over dot treatment is upkeep around the edge as the nail grows. Keeping most dots small and away from one straight line makes minor changes less visually obvious than a strict French border would. A glossy finish helps the pale base stay luminous, but a very dense black pattern would quickly overpower this delicate almond outline.
Red Feature Nails Beside Pink Dots
Bright red feature nails give the pale pink dotted nails a clear color hierarchy, while the small white dots keep the red from becoming one uninterrupted block. The long almond shape makes each color field easy to read from base to tip. Because red is limited to selected nails, the set has a bold center without losing the softer blush atmosphere.
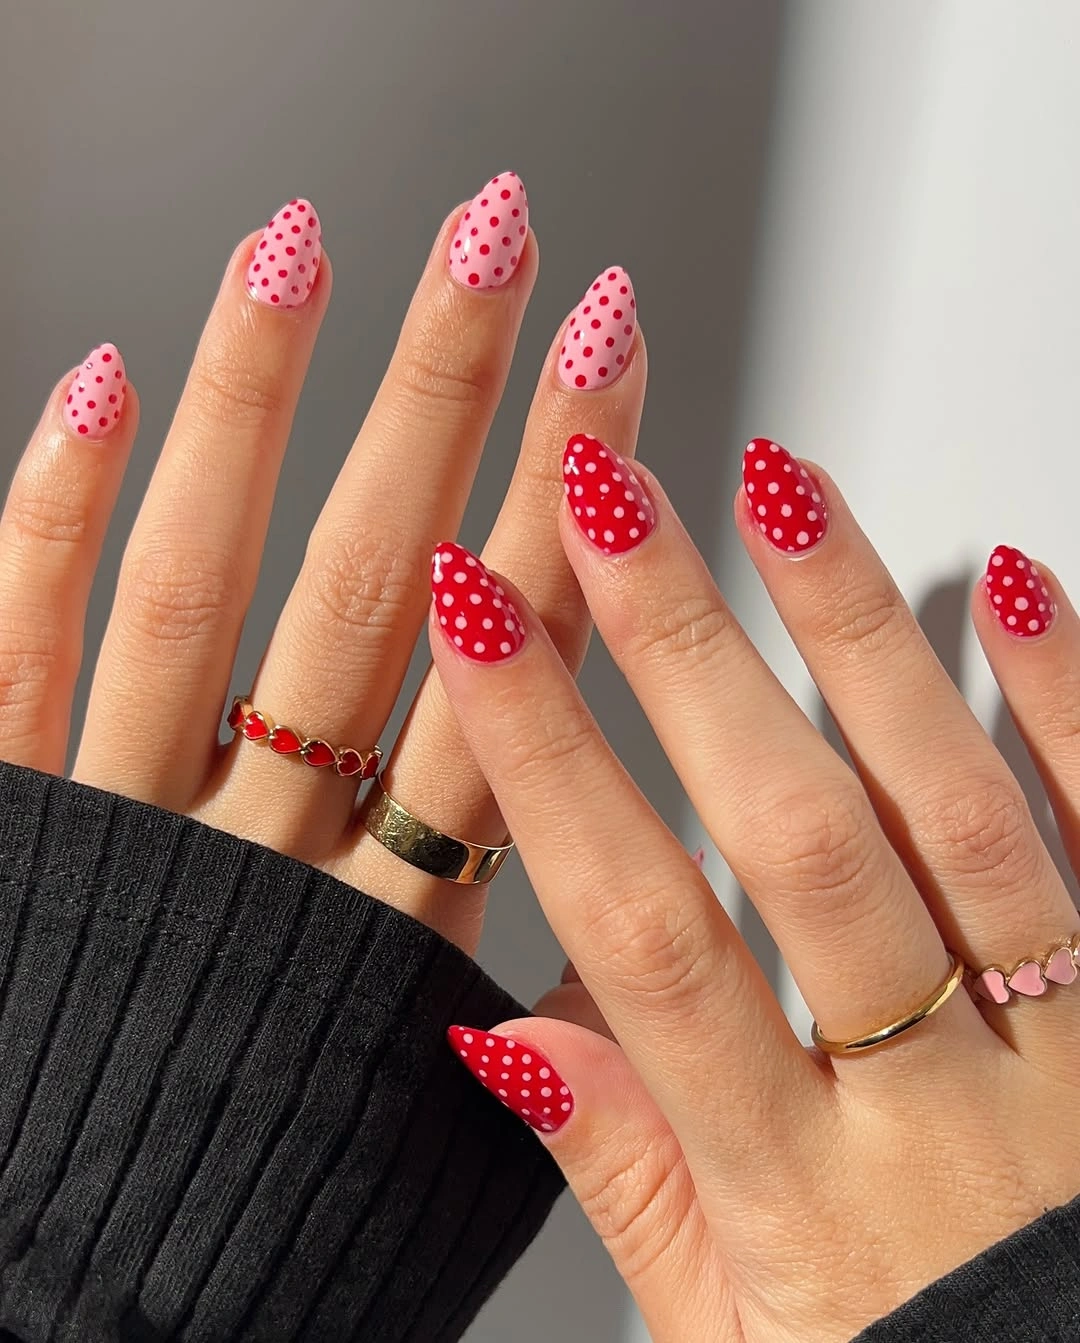
White is a smart dot color beside saturated red because it stays crisp without competing for attention. Someone who prefers a less direct contrast could replace the red with berry or warm coral and keep the pale pink nails unchanged. It is better to preserve the small dot scale than to enlarge every mark, since the red already supplies plenty of visual energy.
Alternating full color and dotted nails is more wearable than giving every nail the same dense design. The solid red sections allow the eye to reset, then make the white dots look more intentional when they return. If the length is reduced, retain only one red feature nail per hand so the motif stays balanced rather than looking crowded across a compact shape.
Chocolate Solids With Blush Dot Accents
Glossy dark brown nails sit beside pale pink nails covered with small white dots, making the dotted areas read as a contrast detail rather than a full-print manicure. The chocolate color has enough depth to anchor the blush without the starkness of black. Both treatments share a shiny surface, so even the contrasting colors feel part of one measured set.
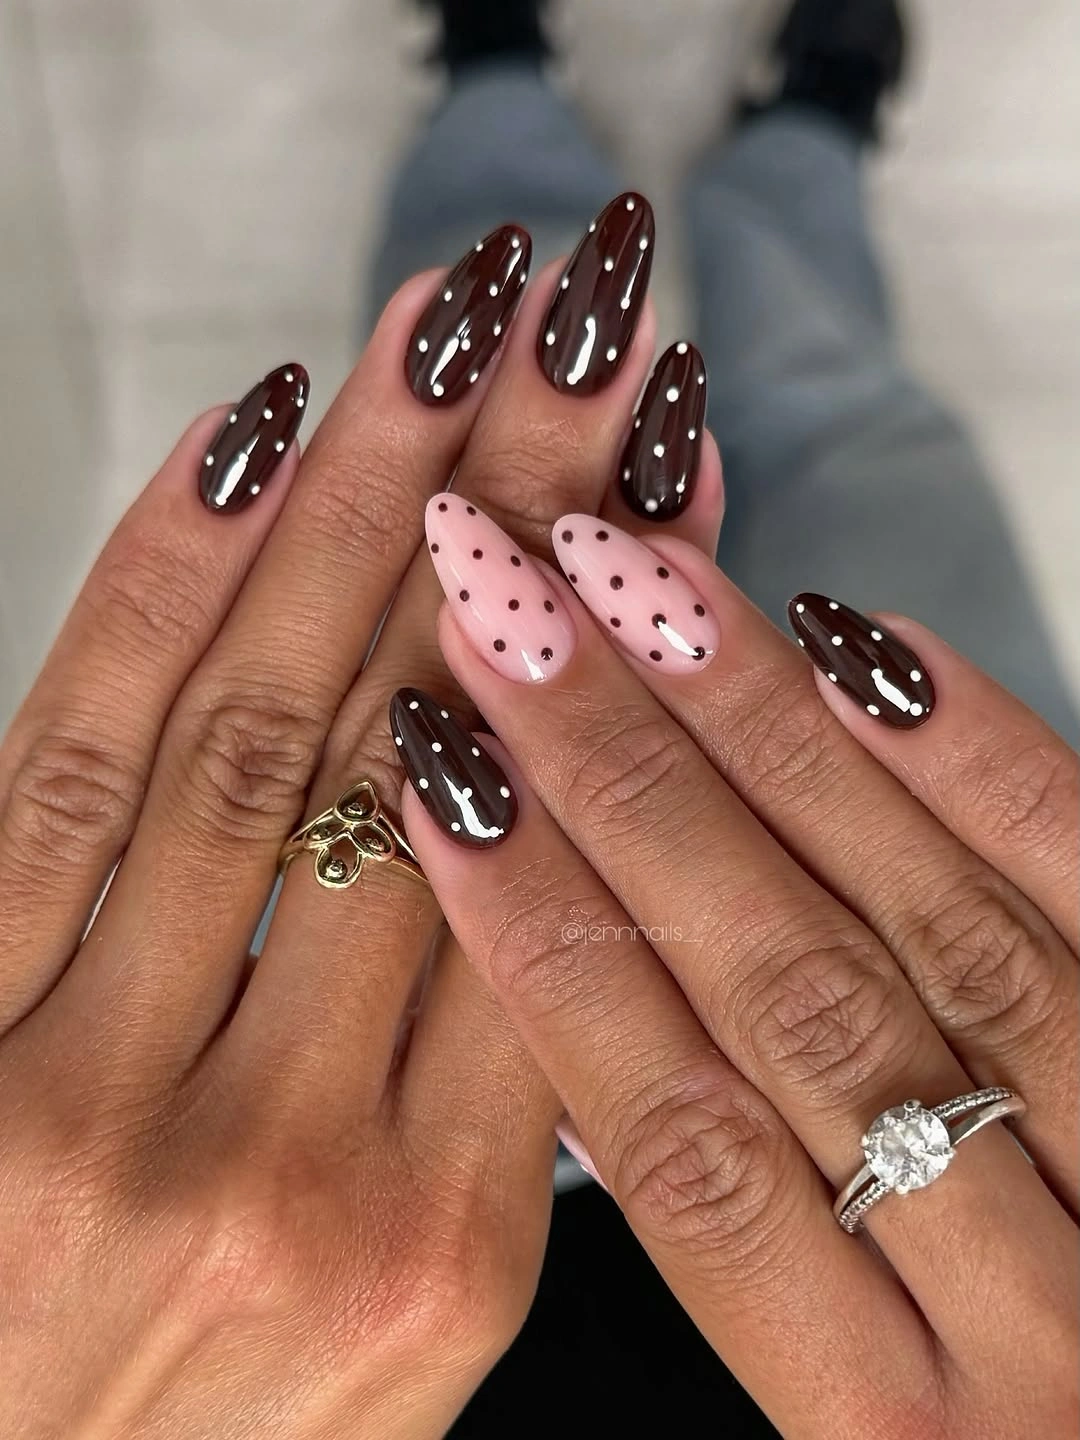
Pairing solid nails with patterned nails is a useful choice when the motif has a soft base. The brown sections give the dots a frame and prevent the pale polish from disappearing against the skin. To make the look more understated, reduce the number of dotted nails; to make it bolder, add a slim brown edge at the tips rather than introducing a new color.
The strongest practical point is restraint. Long almond nails can hold both a dark solid and a dotted blush design, but adding a third major motif would break the clean contrast. A shorter rounded version could keep the same palette by using brown on most nails and one pale dotted accent, where the difference in color will stay readable without needing extra length.
Alternating Red Tips and Dot Clusters
Long pointed pale pink nails alternate between red tips, red dots, and small floral-like dot clusters, creating movement without abandoning one color family. The sheer pink center gives the red details a calm place to sit. Because the most saturated color is reserved for the edges and selected nails, the pattern remains legible across the tapered shape.
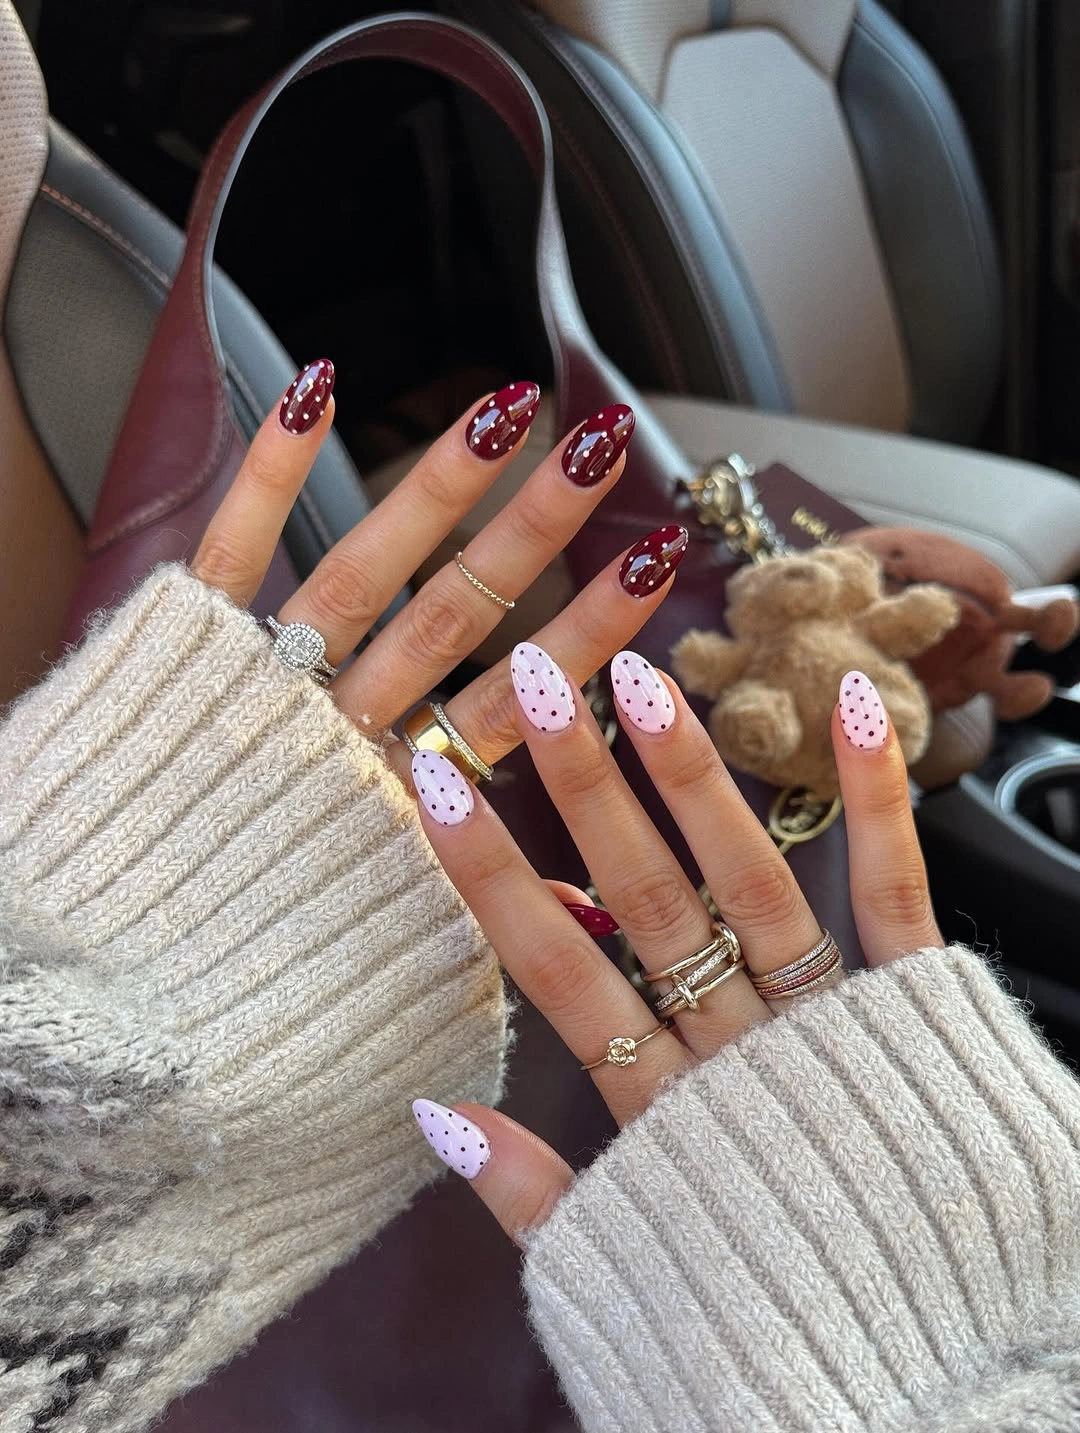
Red looks most controlled here when it is treated as a placement tool rather than a full coating. A narrow tip, a few circular marks, and one fuller accent create different expressions of the same color. If the clusters feel too decorative for everyday wear, keep only the dotted tips; the pale base will still make the red look clear and intentional.
Pointed almond nails naturally emphasize the free edge, so a tip design suits their geometry. A very wide red border could make the nails appear even longer and more dramatic, while a fine curved edge keeps the look lighter. The dot clusters should stay on only a couple of nails, otherwise their dimensional-looking arrangement could compete with the neat directional line of the tips.
White Dots Across Bright Red Nails
Bright red almond nails covered with small white dots have a graphic, cheerful contrast, and one pale pink dotted accent gives the saturated color a needed pause. The dot scale is consistent enough to unite the nails without making the red surfaces look flat. On the long shape, the white marks read as pattern rather than random speckles.
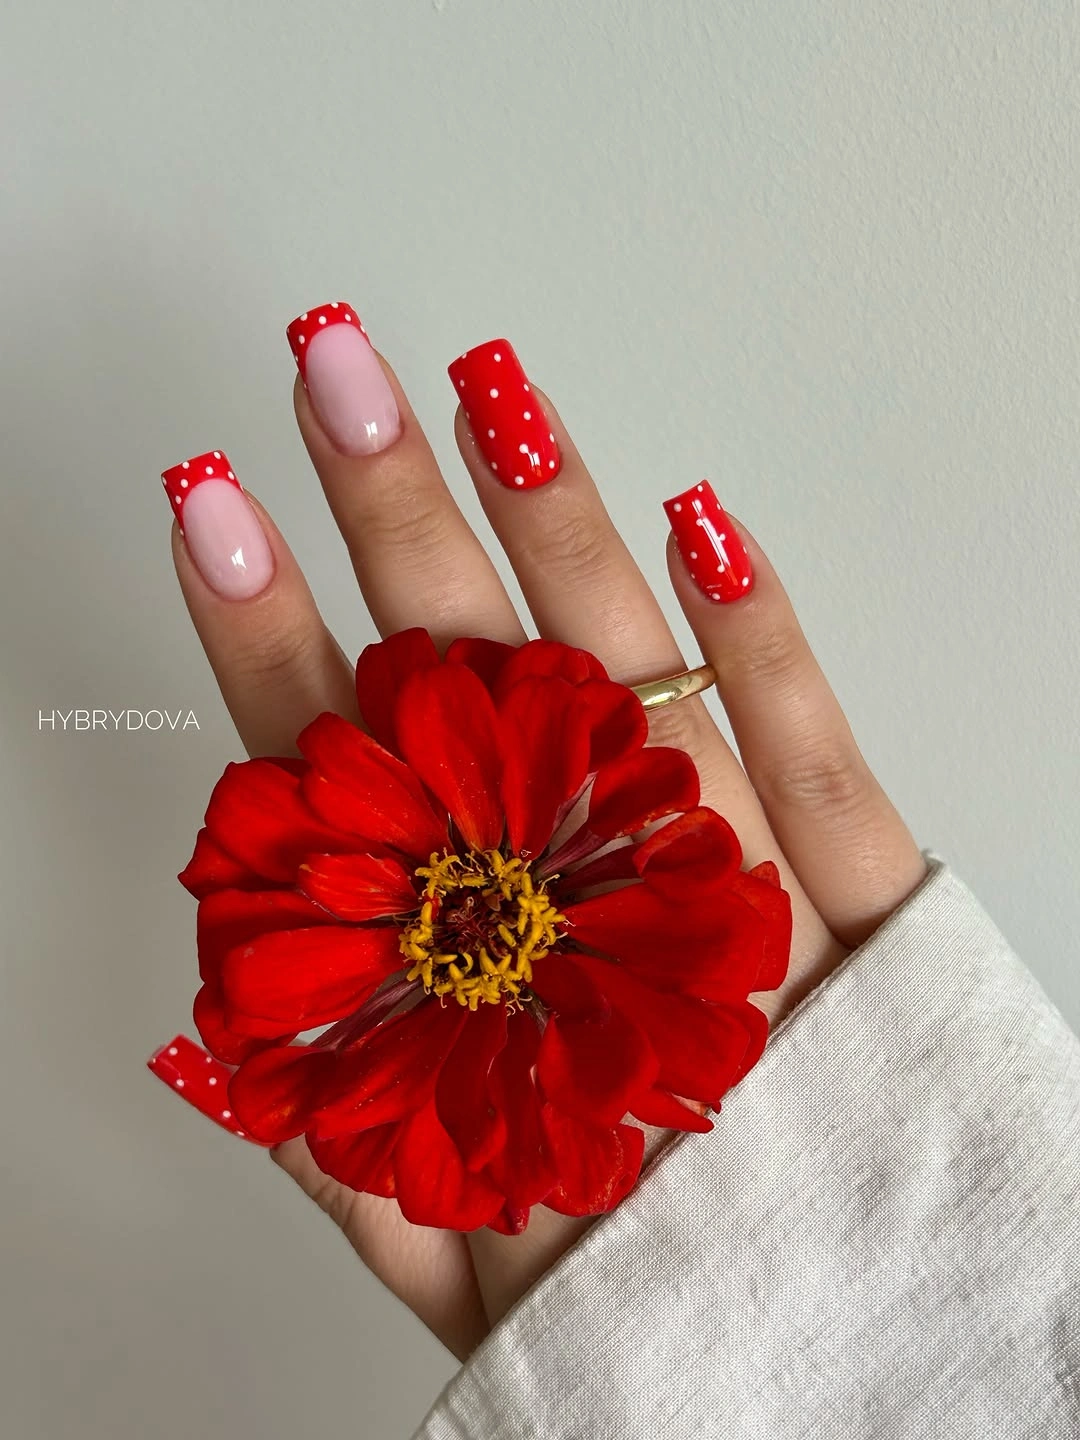
When the base color is this strong, a pale accent nail is more useful than another extra decoration. It creates breathing room while still repeating the white-dot language across the hand. For a softer direction, use a muted cherry or brick red; the white dots will retain their clarity, but the overall contrast will feel less immediate against everyday clothing.
Dot placement should remain relatively even on red because large empty zones would look accidental against such a high-impact base. The pale accent can be a little looser since it already functions as the visual rest. A very short version of this idea would benefit from fewer dots per nail, otherwise the red-and-white contrast may become too dense within a limited surface area.
Red and White Details With Black Punctuation
Medium almond nails mix red, blush, and white fields with black dots, red stripes, and small sculptural-looking accents. The design stays connected because red and white carry the main contrast while black appears only as punctuation. Each nail has a slightly different role, yet the limited palette prevents the variation from feeling like unrelated ideas placed together.
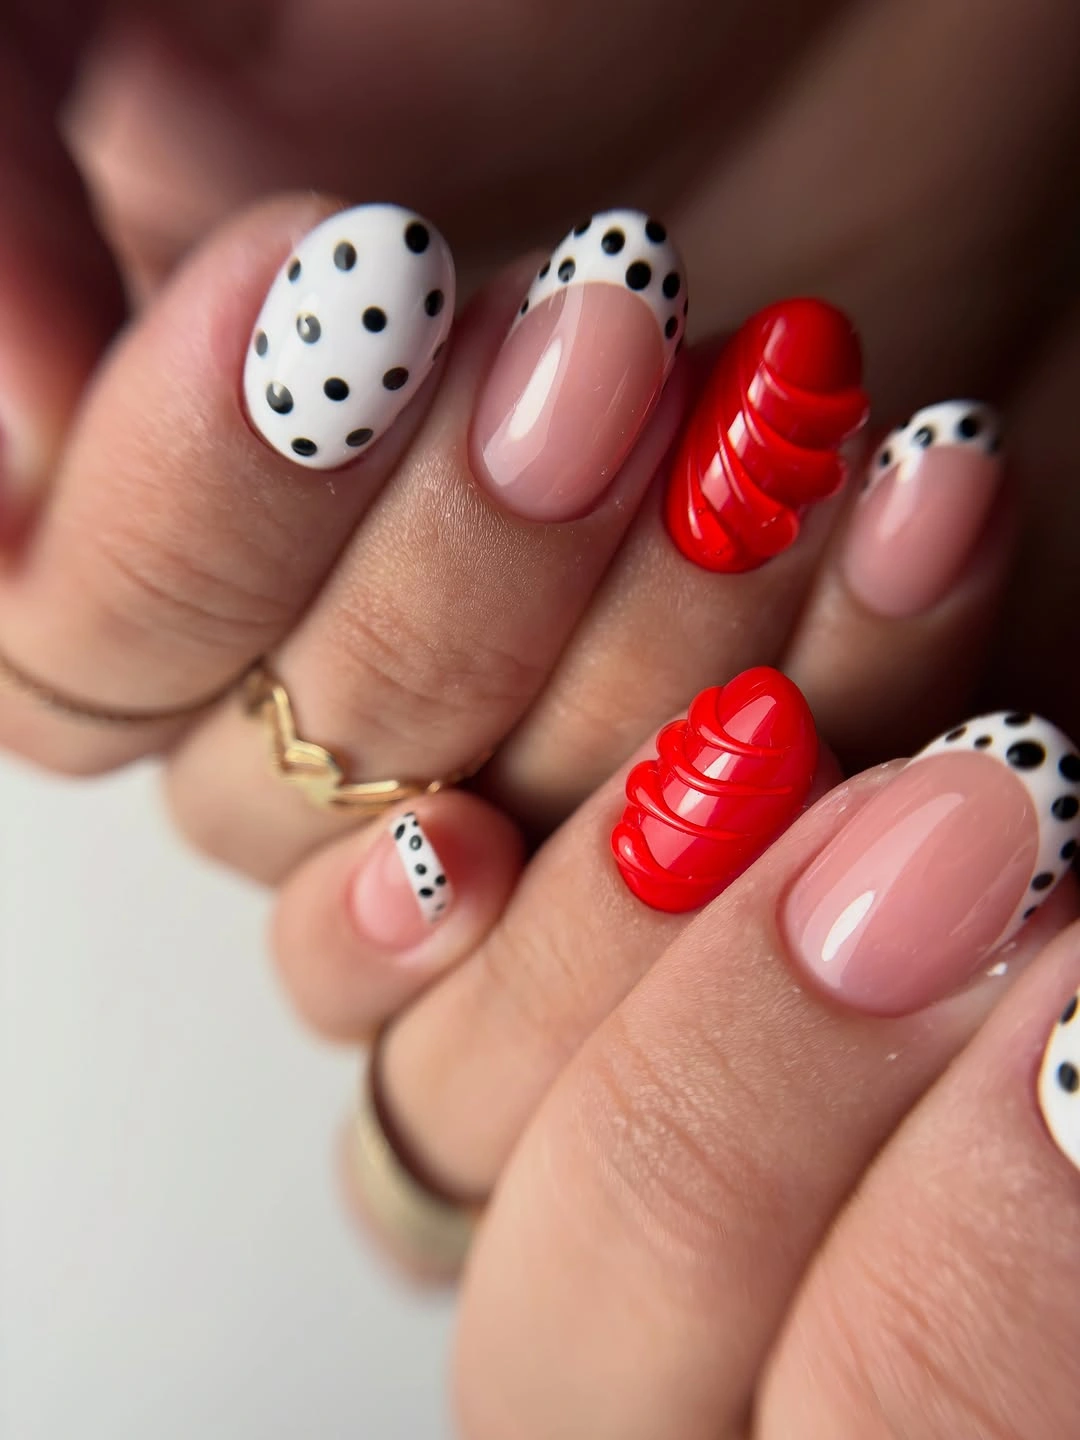
A set with several details needs one stable rule, and here it is color. Keeping the motifs inside red, white, blush, and small black marks lets stripes, dots, and accent forms coexist. For a pared-back interpretation, choose either the dot nails or the red-striped nails, then leave the rest solid; that preserves the same color story with less surface activity.
The risk is loading every nail with a different elaborate element. Medium length gives the pattern room, but it still benefits from a few plain or mostly plain nails between detailed ones. A glossy finish enhances the crisp red-and-white contrasts, while too many raised-looking accents could make the surface appear busy and distract from the tiny black dots that organize the composition.
Brown Dotted Tips on a Blush Base
Long blush almond nails use chocolate-brown French-like edges with fine white dots layered over them, creating softer contrast than a black tip would. The pale center remains open and glossy, so the darker color does not swallow the nail shape. Fine dots make the tips feel light even though the brown border gives each nail a graphic outline.
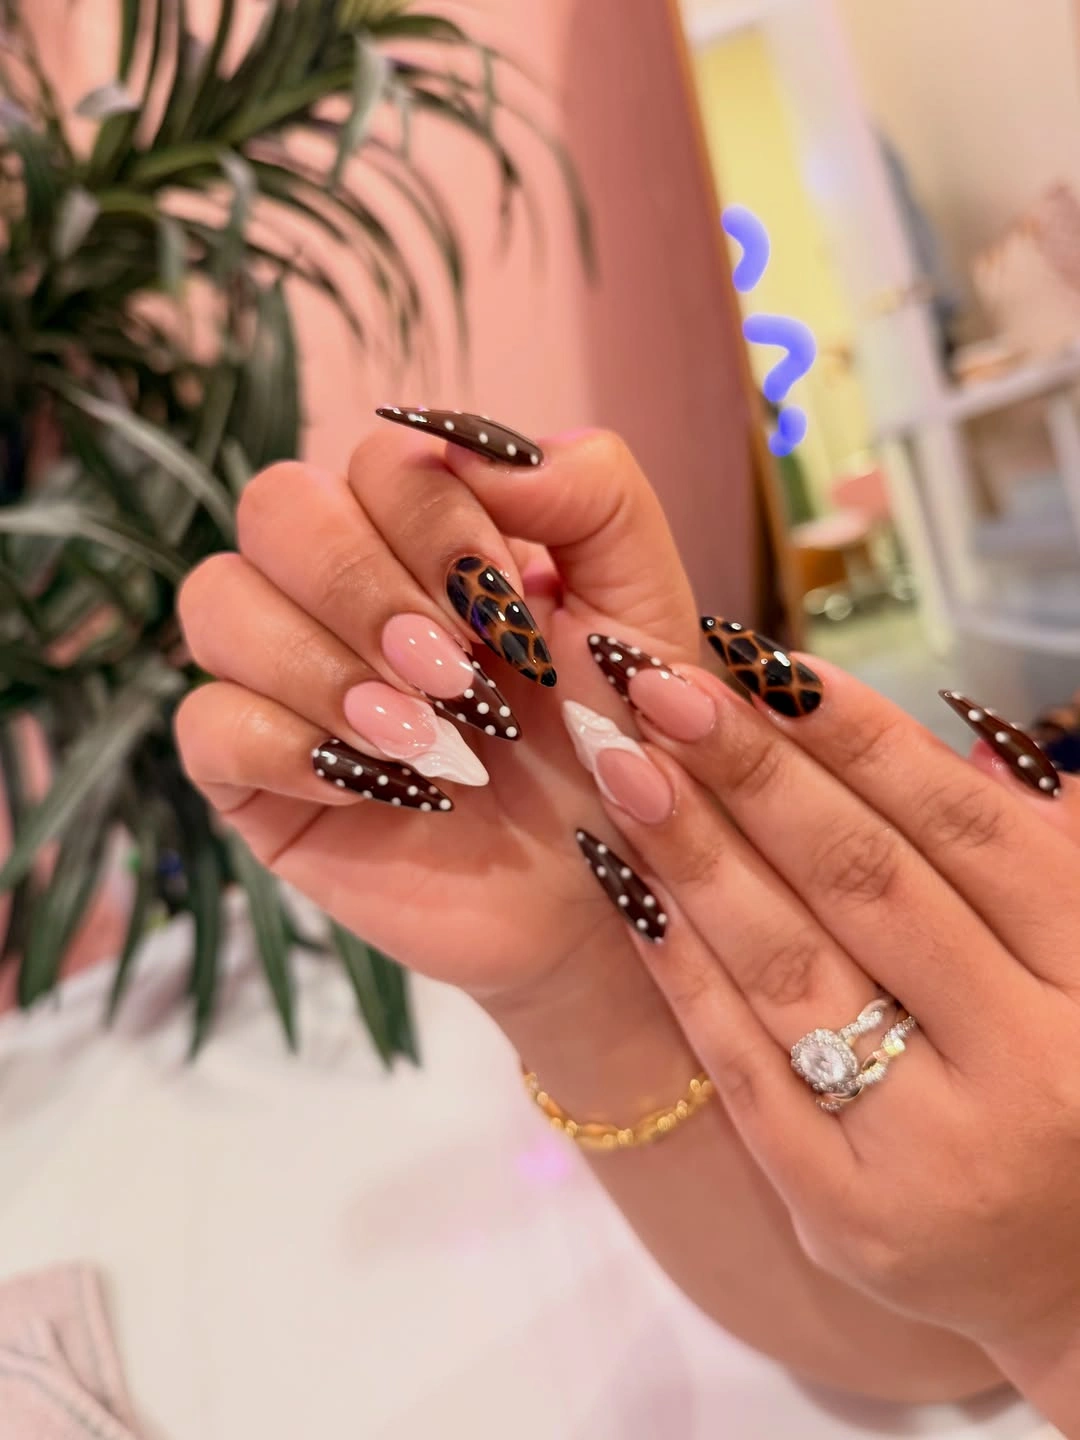
Brown is particularly good for a dotted tip when you want definition without a severe black-and-white effect. A warmer caramel version would be gentler, while deeper espresso makes the edge more pronounced. The dot color should stay pale and small; larger white circles would turn the refined border into a much louder pattern and reduce the delicate contrast of the base.
Because the motif is confined to the ends, the design can be adapted to a shorter nail more easily than a full patterned set. Keep the brown edge narrow as length decreases, then use fewer dots so the tip still has a recognizable curve. That proportional adjustment lets the manicure retain its airy center instead of making the darker border look visually heavy.
Short Nude Nails With One Dot Accent
Short rounded nude nails use one white accent with black dots and a separate red raised-looking detail, proving that a compact shape does not need pattern on every finger to feel playful. The neutral base keeps the small designs legible. Each accent has room to register because the surrounding nails remain quieter and let the color contrast do its work.
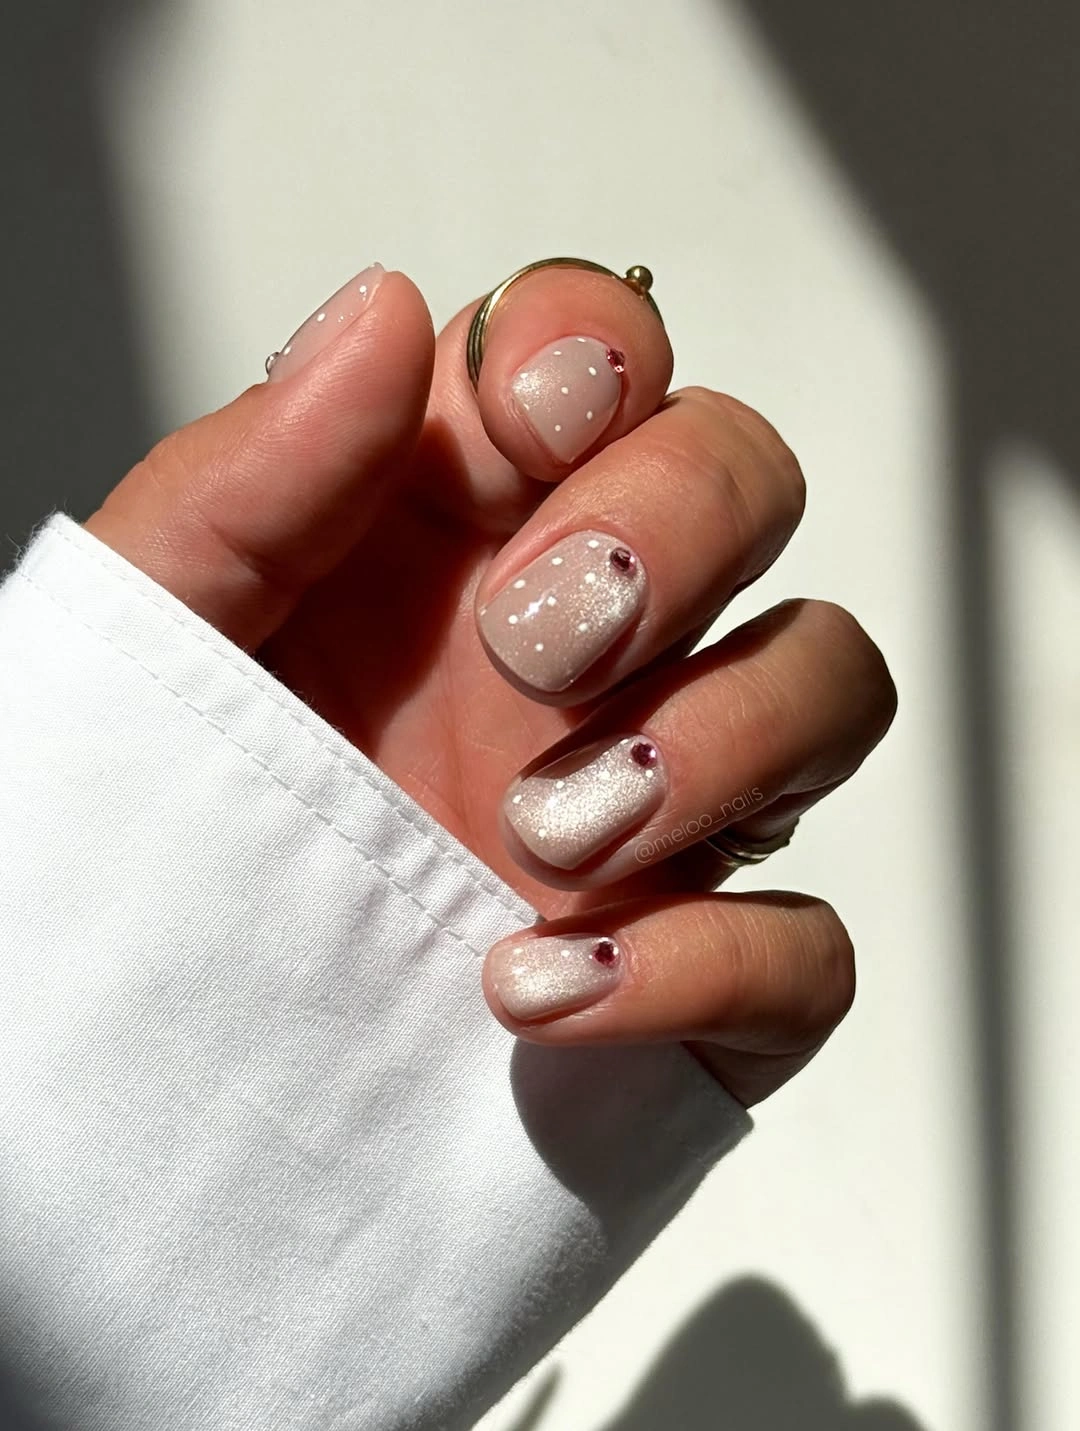
One accent nail is a practical route into polka dots for anyone who prefers short, low-detail nails. The black-on-white pairing is clear at a small scale, while the red detail supplies a separate focal note without spreading across the whole hand. If red feels too sharp, a berry or muted pink accent would still balance the neutral and graphic elements.
Short rounded nails reward simple placement because every mark occupies more of the available space. Putting dots too close to the sidewalls can make the design feel compressed, so a centered cluster or a small tip panel is safer. The nude nails around it also make minor grow-out less visually central, which suits a manicure built around only a few concentrated details.
Pale Green Solids With Irregular Black Spots
Medium rounded nails pair large irregular black-and-white spotted patterns with two pale green solid nails, and the green is what keeps the high-contrast motif from taking over. Its soft color interrupts the black-and-white rhythm without needing another print. The rounded shape also makes the large spots look organic rather than overly geometric across the nail surface.
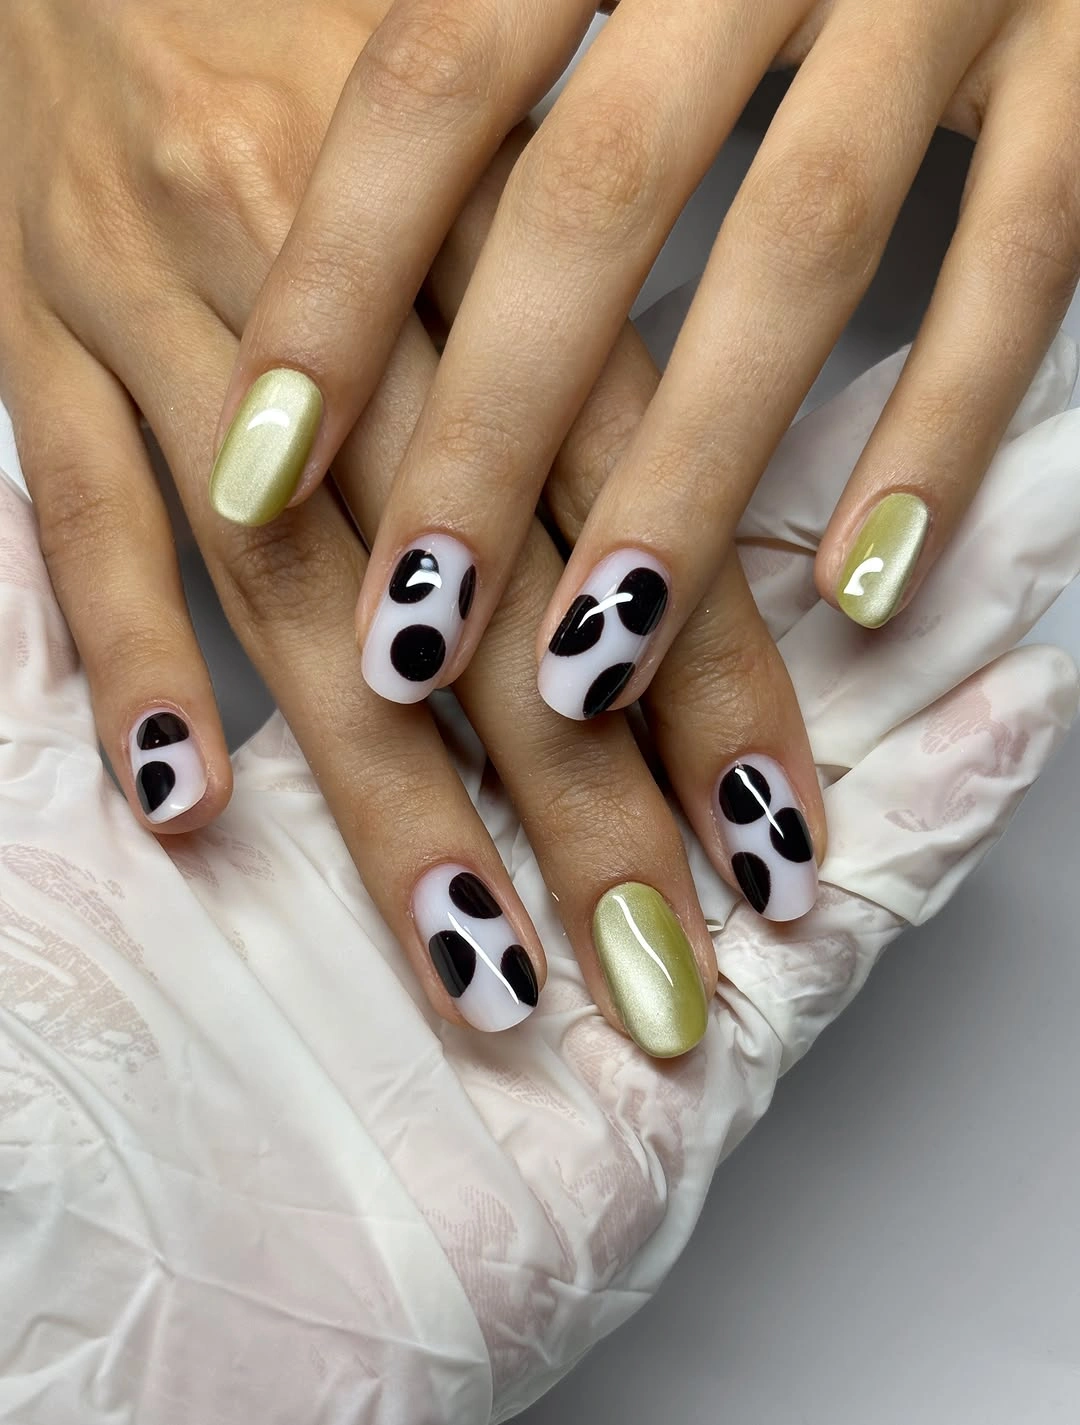
Pale green acts like a calm color buffer here. It gives the spotted nails breathing room and makes the set feel less dependent on one graphic motif. A butter yellow, soft blue, or muted lilac solid could serve a similar role, but the accent nails should remain completely plain so their purpose as visual rest stays clear and useful.
Irregular spots have more visual weight than tiny classic dots, so they are best limited to selected nails. On a shorter length, use fewer and larger shapes rather than trying to reproduce the same density in miniature. That approach preserves the playful pattern while avoiding a crowded effect, especially when the pale green sections are kept smooth and free of additional decoration.
Dotted French Tips With a Blue Accent
Long blush almond nails use white French-style tips filled with black dots, then one pale blue-tipped nail refreshes the palette without disrupting the black-and-white motif. The open blush centers provide more negative space than an all-over dot pattern would. The blue works because it is contained to a single edge and does not compete with the repeated dark marks.
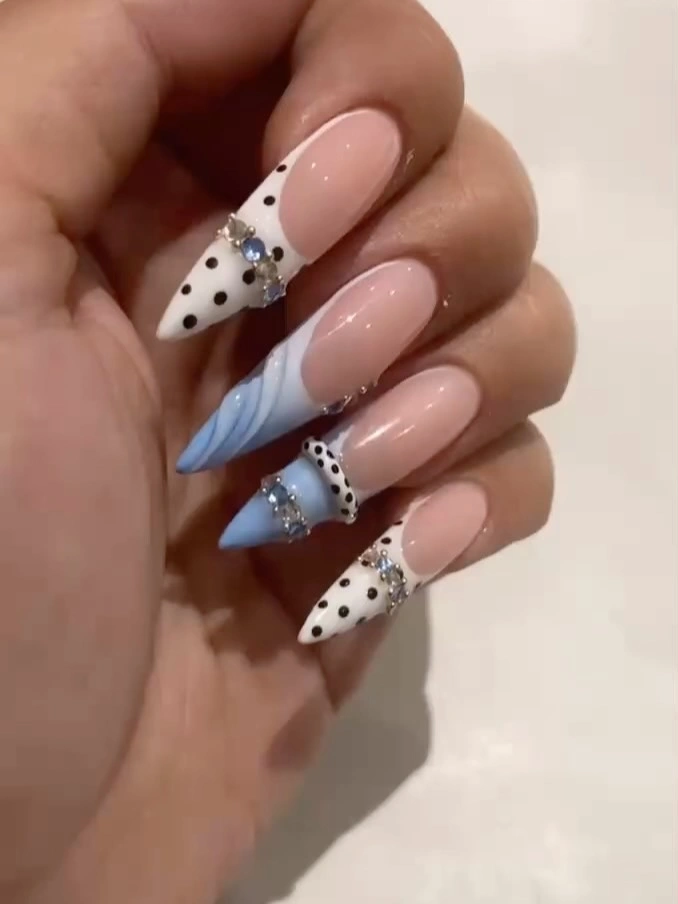
A dotted French edge is a good choice when you want the trend to look light and deliberate. The tips create a clear boundary for the pattern, so the center can stay sheer and calm. For a more neutral version, replace blue with soft gray or cream; for more contrast, keep blue but use it only once, as repeating it on every tip would weaken the black-and-white rhythm.
Long nails make the edge treatment especially noticeable, which is why the dot scale must remain fine. Larger circles would quickly fill the white band and erase the distinction between tip and center. A shorter almond version can still use this idea with a slimmer French curve, giving the manicure the same graphic lift while making the blue accent feel more like a small color note.
Brown Outline Around White Dotted Tips
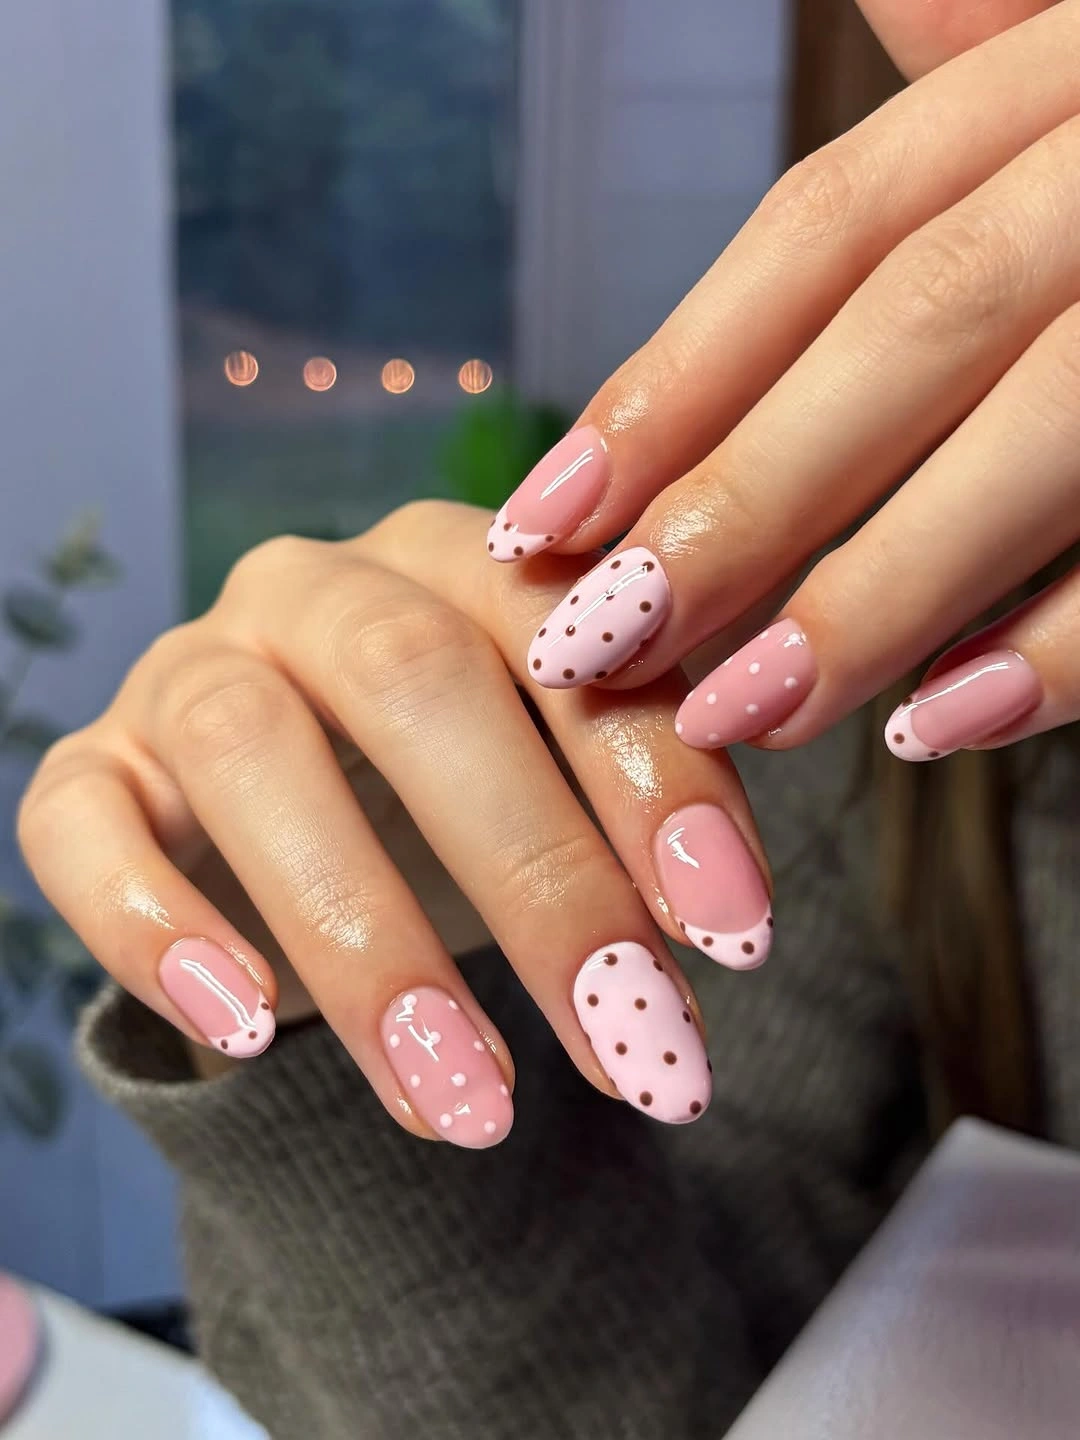
Long nude nails keep the center open, then build definition at the end with white dotted tips bordered in dark brown. The brown outline makes the white section readable without the hard contrast of black. Because all of the ornament stays near the free edge, the nail bed remains calm and the long almond shape has a clear, elegant direction.
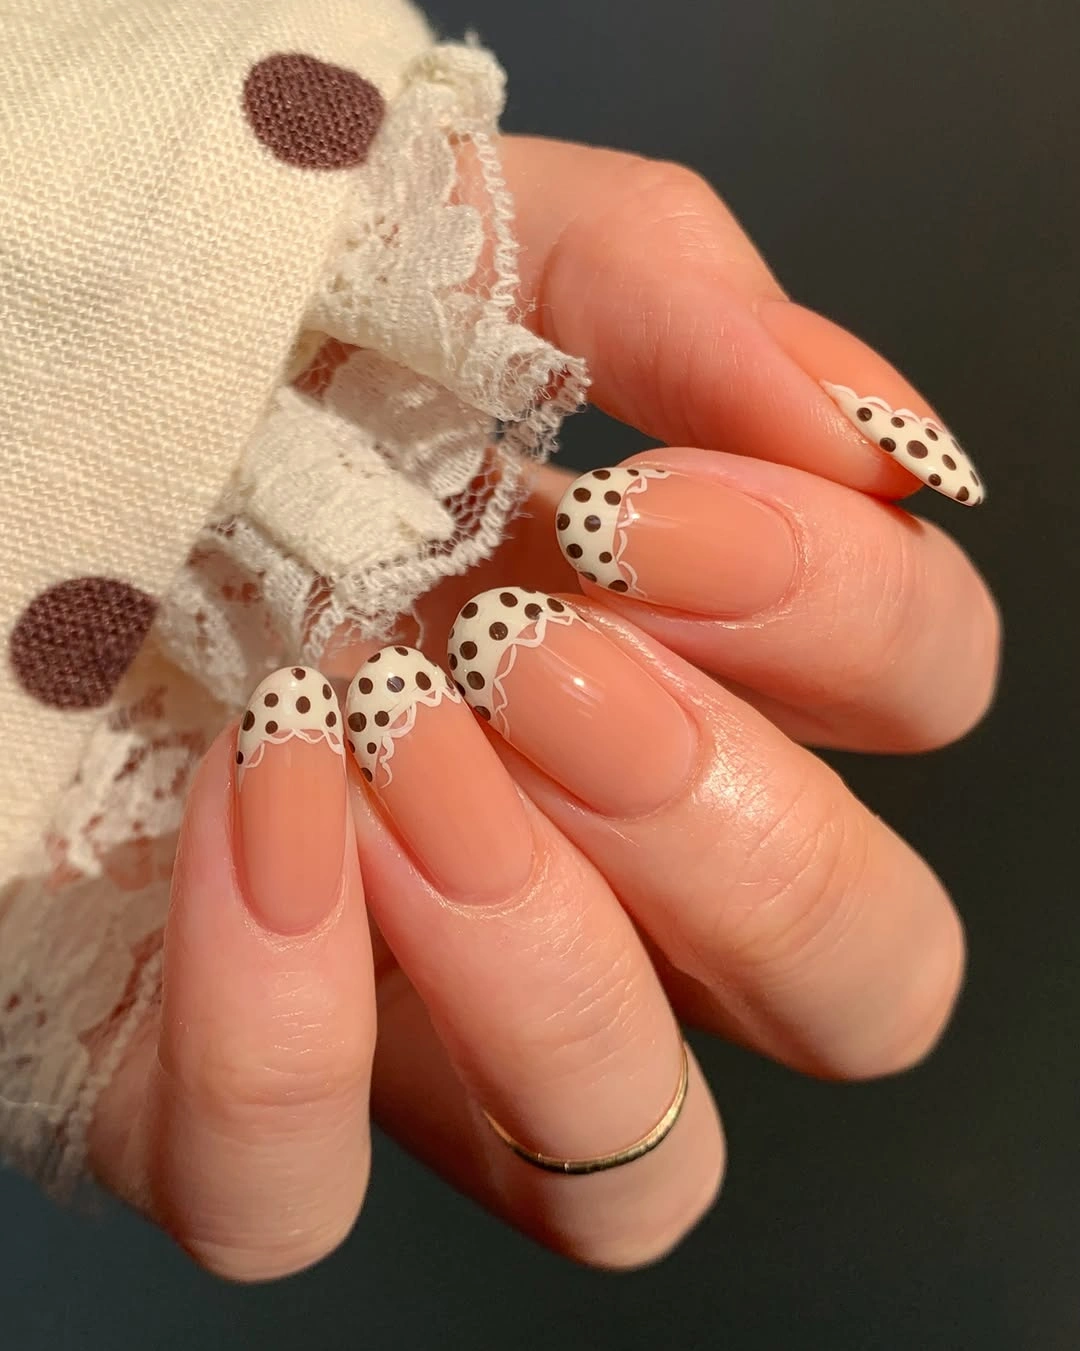
Edge placement is the useful strategy here. It confines the pattern to one area and makes the manicure feel less visually dense than a fully dotted base. A warmer beige or pale pink center could replace nude without changing the design logic, but the outline should remain the darkest element so the tip still looks deliberate rather than softly blurred.
Tip-focused designs can make grow-out appear less central because the detailed area is away from the base, although the visible result will change as nails lengthen. Choosing small dots rather than a solid brown block keeps the edge from looking too heavy. For a shorter shape, reduce both the width of the white band and the number of dots so the curve stays light.
Floral Accents Above Dotted French Edges
Long pale pink nails combine black-and-white dotted French tips with two pale dimensional-looking flowers, yet the flowers are concentrated on selected nails instead of covering the full set. That restraint lets both design ideas stay visible. The blush base and white tips create enough soft space for the raised accents to look intentional rather than crowded.
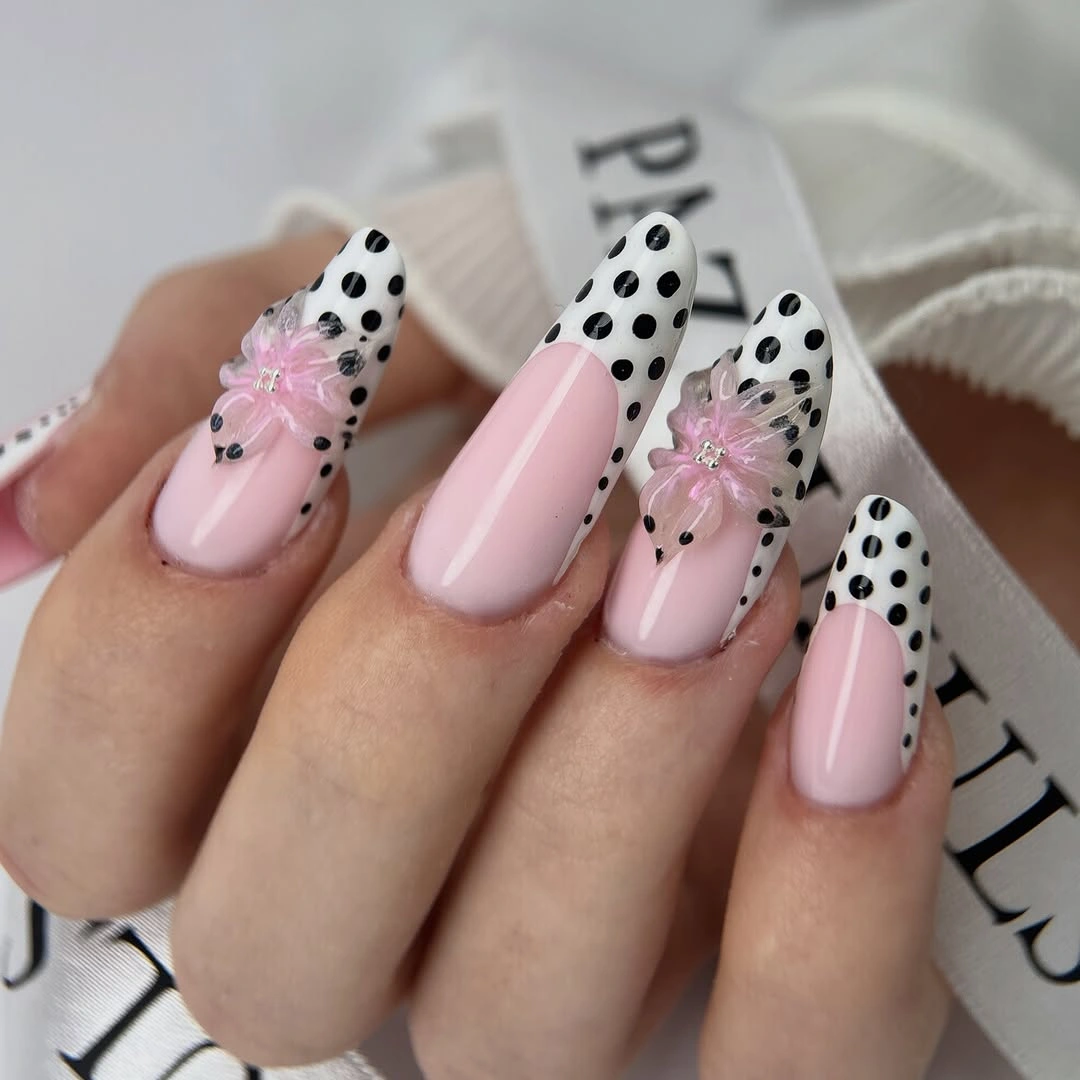
When adding a floral element to dots, placement matters more than adding more color. Keeping the flowers pale lets them relate to the white tips, while the black dots provide a crisp counterpoint. For a simpler version, use flat petal shapes instead of dimensional accents and reserve them for one nail per hand; the manicure will keep its decorative mood with less surface texture.
Long almond nails can support both a tip pattern and an accent form, but only when the middle remains largely clear. Covering the center with additional dots would make the flower disappear into the background. A glossy neutral base gives the elements separation, while a very opaque pink would make the white petals and dotted border feel less airy and more compressed.
Clean Red Dotted Tips on Nude
Medium nude almond nails carry narrow red tips filled with white dots, which introduces a strong color while leaving the nail bed neutral. The placement is what keeps the combination light: red lives at the edge rather than across every nail. White dots soften the saturated band and give the design a small, evenly paced pattern.
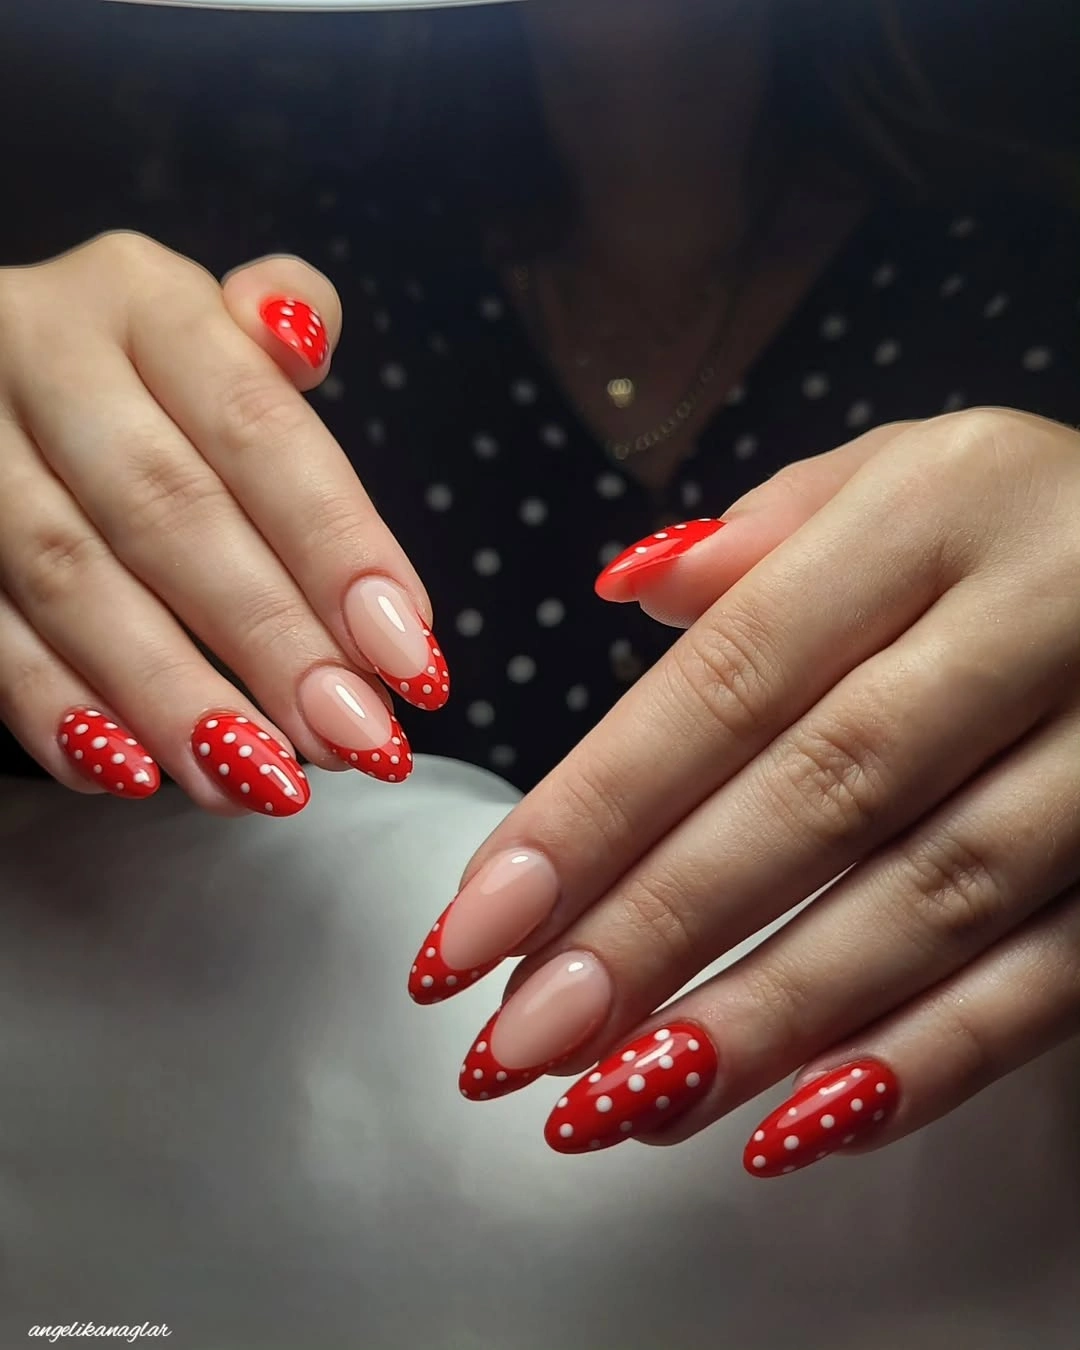
This is a useful choice for someone who likes bright color but does not want a full red manicure. A cherry, tomato, or deeper berry tip can change the mood while the nude center preserves the same open structure. The dots should remain small and separate, because larger marks would make the red band look thicker and visually shorten the available neutral space.
Medium length is practical for this design because there is enough tip to show the pattern without requiring a dramatic almond point. A shorter nail can use a curved micro-tip with just a few dots, while a longer nail could introduce one plain red accent. Both adaptations should keep the base clear so the red still reads as a precise edge decision.
Minimal Tip Dots on Short Nude Almonds
Short-to-medium nude almond nails place tiny white and black dots close to the tips, leaving most of the nail bed bare-looking and delicate. The pattern suggests the polka-dot idea without turning the compact shape into a busy print. The two dot colors create small contrast, but their limited placement keeps the overall result quiet and easy to read.
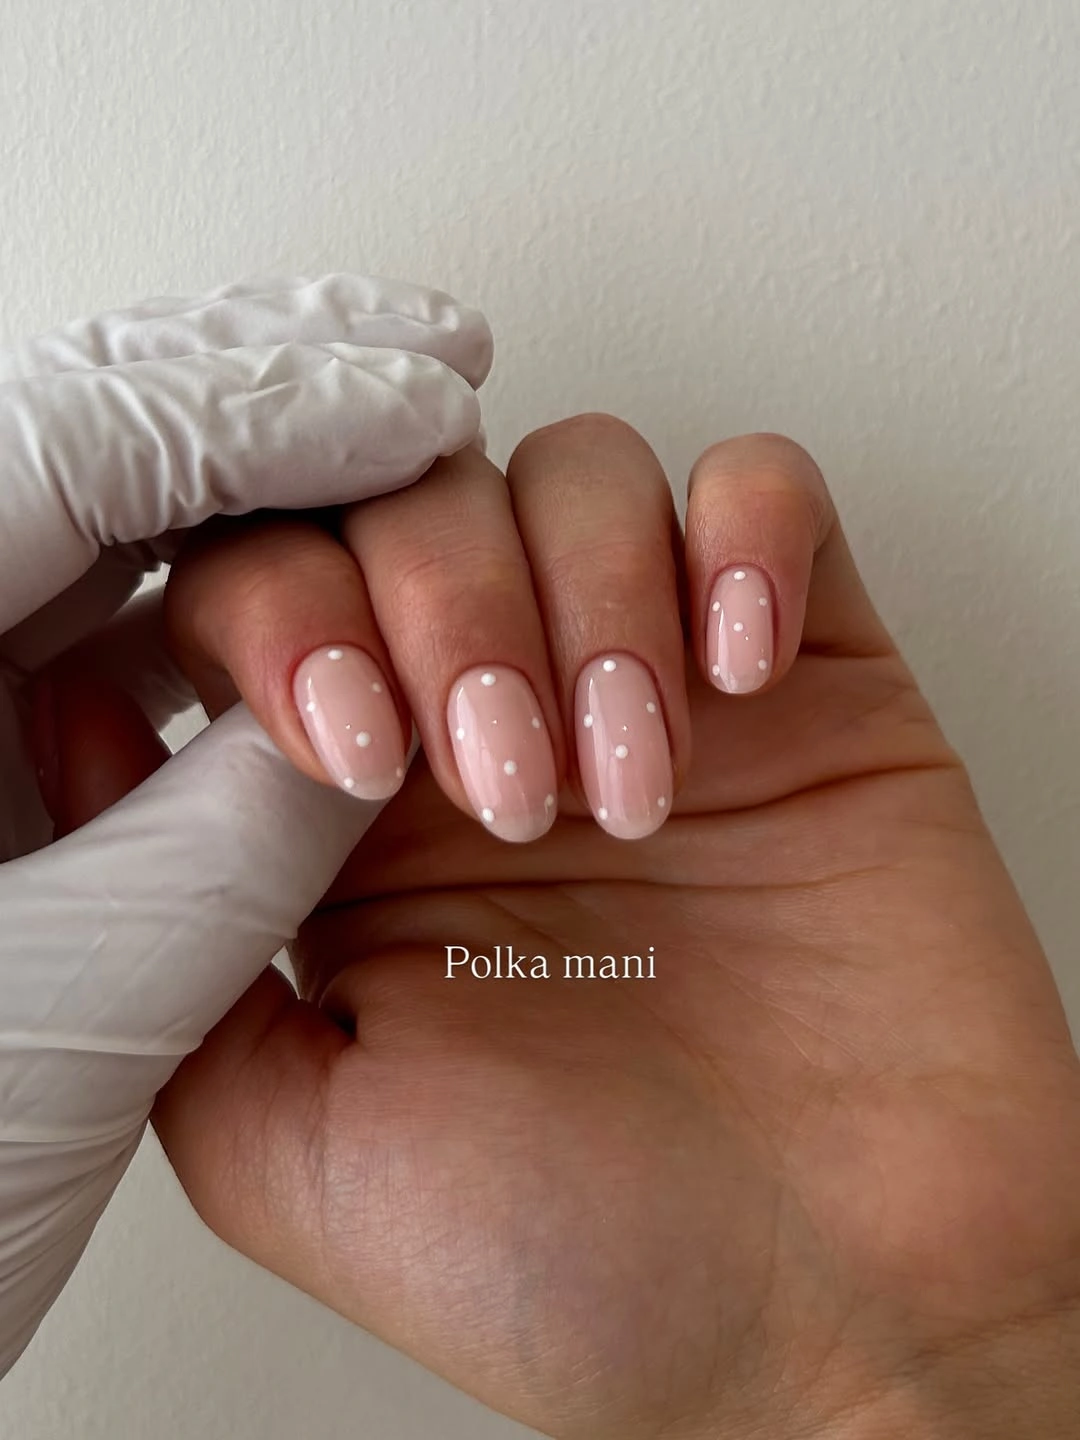
For short nails, a narrow band of detail is often more effective than a full field of dots. The open center makes the design feel spacious and lets the almond outline remain visible. If black feels too sharp, use cocoa brown with white dots; that substitute will preserve a soft contrast while making the tip treatment look less graphic against the nude base.
Small dots demand a little visual discipline. They look strongest when clustered loosely near the edge rather than spaced evenly from cuticle to tip, where they could appear accidental. Choosing only two or three nails for the denser placement is another way to maintain calm, especially if the manicure is meant to feel like an understated detail rather than a statement pattern.
White Petal Dots on Pale Pink
Long pale pink nails use small white petal-like accents and dots with wide spacing, so the glossy blush base remains visible between each ornament. The design has a floral suggestion without relying on dense flowers across every finger. White is soft enough against pink to feel luminous, while the gentle gray-toned shadows keep the tiny shapes legible and not overly sweet.
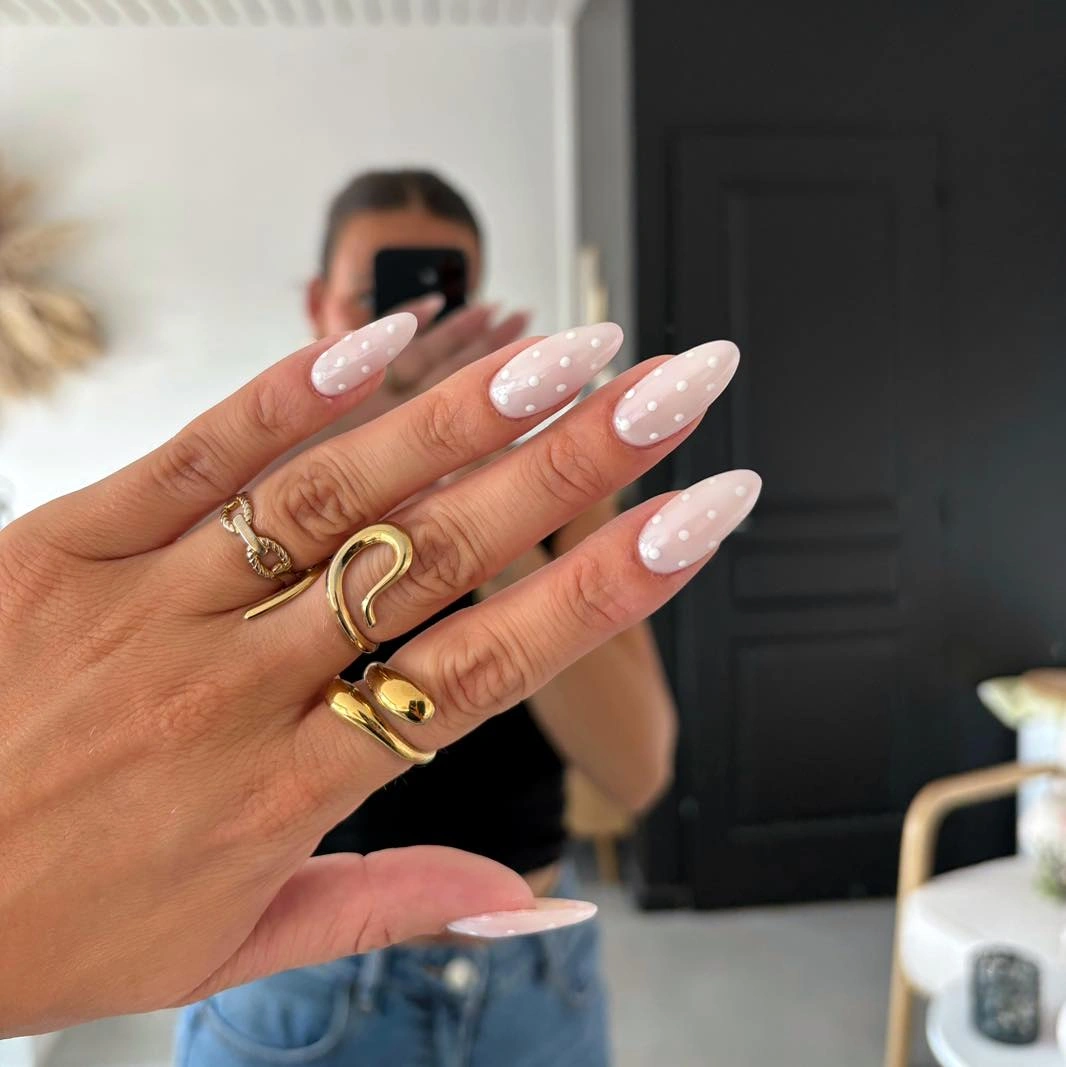
Wide spacing is the reason this manicure feels controlled. It lets each petal-like detail have a clear outline and preserves the reflective quality of the pink surface. For a shorter interpretation, retain one small white flower and a couple of dots on only one accent nail; repeating every detail on every finger would remove the airy quality that makes this arrangement appealing.
A pale pattern needs contrast somewhere, even if it is subtle. Here that contrast comes from the white shapes against blush, not from a dark outline or a strong accent color. Adding black dots would make the design more graphic, but it would also change the gentle balance; it is better to keep the palette limited and let negative space perform the organizing work.
Black Dots Along Crisp White Tips
Long pink almond nails place black dots on white tips, creating a crisp finish against the glossy blush base. The motif stays at the ends, which keeps the longer length from looking crowded and lets the white band frame each nail. Gold rings add warmth nearby, but the manicure itself relies on the clean relationship between pale pink, white, and black.
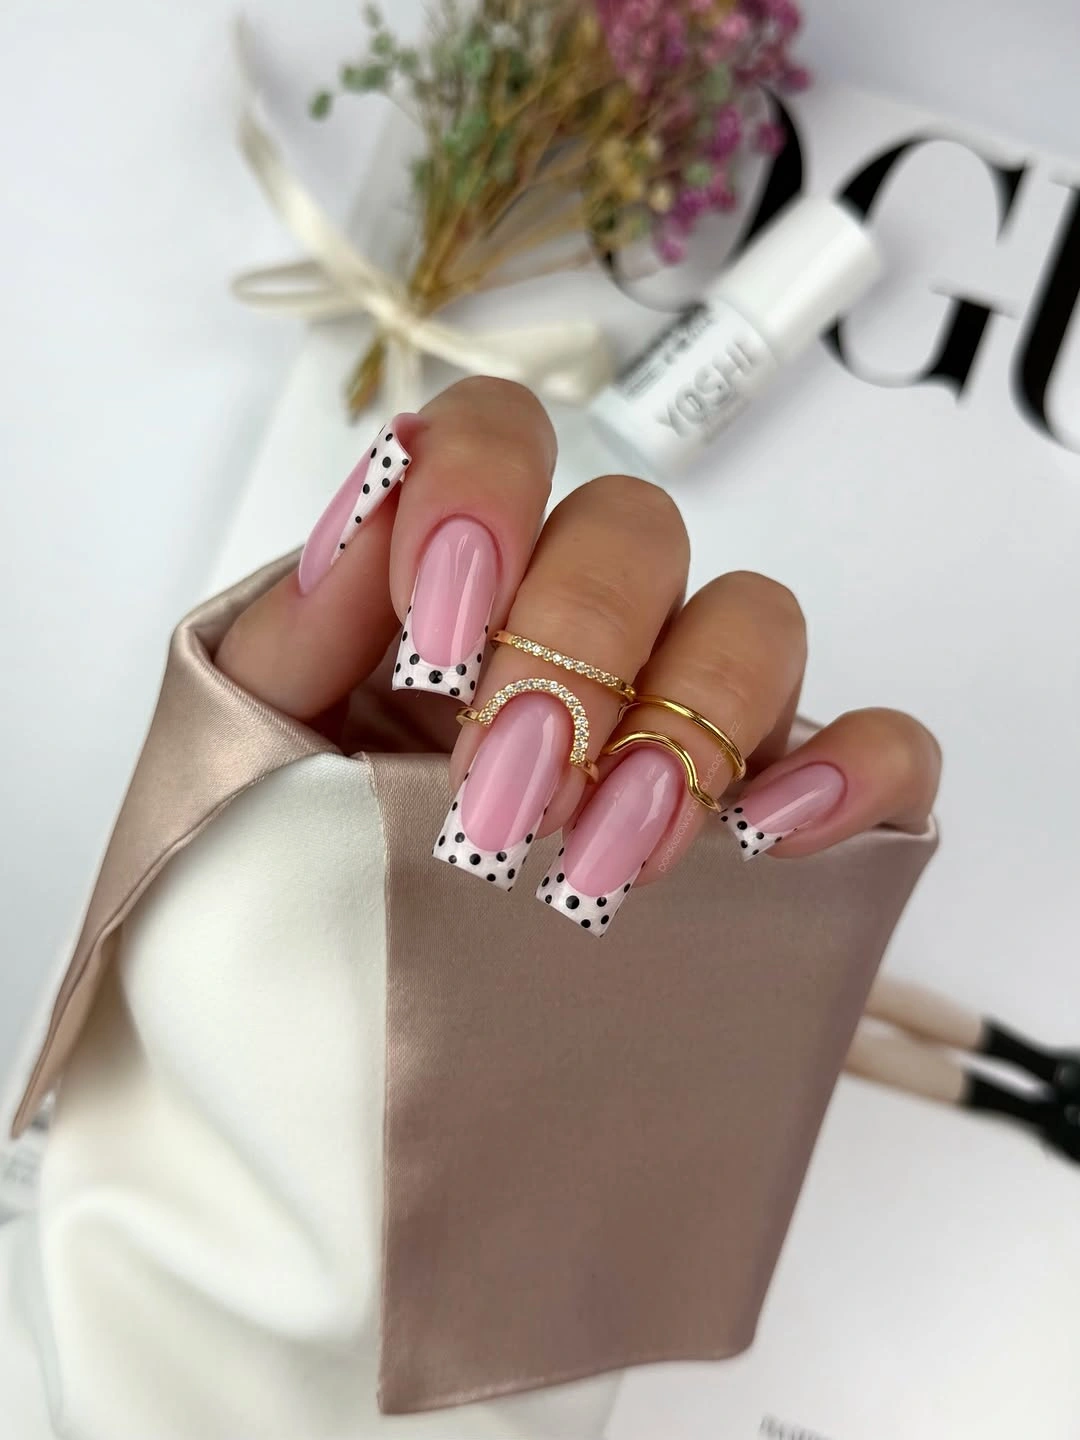
Black dots make the white French edge read more sharply than a brown or gray mark would. That contrast is effective when the dots are clustered at the tip and the center stays bare-looking. For a less intense version, use dark brown dots or reduce the number on each nail; the French shape will remain clear without the strongest possible black-and-white graphic effect.
The long almond line benefits from a tip motif because it follows the nail’s natural direction rather than cutting across the center. A wide white section could feel heavy at this length, so a slim curve with small dots is the better balance. Shorter nails can borrow the color trio with a micro-French edge and only a few dots placed near the middle of the curve.
Blue and Berry Dot Fields With Blush Space
Medium almond nails alternate pale blue dotted nails, dark berry dotted nails, and plain light pink nails, creating a clear repeating rhythm across several color fields. The unadorned blush nails are essential because they give the eye space between the patterned sections. White dots unite the blue and berry surfaces even though those colors carry very different visual weight.
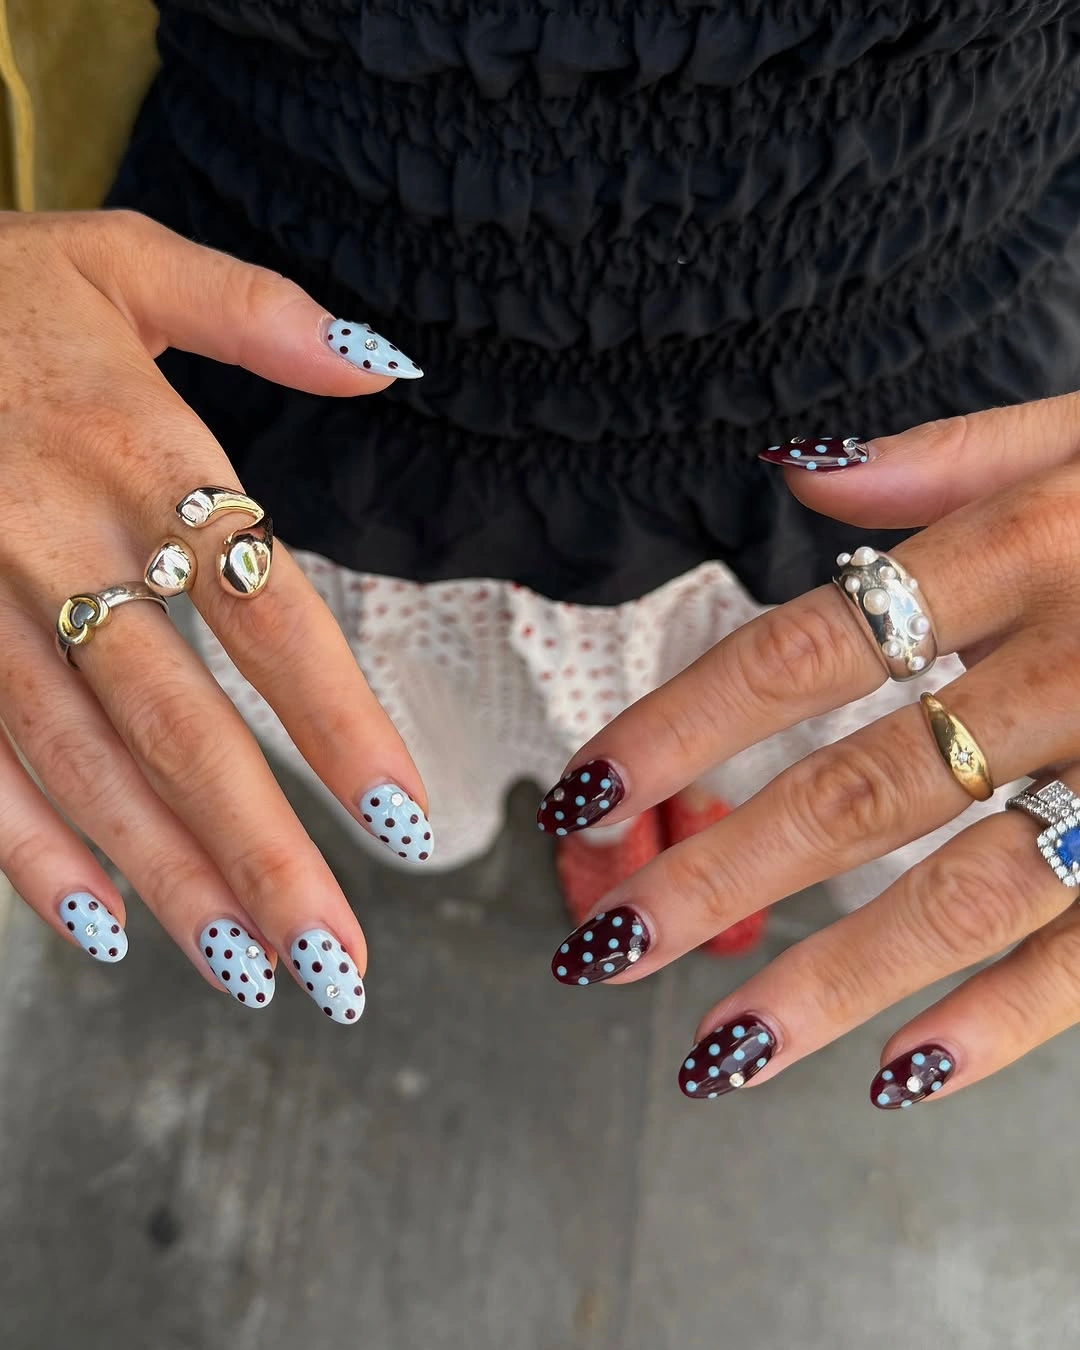
Alternating colors can look deliberate when one pattern rule stays constant. Here, the same white dot language appears on both the cool blue and deeper berry, while the pink nails provide a neutral pause. Someone who wants less contrast could swap berry for mauve; the result will still have variation, but the color jump between fields will feel softer and less dramatic.
The practical limitation is that several painted color fields already create strong activity, so extra stripes or gems would be unnecessary. Medium length gives each section enough room to read without making the design overly elaborate. Keeping the blush nails fully plain also makes the mixed palette easier to live with, since the solid spaces keep the pattern from feeling visually nonstop.
Butter Yellow Dots With Nude Accent Nails
Medium square nails mix buttery yellow dotted nails with nude accent nails, and small black dots serve as the one shared rule across both bases. The yellow feels sunny but softened rather than neon, while the nude areas keep the palette grounded. The squarer shape gives the tiny dots a neat, modern surface and prevents the bright color from appearing overly precious.
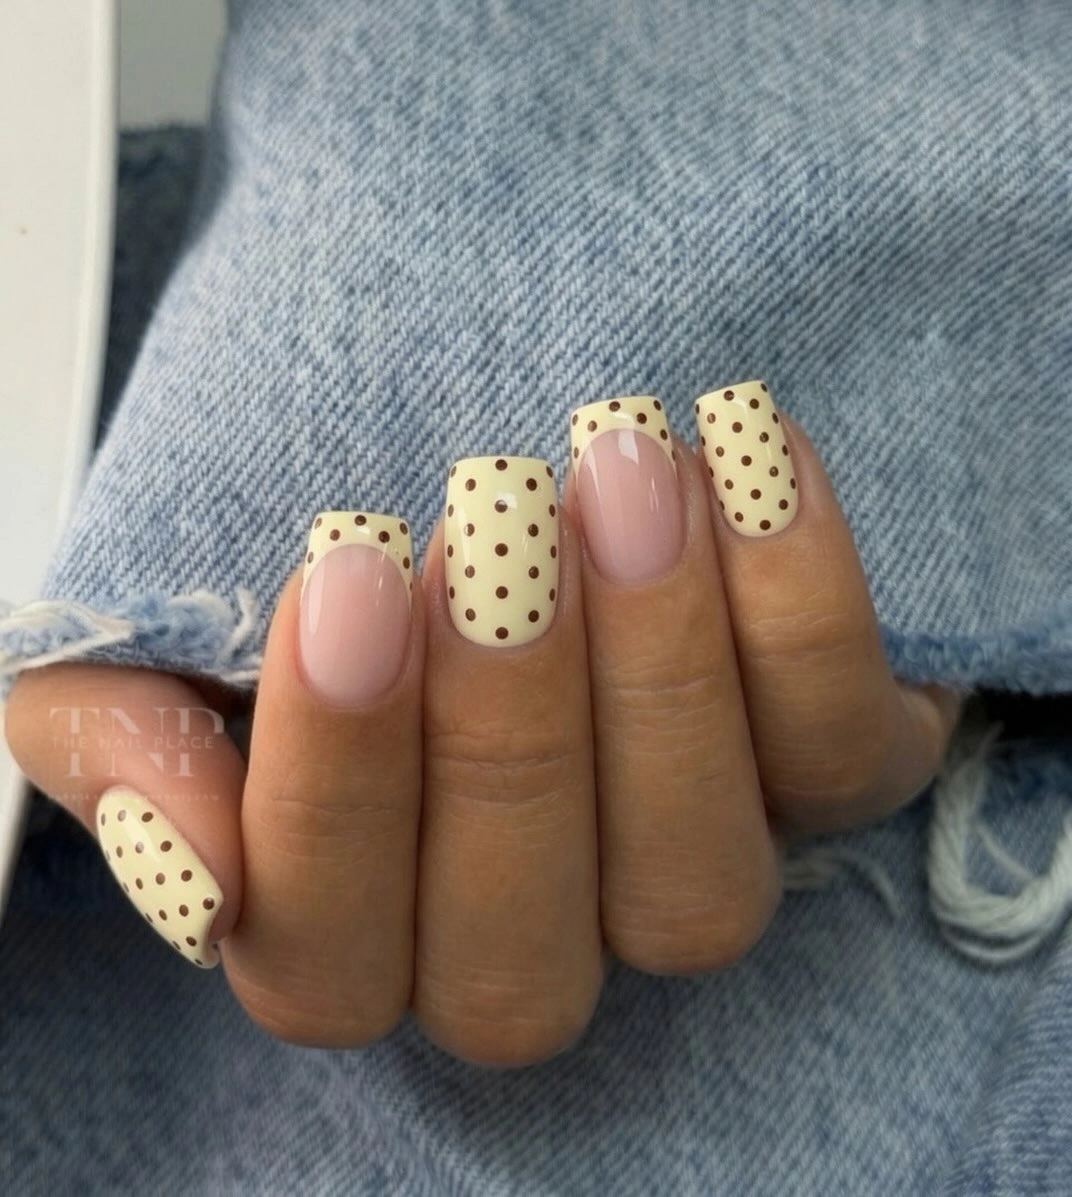
Using the same dot color on yellow and nude is a simple way to make a varied manicure feel coherent. If yellow is outside your usual palette, soft peach or pale green could take its place while keeping the black dots unchanged. The important part is leaving the accent nails mostly plain, so the cheerful color has room to feel like a focused choice rather than a blanket effect.
Square tips make patterned color look slightly more graphic, so the dots should remain small and round to soften that geometry. A large black spot would carry too much weight against buttery yellow and could overpower the quiet nude sections. For shorter nails, reduce the dot count first rather than removing the nude accents, because that open neutral space is what keeps the color scheme balanced.
Layered Black Outline on Dotted French Tips
Long blush nails use white-and-black dotted French tips with a slender dark outline, and the open pink center balances the detailed edges. The outline is especially useful because it keeps the dotted band readable from a distance. Although the motif is fairly graphic, the blush negative space makes the overall set look cleaner than a fully patterned manicure would.
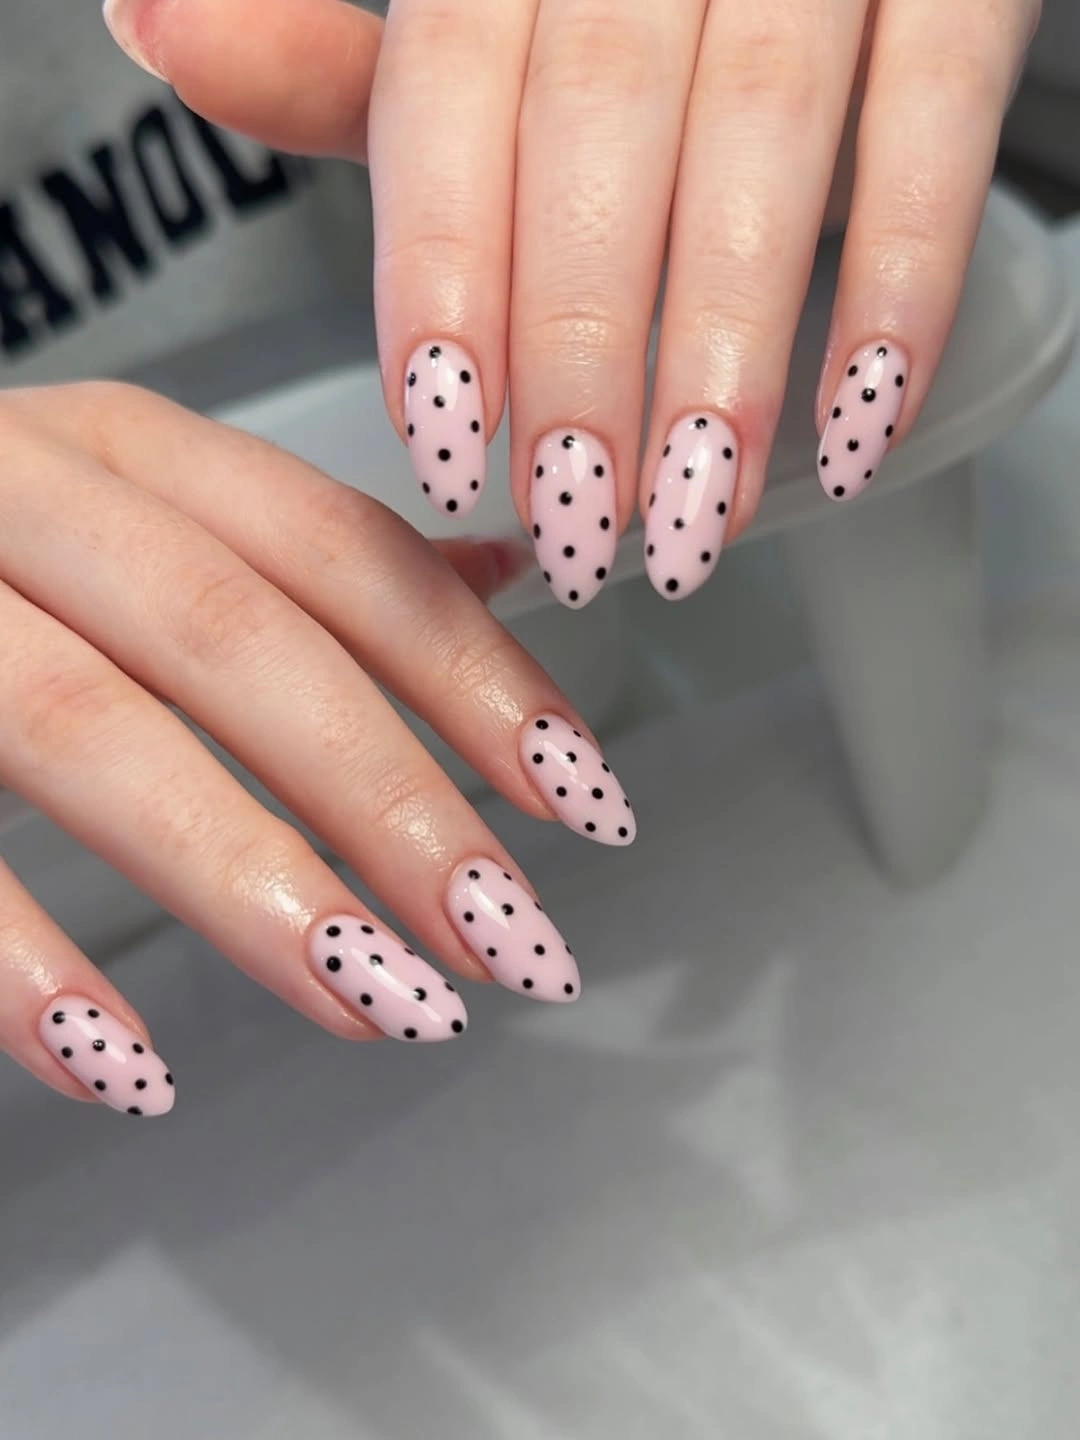
A narrow outline can organize a dotted tip without adding a new color. It gives the white edge structure, then lets the dots feel placed rather than scattered. For a softer variation, switch black to brown or charcoal while keeping the blush center; for a bolder variation, leave the outline dark but make just one accent tip a different pale shade instead of changing every nail.
Because the long almond shape already has a strong directional line, the tip treatment should remain slim. A thick border would occupy too much of the nail and compete with the open center that makes the dots look light. The design can translate to medium length by reducing the number of dots in the curve, preserving the layered effect without compressing it near the edge.
Scattered Black Dots Softened by White Spots
Long pale pink nails carry scattered black dots with a few white accent spots, and the uneven spacing makes the all-over motif feel more refined than a strict grid. The white marks soften the dark contrast without distracting from the pale base. The almond shape leaves enough surface for the pattern to breathe, even though several nails carry dots from side to side.
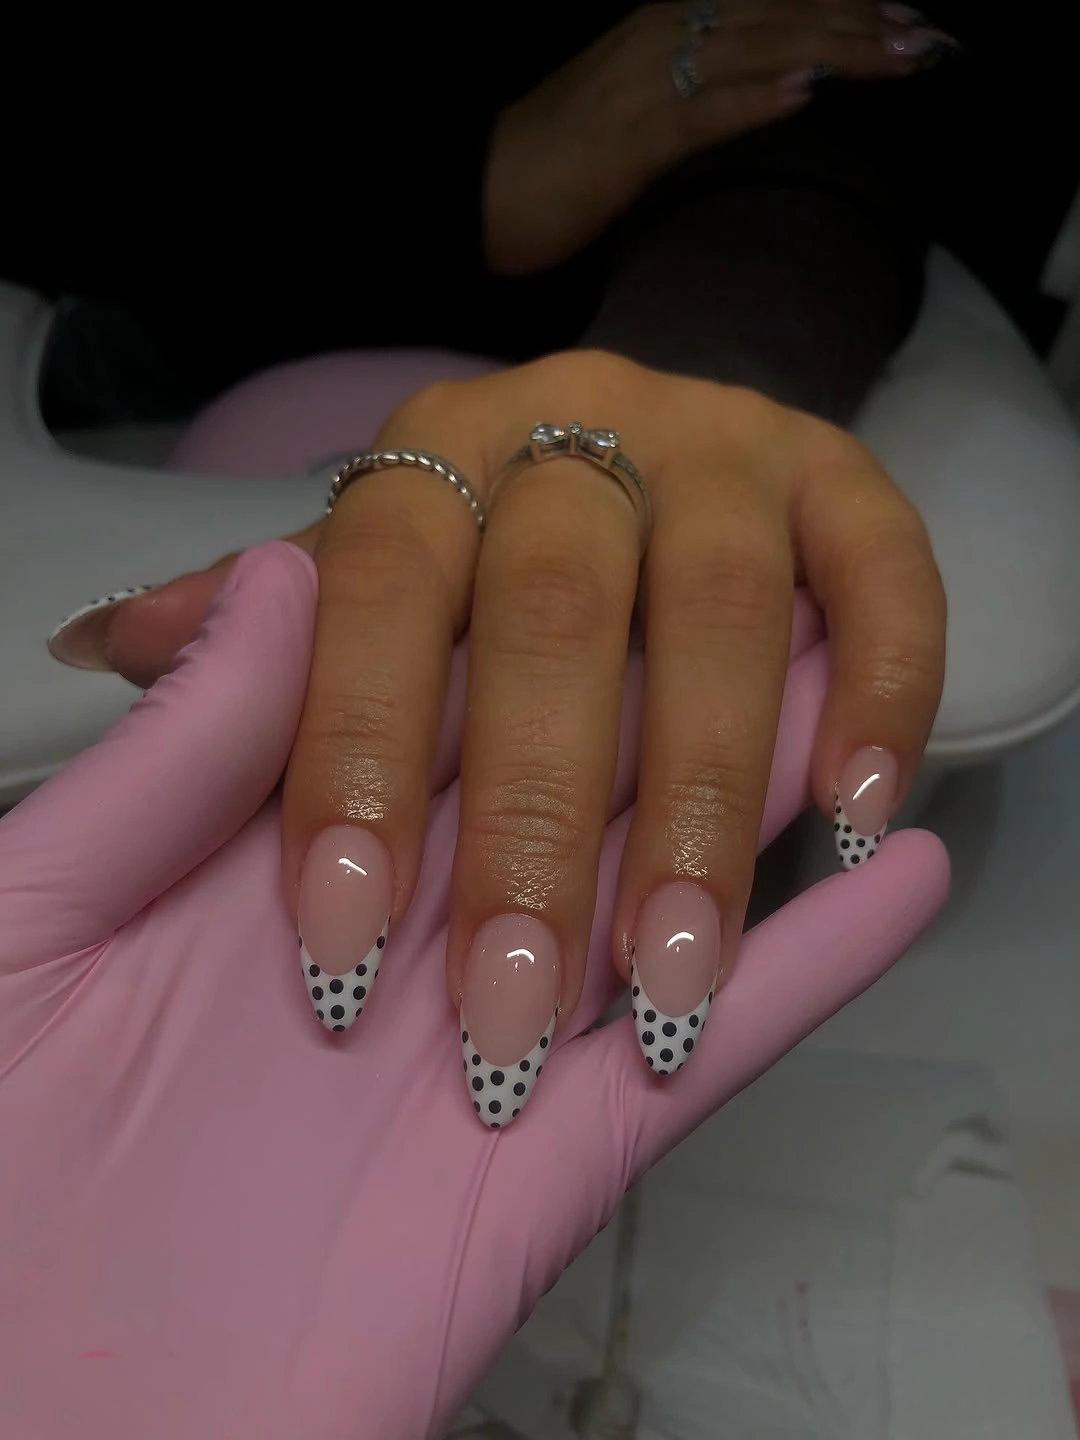
Irregular spacing is the key to this version of the trend. The dots look intentional because they do not all sit at the same distance or form perfect rows, while the white spots act as quiet pauses among the black. If you prefer less pattern, keep this placement on only two nails and make the others sheer pink; the same playful language will become much more subtle.
All-over dots need careful scale on long nails. Using very large black circles would make the surface feel heavy, and perfectly tiny uniform dots could look too rigid. Mixing mostly small marks with a few slightly larger ones creates a more natural visual rhythm. A neutral wardrobe-friendly option is to swap black for deep brown, which retains contrast while softening the overall impression.
Rounded Brown Dotted Tips for Short Nails
Short nude nails use deep brown rounded French tips covered with fine pale dots, adapting the polka-dot idea to a compact, wearable shape. The nude base reduces the visual weight of the dark tip area, while the curved edge follows the natural roundness of the nail. Tiny pale dots keep the brown from looking like a solid block at the ends.
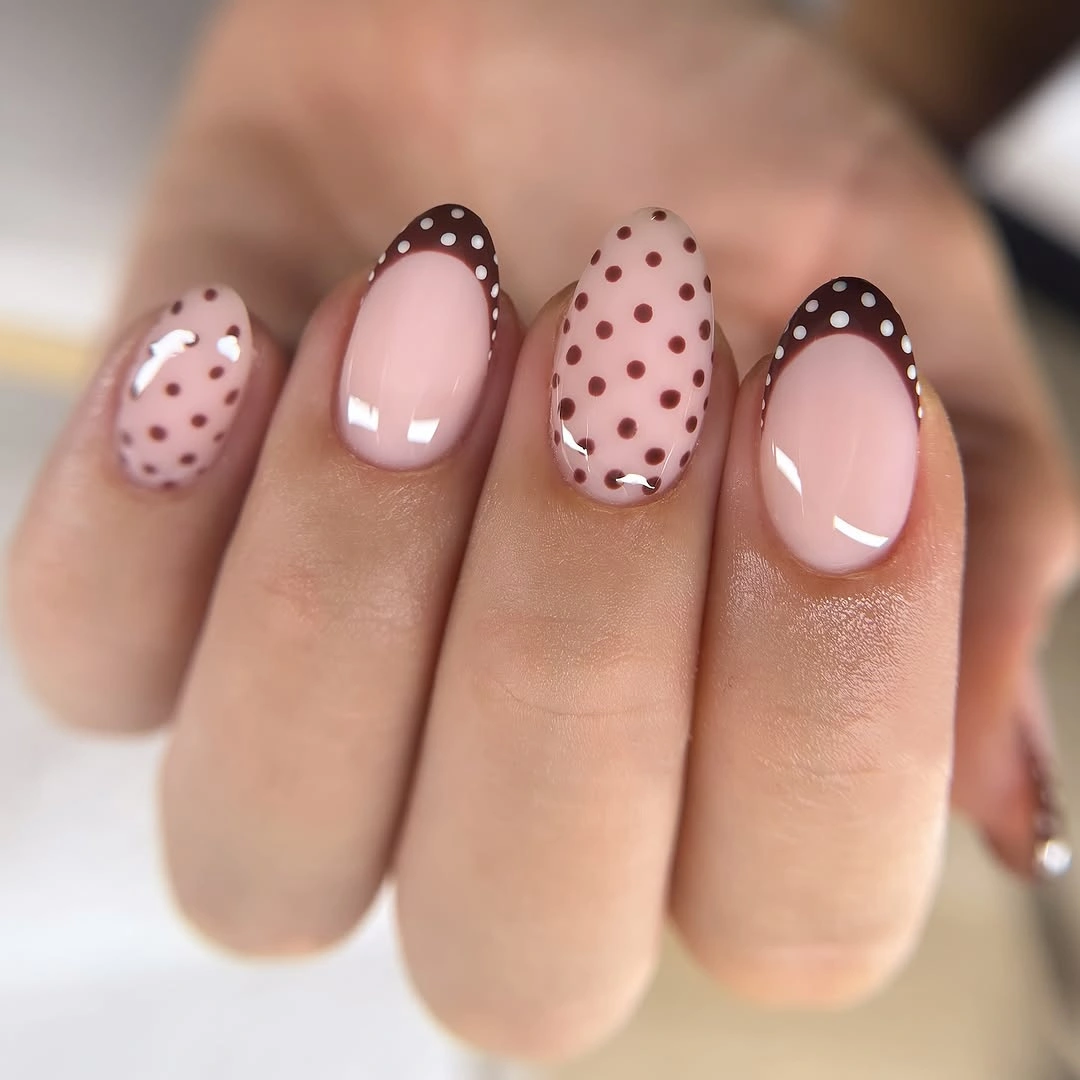
Brown is a helpful alternative to black for short tips because it gives definition without producing the sharpest possible contrast. A warmer cocoa, espresso, or muted burgundy edge would change the mood while keeping the same structure. The dot pattern should remain fine and limited, since large pale circles could quickly make the small tip look wider and more visually dominant.
The rounded French shape is doing practical work here. It keeps the dark color concentrated at the edge and lets the nail bed stay clear, which supports a lighter-looking grow-out area. If the tip is made straighter or thicker, the compact nail will feel more graphic and less delicate. Maintaining that curved narrow band is the simplest way to preserve the manicure’s balance.
Pointed Dotted French Tips on Nude Almonds
Long nude tapered almond nails use a precise white edge with tightly spaced black dots, making the pointed French tip look graphic while the center remains sheer. The contrast is clean because the black marks are confined to the white border. The long shape emphasizes the directional point, and the open middle keeps the detailed tips from overpowering that outline.
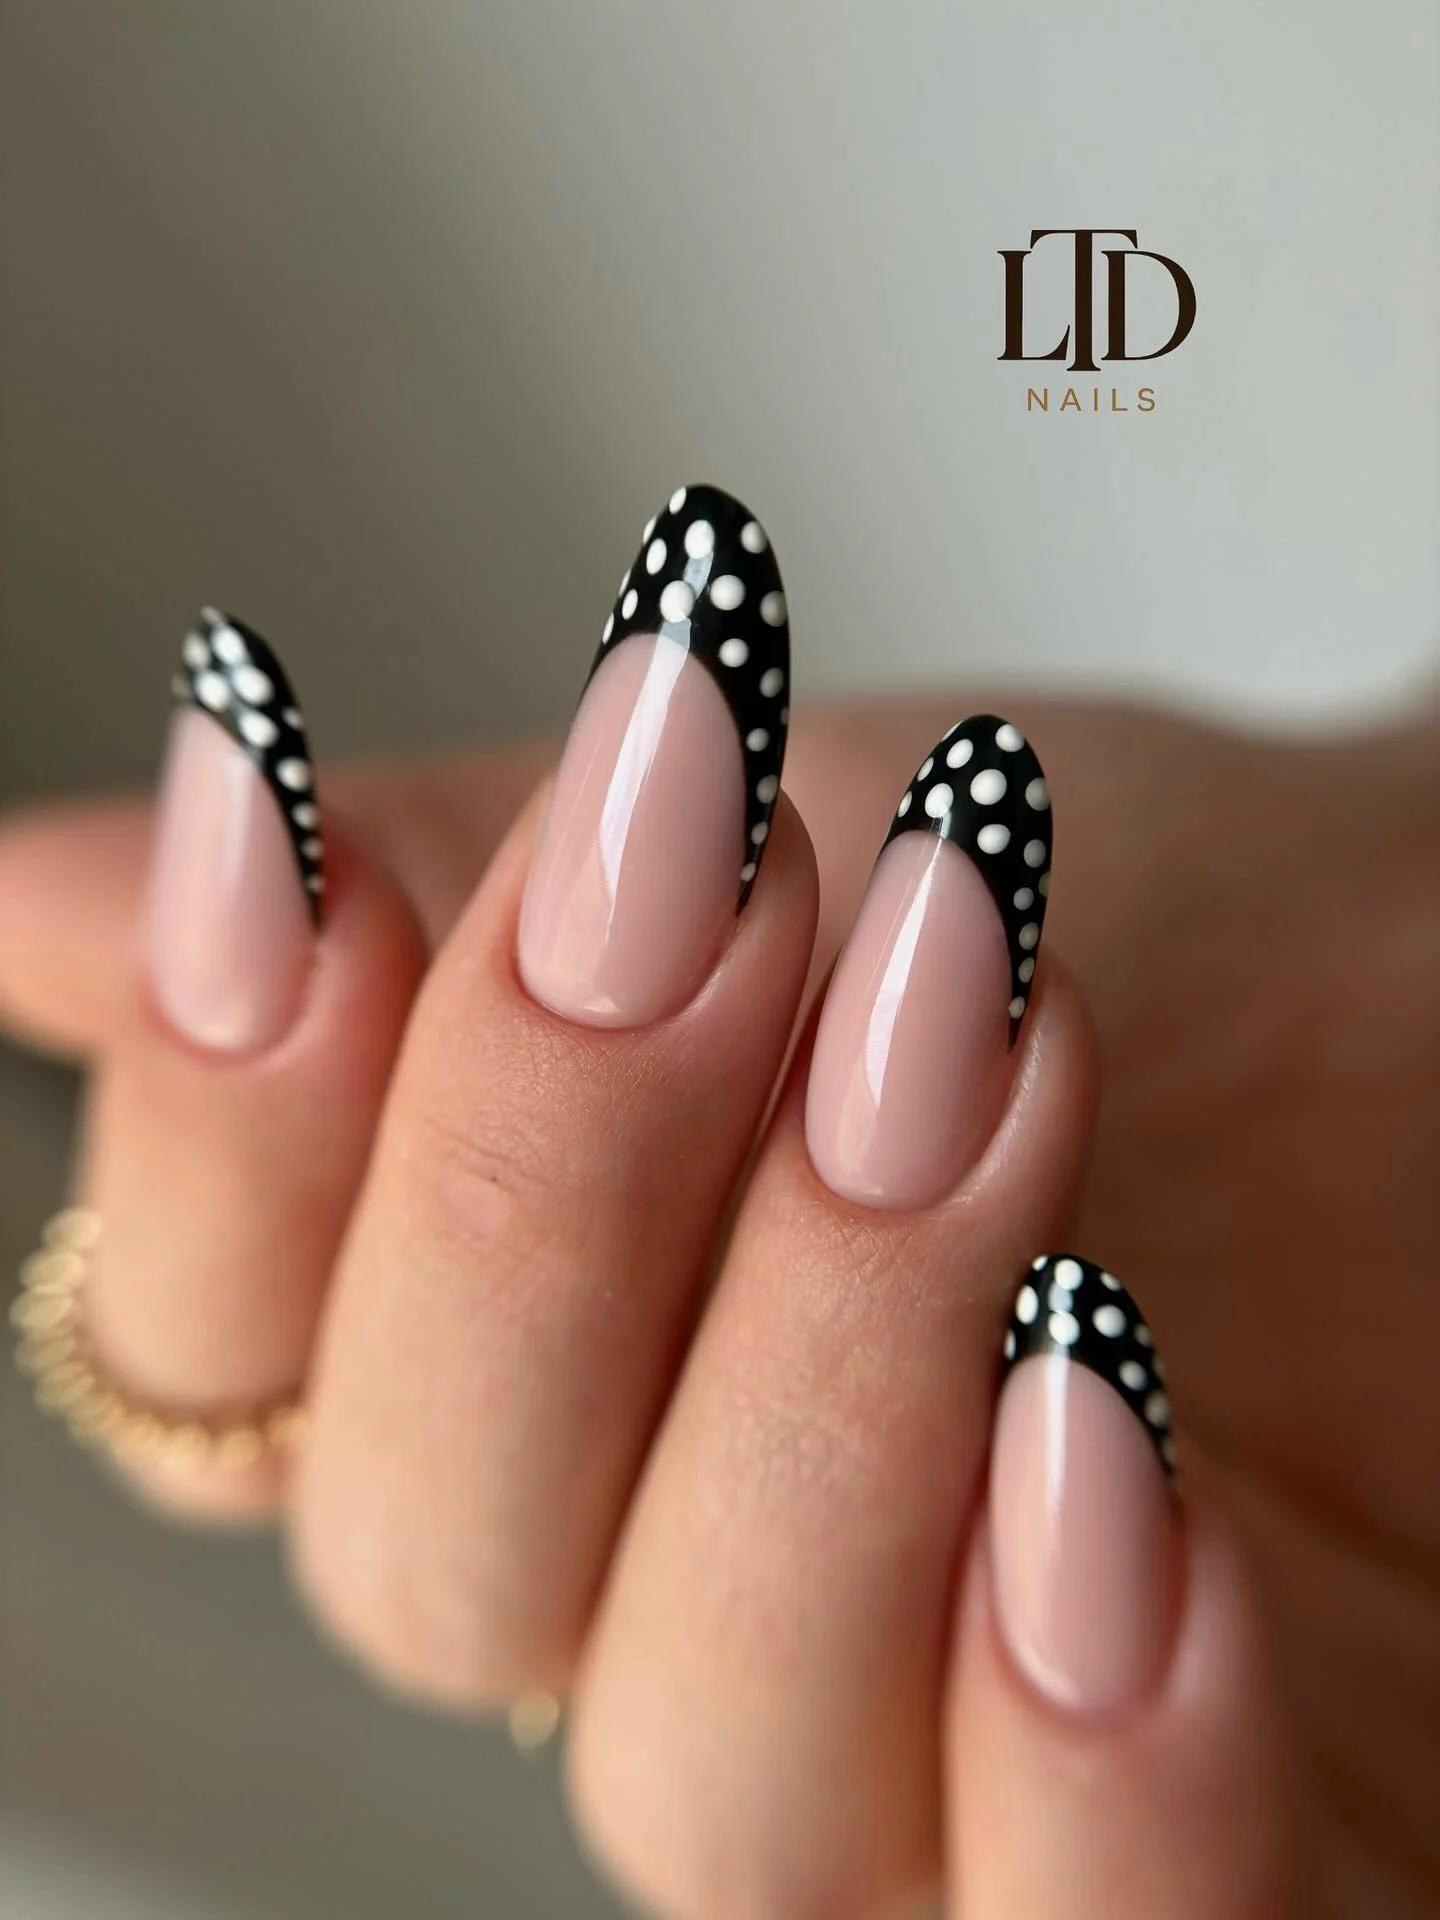
A pointed French tip is naturally more dramatic than a rounded curve, so the dots work best when they stay small and concentrated. For an everyday version, shorten the point and use a softer almond curve while preserving the white-and-black placement. That adjustment changes the intensity of the shape without losing the crisp negative space that makes the pattern feel polished.
The central nude area is essential with a graphic tip like this. Filling it with more dots or an accent stripe would compete with the sharp edge and make the long nail look overdesigned. A thin black outline can be added if the white tip needs more definition, but the border should remain fine enough to support the point instead of turning it into a heavy dark triangle.
Fine Black Borders Around White Dot Tips
Long sheer blush almond nails use white French edges bordered and filled with small black polka dots, while the transparent-looking center keeps the manicure light. The fine black outline gives the white band definition and makes the dot placement appear deliberate. Because the strongest contrast stays at the tips, the almond silhouette remains the main line rather than becoming a background for pattern.
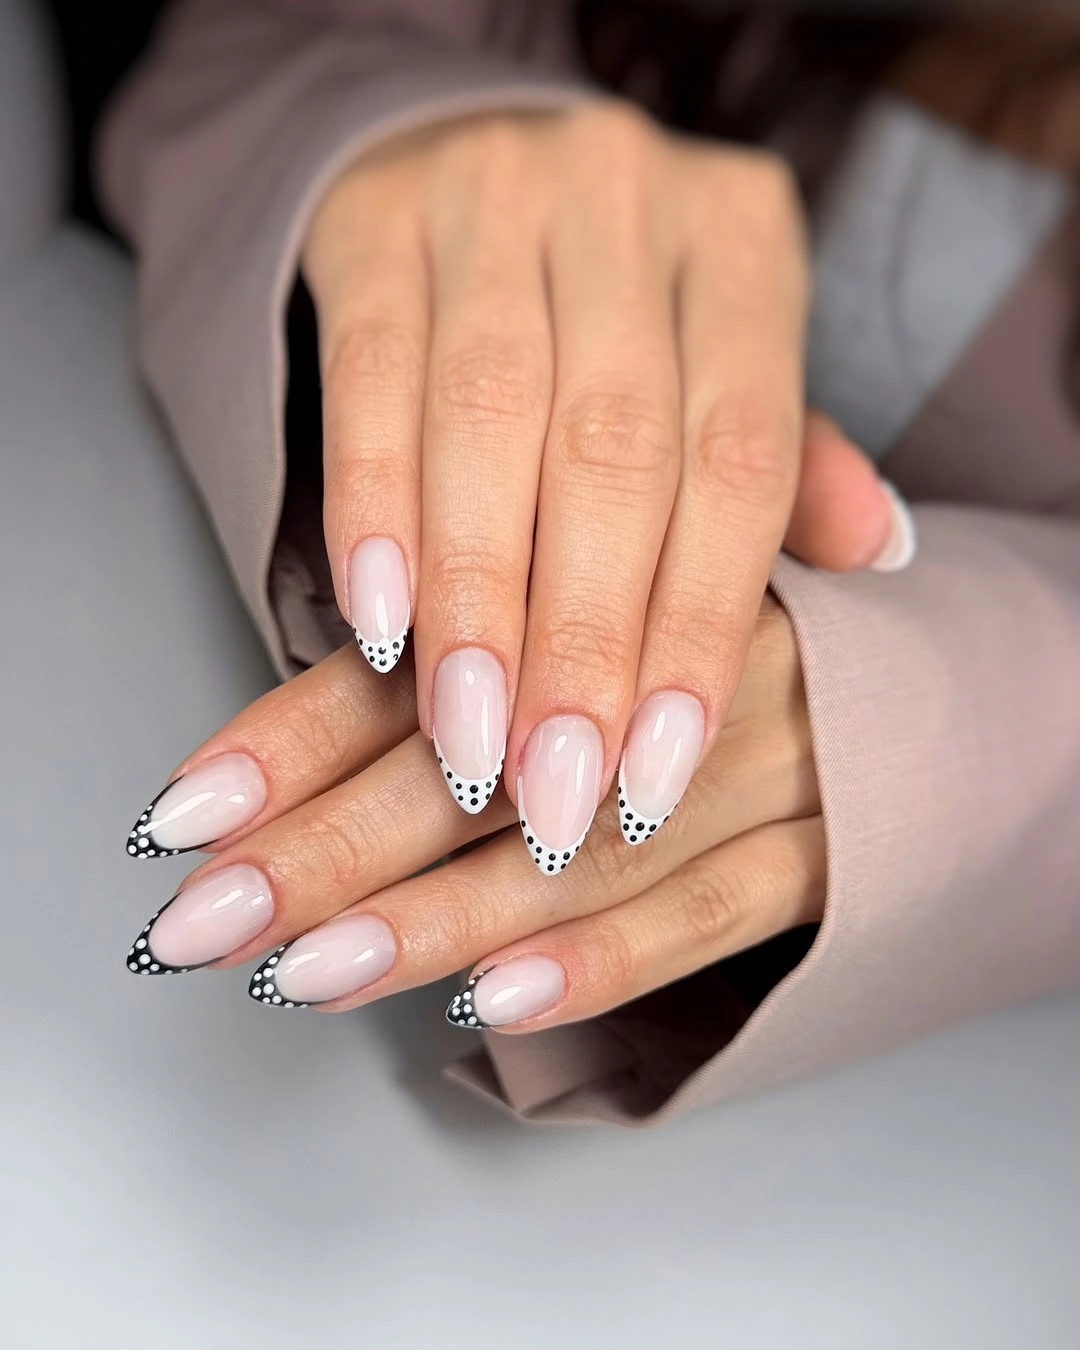
There is a clear balance between the thin dark border and the white dotted field. The outline creates structure, then the dots add movement without needing another color. A quieter adaptation would use shorter nails with a slimmer French curve and fewer marks, while a bolder version could keep the long length but add one plain black accent nail instead of increasing the dot density.
The final visual consequence is a manicure that feels detailed at the edge and calm through the center. That division is especially useful on longer tips, where full coverage would make the length feel more dramatic than necessary. Keeping the black line narrow and the dots small protects the airy quality; widening either element would shift the same palette toward a much heavier graphic statement.