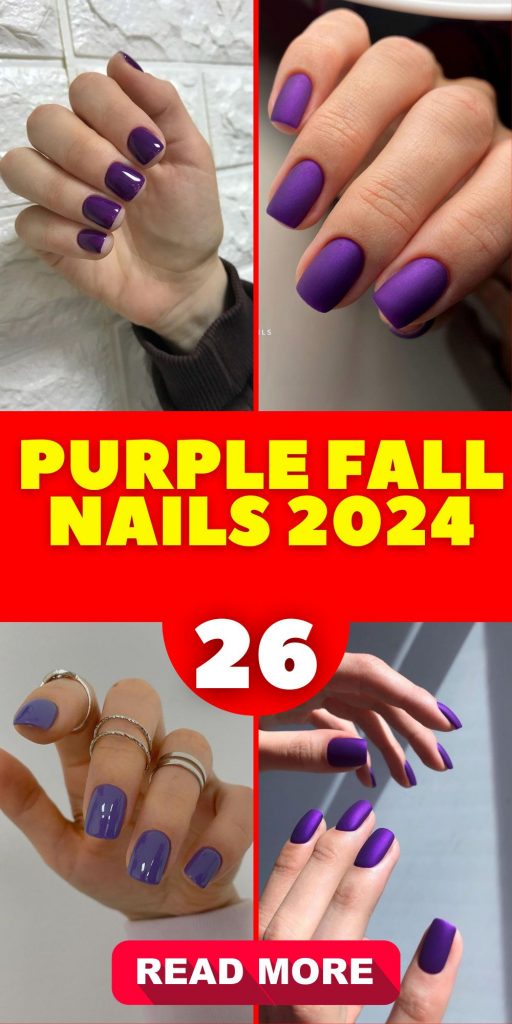
Purple Fall Nails 2024 26 Ideas: The Hottest Trends and Designs
Purple Fall Nails 2024 are set to be the must-have look this season, combining the elegance of purple hues with innovative designs that capture the essence of autumn. Whether you’re a fan of dark shades or prefer something light, there’s a purple manicure out there that will fit your style perfectly. This article will dive into various nail design ideas, exploring everything from acrylic applications to matte finishes, and offering practical advice on how to achieve these looks at home.
Deep Plum Elegance
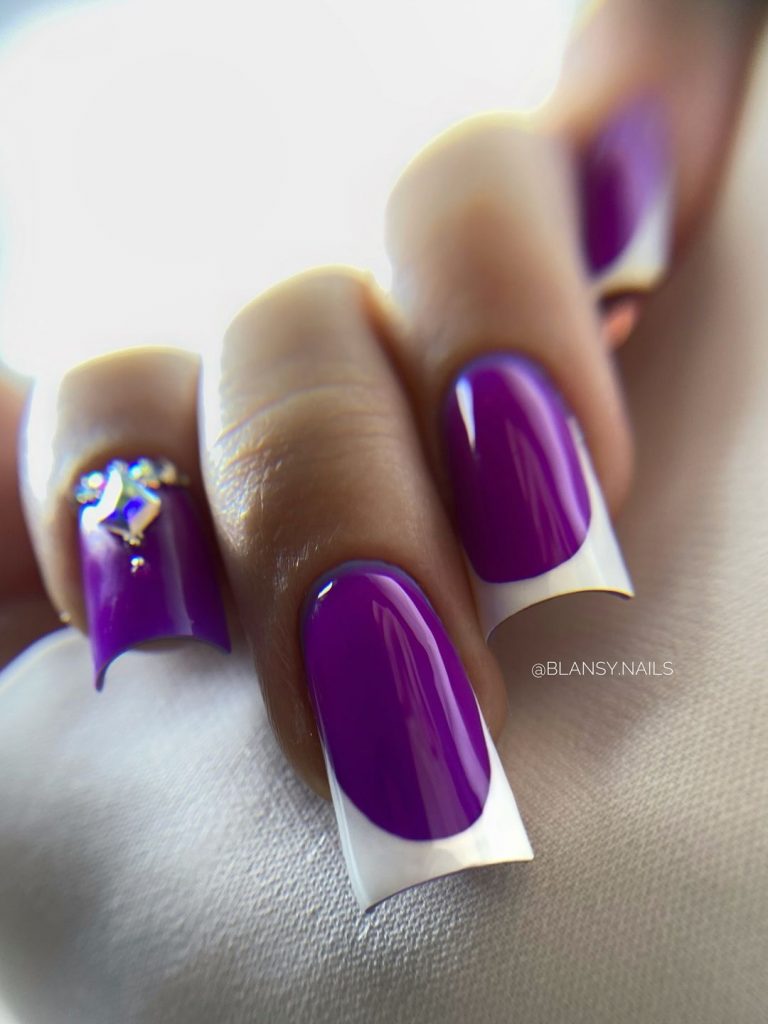
The first nail design showcases a rich, deep plum color that screams sophistication and elegance. The nails are perfectly shaped into a classic square with a slight curve at the tips, enhancing the overall refined look. The standout feature is the accent nail adorned with a delicate gold charm, adding a touch of luxury and drawing attention without overpowering the design.
Consumables:
- Plum nail polish (e.g., OPI “Lincoln Park After Dark”)
- Gold nail charms (e.g., Swarovski Crystal Charms)
- Base coat (e.g., Essie First Base)
- Top coat (e.g., Seche Vite Dry Fast Top Coat)
Recommendations:
- Choose a high-quality plum polish for maximum color payoff.
- Ensure the gold charms are secure but removable without damaging the nail.
DIY Instructions:
- Start with a base coat to protect your nails.
- Apply two coats of plum nail polish, allowing each layer to dry thoroughly.
- Carefully place the gold charm on the accent nail using a small amount of nail glue.
- Finish with a top coat to seal in the design and add shine.
Lavender Waves with Nude Accents
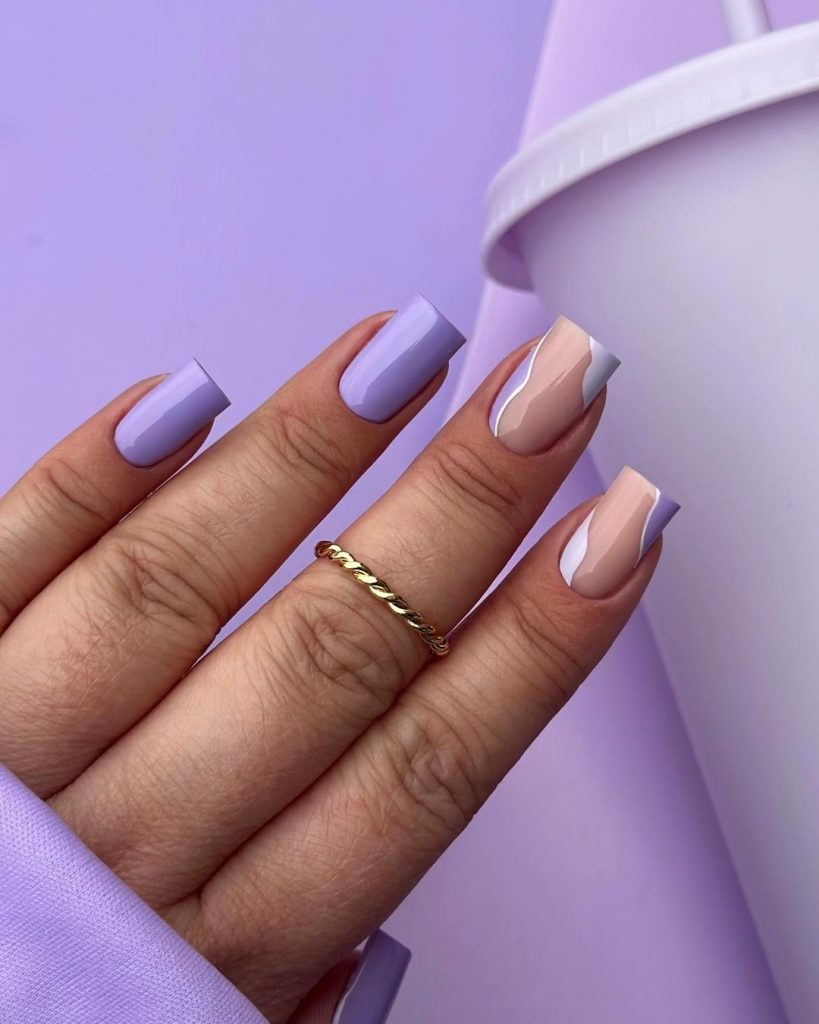
This manicure features a playful yet sophisticated mix of lavender and nude shades, creating a chic contrast. The nails are shaped into a medium square, providing a balanced canvas for the colors to pop. The design includes wavy lines that add a dynamic element, making it perfect for those who love a modern, trendy look.
Consumables:
- Lavender nail polish (e.g., Essie “Lilacism”)
- Nude nail polish (e.g., OPI “Samoan Sand”)
- Nail art brush (e.g., Winstonia Fine Line Brush)
- Base coat (e.g., Orly Bonder)
- Top coat (e.g., Seche Vite Dry Fast Top Coat)
Recommendations:
- Use a fine nail art brush to achieve precise, clean lines.
- Opt for a nude polish that complements your skin tone for the best contrast.
DIY Instructions:
- Begin with a base coat to create a smooth foundation.
- Apply two coats of lavender polish on all nails except the accent nail.
- On the accent nail, paint a nude base and let it dry completely.
- Use a nail art brush to create wavy lines with the lavender polish over the nude base.
- Seal the design with a top coat for a glossy finish.
Bold Abstract Art
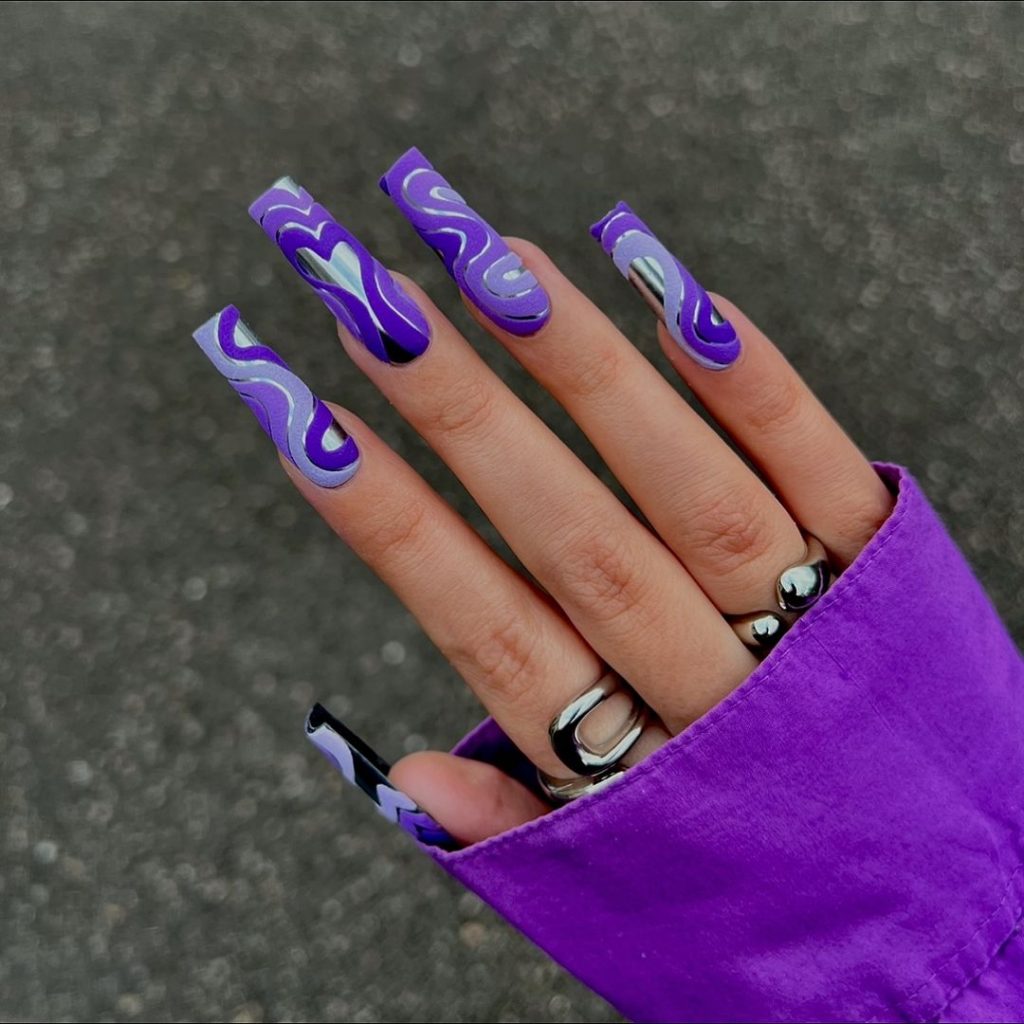
This design features bold, abstract swirls in various shades of purple, creating a captivating and artistic look. The nails are long and squared, providing ample space for the intricate patterns. This style is perfect for those who want to make a statement with their nails.
Consumables:
- Dark purple nail polish (e.g., Zoya “Savita”)
- Light purple nail polish (e.g., OPI “Do You Lilac It?”)
- Black nail polish (e.g., Essie “Licorice”)
- White nail polish (e.g., Sally Hansen “White On”)
- Nail art brushes (e.g., Beetles Nail Art Liner Brushes)
- Base coat (e.g., Orly Bonder)
- Top coat (e.g., Seche Vite Dry Fast Top Coat)
Recommendations:
- Ensure each color layer dries completely before applying the next to prevent smudging.
- Use thin brushes for detailed work to achieve clean, sharp lines.
DIY Instructions:
- Apply a base coat to all nails.
- Paint each nail with a base color of your choice (dark purple recommended).
- Use the nail art brushes to create abstract swirls with light purple, black, and white polishes.
- Let each color dry before adding the next to maintain clarity in the design.
- Finish with a top coat to protect your artwork.
Soft Lavender with Glitter Accents
This design features a soft lavender base with delicate glitter accents, creating a subtle yet enchanting look. The nails are shaped into a feminine almond shape, enhancing the overall elegance of the design. This style is perfect for those who prefer a more understated look with a hint of sparkle.
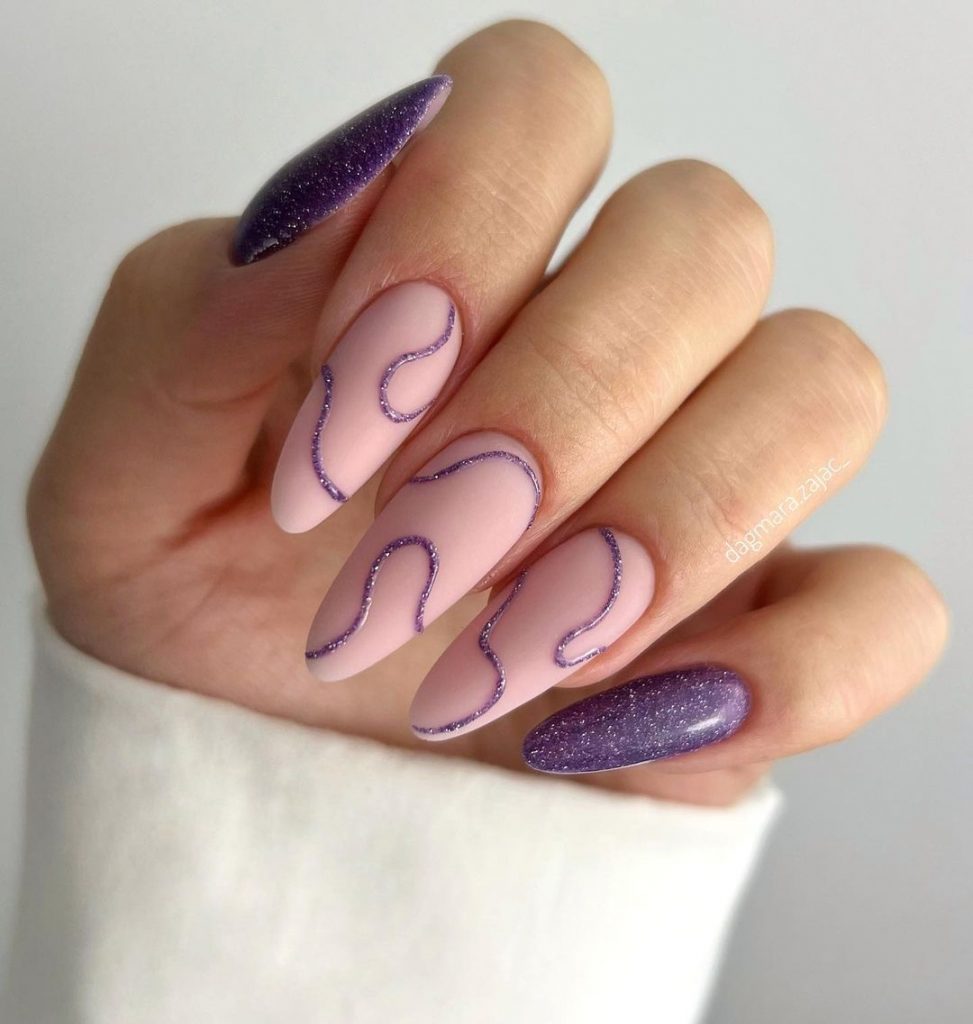
Consumables:
- Soft lavender nail polish (e.g., Essie “Go Ginza”)
- Purple glitter polish (e.g., China Glaze “Fairy Dust”)
- Base coat (e.g., Sally Hansen Double Duty)
- Top coat (e.g., Seche Vite Dry Fast Top Coat)
Recommendations:
- Choose a fine glitter polish for a more sophisticated sparkle.
- Apply the glitter polish sparingly to keep the design delicate.
DIY Instructions:
- Start with a base coat to protect your nails.
- Apply two coats of soft lavender polish, allowing each coat to dry thoroughly.
- Lightly brush the glitter polish on the tips of the nails for a gradient effect.
- Finish with a top coat to seal in the design and add shine.
Marbleized Purple Perfection
This design showcases a stunning marbleized effect in various shades of purple, creating a unique and eye-catching look. The nails are shaped into a trendy almond shape, perfect for showcasing the intricate marble pattern. This style is ideal for those who want a sophisticated yet artistic manicure.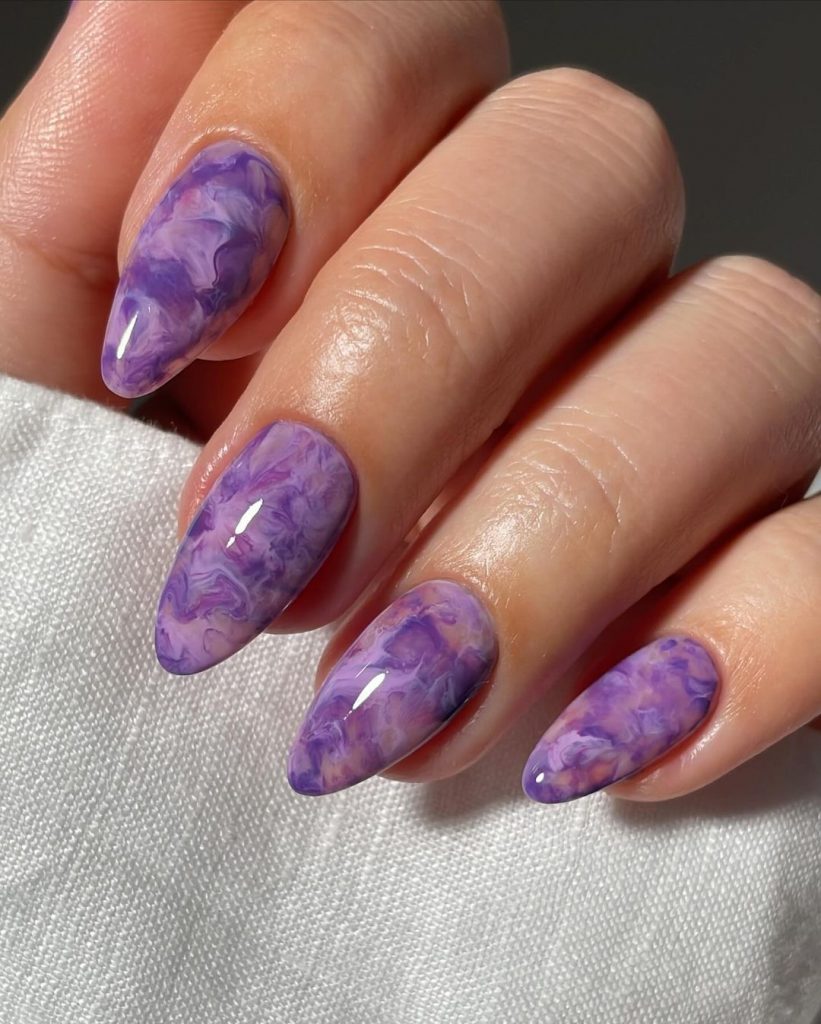
Consumables:
- Dark purple nail polish (e.g., OPI “Purple Palazzo Pants”)
- Light purple nail polish (e.g., Zoya “Malia”)
- White nail polish (e.g., Essie “Blanc”)
- Nail art sponge (e.g., Real Techniques Miracle Complexion Sponge)
- Base coat (e.g., Orly Bonder)
- Top coat (e.g., Seche Vite Dry Fast Top Coat)
Recommendations:
- Use a makeup sponge to blend the colors for a seamless marble effect.
- Apply thin layers to avoid a bulky finish.
DIY Instructions:
- Apply a base coat to all nails.
- Paint each nail with a base color of light purple.
- Use a makeup sponge to dab dark purple and white polishes onto the nails, creating a marbleized effect.
- Blend the colors by lightly tapping the sponge until the desired pattern is achieved.
- Finish with a top coat to seal the design and add shine.
Glitter French Tips
This design features a stunning combination of soft pink and vibrant purple glitter French tips. The nails are long and shaped into a classic coffin style, providing a perfect canvas for the glittery accents. The glitter French tips add a festive and glamorous touch, making this design perfect for special occasions or simply adding some sparkle to your everyday look.
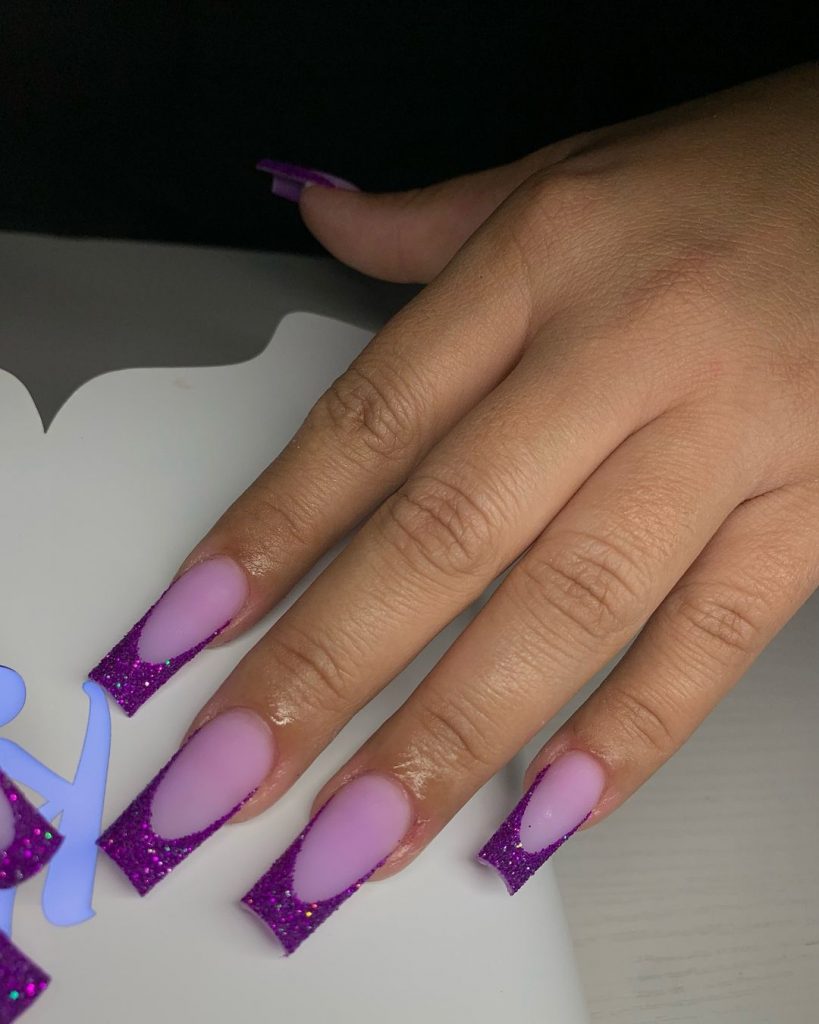
Consumables:
- Soft pink nail polish (e.g., Essie “Ballet Slippers”)
- Purple glitter polish (e.g., China Glaze “Let’s Jam”)
- Base coat (e.g., Sally Hansen Double Duty)
- Top coat (e.g., Seche Vite Dry Fast Top Coat)
- Nail tape or guides for creating French tips
Recommendations:
- Use nail tape or guides to ensure crisp, clean lines for the French tips.
- Apply a thin layer of glitter polish to prevent clumping and achieve a smooth finish.
DIY Instructions:
- Start with a base coat to protect your nails.
- Apply two coats of soft pink polish, allowing each layer to dry thoroughly.
- Use nail tape or guides to mark the tips of your nails, then apply the purple glitter polish.
- Remove the tape or guides carefully and finish with a top coat to seal the design and add shine.
Lavender and Nude Swirls
This design features a sophisticated mix of lavender and nude shades, accented with delicate swirls and glitter details. The nails are medium-length and shaped into a square style, providing a balanced canvas for the intricate design. The combination of the soft lavender and nude tones with the glitter accents makes this design both elegant and eye-catching.
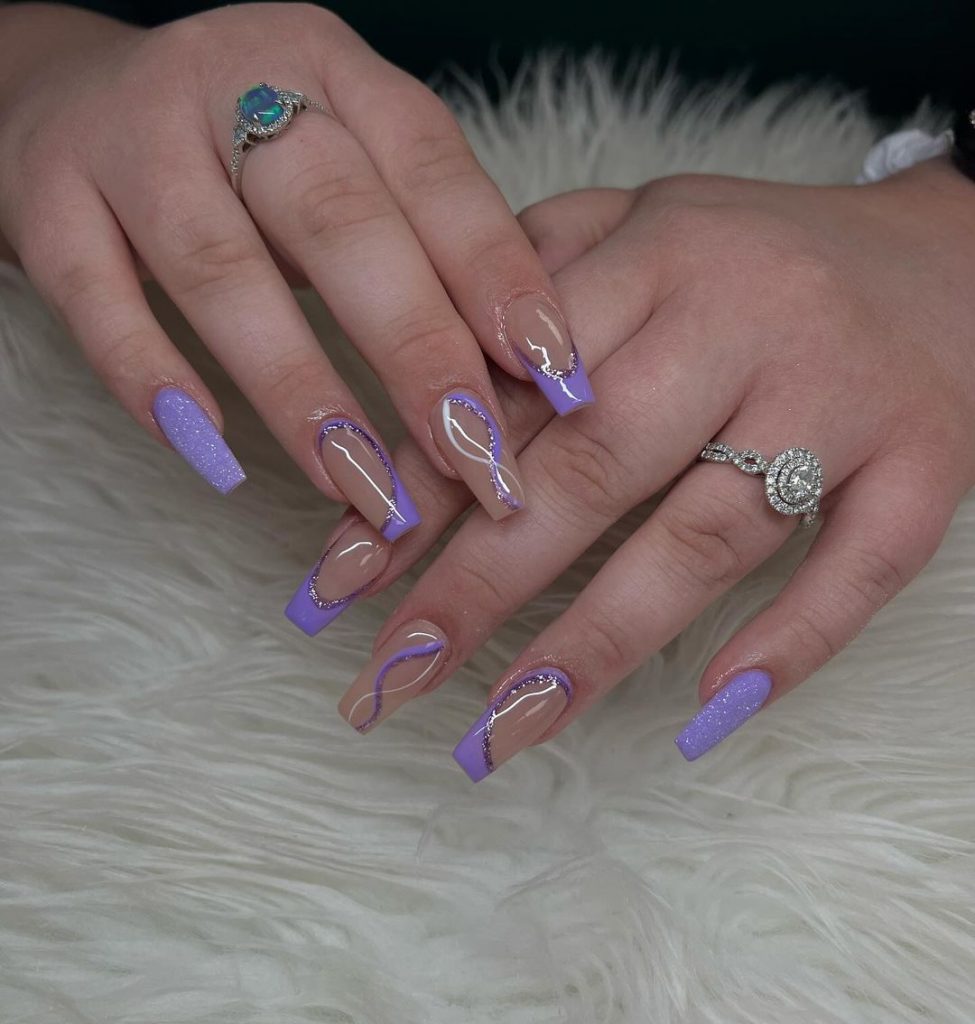
Consumables:
- Lavender nail polish (e.g., OPI “Do You Lilac It?”)
- Nude nail polish (e.g., Essie “Topless & Barefoot”)
- Purple glitter polish (e.g., Zoya “Roxy”)
- Nail art brush (e.g., Winstonia Fine Line Brush)
- Base coat (e.g., Orly Bonder)
- Top coat (e.g., Seche Vite Dry Fast Top Coat)
Recommendations:
- Use a fine nail art brush to create precise swirls and glitter accents.
- Opt for a nude polish that complements your skin tone to achieve the best contrast with the lavender.
DIY Instructions:
- Apply a base coat to create a smooth foundation.
- Paint all nails with a nude polish base and let it dry completely.
- Use a nail art brush to create lavender swirls on each nail.
- Add glitter accents with a fine brush for an extra touch of sparkle.
- Seal the design with a top coat for a glossy finish.
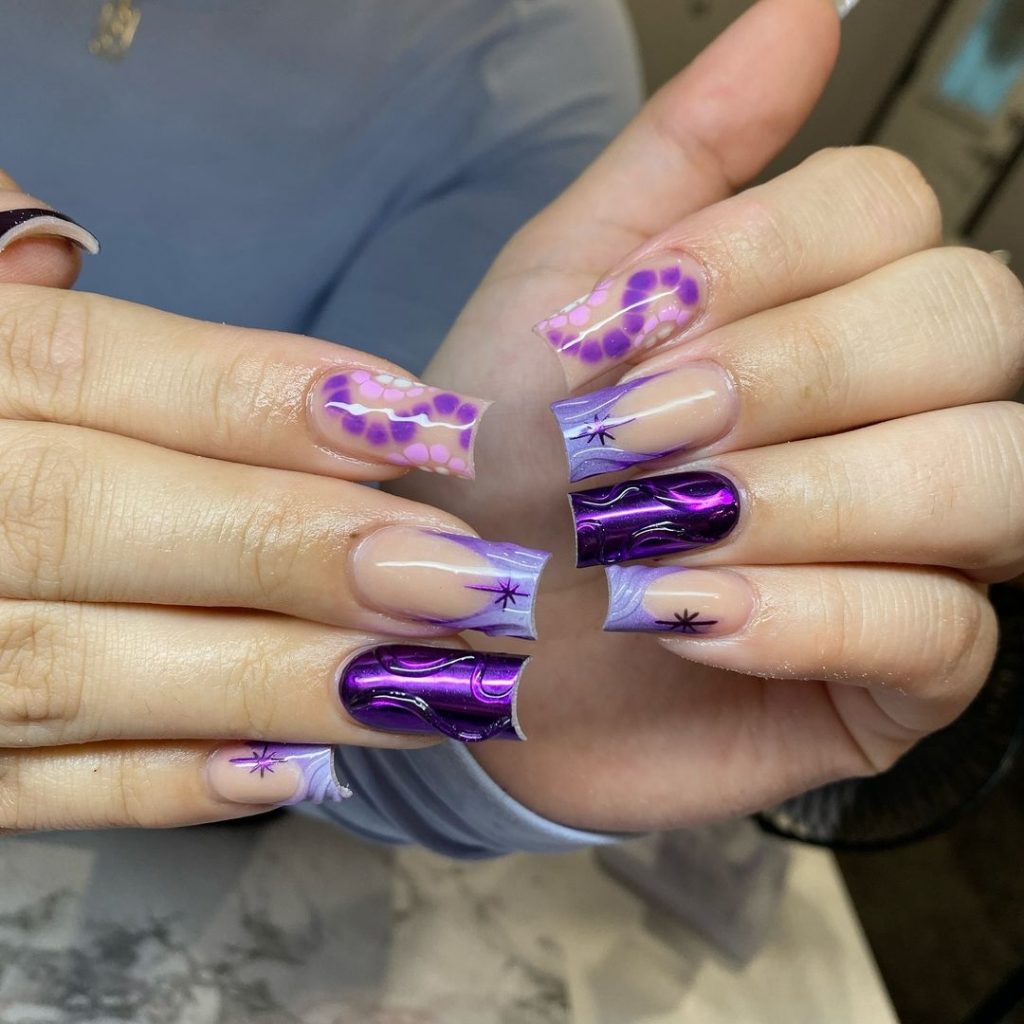
Abstract Purple Art
This manicure features a bold mix of abstract patterns in various shades of purple and pink, creating a playful and artistic look. The nails are long and squared, offering ample space for the intricate designs. This style is perfect for those who love unique and creative nail art that stands out.
Consumables:
- Dark purple nail polish (e.g., Essie “Sexy Divide”)
- Light purple nail polish (e.g., OPI “You’re Such a BudaPest”)
- Pink nail polish (e.g., Zoya “Maddie”)
- White nail polish (e.g., Sally Hansen “White On”)
- Nail art brushes (e.g., Beetles Nail Art Liner Brushes)
- Base coat (e.g., Orly Bonder)
- Top coat (e.g., Seche Vite Dry Fast Top Coat)
Recommendations:
- Ensure each color layer dries completely before applying the next to prevent smudging.
- Use thin brushes for detailed work to achieve clean, sharp lines.
DIY Instructions:
- Apply a base coat to all nails.
- Paint each nail with a base color of your choice (dark purple recommended).
- Use the nail art brushes to create abstract patterns with light purple, pink, and white polishes.
- Let each color dry before adding the next to maintain clarity in the design.
- Finish with a top coat to protect your artwork.
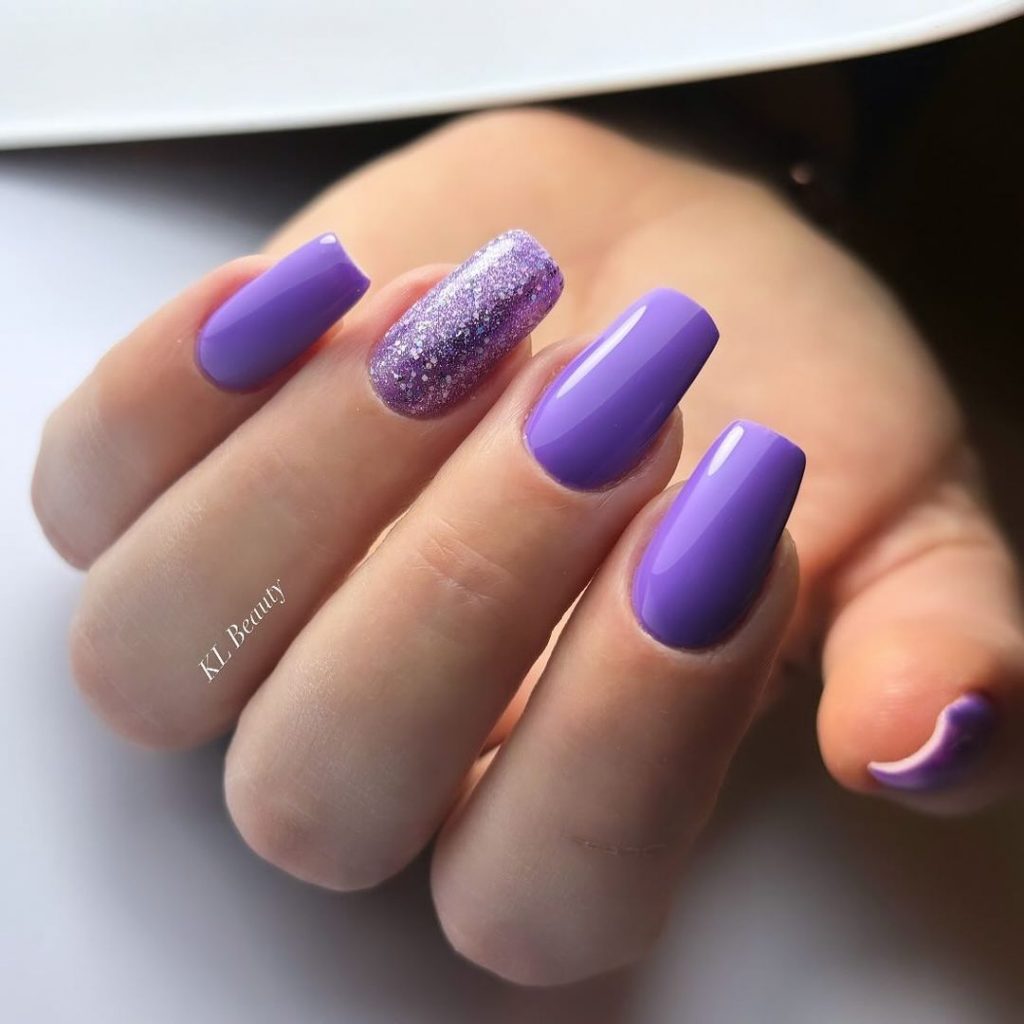
Solid Lavender with Glitter Accent
This design features a solid lavender base with a single glitter accent nail, creating a simple yet striking look. The nails are medium-length and shaped into a classic square, making this design versatile and easy to wear for any occasion. The glitter accent adds a touch of sparkle without overwhelming the overall look.
Consumables:
- Lavender nail polish (e.g., Essie “Lilacism”)
- Purple glitter polish (e.g., China Glaze “Fairy Dust”)
- Base coat (e.g., Sally Hansen Double Duty)
- Top coat (e.g., Seche Vite Dry Fast Top Coat)
Recommendations:
- Choose a high-quality lavender polish for a smooth, even finish.
- Apply the glitter polish sparingly to the accent nail for a delicate sparkle.
DIY Instructions:
- Start with a base coat to protect your nails.
- Apply two coats of lavender polish on all nails, allowing each layer to dry thoroughly.
- On the accent nail, apply one or two coats of purple glitter polish.
- Finish with a top coat to seal in the design and add shine.
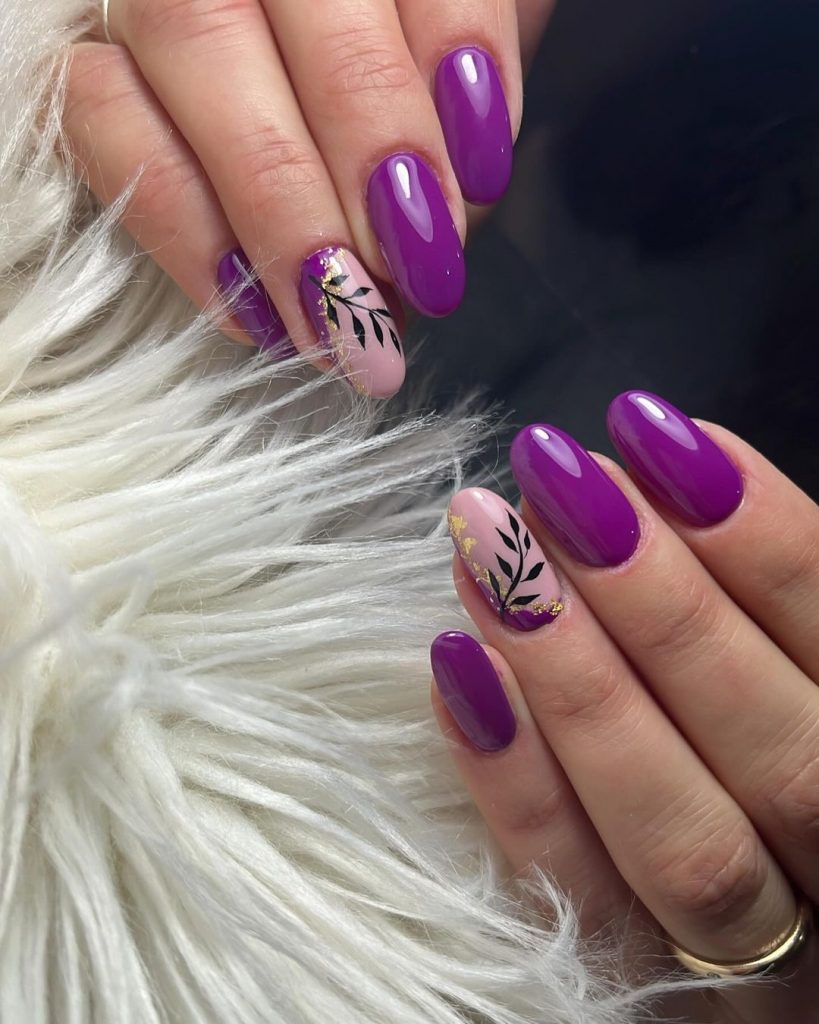
Purple with Leaf Accents
This design features a rich purple base with leaf accents on two nails, adding a touch of nature-inspired elegance to the manicure. The nails are shaped into a trendy almond shape, perfect for showcasing the intricate leaf design. The combination of the vibrant purple and the detailed leaf accents makes this design both sophisticated and unique.
Consumables:
- Purple nail polish (e.g., OPI “Purple with a Purpose”)
- Nude nail polish (e.g., Essie “Topless & Barefoot”)
- Black nail polish (e.g., Essie “Licorice”)
- Gold foil flakes (e.g., Born Pretty Gold Foil)
- Nail art brushes (e.g., Winstonia Fine Line Brush)
- Base coat (e.g., Orly Bonder)
- Top coat (e.g., Seche Vite Dry Fast Top Coat)
Recommendations:
- Use a fine nail art brush to create precise leaf patterns.
- Apply gold foil flakes carefully to avoid smudging the design.
DIY Instructions:
- Apply a base coat to all nails.
- Paint the accent nails with nude polish and the rest with purple polish.
- Use a fine brush to paint black leaf patterns on the accent nails.
- Carefully apply gold foil flakes to add a touch of shimmer to the leaf design.
- Finish with a top coat to seal the design and add shine.
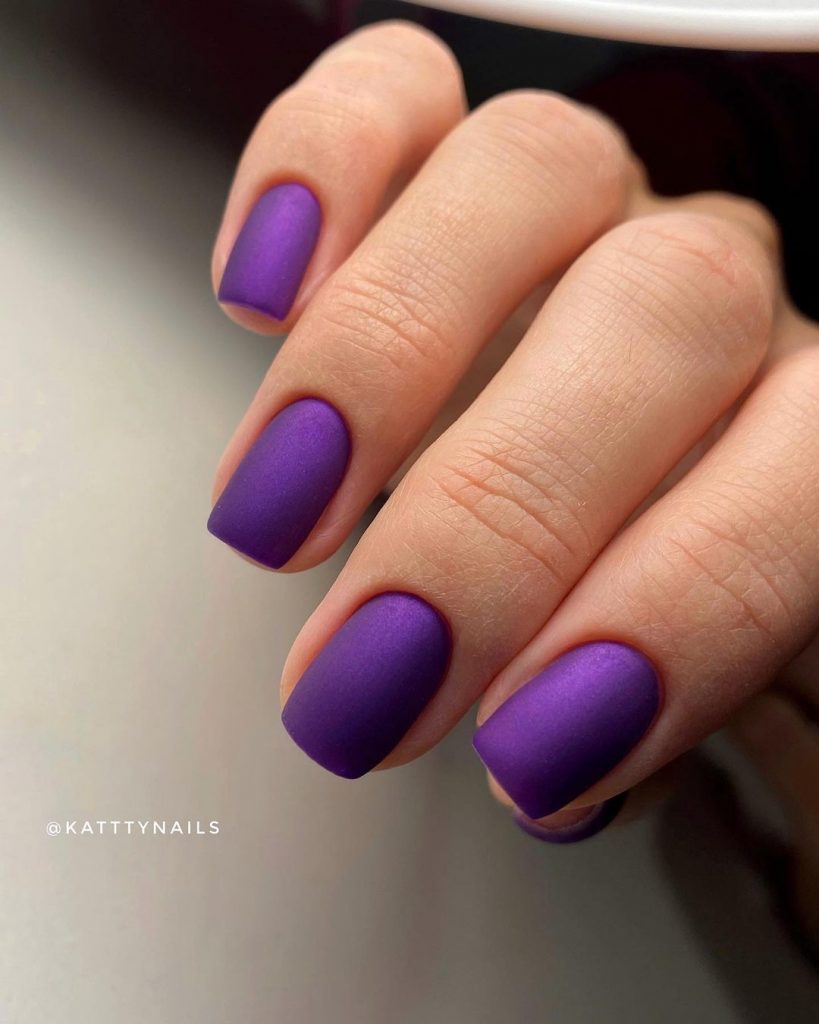
Matte Purple Perfection
This design showcases a sleek matte purple finish that exudes sophistication and modern elegance. The nails are short and squared, giving a neat and polished look that’s perfect for any occasion. The matte texture adds a unique twist to the classic purple manicure, making it a standout style for fall 2024.
Consumables:
- Matte purple nail polish (e.g., OPI “Purple Palazzo Pants”)
- Base coat (e.g., Essie First Base)
- Matte top coat (e.g., Essie Matte About You)
Recommendations:
- Use a high-quality matte top coat to ensure the finish stays smooth and chip-free.
- Apply thin layers of polish to avoid streaks and achieve an even matte finish.
DIY Instructions:
- Start with a base coat to protect your nails and provide a smooth foundation.
- Apply two coats of matte purple polish, allowing each layer to dry thoroughly.
- Finish with a matte top coat to seal the design and maintain the matte texture.
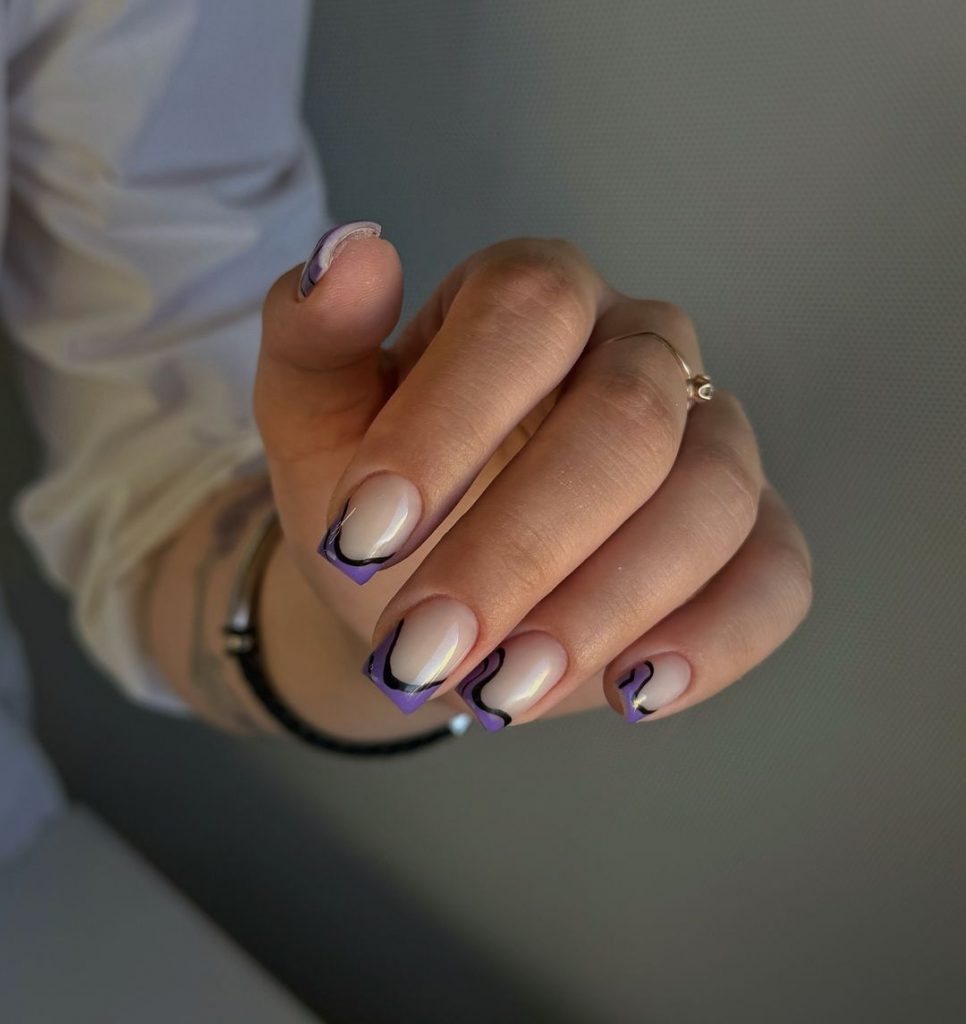
Abstract Lavender Tips
This manicure features nude nails with abstract lavender tips and black swirl accents. The nails are medium-length and shaped into a square, providing a balanced canvas for the intricate design. The combination of the nude base and the artistic tips makes this design both elegant and trendy.
Consumables:
- Nude nail polish (e.g., OPI “Samoan Sand”)
- Lavender nail polish (e.g., Essie “Lilacism”)
- Black nail polish (e.g., Essie “Licorice”)
- Nail art brush (e.g., Winstonia Fine Line Brush)
- Base coat (e.g., Orly Bonder)
- Top coat (e.g., Seche Vite Dry Fast Top Coat)
Recommendations:
- Use a fine nail art brush to create precise swirl accents.
- Opt for a nude polish that complements your skin tone for the best contrast with the lavender.
DIY Instructions:
- Apply a base coat to create a smooth foundation.
- Paint all nails with a nude polish base and let it dry completely.
- Use a nail art brush to create lavender tips and black swirl accents on each nail.
- Seal the design with a top coat for a glossy finish.
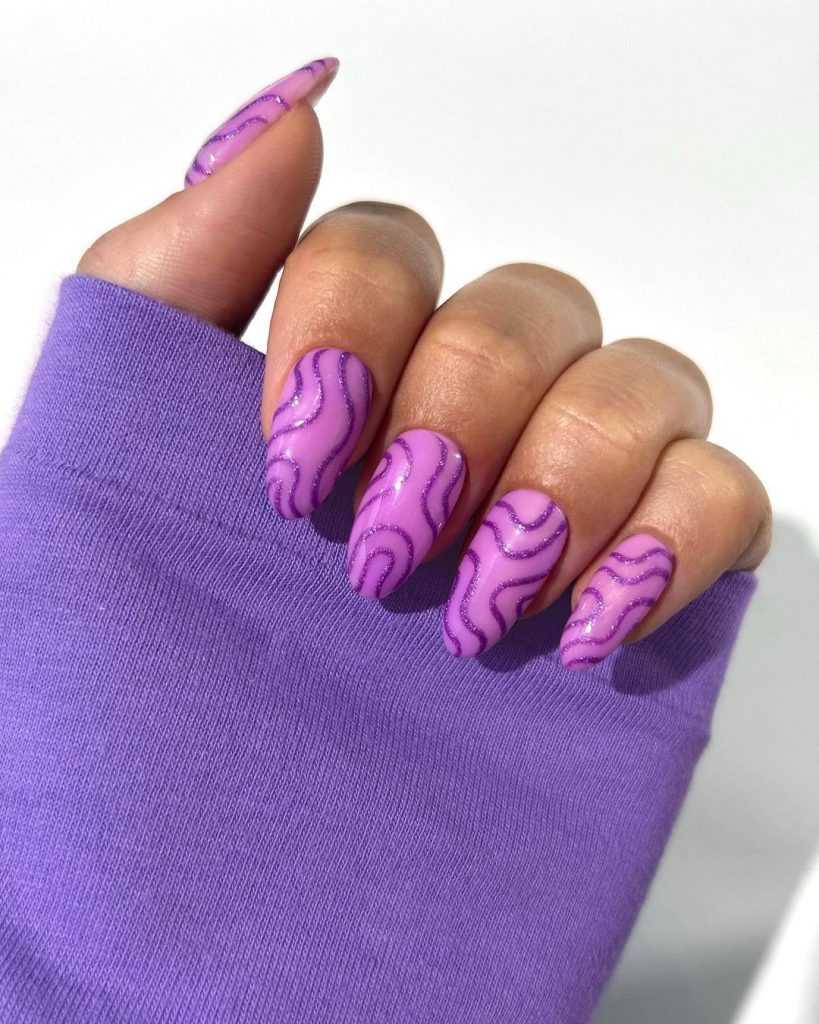
Glittery Lavender Waves
This design features a vibrant lavender base with glittery wave accents, creating a fun and eye-catching look. The nails are medium-length and almond-shaped, providing a trendy silhouette. The glitter accents add a playful touch to the manicure, making it perfect for those who love a bit of sparkle.
Consumables:
- Lavender nail polish (e.g., OPI “Do You Lilac It?”)
- Purple glitter polish (e.g., Zoya “Roxy”)
- Nail art brush (e.g., Beetles Nail Art Liner Brushes)
- Base coat (e.g., Orly Bonder)
- Top coat (e.g., Seche Vite Dry Fast Top Coat)
Recommendations:
- Use a fine nail art brush to create precise glitter wave accents.
- Apply thin layers of glitter polish to avoid clumping and achieve a smooth finish.
DIY Instructions:
- Start with a base coat to protect your nails.
- Apply two coats of lavender polish, allowing each layer to dry thoroughly.
- Use a nail art brush to create glitter wave accents on each nail.
- Finish with a top coat to seal the design and add shine.
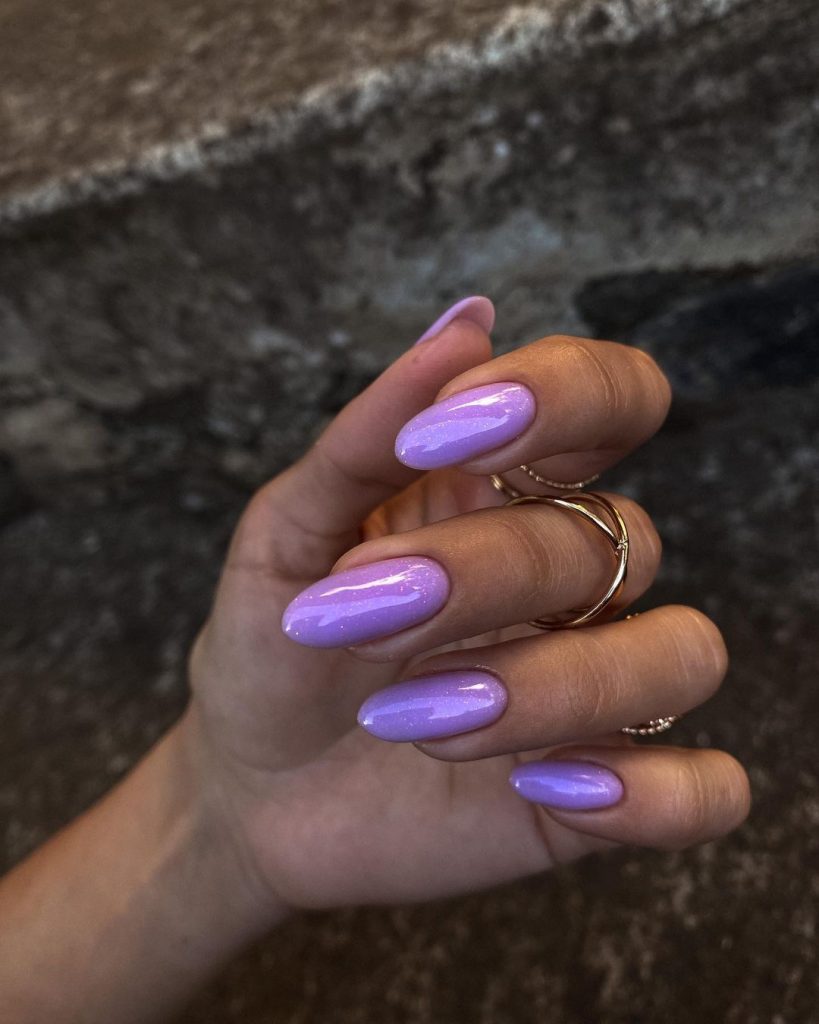
Shimmery Lilac Almonds
This manicure features a beautiful shimmery lilac color on almond-shaped nails, creating a soft and feminine look. The shimmer adds a touch of elegance and sparkle, making this design perfect for any occasion. The almond shape enhances the delicate and sophisticated feel of the manicure.
Consumables:
- Shimmery lilac nail polish (e.g., Essie “Go Ginza”)
- Base coat (e.g., Sally Hansen Double Duty)
- Top coat (e.g., Seche Vite Dry Fast Top Coat)
Recommendations:
- Choose a high-quality shimmery polish for a smooth, even finish.
- Apply thin layers of polish to avoid streaks and achieve an even shimmer.
DIY Instructions:
- Start with a base coat to protect your nails.
- Apply two coats of shimmery lilac polish, allowing each layer to dry thoroughly.
- Finish with a top coat to seal the design and add shine.
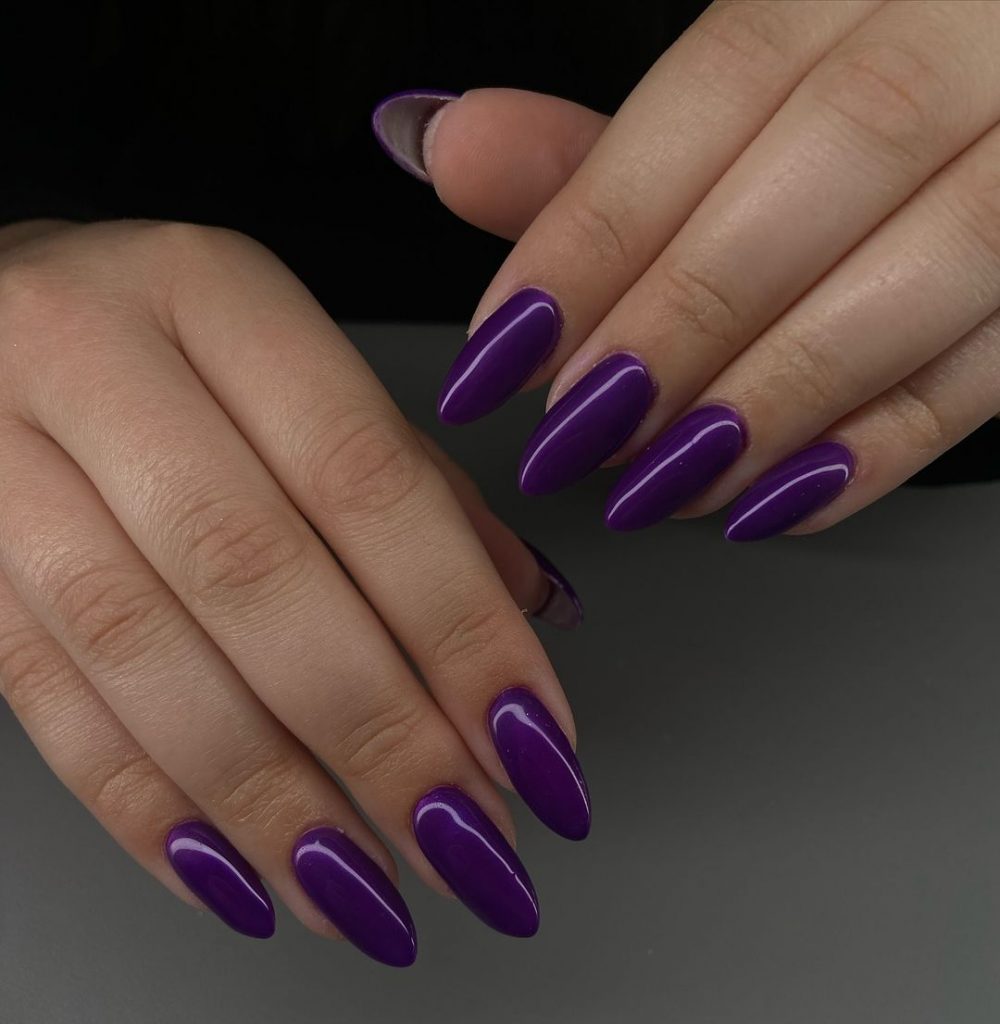
Deep Purple Shine
This design features a rich, deep purple color with a glossy finish on almond-shaped nails. The intense purple hue is both bold and elegant, making it perfect for fall. The glossy finish adds a sleek and polished look, enhancing the overall sophistication of the manicure.
Consumables:
- Deep purple nail polish (e.g., OPI “Lincoln Park After Dark”)
- Base coat (e.g., Essie First Base)
- Top coat (e.g., Seche Vite Dry Fast Top Coat)
Recommendations:
- Use a high-quality top coat to maintain the glossy finish and prevent chipping.
- Apply thin layers of polish to ensure an even and smooth application.
DIY Instructions:
- Start with a base coat to protect your nails and provide a smooth foundation.
- Apply two coats of deep purple polish, allowing each layer to dry thoroughly.
- Finish with a top coat to seal the design and add shine.
Shimmering Purple Gradient
This design features a beautiful gradient from a deep, dark purple to a shimmering lavender, creating a captivating ombré effect. The nails are medium-length and shaped into a square, providing a sleek and modern look. The gradient effect is enhanced by the subtle shimmer, adding depth and dimension to the manicure.
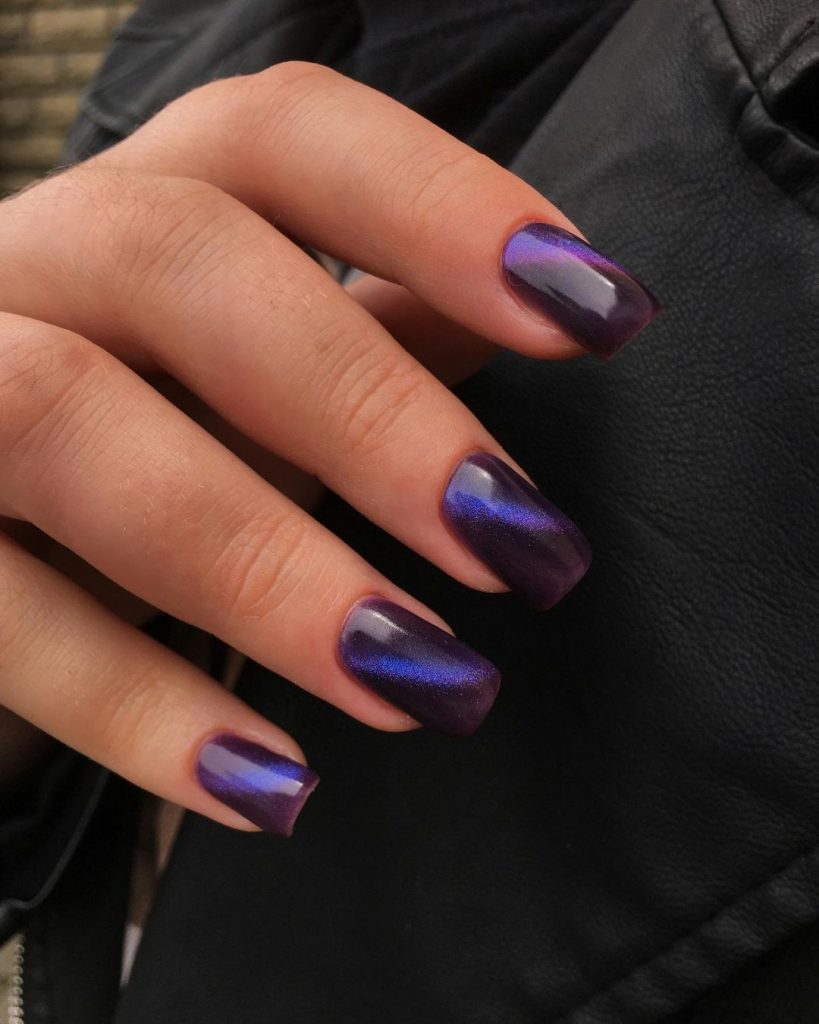
Consumables:
- Dark purple nail polish (e.g., Essie “Sexy Divide”)
- Lavender nail polish (e.g., OPI “Do You Lilac It?”)
- Shimmer top coat (e.g., Essie “Shine of the Times”)
- Makeup sponge for gradient effect
- Base coat (e.g., Orly Bonder)
- Top coat (e.g., Seche Vite Dry Fast Top Coat)
Recommendations:
- Use a makeup sponge to blend the colors seamlessly for the gradient effect.
- Apply a shimmer top coat to add extra sparkle and dimension to the gradient.
DIY Instructions:
- Start with a base coat to protect your nails.
- Apply a base layer of lavender polish and let it dry.
- Use a makeup sponge to dab the dark purple polish at the tips and blend it into the lavender.
- Apply a shimmer top coat to enhance the gradient effect.
- Finish with a top coat to seal the design and add shine.
Purple and White Floral Accent
This manicure features a bold purple base with white accent nails adorned with black floral designs. The nails are medium-length and shaped into a square, creating a balanced and stylish look. The floral accents add a touch of nature-inspired elegance, making this design perfect for those who love a mix of bold and delicate elements.
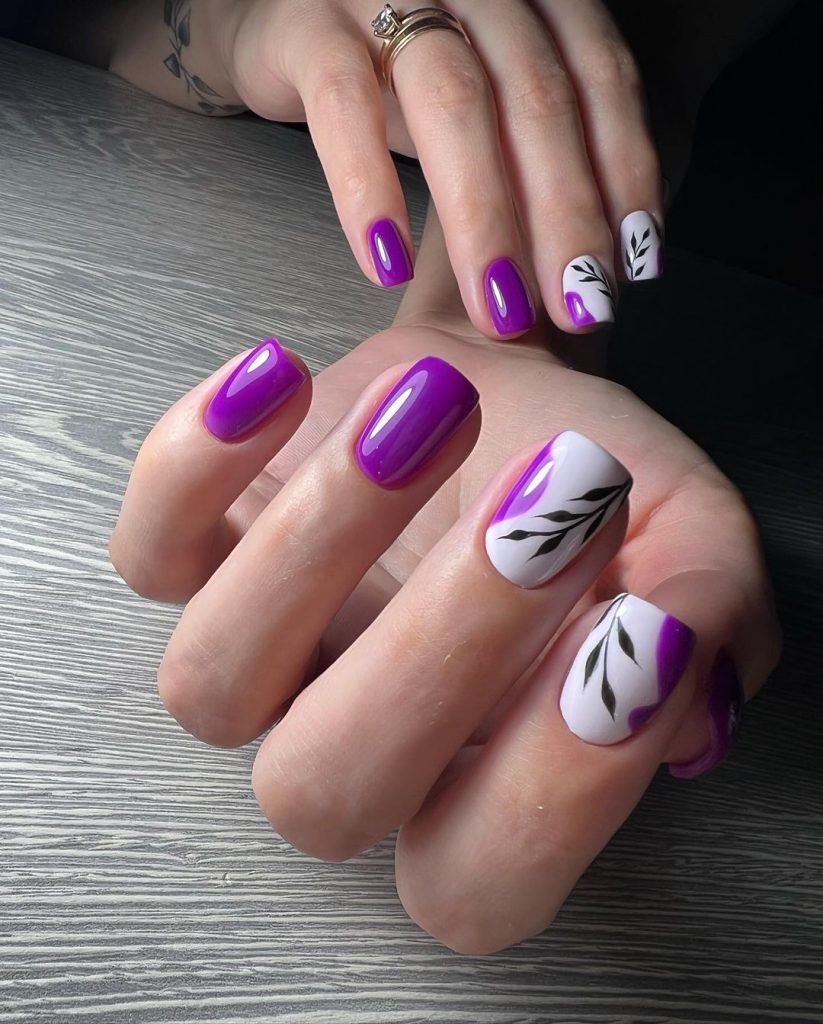
Consumables:
- Purple nail polish (e.g., OPI “Purple with a Purpose”)
- White nail polish (e.g., Sally Hansen “White On”)
- Black nail polish (e.g., Essie “Licorice”)
- Nail art brush (e.g., Winstonia Fine Line Brush)
- Base coat (e.g., Orly Bonder)
- Top coat (e.g., Seche Vite Dry Fast Top Coat)
Recommendations:
- Use a fine nail art brush to create precise floral designs.
- Opt for a high-quality white polish to ensure a smooth, opaque finish.
DIY Instructions:
- Apply a base coat to all nails.
- Paint the accent nails with white polish and the rest with purple polish.
- Use a fine brush to paint black floral designs on the accent nails.
- Finish with a top coat to seal the design and add shine.
Solid Glossy Purple
This design features a solid, glossy purple finish on long, square-shaped nails. The intense purple hue is both bold and vibrant, making it a perfect statement manicure for fall. The glossy finish adds a sleek and polished look, enhancing the overall impact of the design.
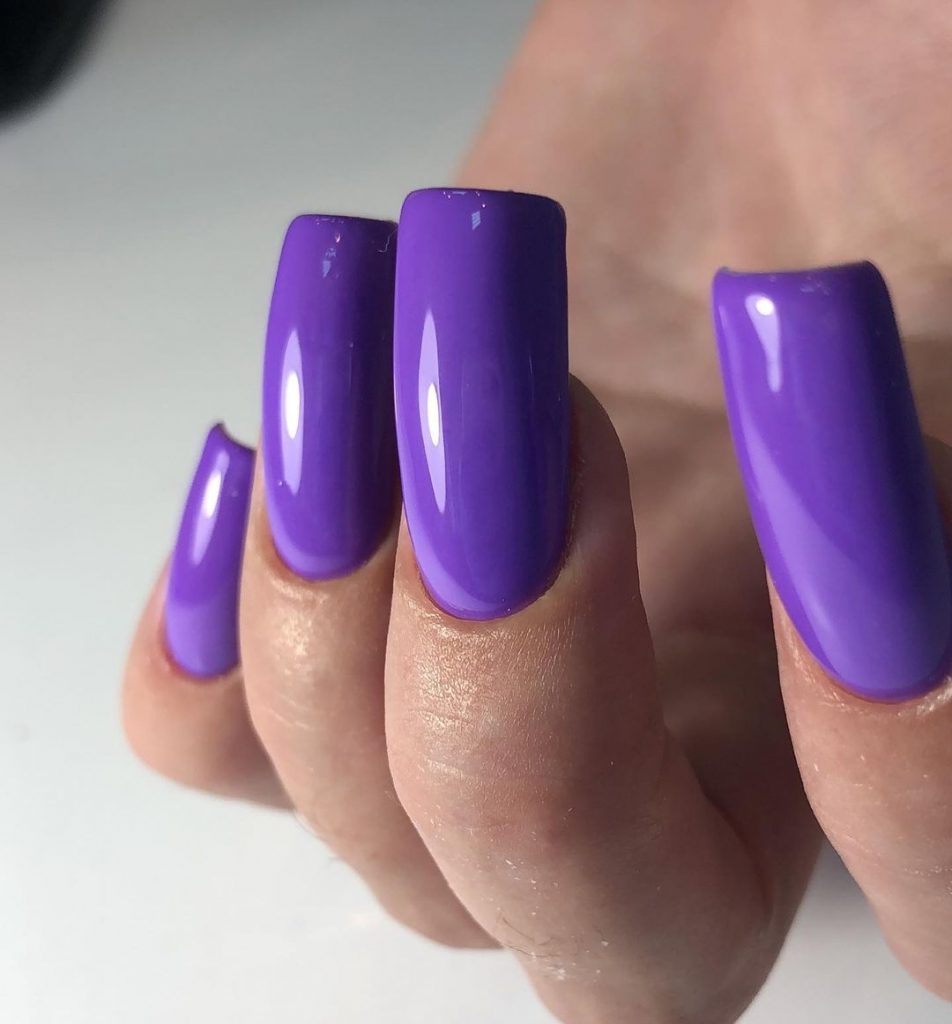
Consumables:
- Purple nail polish (e.g., Essie “Play Date”)
- Base coat (e.g., Essie First Base)
- Top coat (e.g., Seche Vite Dry Fast Top Coat)
Recommendations:
- Use a high-quality top coat to maintain the glossy finish and prevent chipping.
- Apply thin layers of polish to ensure an even and smooth application.
DIY Instructions:
- Start with a base coat to protect your nails and provide a smooth foundation.
- Apply two coats of purple polish, allowing each layer to dry thoroughly.
- Finish with a top coat to seal the design and add shine.
Matte Purple Elegance
This manicure features a sophisticated matte purple finish on medium-length, square-shaped nails. The matte texture adds a unique and modern twist to the classic purple manicure, making it perfect for any occasion. The deep purple hue is both elegant and striking, adding a touch of luxury to the look.
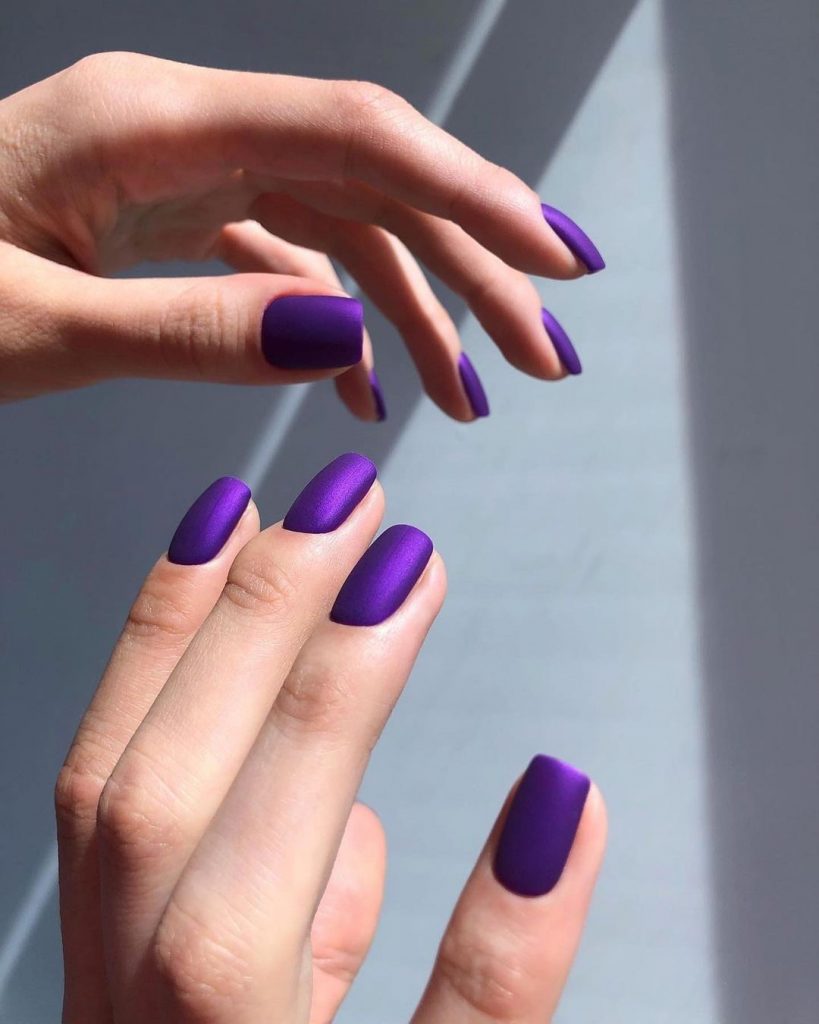
Consumables:
- Matte purple nail polish (e.g., OPI “Purple Palazzo Pants”)
- Base coat (e.g., Essie First Base)
- Matte top coat (e.g., Essie Matte About You)
Recommendations:
- Use a high-quality matte top coat to ensure the finish stays smooth and chip-free.
- Apply thin layers of polish to avoid streaks and achieve an even matte finish.
DIY Instructions:
- Start with a base coat to protect your nails and provide a smooth foundation.
- Apply two coats of matte purple polish, allowing each layer to dry thoroughly.
- Finish with a matte top coat to seal the design and maintain the matte texture.
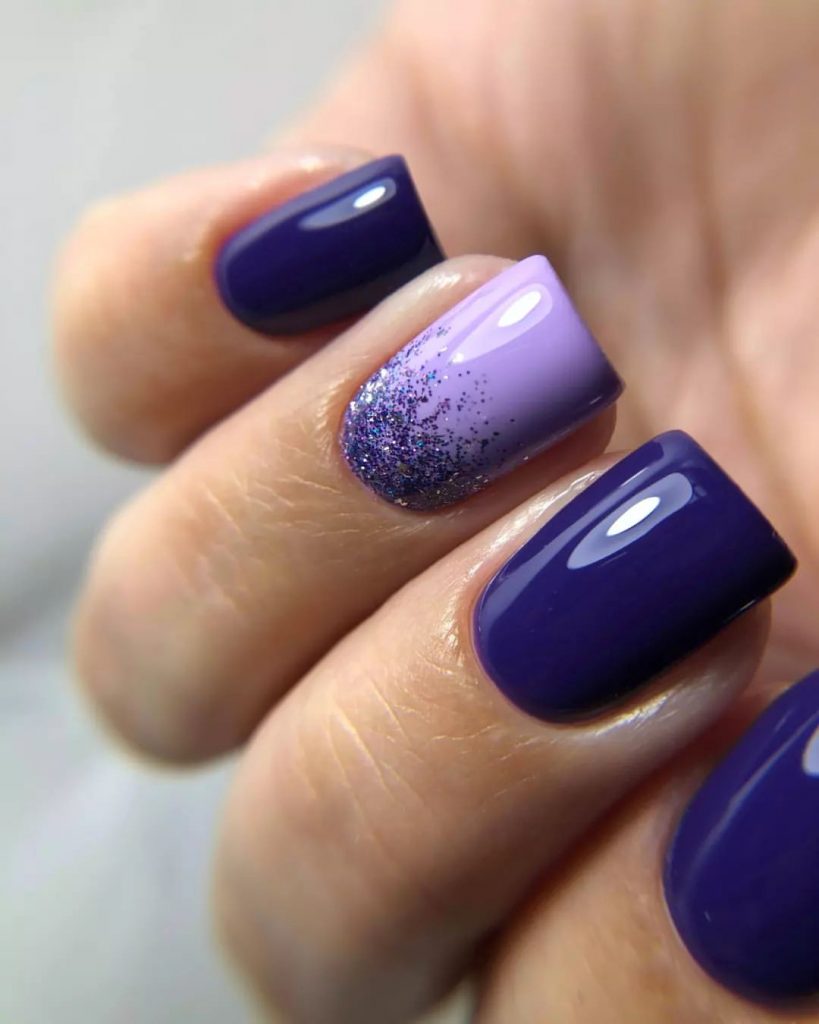
Purple and Lavender Glitter Gradient
This design showcases a stunning gradient from deep purple to lavender, with the added sparkle of glitter on the accent nails. The nails are medium-length and squared, providing a perfect canvas for the gradient and glitter effects. The combination of colors and textures makes this design both eye-catching and sophisticated.
Consumables:
- Deep purple nail polish (e.g., Essie “Sexy Divide”)
- Lavender nail polish (e.g., OPI “Do You Lilac It?”)
- Purple glitter polish (e.g., China Glaze “Fairy Dust”)
- Makeup sponge for gradient effect
- Base coat (e.g., Orly Bonder)
- Top coat (e.g., Seche Vite Dry Fast Top Coat)
Recommendations:
- Use a makeup sponge to blend the colors seamlessly for the gradient effect.
- Apply the glitter polish sparingly to create a delicate sparkle on the accent nails.
DIY Instructions:
- Start with a base coat to protect your nails.
- Apply a base layer of lavender polish and let it dry.
- Use a makeup sponge to dab the deep purple polish at the tips and blend it into the lavender.
- Apply a purple glitter polish to the accent nails for added sparkle.
- Finish with a top coat to seal the design and add shine.
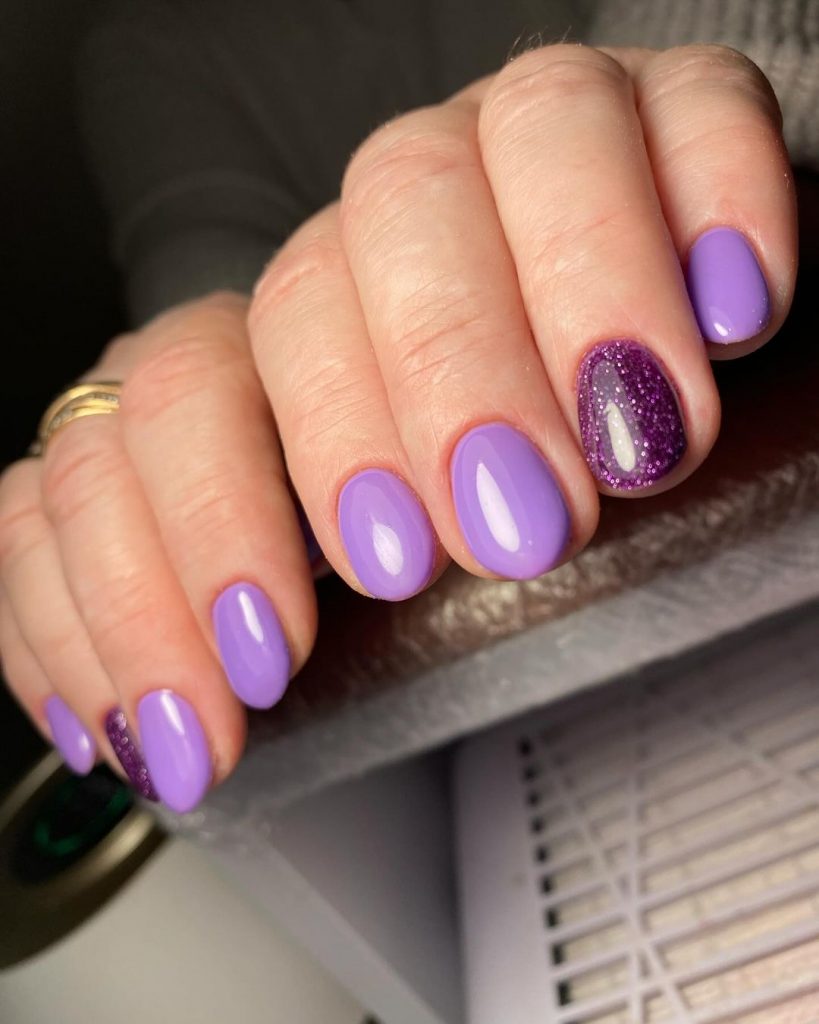
Lavender and Glitter Accent
This design features a beautiful lavender base with a single glitter accent nail, creating a delicate yet striking look. The nails are short and oval-shaped, offering a chic and sophisticated appearance. The glitter accent adds a touch of sparkle, making this manicure perfect for both everyday wear and special occasions.
Consumables:
- Lavender nail polish (e.g., Essie “Lilacism”)
- Purple glitter polish (e.g., China Glaze “Fairy Dust”)
- Base coat (e.g., Sally Hansen Double Duty)
- Top coat (e.g., Seche Vite Dry Fast Top Coat)
Recommendations:
- Choose a high-quality lavender polish for a smooth, even finish.
- Apply the glitter polish sparingly to the accent nail for a delicate sparkle.
DIY Instructions:
- Start with a base coat to protect your nails.
- Apply two coats of lavender polish on all nails, allowing each layer to dry thoroughly.
- On the accent nail, apply one or two coats of purple glitter polish.
- Finish with a top coat to seal the design and add shine.
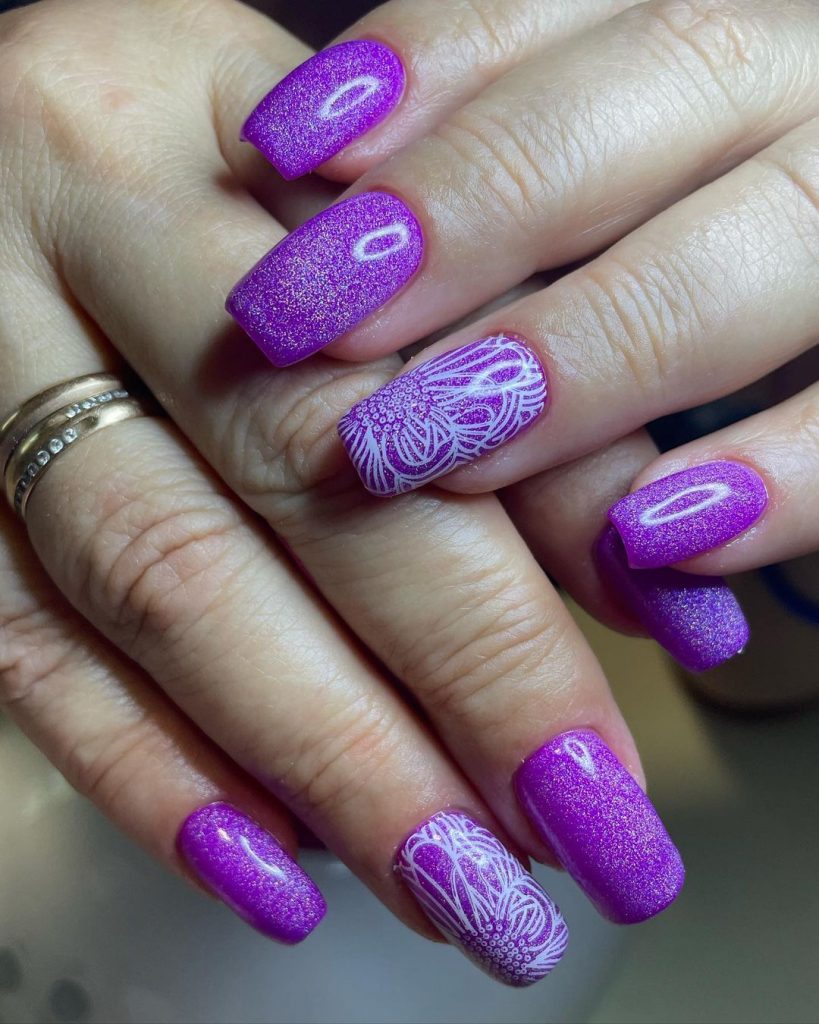
Holographic Purple with White Floral Accent
This design features a stunning holographic purple polish with intricate white floral accents on two nails. The nails are medium-length and shaped into a square, providing a perfect canvas for the detailed floral designs. The holographic finish adds a mesmerizing shimmer, making this manicure truly eye-catching.
Consumables:
- Holographic purple nail polish (e.g., ILNP “Mega”)
- White nail polish (e.g., Sally Hansen “White On”)
- Nail art brush (e.g., Winstonia Fine Line Brush)
- Base coat (e.g., Orly Bonder)
- Top coat (e.g., Seche Vite Dry Fast Top Coat)
Recommendations:
- Use a fine nail art brush to create precise floral designs.
- Apply thin layers of holographic polish to ensure an even finish.
DIY Instructions:
- Apply a base coat to all nails.
- Paint all nails with holographic purple polish and let it dry completely.
- Use a fine brush to paint white floral designs on two accent nails.
- Finish with a top coat to seal the design and add shine.
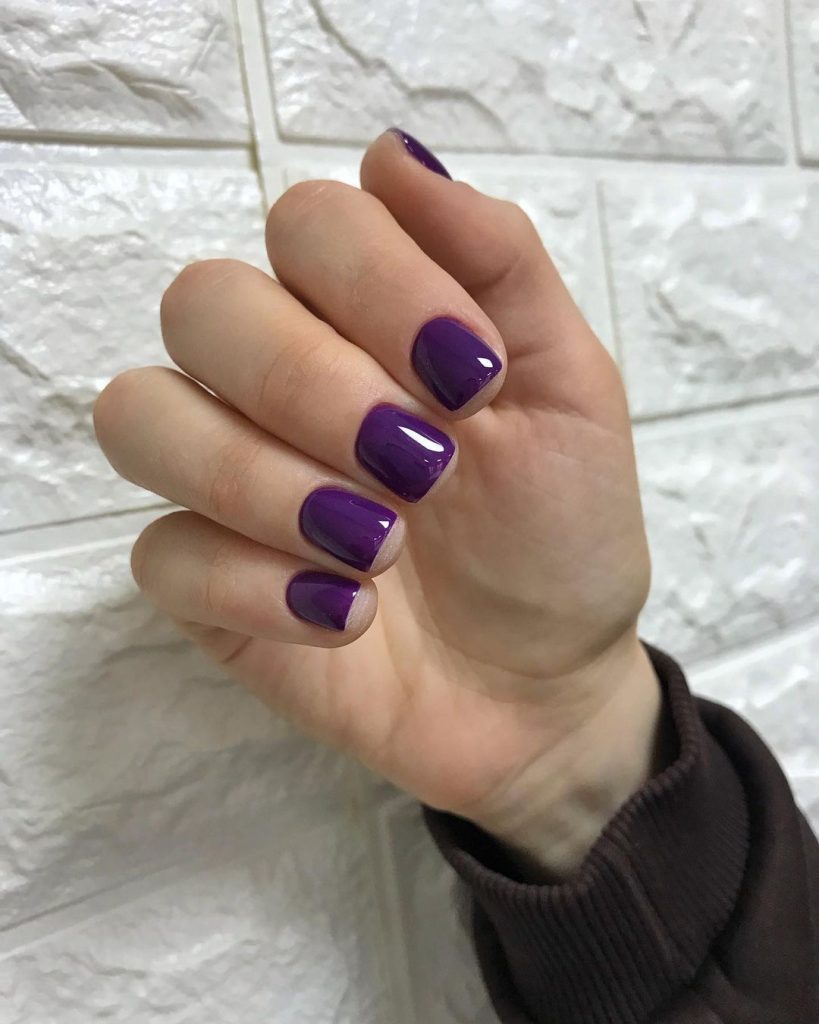
Solid Dark Purple
This design features a solid, dark purple finish on short, square-shaped nails. The deep purple hue is both bold and elegant, making it a perfect statement manicure for fall. The glossy finish adds a sleek and polished look, enhancing the overall impact of the design.
Consumables:
- Dark purple nail polish (e.g., Essie “Sexy Divide”)
- Base coat (e.g., Essie First Base)
- Top coat (e.g., Seche Vite Dry Fast Top Coat)
Recommendations:
- Use a high-quality top coat to maintain the glossy finish and prevent chipping.
- Apply thin layers of polish to ensure an even and smooth application.
DIY Instructions:
- Start with a base coat to protect your nails and provide a smooth foundation.
- Apply two coats of dark purple polish, allowing each layer to dry thoroughly.
- Finish with a top coat to seal the design and add shine.
Soft Lavender Gloss
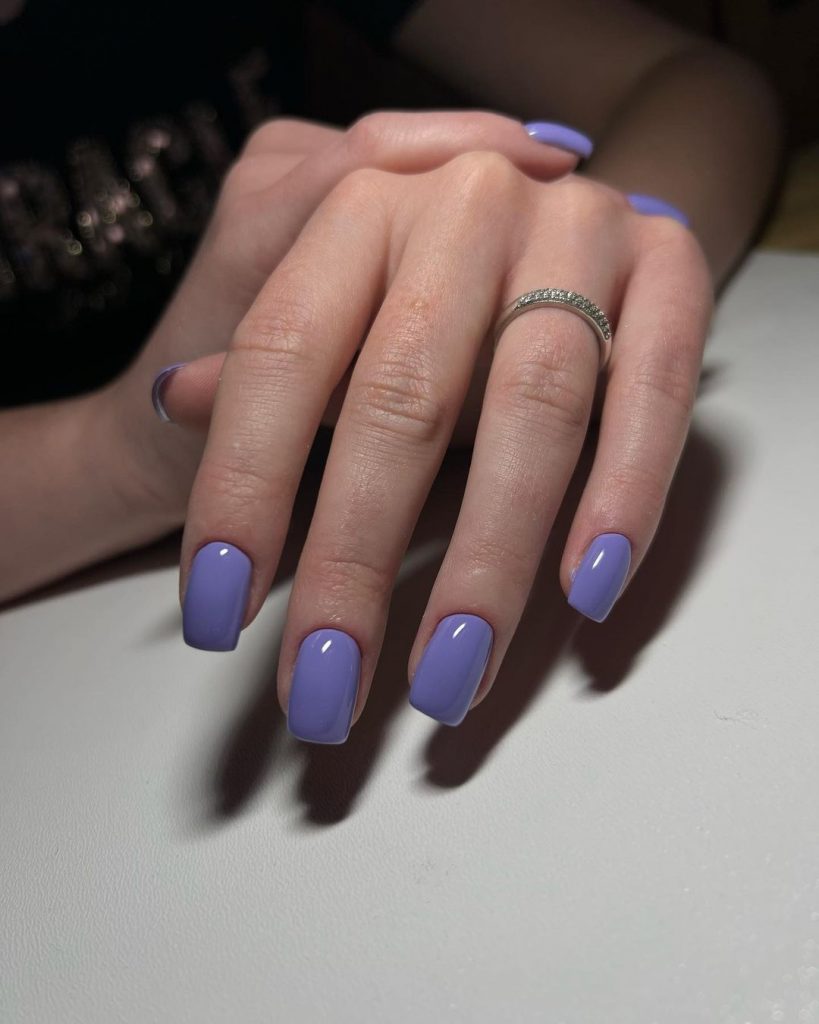
This design features a soft lavender gloss finish on medium-length, square-shaped nails. The light lavender hue is perfect for adding a touch of color while keeping the look subtle and sophisticated. The glossy finish adds a sleek and polished appearance, making this design versatile for any occasion.
Consumables:
- Soft lavender nail polish (e.g., OPI “Do You Lilac It?”)
- Base coat (e.g., Sally Hansen Double Duty)
- Top coat (e.g., Seche Vite Dry Fast Top Coat)
Recommendations:
- Choose a high-quality lavender polish for a smooth, even finish.
- Apply thin layers of polish to avoid streaks and achieve a glossy finish.
DIY Instructions:
- Start with a base coat to protect your nails.
- Apply two coats of soft lavender polish, allowing each layer to dry thoroughly.
- Finish with a top coat to seal the design and add shine.
Dark Purple Glitter
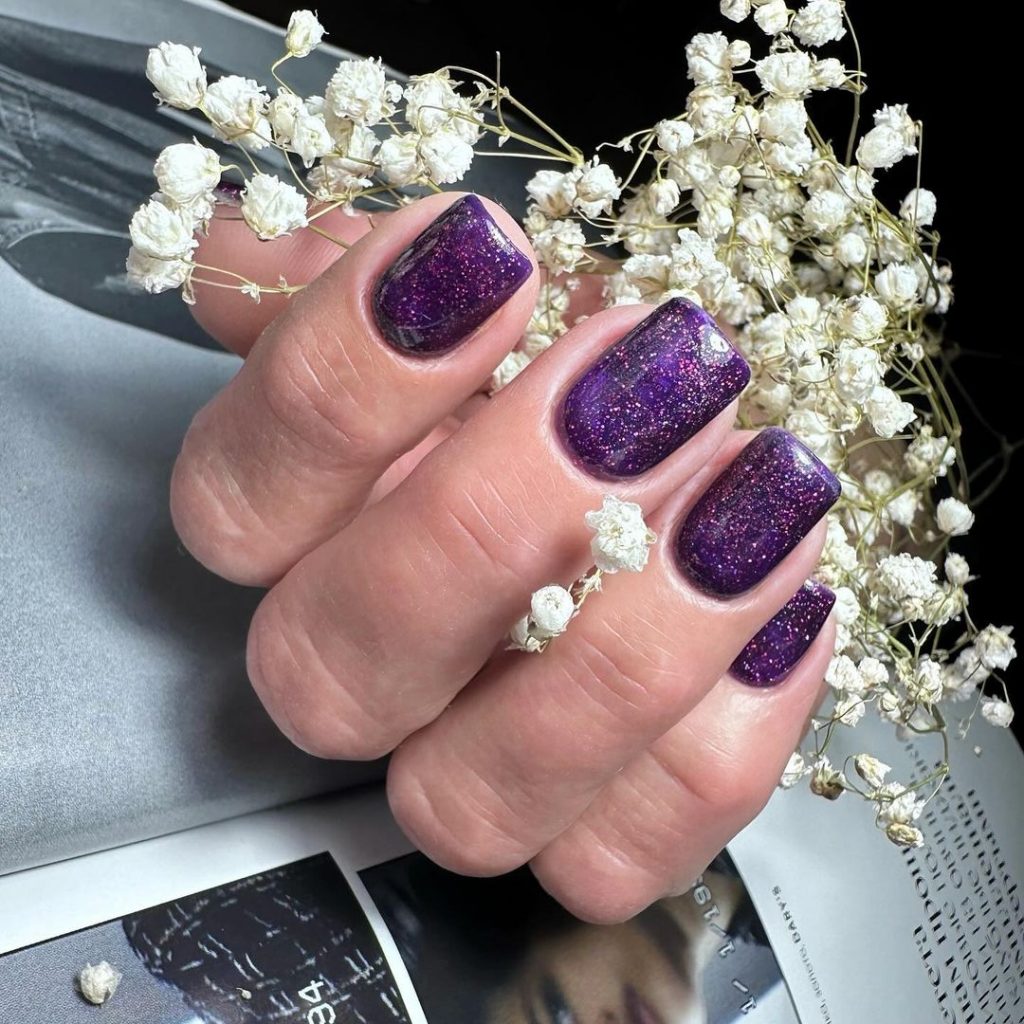
This design showcases a rich, dark purple base with a glittery finish on short, square-shaped nails. The glitter adds depth and sparkle, making this manicure perfect for special occasions or a night out. The dark purple hue combined with the glitter creates a glamorous and eye-catching look.
Consumables:
- Dark purple nail polish (e.g., Essie “Sexy Divide”)
- Purple glitter polish (e.g., China Glaze “Fairy Dust”)
- Base coat (e.g., Orly Bonder)
- Top coat (e.g., Seche Vite Dry Fast Top Coat)
Recommendations:
- Apply the glitter polish sparingly to create a delicate sparkle.
- Use a high-quality top coat to maintain the glittery finish and prevent chipping.
DIY Instructions:
- Start with a base coat to protect your nails.
- Apply two coats of dark purple polish, allowing each layer to dry thoroughly.
- On the accent nails, apply one or two coats of purple glitter polish.
- Finish with a top coat to seal the design and add shine.
Glossy Purple Perfection
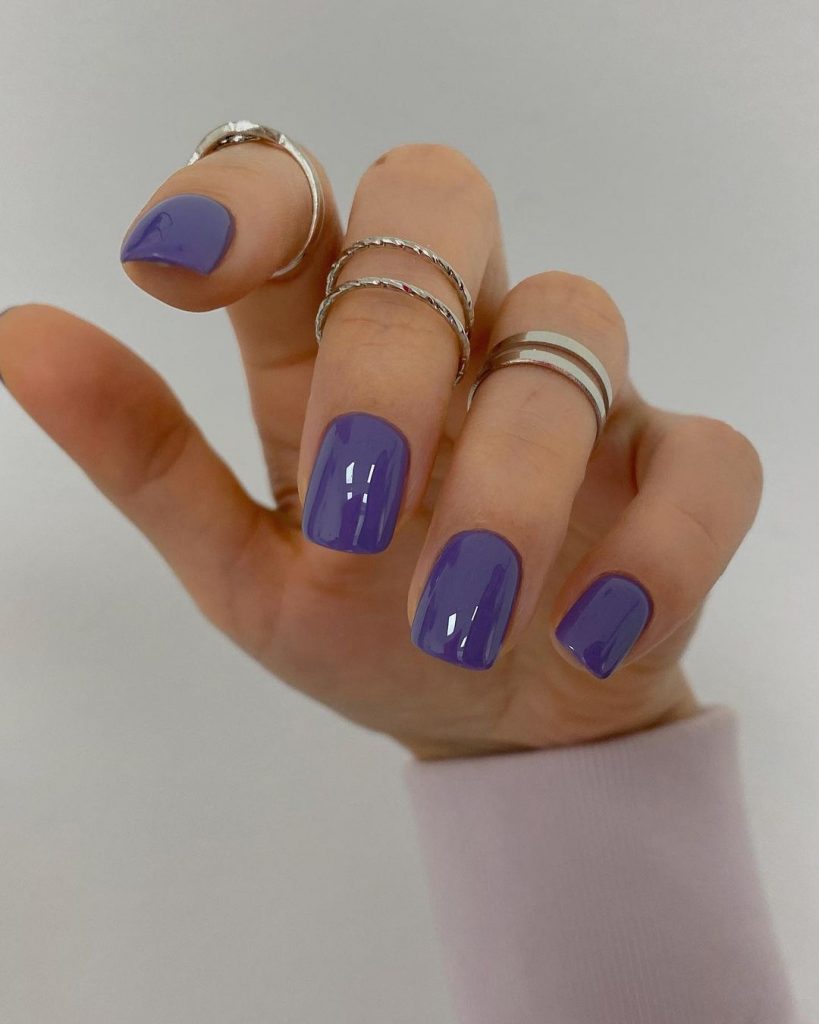
This design features a solid, glossy purple finish on short, square-shaped nails. The vibrant purple hue is both bold and elegant, making it a perfect statement manicure for fall. The glossy finish adds a sleek and polished look, enhancing the overall impact of the design.
Consumables:
- Purple nail polish (e.g., Essie “Play Date”)
- Base coat (e.g., Essie First Base)
- Top coat (e.g., Seche Vite Dry Fast Top Coat)
Recommendations:
- Use a high-quality top coat to maintain the glossy finish and prevent chipping.
- Apply thin layers of polish to ensure an even and smooth application.
DIY Instructions:
- Start with a base coat to protect your nails and provide a smooth foundation.
- Apply two coats of purple polish, allowing each layer to dry thoroughly.
- Finish with a top coat to seal the design and add shine.
Save Pin
