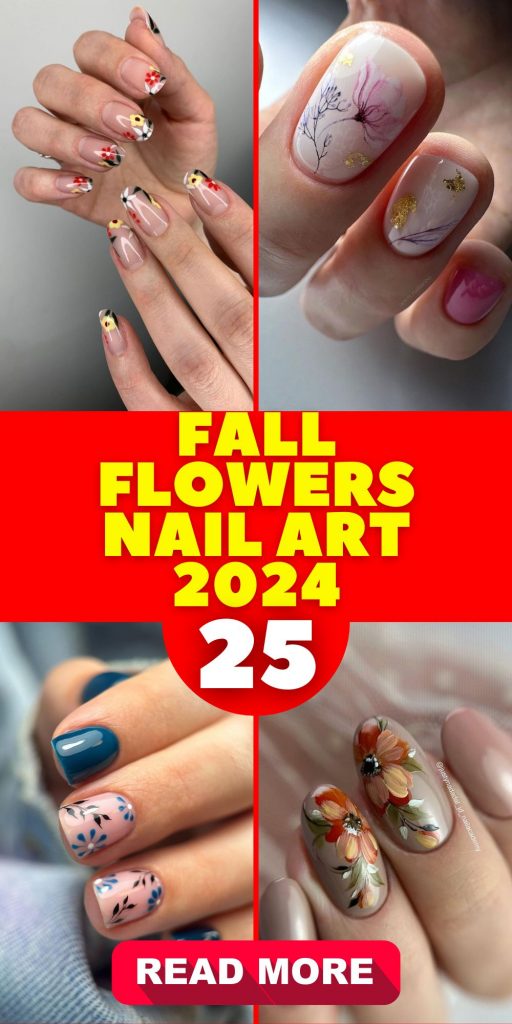
Top Fall Flowers Nail Art Designs for 2024 25 Ideas: Embrace the Beauty of Autumn
Fall is the season where nature puts on a show, and what better way to capture that beauty than on your nails? Whether you’re a nail art enthusiast or just looking for a fresh and stylish manicure for the season, fall flowers nail art is here to elevate your look. But how do you translate the vibrant colors and intricate designs of autumn into nail art that’s both stunning and easy to achieve? Let’s explore some gorgeous ideas, with expert tips on how to bring these designs to life.
Vibrant Red Blossoms
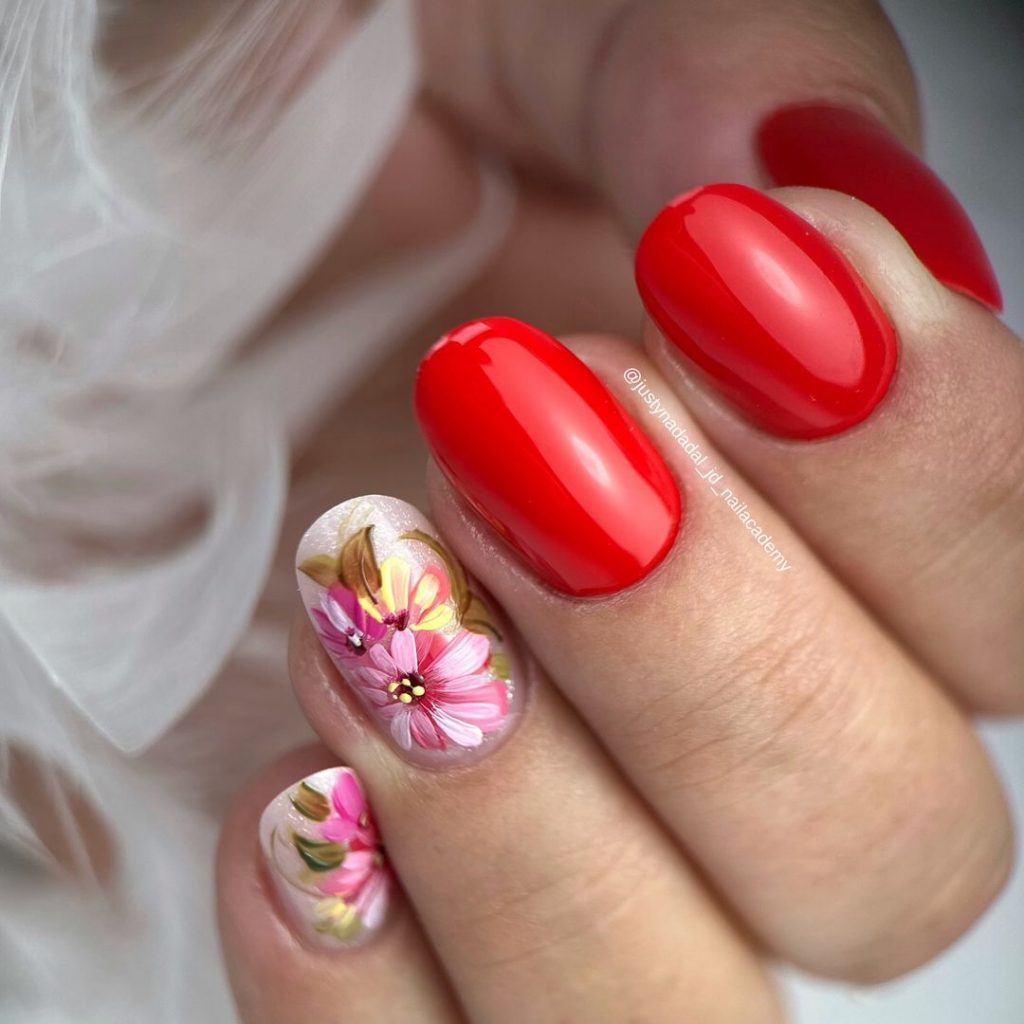
There’s something undeniably bold and captivating about a bright red manicure. In this design, the fiery red polish is complemented by a delicate floral accent on the ring finger, making the flowers truly pop against the solid background. The combination of red with soft pink and yellow flowers brings a touch of nature’s last blooms before winter, capturing the essence of fall flowers nail art 2024. This look is both stylish and elegant, perfect for those who want their nails to be a statement piece.
Consumables
- Base coat: CND Stickey Base Coat
- Red polish: OPI Big Apple Red
- Floral stickers or hand-painted flowers: Maniology BM-S230 Floral Frenzy Stamping Plate with MoYou London Black Knight Nail Polish
- Top coat: Seche Vite Dry Fast Top Coat
DIY Instructions
- Start by applying a base coat to protect your nails and ensure longevity.
- Apply two coats of the red polish, letting each layer dry completely.
- Using a thin brush or a stamping plate, apply the floral design on the accent nail. If you’re using stickers, carefully place them on the nail.
- Seal the design with a high-gloss top coat to add shine and protect your art.
Earthy Green and Daisy Charm
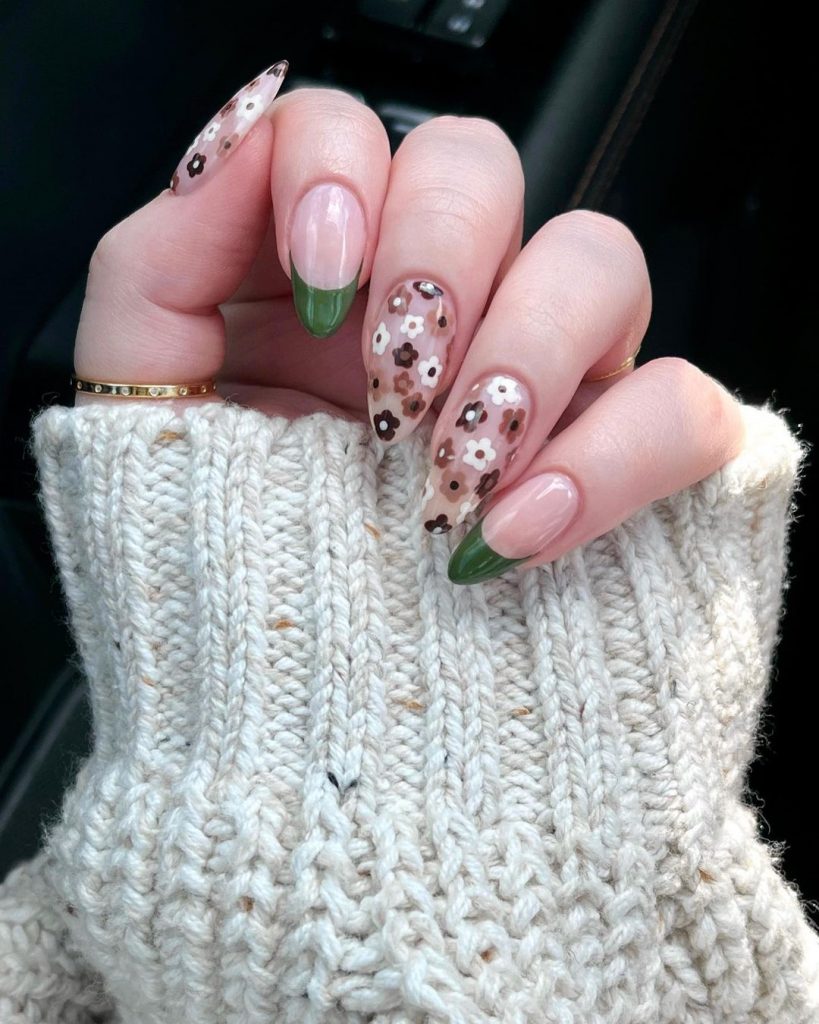
This manicure combines the earthy tones of green with the charm of daisies, evoking the feel of a cozy autumn day. The green French tips are paired with daisy decals on a neutral base, creating a look that’s both fun and elegant. This autumn design is perfect for those who want a fresh, natural look with a touch of whimsy, blending effortlessly with the season’s rich colors.
Consumables
- Base coat: OPI Natural Nail Base Coat
- Neutral polish: Essie Ballet Slippers
- Green polish for tips: Sally Hansen Insta-Dri in Leaf Me Be
- Daisy stickers: Kiss Nail Art Stickers Daisies
- Top coat: OPI Top Coat
DIY Instructions
- Begin with a base coat to prep your nails and extend the life of your manicure.
- Apply two coats of the neutral polish and let it dry thoroughly.
- Carefully paint the tips of your nails with the green polish, or use nail guides for a perfect French tip.
- Apply the daisy stickers or create daisies using a dotting tool and white polish.
- Finish with a top coat to seal and protect your design.
Sunflower Elegance
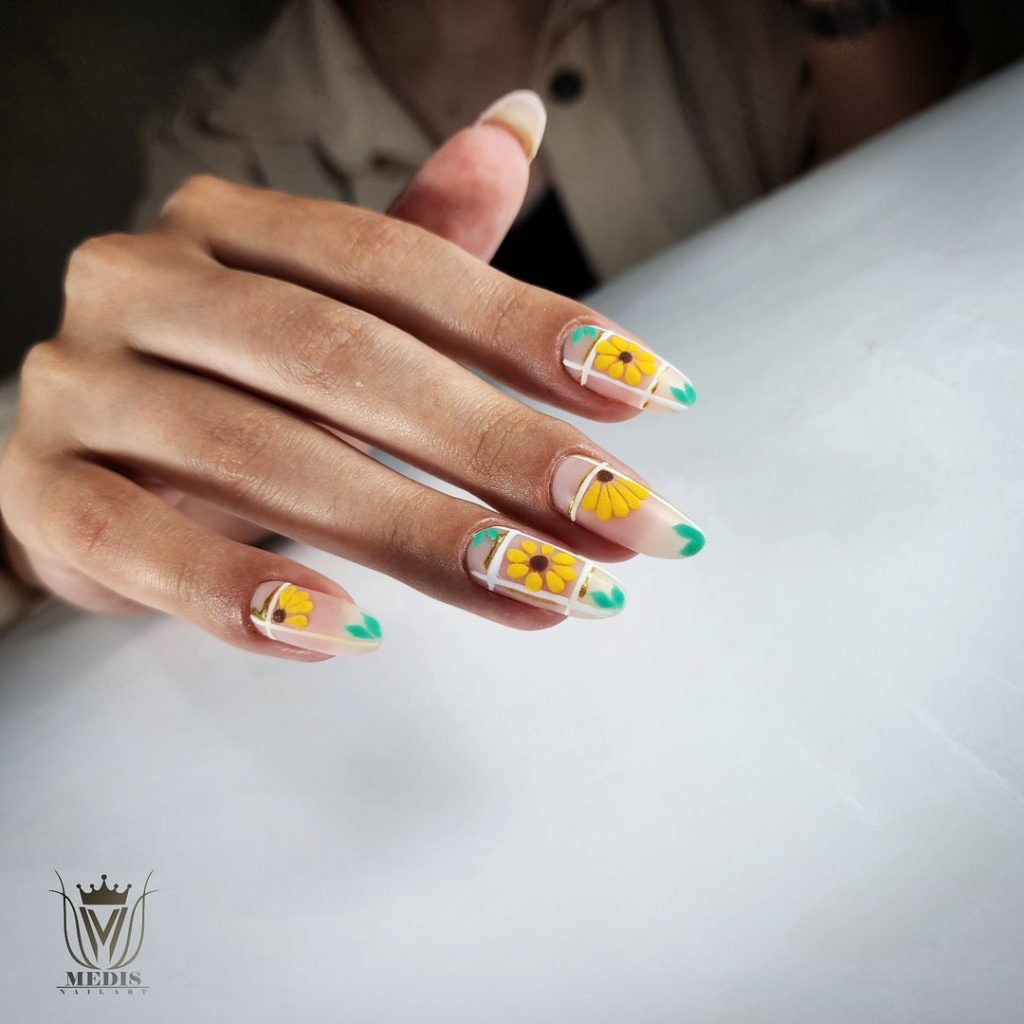
This design brings a burst of sunshine to your fall manicure with vibrant sunflowers set against a natural nude base. The yellow and brown tones of the sunflowers are a nod to the rich colors of fall, making this design both stylish and fun. The floral patterns are arranged meticulously across the nails, giving off an elegant vibe that’s perfect for any autumn occasion.
Consumables
- Base coat: Zoya Anchor Basecoat
- Nude polish: OPI Be There in a Prosecco
- Yellow and brown polish for sunflowers: China Glaze Happy Go Lucky and OPI Suzi Loves Cowboys
- Thin brush or nail art pen for detailing
- Top coat: Essie Good To Go Top Coat
DIY Instructions
- Apply a base coat to your nails to ensure a smooth application.
- Paint your nails with two coats of the nude polish and allow it to dry.
- Using a thin brush or nail art pen, carefully draw the sunflower petals with the yellow polish, then add the brown centers.
- Once your design is complete, apply a top coat to protect the nail art and add shine.
Minimalist Autumn Leaves
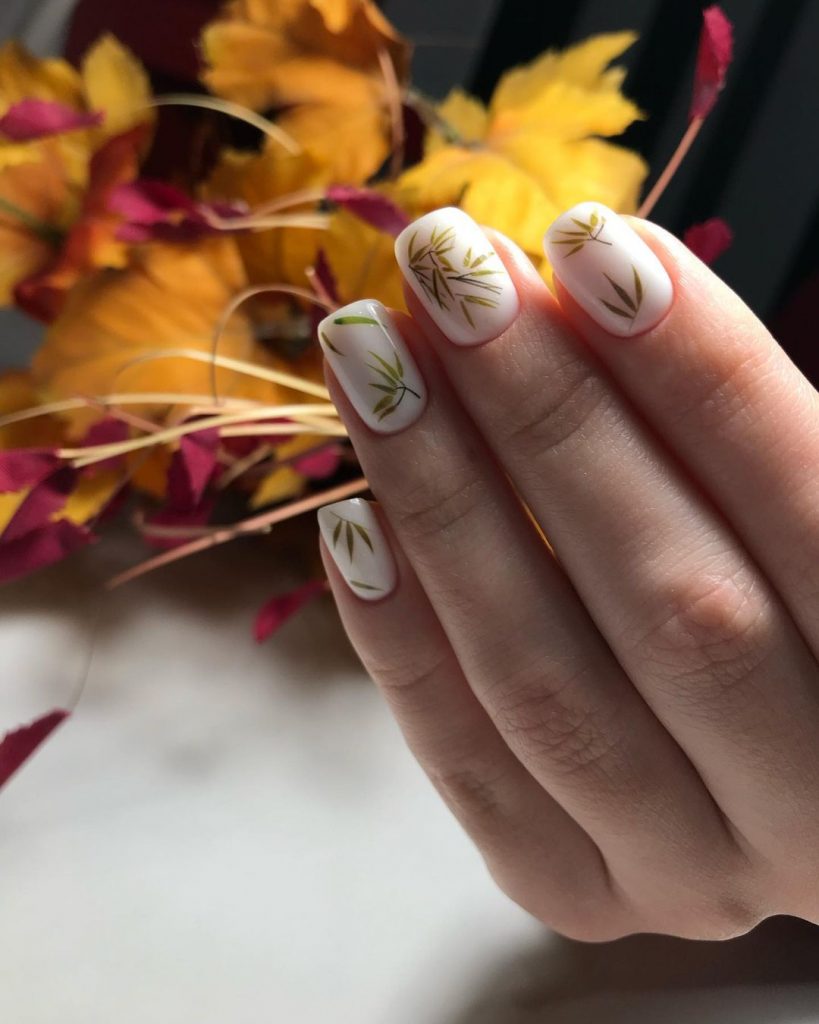
This manicure is a minimalist’s dream, featuring simple yet elegant leaf designs on a matte nude background. The leaves are subtle, rendered in soft greens and golds, perfectly embodying the autumn leaves theme. The overall look is both simple and elegant, making it an ideal choice for those who prefer understated nail art with a touch of seasonal flair.
Consumables
- Base coat: OPI Nail Envy Matte
- Nude polish: Zoya Avril
- Green and gold polish for leaves: Essie Mojito Madness and Sally Hansen Golden-I
- Thin brush for detailing
- Matte top coat: Revlon Matte Top Coat
DIY Instructions
- Start with a matte base coat to give your nails a smooth, velvety finish.
- Apply two coats of the nude polish and let them dry completely.
- Using a thin brush, draw the leaf designs with green and gold polishes, focusing on the tips or edges of your nails.
- Seal the design with a matte top coat to keep the look sophisticated and chic.
Chocolate Brown Delight
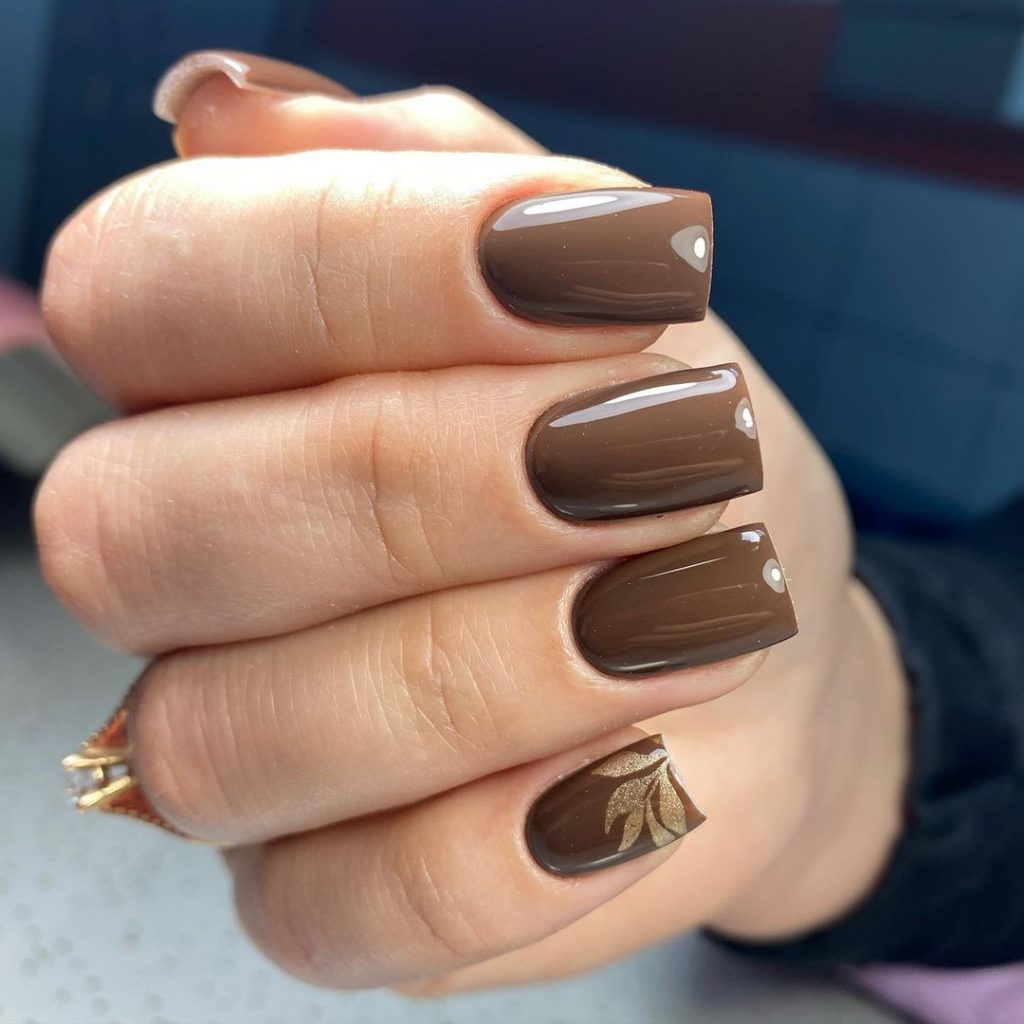
Rich chocolate brown nails are a staple for the fall season, and this design takes it to the next level with a single accent nail featuring a gold leaf motif. The deep brown shade is both trendy and elegant, perfect for those looking to embrace the cozy, warm tones of autumn. The gold leaf adds just the right amount of sparkle, making this manicure both simple and stylish.
Consumables
- Base coat: Sally Hansen Double Duty Base & Top Coat
- Brown polish: Essie Hot Cocoa
- Gold polish for leaf design: Orly Luxe
- Thin brush for detailing
- Top coat: Sally Hansen Insta-Dri Top Coat
DIY Instructions
- Apply a base coat to protect your nails and help the polish adhere better.
- Paint your nails with two coats of the brown polish, allowing each layer to dry thoroughly.
- On one accent nail, use a thin brush to draw a delicate leaf design with the gold polish.
- Finish with a glossy top coat to enhance the shine and longevity of your manicure.
Soft Yellow and Autumn Leaves
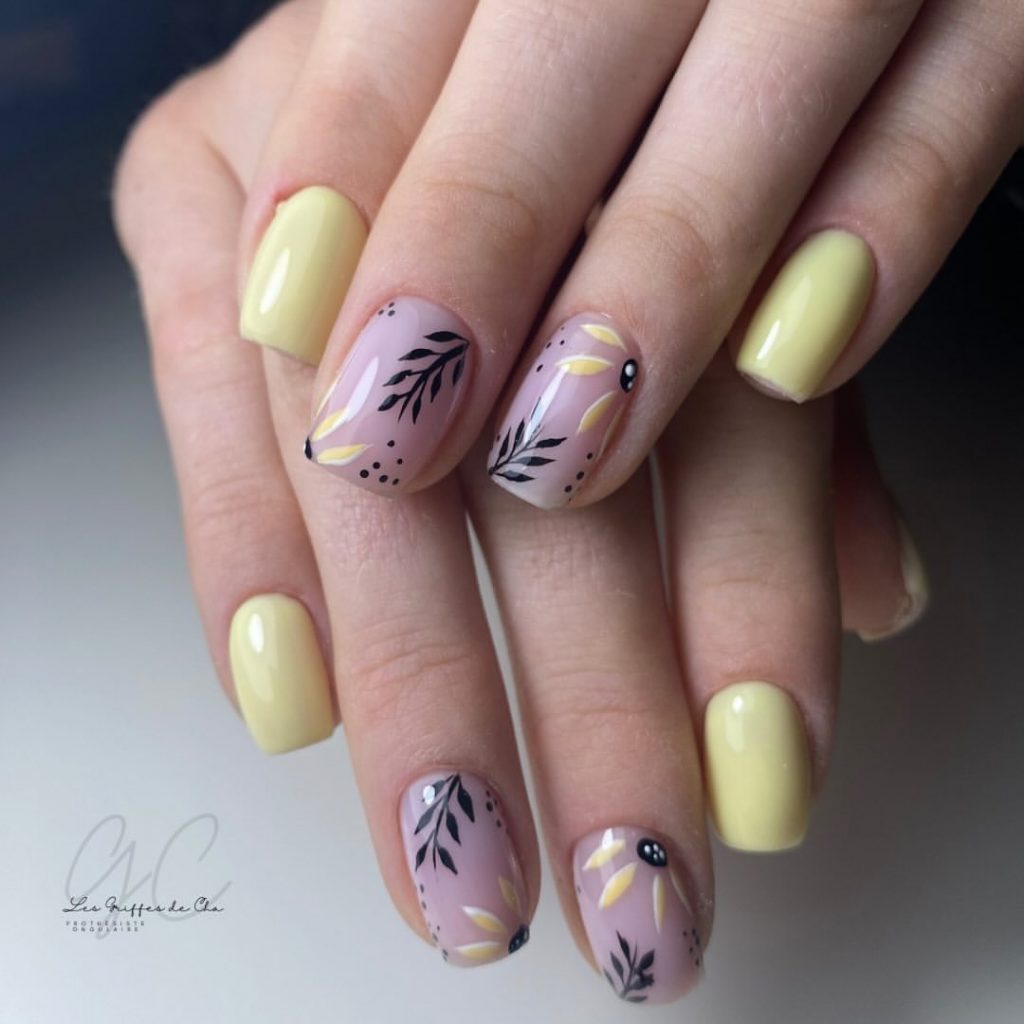
This manicure brings together soft pastel yellow and a delicate leaf design on a neutral background, creating a serene and sophisticated look. The contrast between the matte pale yellow and the intricate black and yellow leaves on a nude base is subtle yet eye-catching. This design perfectly captures the essence of autumn with its muted tones and minimalist elegance, making it ideal for those who appreciate both simplicity and detail.
Consumables
- Base coat: Essie All In One Base Coat
- Pastel yellow polish: OPI How Does Your Zen Garden Grow?
- Nude polish: Zoya Avery
- Black and yellow polish for leaf designs: Sally Hansen Black Out and China Glaze Happy Go Lucky
- Top coat: Zoya Armor Top Coat
DIY Instructions
- Begin with a base coat to protect your nails.
- Apply two coats of pastel yellow polish on half of your nails, and nude polish on the other half. Let them dry completely.
- Using a thin brush, create delicate leaf patterns with black and yellow polishes on the nude nails.
- Seal your design with a top coat to enhance durability.
Bold Pink and Black Contrast
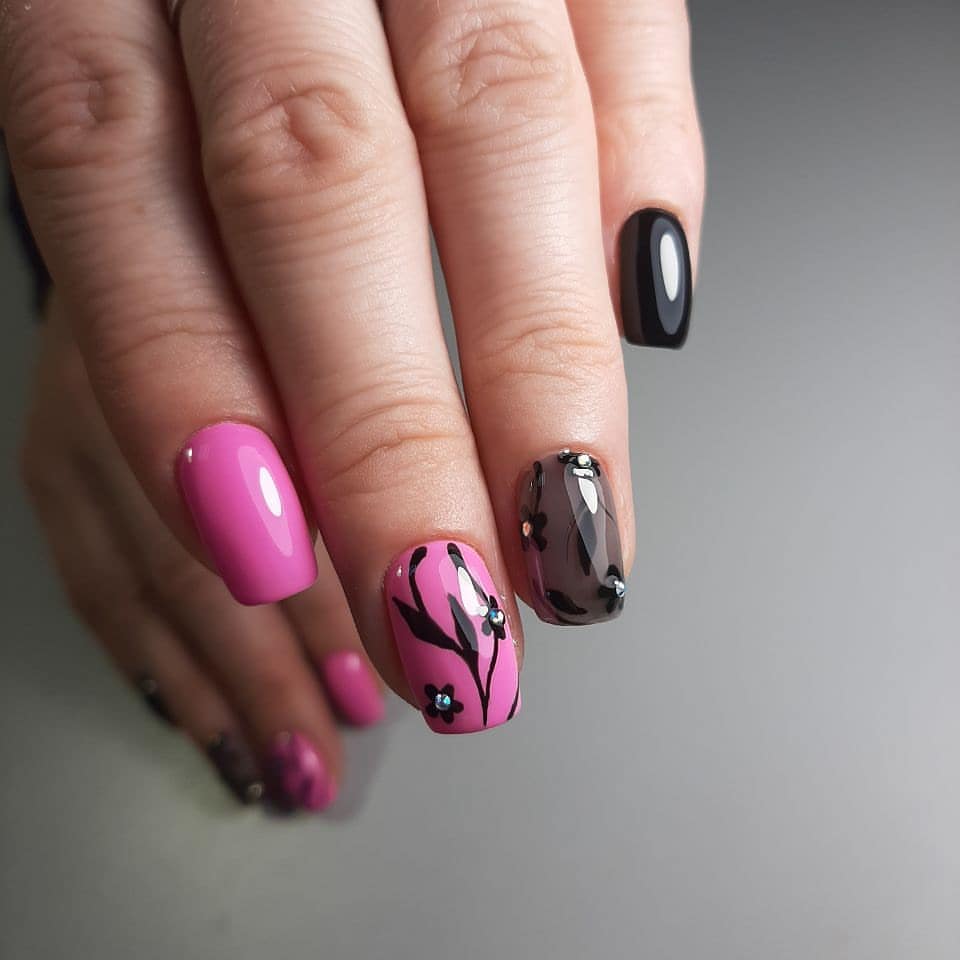
This nail design combines bold pink with sophisticated black and gray tones, enhanced by subtle floral accents. The contrasting colors create a dramatic and stylish effect, while the black leaves on the pink and gray nails add a touch of elegance and intrigue. This look is perfect for those who want to make a statement with their manicure, blending fun and sophistication.
Consumables
- Base coat: Sally Hansen Double Duty Base & Top Coat
- Pink polish: Essie Fiesta
- Black and gray polish: OPI Black Onyx and OPI I Can Never Hut Up
- Floral stickers or hand-painted flowers: MoYou London Tropical Floral Nail Stamping Plate
- Top coat: Essie Gel Setter Top Coat
DIY Instructions
- Start by applying a base coat to your nails for a smooth surface.
- Apply two coats of pink polish on some nails, and black and gray on others. Allow them to dry thoroughly.
- Add floral accents using either stickers or a stamping plate, focusing on the black and gray nails for contrast.
- Finish with a top coat to add a glossy finish and protect the design.
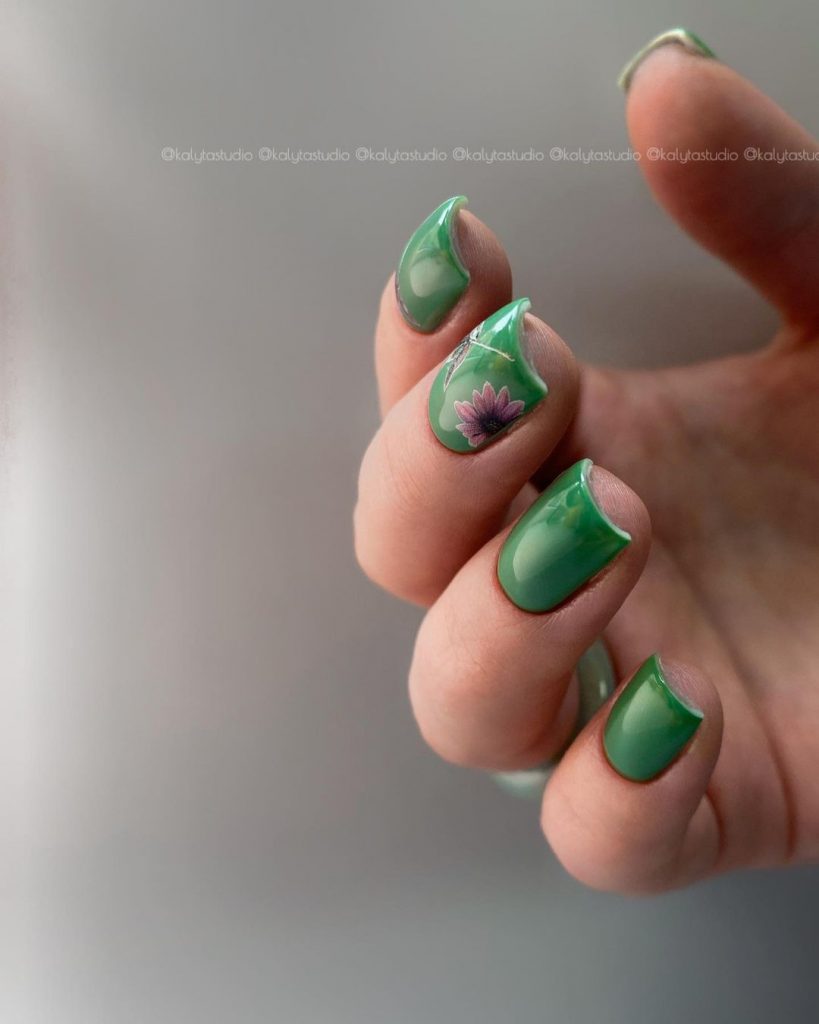
Green Serenity with Floral Accent
This manicure features a rich, deep green base color with a delicate floral accent, exuding both tranquility and nature-inspired beauty. The green nails are reminiscent of lush autumn foliage, while the single floral detail adds a touch of softness to the bold color. This elegant design is perfect for those looking for a sophisticated yet fun take on fall flowers nail art 2024.
Consumables
- Base coat: Orly Bonder Basecoat
- Green polish: Essie Off Tropic
- Pink and white polish for flower detail: Essie Muchi, Muchi and OPI Alpine Snow
- Thin brush for detailing
- Top coat: Revlon ColorStay Gel Envy Diamond Top Coat
DIY Instructions
- Apply a base coat to your nails to ensure a smooth application and long-lasting wear.
- Paint your nails with two coats of green polish and let them dry completely.
- Using a thin brush, add a small floral design on one nail, preferably on the ring finger, for a subtle accent.
- Seal with a top coat to enhance the shine and durability of your manicure.
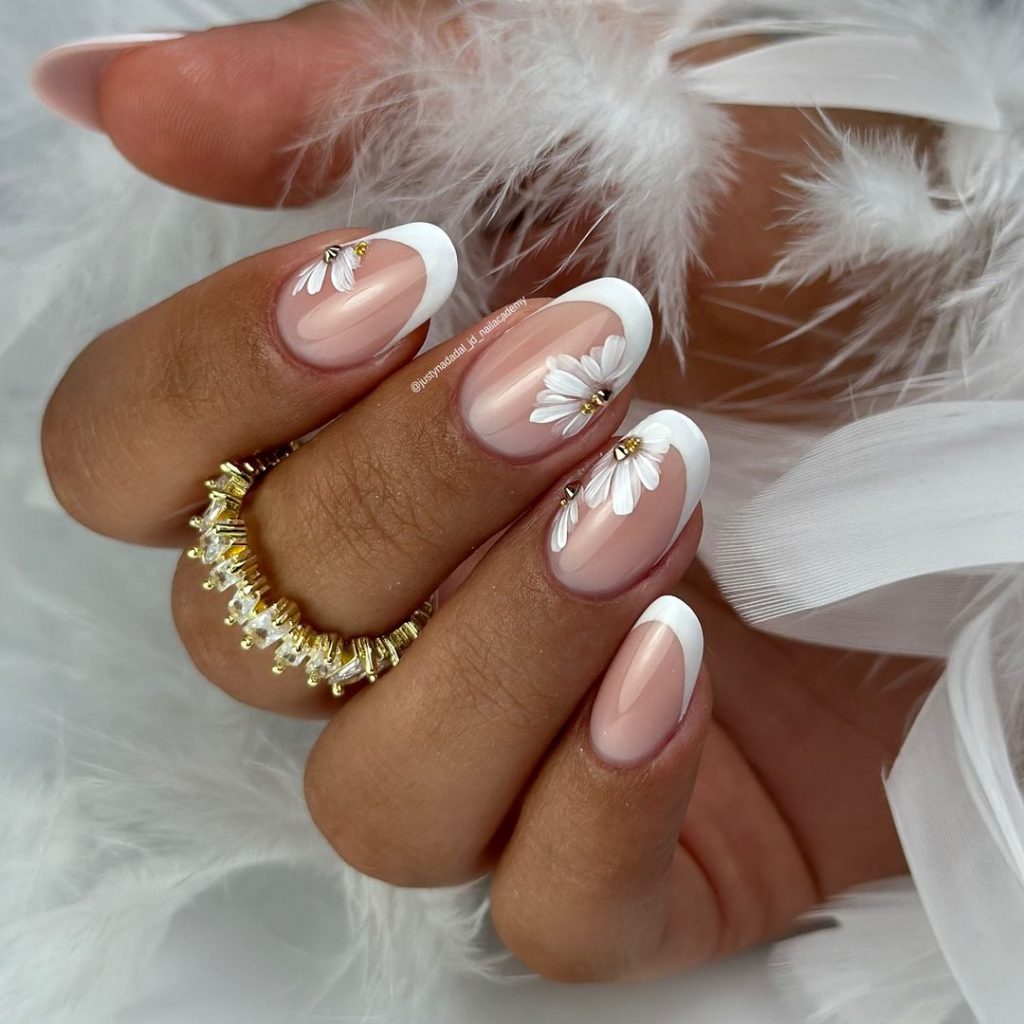
Elegant White Daisy French Tips
This sophisticated take on the classic French manicure features delicate white daisies against a sheer nude base, perfect for an autumn look. The white tips and daisy accents create a fresh and clean appearance, blending classic elegance with a touch of floral charm. This design is ideal for those who prefer a simple yet stylish manicure that complements any outfit or occasion.
Consumables
- Base coat: Essie Ridge Filling Base Coat
- Sheer nude polish: Essie Mademoiselle
- White polish for French tips: OPI Alpine Snow
- Daisy stickers or hand-painted daisies: Kiss Nail Art Stickers Daisies
- Top coat: Sally Hansen Miracle Gel Top Coat
DIY Instructions
- Start with a ridge-filling base coat to smooth out the surface of your nails.
- Apply a sheer nude polish in two coats, letting each coat dry completely.
- Carefully paint the tips of your nails with white polish for a classic French look, or use guides for precision.
- Add daisy stickers or hand-paint small daisies on the accent nails. Finish with a top coat to protect the design and add shine.
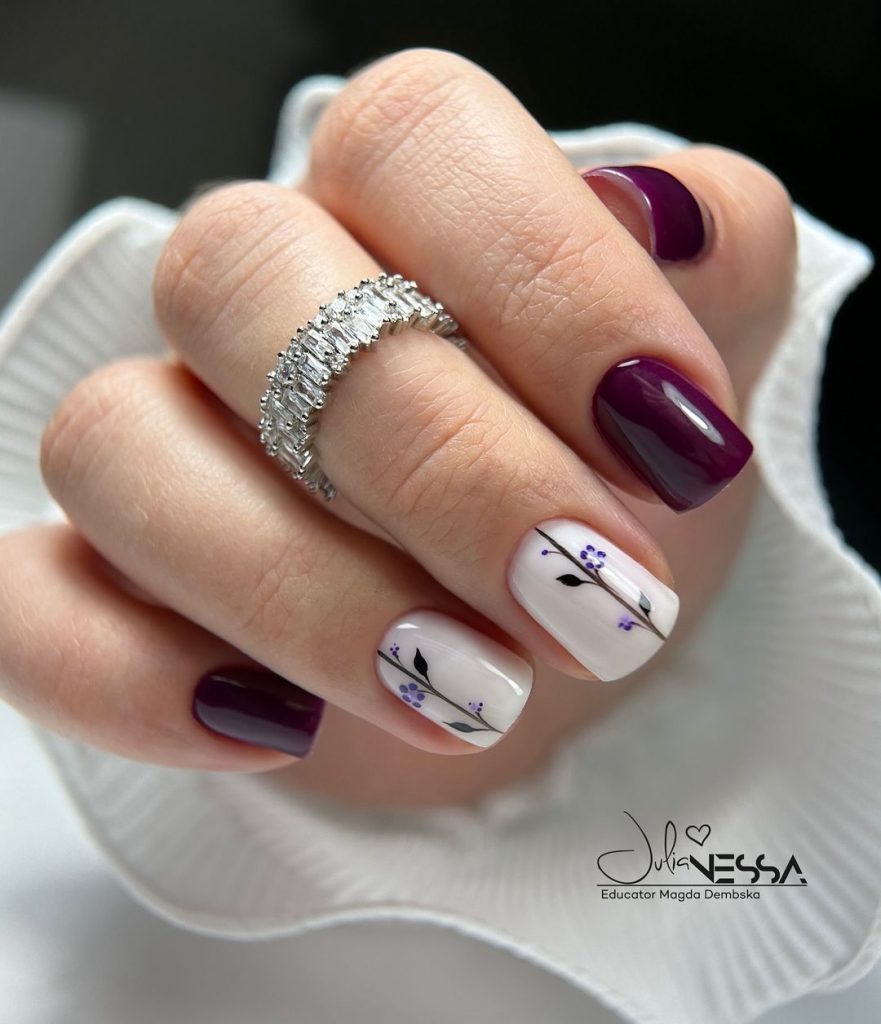
Deep Burgundy with Delicate Floral Details
This manicure features a deep burgundy polish paired with delicate white floral accents, creating a striking contrast that is both rich and elegant. The burgundy color is perfect for the autumn season, while the floral designs add a touch of delicacy, making this look suitable for any formal or casual occasion. This design is a perfect representation of fall flowers nail art 2024, combining the warmth of autumn colors with the beauty of floral art.
Consumables
- Base coat: Deborah Lippmann Hard Rock Base & Top Coat
- Burgundy polish: Essie Bahama Mama
- White polish for floral details: OPI Alpine Snow
- Thin brush for detailing
- Top coat: Seche Vite Dry Fast Top Coat
DIY Instructions
- Begin with a base coat to protect your nails and extend the life of your manicure.
- Apply two coats of burgundy polish and allow them to dry completely.
- Using a thin brush, carefully draw small floral designs on select nails for a subtle yet beautiful accent.
- Finish with a top coat to seal the design and add a glossy finish.
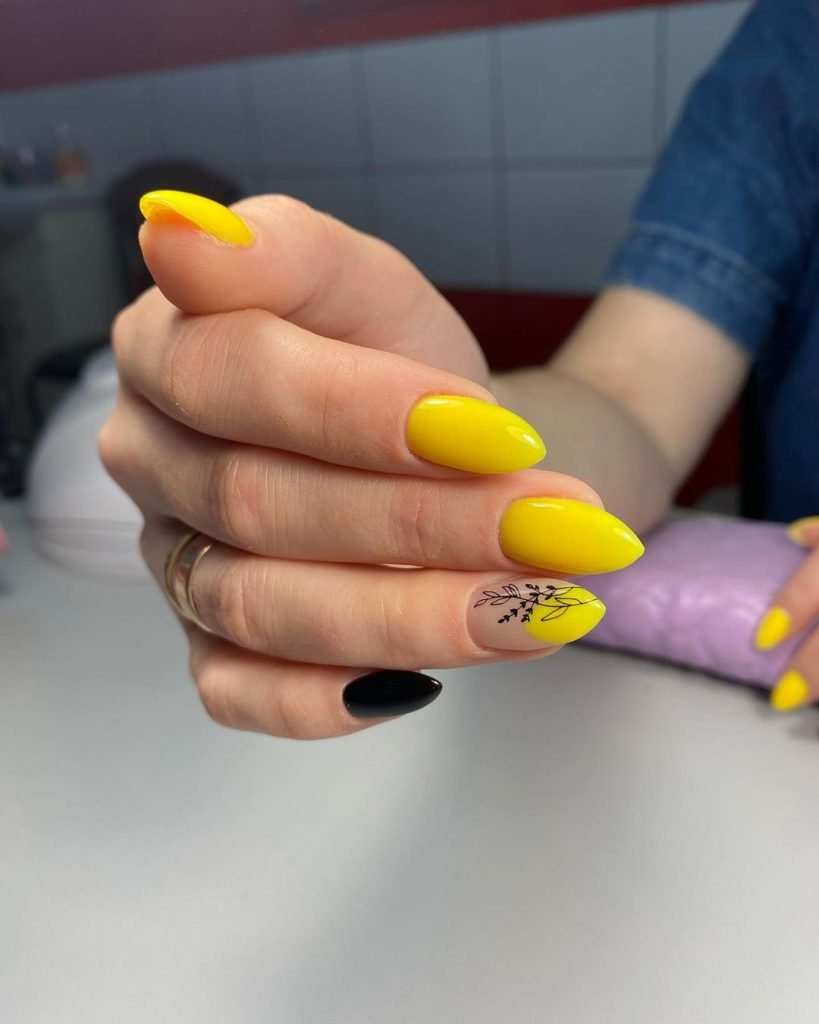
Bold Yellow with Floral Accent
This vibrant yellow manicure is the perfect way to add a pop of color to your fall look. The bright yellow nails are complemented by a single accent nail featuring a delicate black floral design on a nude base. The inclusion of a solid black nail further enhances the contrast, making this manicure both bold and fun. This design is great for those who love a stylish yet straightforward look, perfect for brightening up the autumn season.
Consumables
- Base coat: Essie First Base Coat
- Yellow polish: OPI I Just Can’t Cope-acabana
- Black polish: OPI Black Onyx
- Nude polish: Essie Ballet Slippers
- Black polish for floral design: Essie Licorice
- Top coat: Essie Gel Couture Top Coat
DIY Instructions
- Apply a base coat to your nails for a smooth application.
- Paint most of your nails with two coats of yellow polish, except one accent nail which should be painted nude, and another painted black. Allow each coat to dry thoroughly.
- Use a thin brush to paint a delicate black floral design on the nude nail.
- Finish with a top coat to seal the design and add a glossy finish.
Golden Autumn Blossoms
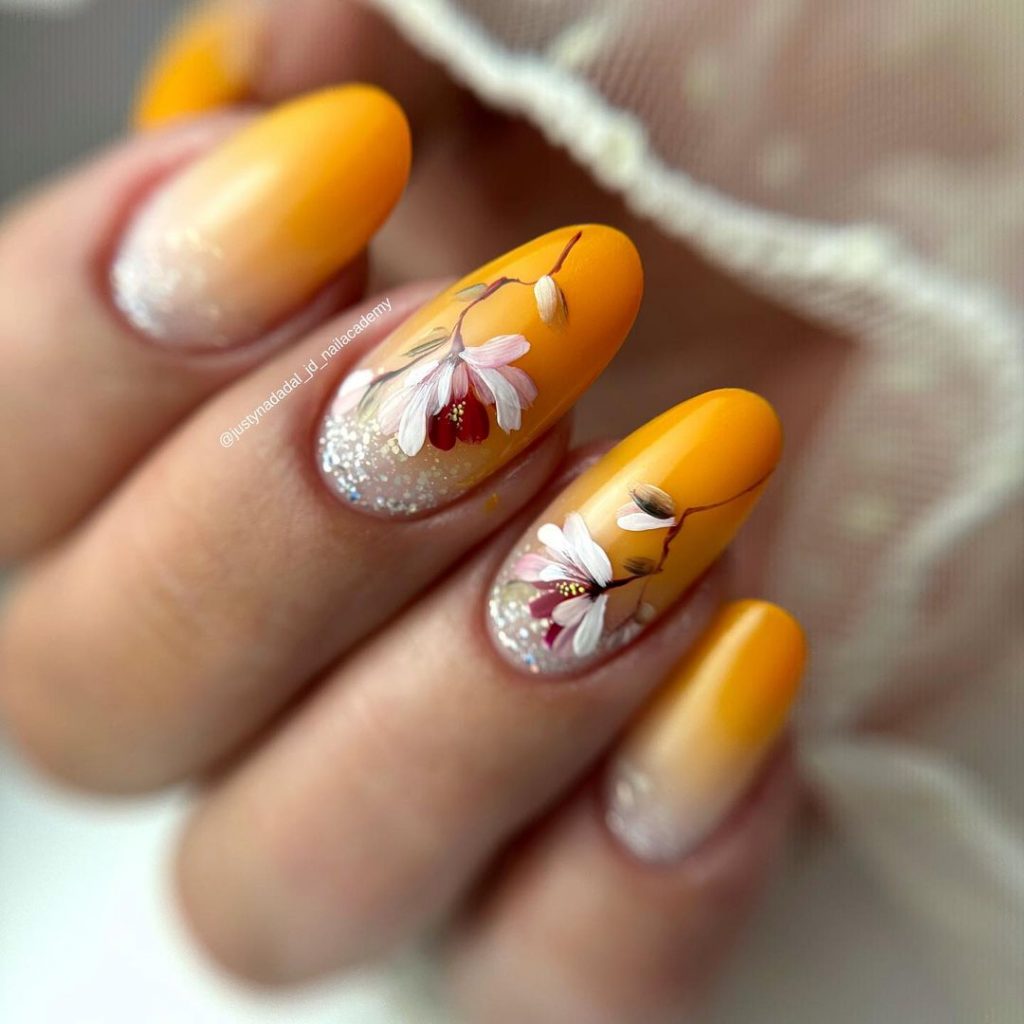
This manicure showcases the warm, golden hues of autumn with a stunning gradient effect, blending from deep yellow to a soft golden shimmer. Delicate hand-painted flowers add an extra touch of elegance, making this design ideal for those who want a stylish and elegant look. The intricate floral details and the soft glitter at the base of the nails perfectly capture the essence of fall flowers nail art 2024, making it a standout choice for the season.
Consumables
- Base coat: Orly Bonder Basecoat
- Yellow polish: China Glaze Happy Go Lucky
- Glitter polish: Zoya Trixie
- White and pink polish for floral details: OPI Alpine Snow and Essie Muchi, Muchi
- Thin brush for detailing
- Top coat: Seche Vite Dry Fast Top Coat
DIY Instructions
- Start with a base coat to protect your nails and provide a smooth canvas.
- Create a gradient effect by applying yellow polish at the tips and blending it into the glitter polish at the base.
- Once dry, use a thin brush to paint delicate floral designs on a few nails, adding soft pink and white details.
- Seal with a top coat to ensure your design lasts and shines beautifully.
Subtle Gray with Butterfly Accent
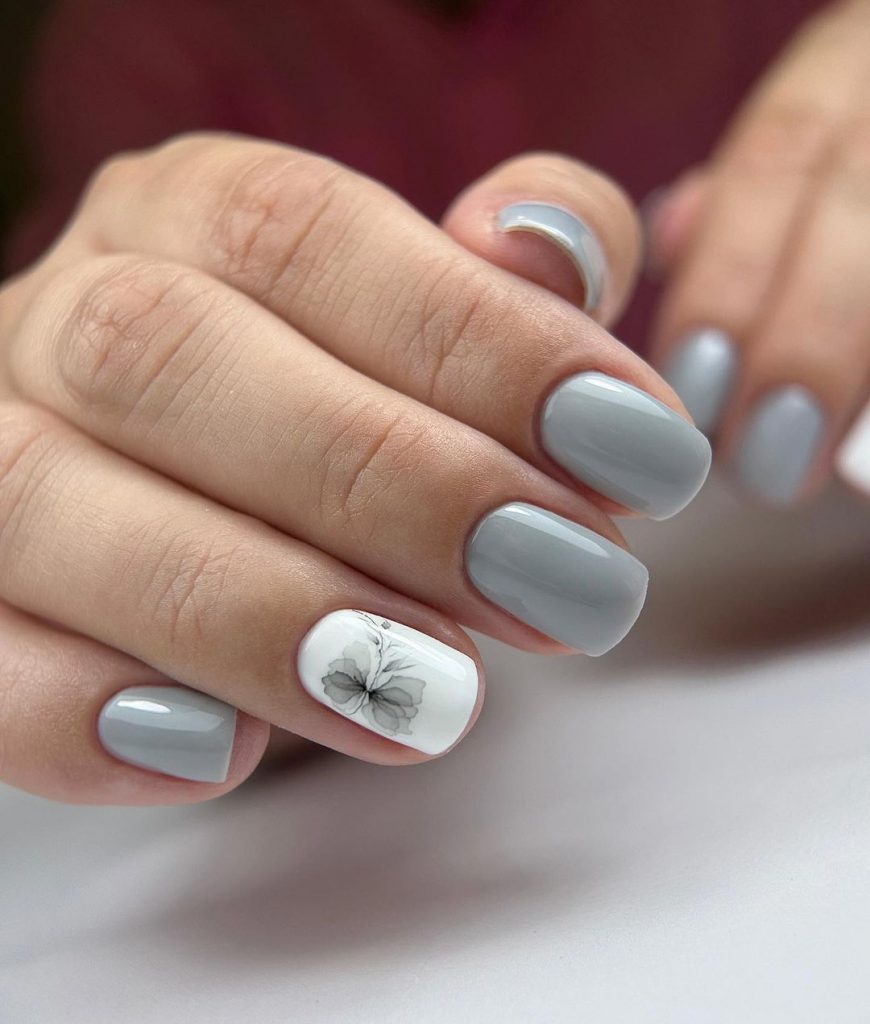
This manicure combines the sophistication of a soft gray polish with the delicate beauty of a butterfly accent. The contrast between the cool gray and the intricate butterfly on a single white accent nail adds a touch of elegance to this minimalist design. Perfect for those who prefer a simple yet refined look, this autumn manicure is versatile and works well for both casual and formal settings.
Consumables
- Base coat: OPI Natural Nail Base Coat
- Gray polish: Zoya Dove
- White polish: OPI Alpine Snow
- Black polish for butterfly design: Essie Licorice
- Thin brush for detailing
- Top coat: Zoya Armor Top Coat
DIY Instructions
- Begin with a base coat to smooth the nail surface and enhance polish adhesion.
- Apply two coats of gray polish to most of your nails, with one nail painted white as an accent. Allow to dry completely.
- Using a thin brush, draw a delicate butterfly on the white accent nail using black polish.
- Finish with a top coat to protect your design and add a glossy finish.
Warm Beige with Autumn Florals
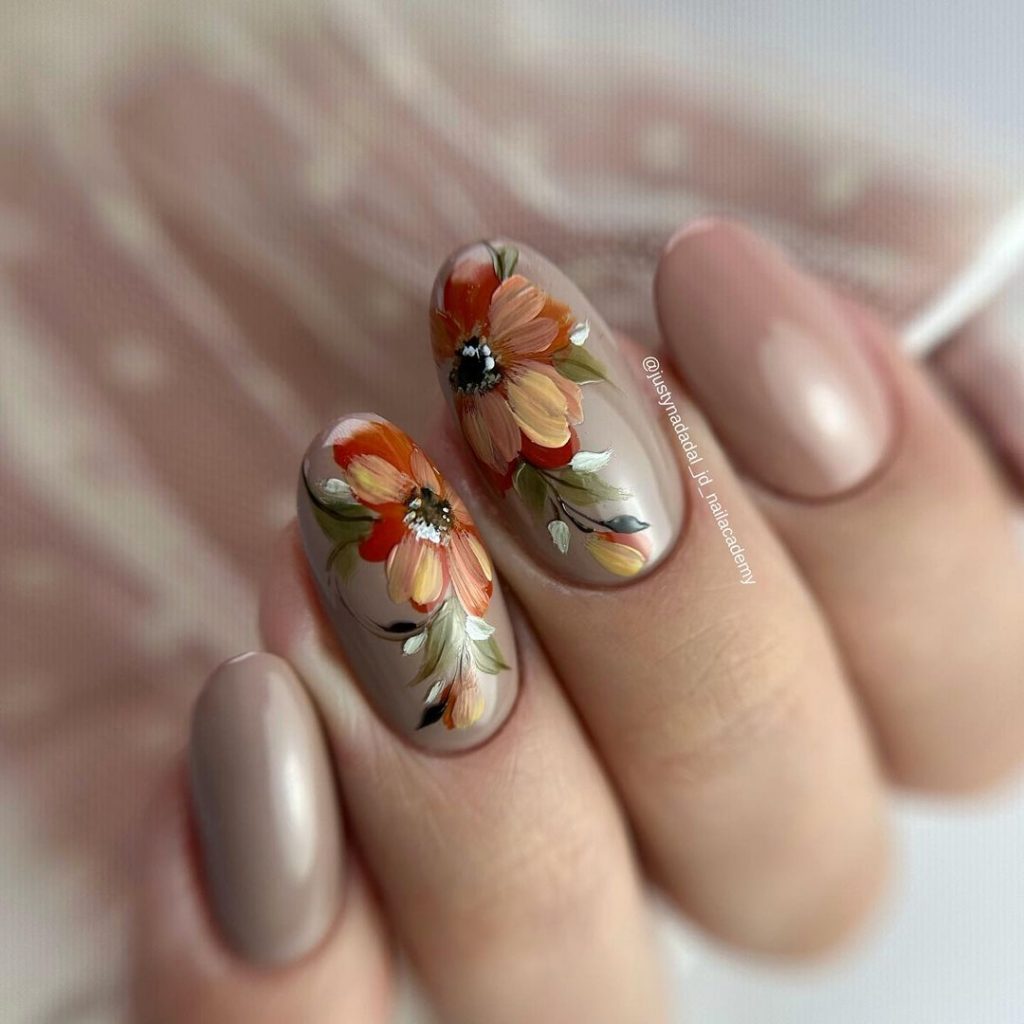
This manicure features a warm beige base with stunning hand-painted autumn flowers in shades of orange, red, and green. The detailed floral art is a beautiful representation of the autumn season, making this design both stylish and elegant. The soft beige background provides the perfect canvas for the vibrant flowers, making them stand out without overpowering the overall look. This manicure is perfect for those who want to embrace the beauty of fall in a subtle yet artistic way.
Consumables
- Base coat: Deborah Lippmann Hard Rock Base & Top Coat
- Beige polish: OPI Samoan Sand
- Orange, red, and green polish for floral details: Essie Meet Me at Sunset, OPI Got the Blues for Red, Essie Mojito Madness
- Thin brush for detailing
- Top coat: Essie Gel Couture Top Coat
DIY Instructions
- Apply a base coat to your nails to ensure a long-lasting manicure.
- Paint your nails with two coats of beige polish and let them dry thoroughly.
- Using a thin brush, create autumn floral designs on select nails, combining orange, red, and green polishes for a vibrant effect.
- Finish with a top coat to protect your design and give it a beautiful shine.
Classic French with Floral Accent
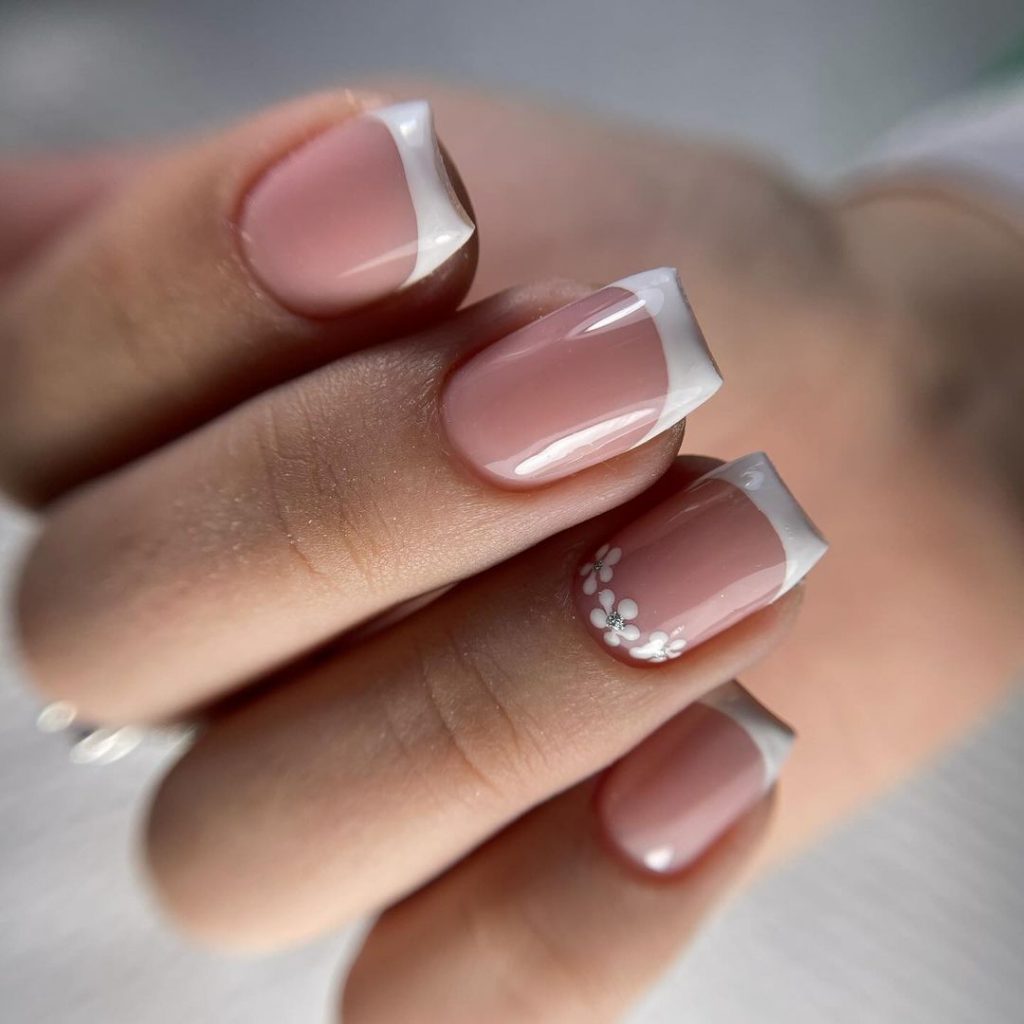
This manicure takes the classic French tip to a new level with the addition of a delicate floral accent on one nail. The clean white tips are paired with a soft pink base, while the small white flowers on the accent nail add a touch of elegance and charm. This stylish design is perfect for those who love a timeless look with a subtle nod to fall flowers nail art 2024. It’s a versatile manicure that can complement any outfit or occasion.
Consumables
- Base coat: OPI Ridge Filler
- Pink polish: Essie Ballet Slippers
- White polish for tips and floral design: OPI Alpine Snow
- Thin brush for detailing
- Top coat: Essie Gel Couture Top Coat
DIY Instructions
- Start with a base coat to smooth out the nail surface and ensure a flawless finish.
- Apply two coats of pink polish and let them dry completely.
- Carefully paint white tips on each nail for a classic French manicure. Use a thin brush to add small white flowers to the accent nail.
- Seal with a top coat to protect your design and add a glossy shine.
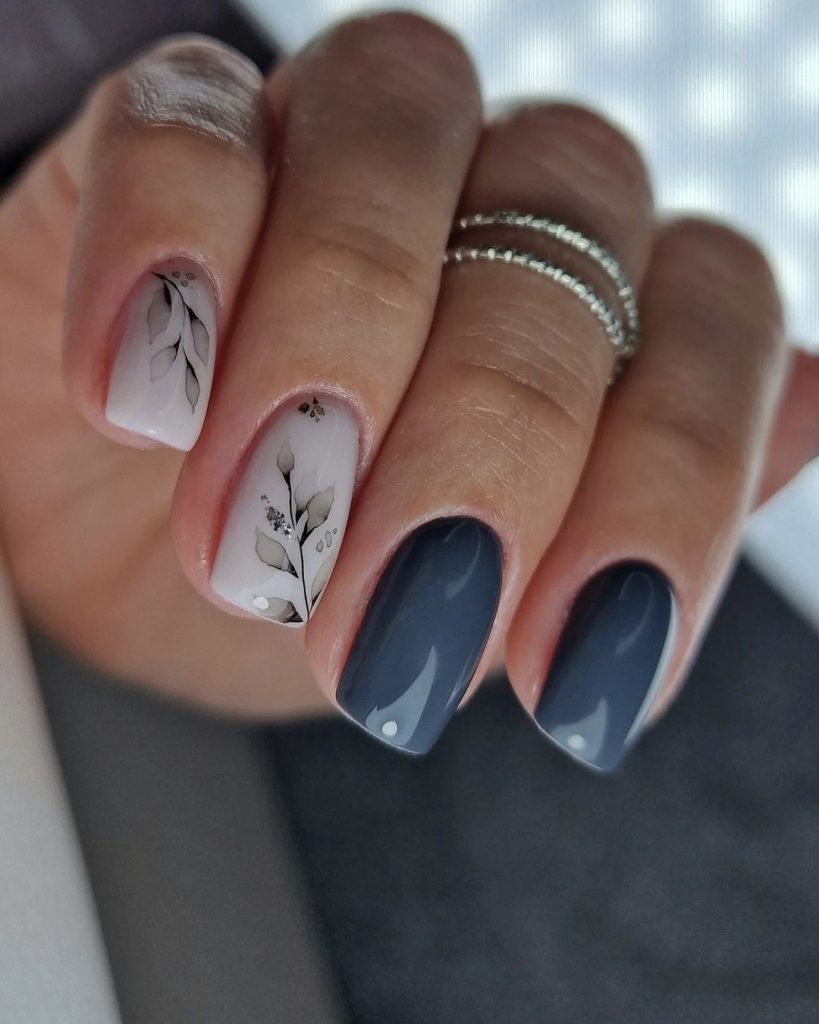
Smoky Gray with Subtle Leaves
This manicure features a sophisticated smoky gray polish paired with a delicate leaf design on a soft nude background. The contrast between the deep gray and the light nude makes the leaves stand out beautifully, giving a subtle yet refined look. The minimalist design, enhanced by a hint of glitter on the accent nails, adds just the right amount of sparkle, making this manicure elegant and perfect for the autumn season.
Consumables
- Base coat: Essie All In One Base Coat
- Gray polish: OPI Less is Norse
- Nude polish: Zoya Avery
- Black polish for leaf design: Essie Licorice
- Glitter polish: OPI Pirouette My Whistle
- Thin brush for detailing
- Top coat: Seche Vite Dry Fast Top Coat
DIY Instructions
- Apply a base coat to your nails for a smooth foundation.
- Paint most of your nails with two coats of gray polish, leaving a couple for the nude base. Allow to dry completely.
- Using a thin brush, draw delicate black leaves on the nude nails, adding a touch of glitter for an extra shine.
- Seal with a top coat to ensure your design lasts and maintains its gloss.
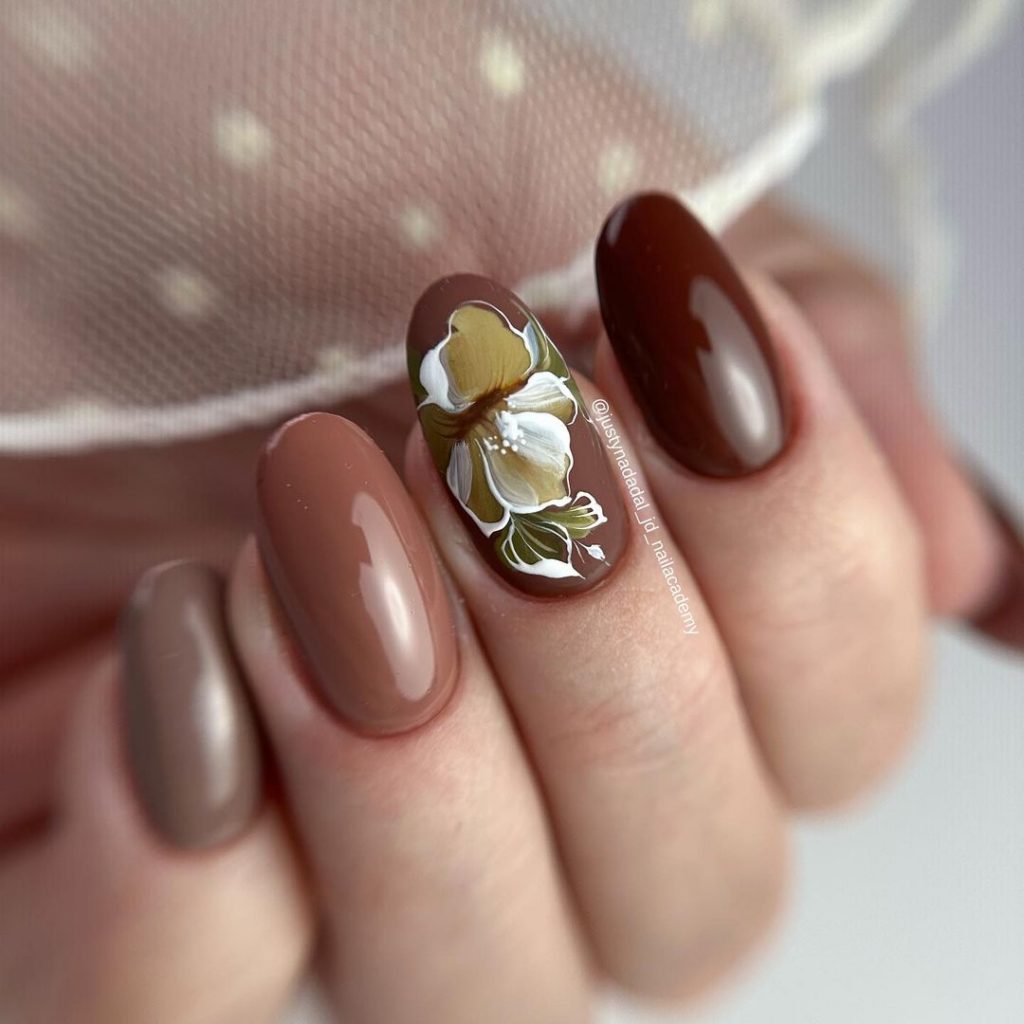
Rich Browns with a Floral Centerpiece
This manicure embraces the warm tones of autumn with rich shades of brown, accented by a striking floral design on the center nail. The combination of dark chocolate, mocha, and caramel tones creates a cozy and inviting palette, perfect for the season. The floral design, painted in soft, earthy colors, adds a sophisticated and stylish touch, making this manicure a standout for any autumn occasion.
Consumables
- Base coat: Orly Bonder Basecoat
- Dark brown polish: OPI Midnight in Moscow
- Medium brown polish: Zoya Chanelle
- Light brown polish: Essie Mink Muffs
- White and green polish for floral details: OPI Alpine Snow and Essie Mojito Madness
- Thin brush for detailing
- Top coat: Essie Gel Couture Top Coat
DIY Instructions
- Start with a base coat to protect your nails and enhance the longevity of your manicure.
- Paint your nails with varying shades of brown, creating an ombré effect across your fingers.
- On the center nail, use a thin brush to paint a detailed floral design, incorporating white and green accents for contrast.
- Finish with a top coat to seal the design and give it a high-gloss finish.
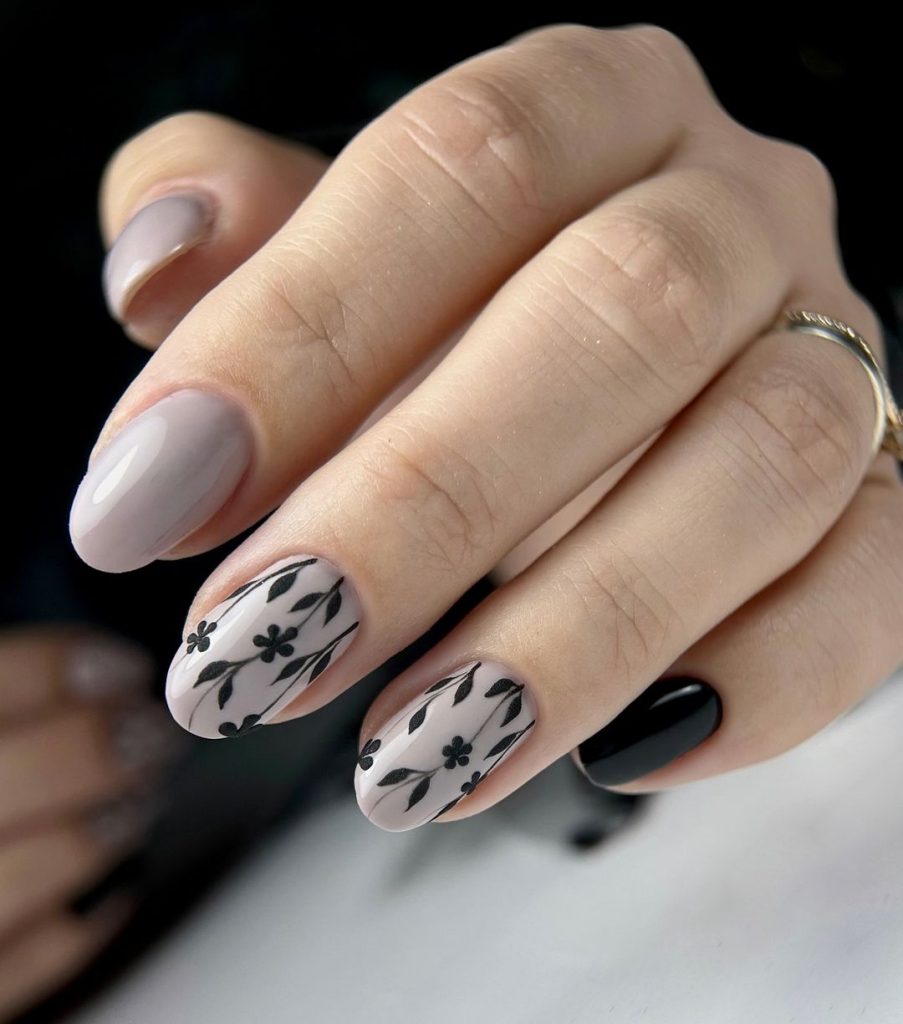
Monochrome Floral Elegance
This manicure combines classic black and white with a floral twist, creating a bold yet elegant look. The soft nude base on most nails provides a neutral canvas for the intricate black floral designs, which add depth and dimension. The use of black polish on one nail enhances the contrast, making the floral accents stand out even more. This design is perfect for those who love a stylish and sophisticated approach to autumn nail art.
Consumables
- Base coat: Sally Hansen Double Duty Base & Top Coat
- Nude polish: Essie Ballet Slippers
- Black polish: OPI Black Onyx
- Thin brush for detailing
- Top coat: OPI Top Coat
DIY Instructions
- Begin with a base coat to prep your nails.
- Apply two coats of nude polish to most of your nails, leaving one nail for a full black polish.
- Use a thin brush to create intricate black floral designs on the nude nails.
- Seal the design with a top coat for a polished and long-lasting finish.
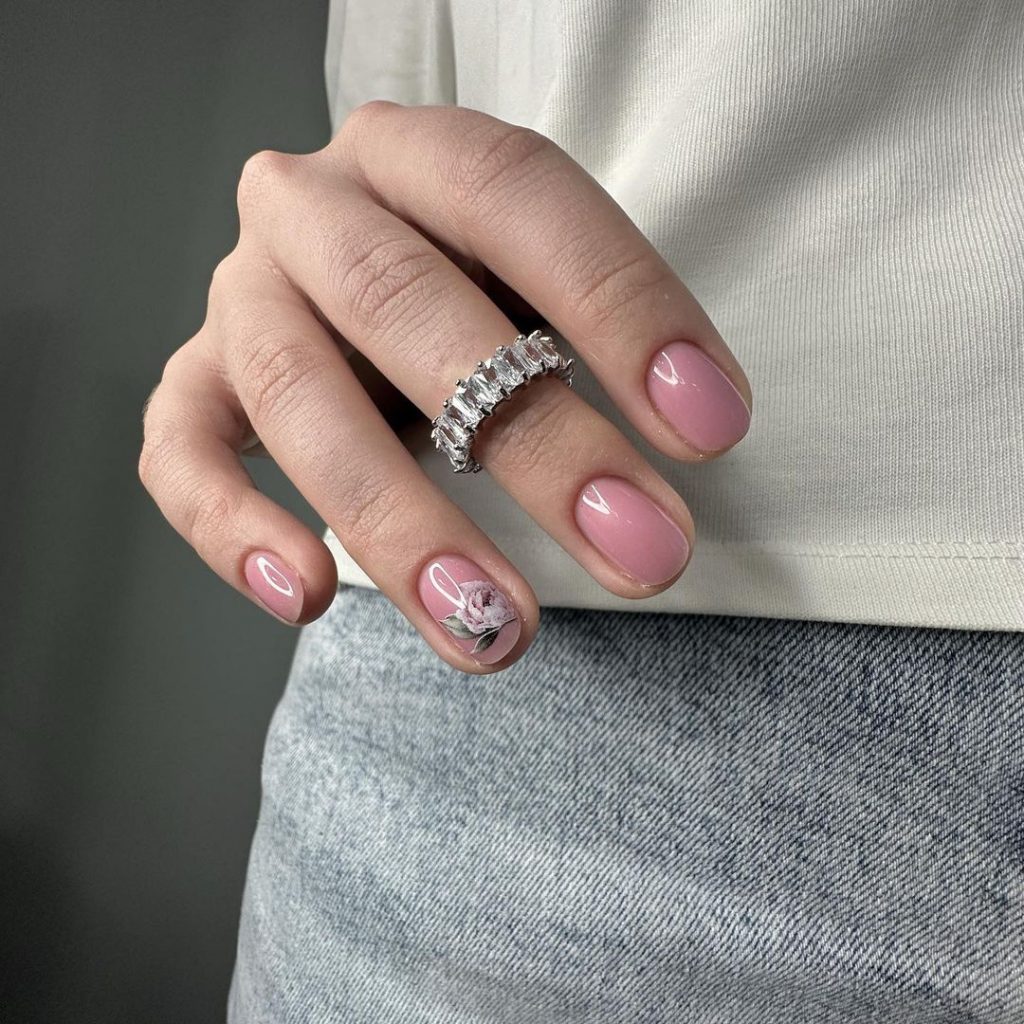
Soft Pink with a Delicate Rose
This manicure is the epitome of subtle elegance, featuring a soft pink polish complemented by a delicate rose accent on a single nail. The light pink base provides a fresh and clean look, while the hand-painted rose adds a romantic and feminine touch. This simple yet elegant design is perfect for those who prefer a minimalistic approach to fall flowers nail art 2024.
Consumables
- Base coat: Essie Ridge Filling Base Coat
- Light pink polish: Essie Ballet Slippers
- White and green polish for rose details: OPI Alpine Snow and Essie Mojito Madness
- Thin brush for detailing
- Top coat: Zoya Armor Top Coat
DIY Instructions
- Apply a base coat to smooth out the nail surface.
- Paint your nails with two coats of light pink polish, allowing each layer to dry thoroughly.
- Using a thin brush, create a delicate rose on the accent nail with white and green polishes.
- Finish with a top coat to protect the design and add a subtle shine.
Bright Yellow with Daisy Accents
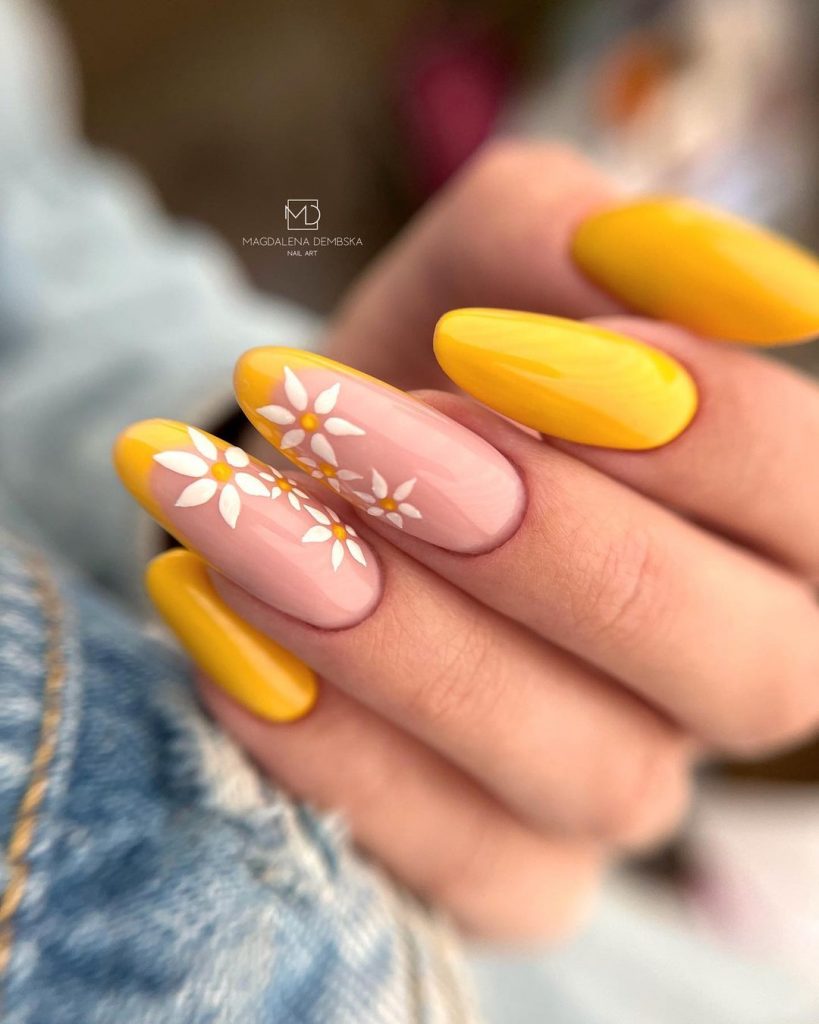
This manicure is a burst of sunshine with its vibrant yellow base and playful daisy accents. The combination of bold yellow and delicate white daisies creates a cheerful and fun look, perfect for brightening up the autumn season. The daisy design on the nude accent nails adds a whimsical touch, making this manicure ideal for those who love stylish and joyful nail art.
Consumables
- Base coat: Orly Bonder Basecoat
- Yellow polish: OPI Sun, Sea, and Sand in My Pants
- White polish for daisy accents: Essie Blanc
- Yellow polish for daisy centers: China Glaze Happy Go Lucky
- Thin brush for detailing
- Top coat: Essie Gel Couture Top Coat
DIY Instructions
- Start with a base coat to protect your nails and create a smooth surface.
- Apply two coats of yellow polish to most of your nails, leaving one or two accent nails nude.
- Use a thin brush to paint delicate daisies on the nude nails, adding yellow centers for a pop of color.
- Seal with a top coat to ensure your design stays vibrant and long-lasting.
Blue Florals on Nude Base
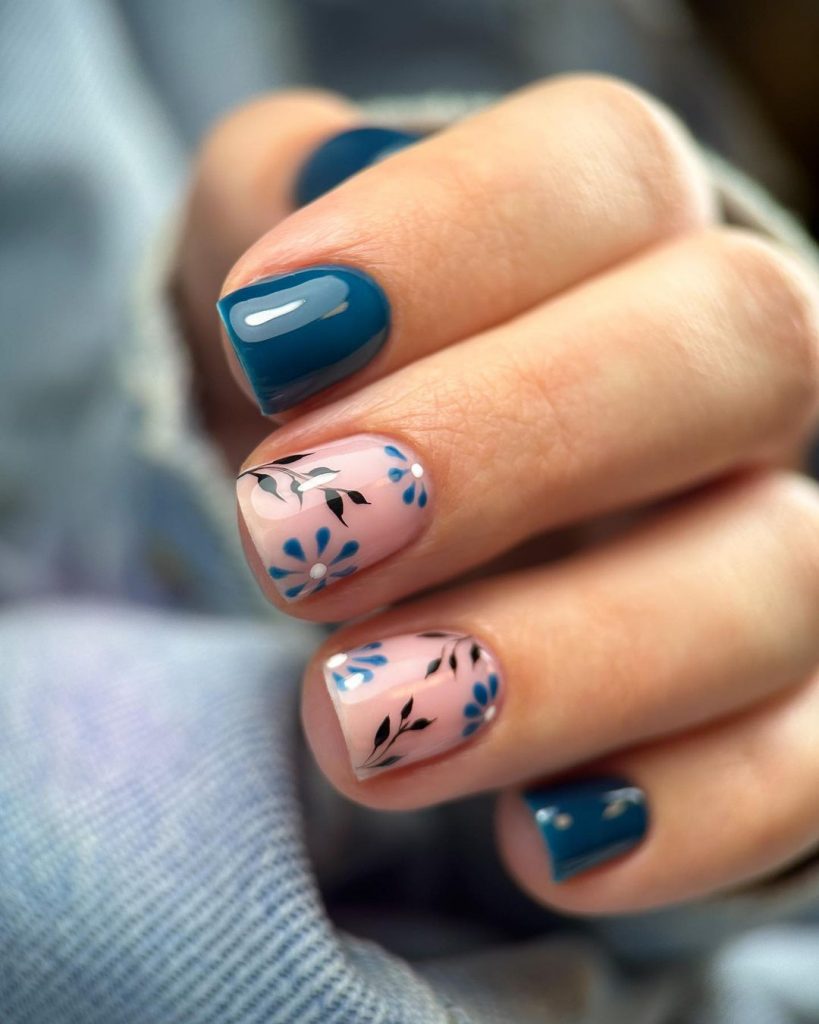
This manicure beautifully combines a deep blue polish with delicate floral designs on a soft nude base. The intricate blue flowers with black leaves create a striking contrast against the nude background, while the blue nails add a touch of boldness. This design is perfect for those who want to blend elegant and fun elements in their nail art, making it ideal for the autumn season.
Consumables
- Base coat: OPI Natural Nail Base Coat
- Blue polish: Essie Aruba Blue
- Nude polish: Zoya Avery
- Black polish for leaves: Essie Licorice
- Blue polish for flowers: OPI Rich Girls & Po-Boys
- Thin brush for detailing
- Top coat: Seche Vite Dry Fast Top Coat
DIY Instructions
- Apply a base coat to protect your nails and create a smooth surface.
- Paint your nails with two coats of blue polish, leaving a few nails for the nude base. Allow to dry completely.
- Use a thin brush to paint the floral designs with blue and black polishes on the nude nails.
- Seal with a top coat to protect your design and add a glossy finish.
Navy with Golden Accents
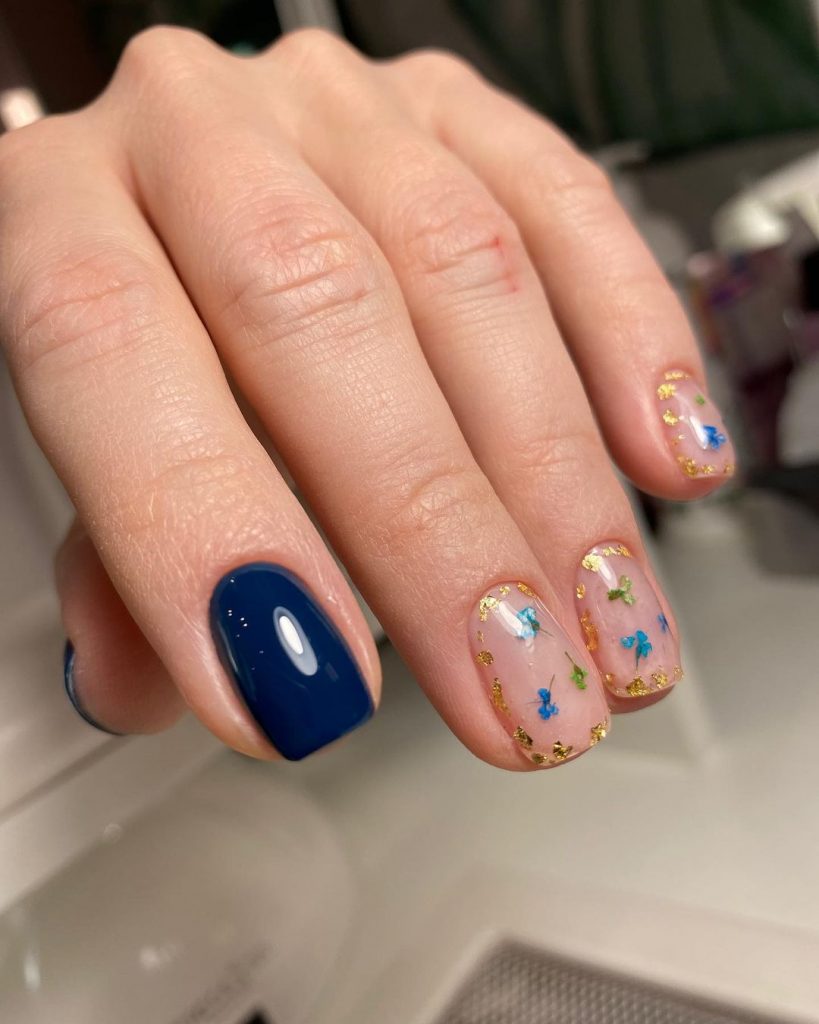
This manicure features a rich navy blue polish contrasted by accent nails adorned with tiny golden leaves and butterflies. The mix of deep blue and delicate gold details gives this design a luxurious and elegant feel, perfect for the autumn season. The clear base on the accent nails allows the golden designs to pop, making this manicure both stylish and sophisticated.
Consumables
- Base coat: Essie All In One Base Coat
- Navy blue polish: OPI Russian Navy
- Gold leaf and butterfly stickers: Born Pretty Gold Leaf Nail Stickers
- Top coat: Sally Hansen Miracle Gel Top Coat
DIY Instructions
- Start with a base coat to ensure a smooth application and protect your nails.
- Apply two coats of navy blue polish on most of your nails, leaving one or two nails clear for the accent designs.
- Place the golden leaf and butterfly stickers on the clear nails, positioning them for the best visual impact.
- Seal the entire manicure with a top coat to secure the stickers and add a glossy finish.
Delicate Florals with Gold Foil
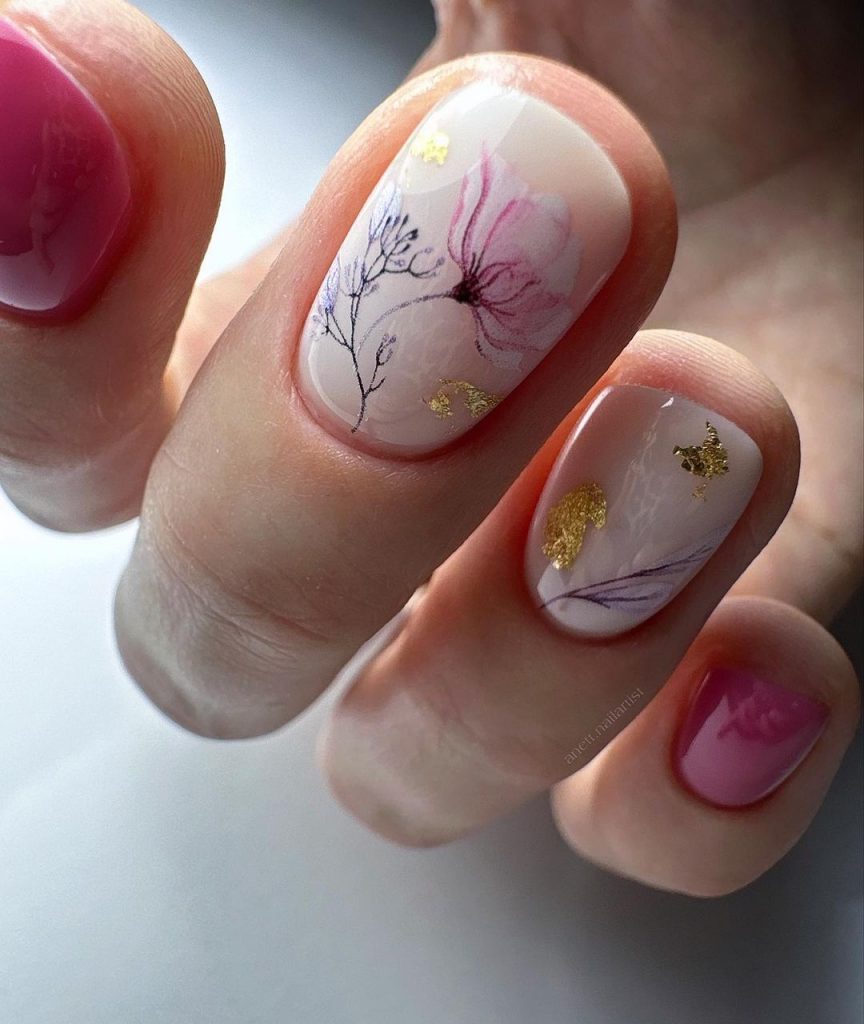
This manicure showcases a delicate pink base with hand-painted floral designs, enhanced by subtle touches of gold foil. The combination of soft florals and shimmering gold creates a refined and elegant look, perfect for those who love stylish and sophisticated nail art. The use of gold foil adds a hint of luxury, making this design ideal for special occasions or simply elevating your everyday style.
Consumables
- Base coat: Orly Bonder Basecoat
- Pink polish: Essie Ballet Slippers
- White and purple polish for florals: OPI Alpine Snow and Essie Lilacism
- Gold foil flakes: OPI Gold Flake
- Thin brush for detailing
- Top coat: Seche Vite Dry Fast Top Coat
DIY Instructions
- Begin with a base coat to prepare your nails for polish.
- Apply two coats of pink polish and allow to dry completely.
- Use a thin brush to paint delicate floral designs on a few nails, adding gold foil flakes for an extra touch of luxury.
- Finish with a top coat to seal the design and add a long-lasting shine.
Floral French Tips
This manicure offers a fresh take on the classic French tip with a playful floral twist. The nude base is complemented by colorful flowers painted along the tips of the nails, giving the design a fun and stylish vibe. The combination of different colors for the flowers adds a touch of whimsy, making this manicure perfect for those who want to add a cheerful note to their autumn style.
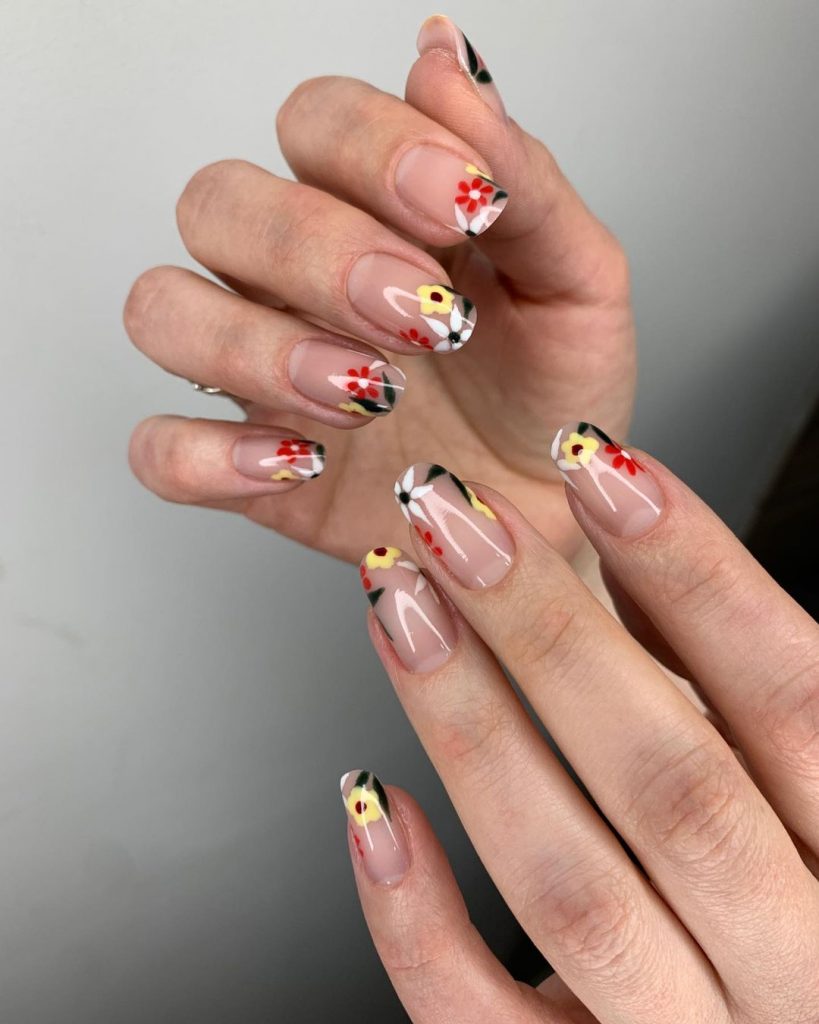
Consumables
- Base coat: Essie Ridge Filling Base Coat
- Nude polish: OPI Bubble Bath
- White, red, yellow, and green polish for floral designs: Essie Blanc, OPI Big Apple Red, China Glaze Happy Go Lucky, Essie Mojito Madness
- Thin brush for detailing
- Top coat: Sally Hansen Miracle Gel Top Coat
DIY Instructions
- Start with a base coat to smooth out the nail surface.
- Apply two coats of nude polish and let dry thoroughly.
- Using a thin brush, paint small flowers along the tips of each nail, varying the colors to create a vibrant look.
- Seal the design with a top coat for added protection and shine.
Soft Yellow with White Florals
This manicure features a soft yellow base adorned with delicate white floral designs, capturing the essence of spring in an autumn palette. The light yellow shade is perfect for those who prefer a subtle yet cheerful look, while the hand-painted white flowers add a touch of elegance and femininity. This design is great for bringing a bit of brightness to the cooler fall months.
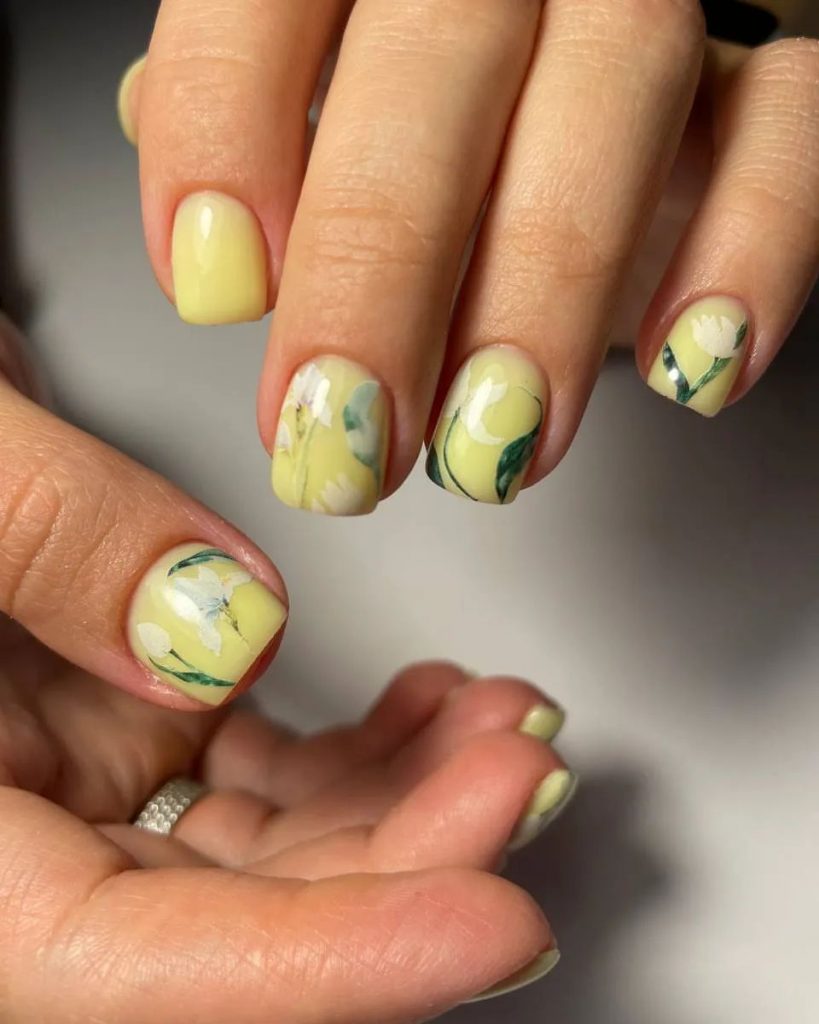
Consumables
- Base coat: OPI Natural Nail Base Coat
- Yellow polish: Essie Chillato
- White polish for florals: Essie Blanc
- Green polish for leaves: OPI Suzi The First Lady of Nails
- Thin brush for detailing
- Top coat: Zoya Armor Top Coat
DIY Instructions
- Apply a base coat to prepare your nails.
- Paint your nails with two coats of yellow polish, allowing each coat to dry completely.
- Use a thin brush to create delicate white flowers and green leaves on a few nails.
- Finish with a top coat to protect the design and give it a polished finish.
Save Pin
