
33 Winter Black Nails Looks to Try in 2027
Every winter I brace for the avalanche of red and green. This year, black is the quiet invitation I didn’t know I needed. It’s not a trend, it’s a mood — and it comes in way more variations than you’d expect.
Here are 33 ways to wear Winter Black Nails, from two-coat gloss to matte cable knit to celestial foil. I’ve tested them on my short nail beds and seen which ones last through two weeks of typing, hand-washing, and which ones chip by day four. Some are salon-only, others you can do while watching TV. Whether you want snowflakes or something simpler, there’s a version here that actually works for real life.
Classic Deep Glossy Black Short Square Nails
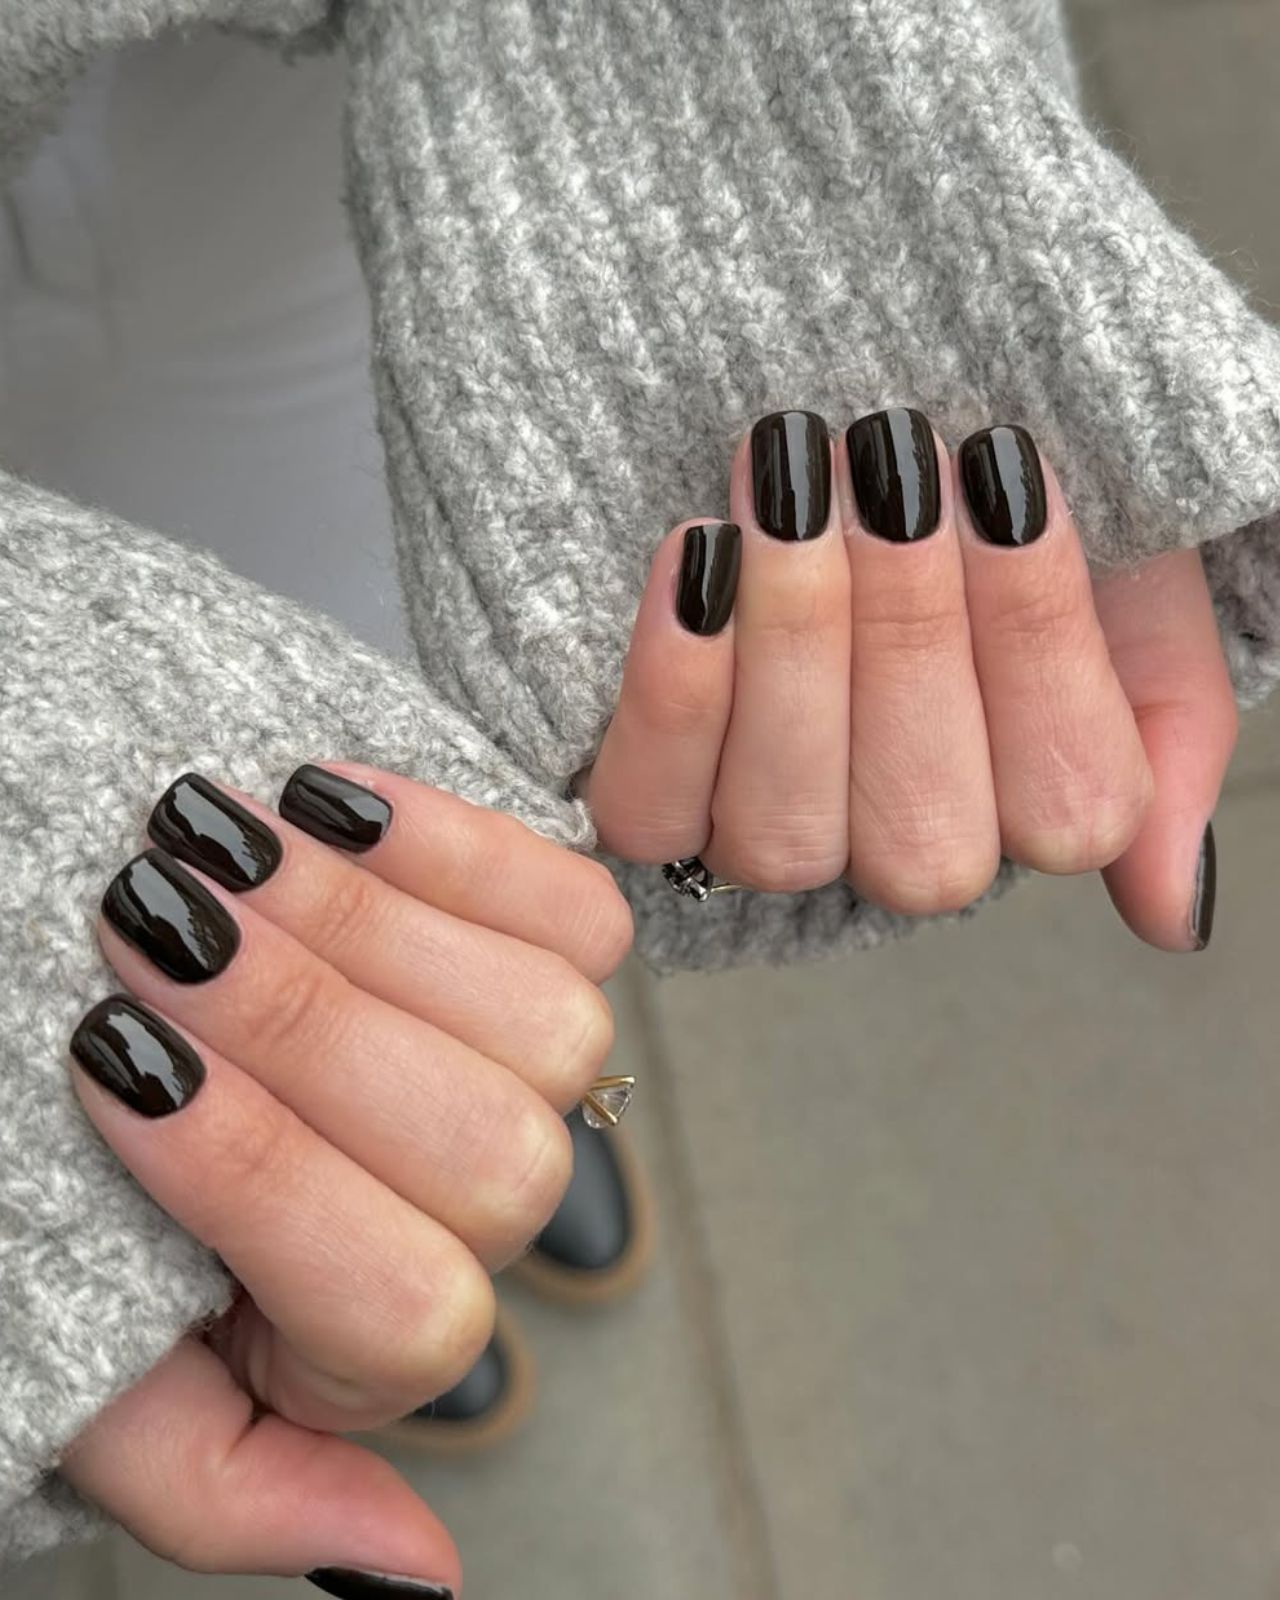
This is the design I keep coming back to, even when I tell myself I want something more interesting. Short square black nails in a high-gloss finish read sharp, clean, and like you have your life together. The shine is the whole point here. Without it, black goes flat fast. I wore these through a week of typing and two rounds of dish duty. By day six, the tips showed light wear. A fresh top coat on day five brought the mirror finish back. Easy removal with regular polish remover, no soaking, no foil. Sometimes the simplest option is the one you actually maintain.
That said, I do wonder how many people commit to black and then get bored by day three. It is not a look that changes in different light. What you see is what you get. For me, that reliability is the appeal. For others, it might feel like a cop-out. Try it once and decide which camp you fall into.
Glossy Black with Subtle Gold Star Accents
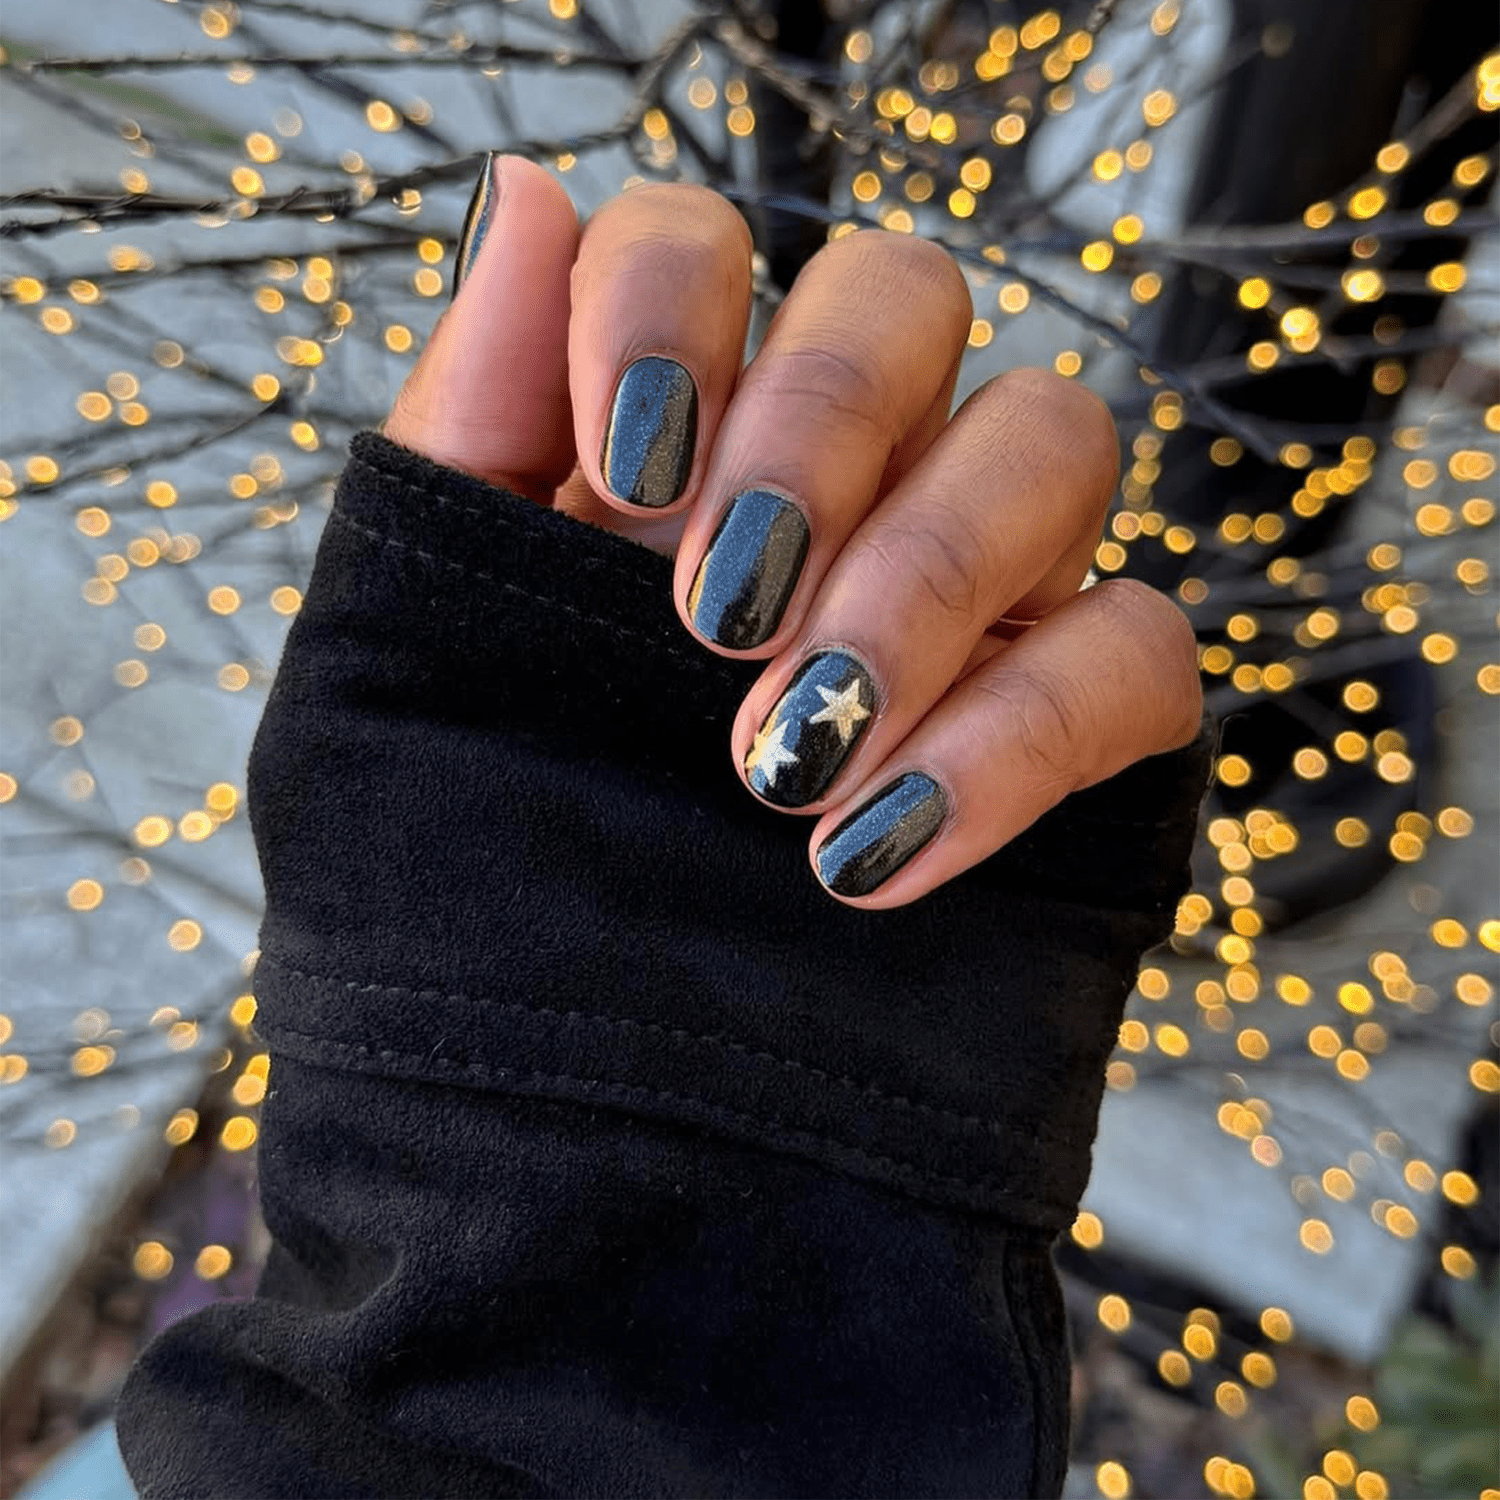
The gold stars here are not trying to be the main event, and that is what makes them work. Black nails gold stars on a short square shape feel like a nod to the holidays without shouting about it. The gold star accent sits on two nails per hand, placed off-center so it reads organic, not stamped. This is a solid DIY project if you have a steady hand and a dotting tool. The stars will lift at the edges around day ten if you skip a thick top coat layer. I would not wear this past a holiday party circuit, but for two weeks of December, it hits the right note.
Black with Crisp White Snowflake Stamping
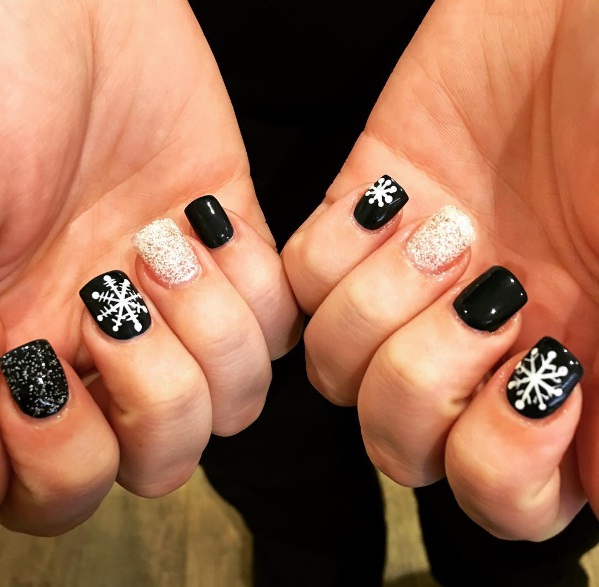
I saw this set and thought, that is either going to look delicate or like a child’s craft project. The execution here lands on the right side. Black white snowflake nails with clean snowflake stamping on a glossy base read intentional and crisp. The white lines are opaque, not ghosted, which is harder to achieve than people admit. Stamping requires a light hand and the right consistency of polish. Too wet and it bleeds. Too dry and it flakes off during application. The silver glitter accent on the ring finger breaks up the pattern without competing. This is a salon-leaning look unless you already own a stamping kit and have practiced the pull. Worth the booking for the precision alone.
The festive feel is obvious. What is less obvious is how the white holds up against the black. After a week, the contrast stays sharp if you sealed the stamping well. Skipping the top coat over the stamp means the white lifts in patches. Do not skip it.
Glossy Black with Glitter Accent Stripe
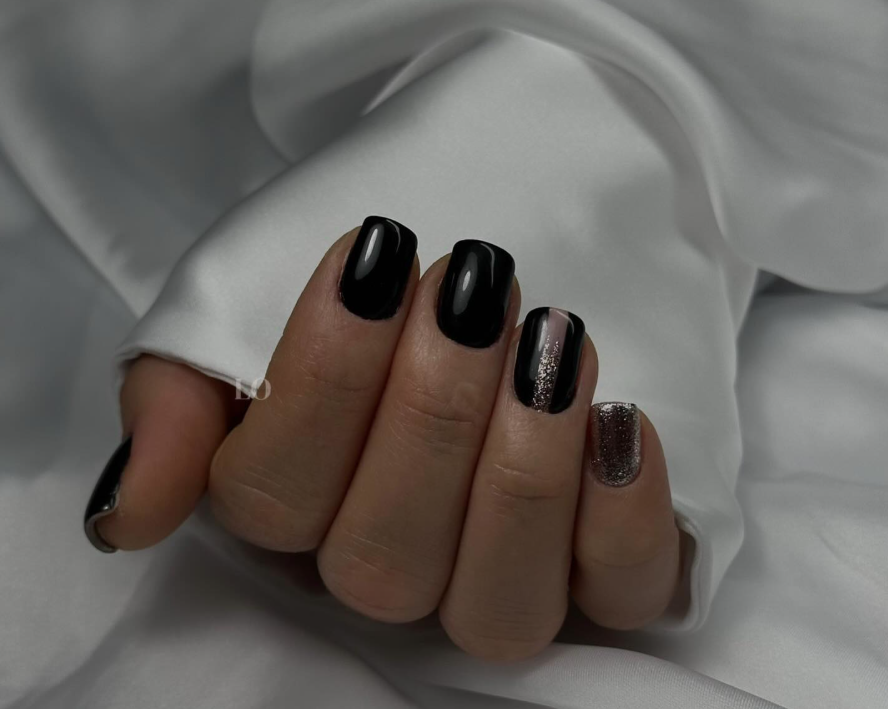
Why commit to full glitter when a single stripe does the trick? This short square keeps the black nails silver glitter stripe confined to one accent nail, a thin silver line down the center with a whisper of pale pink at the edge. The glitter accent nail catches light without screaming for attention, which means it works for a Tuesday meeting and a Friday dinner. My one caveat: that stripe is only as good as your top coat seal, skip the thick layer and you will see edge wear by day six.
Black with White Snowflake Decals and Glitter
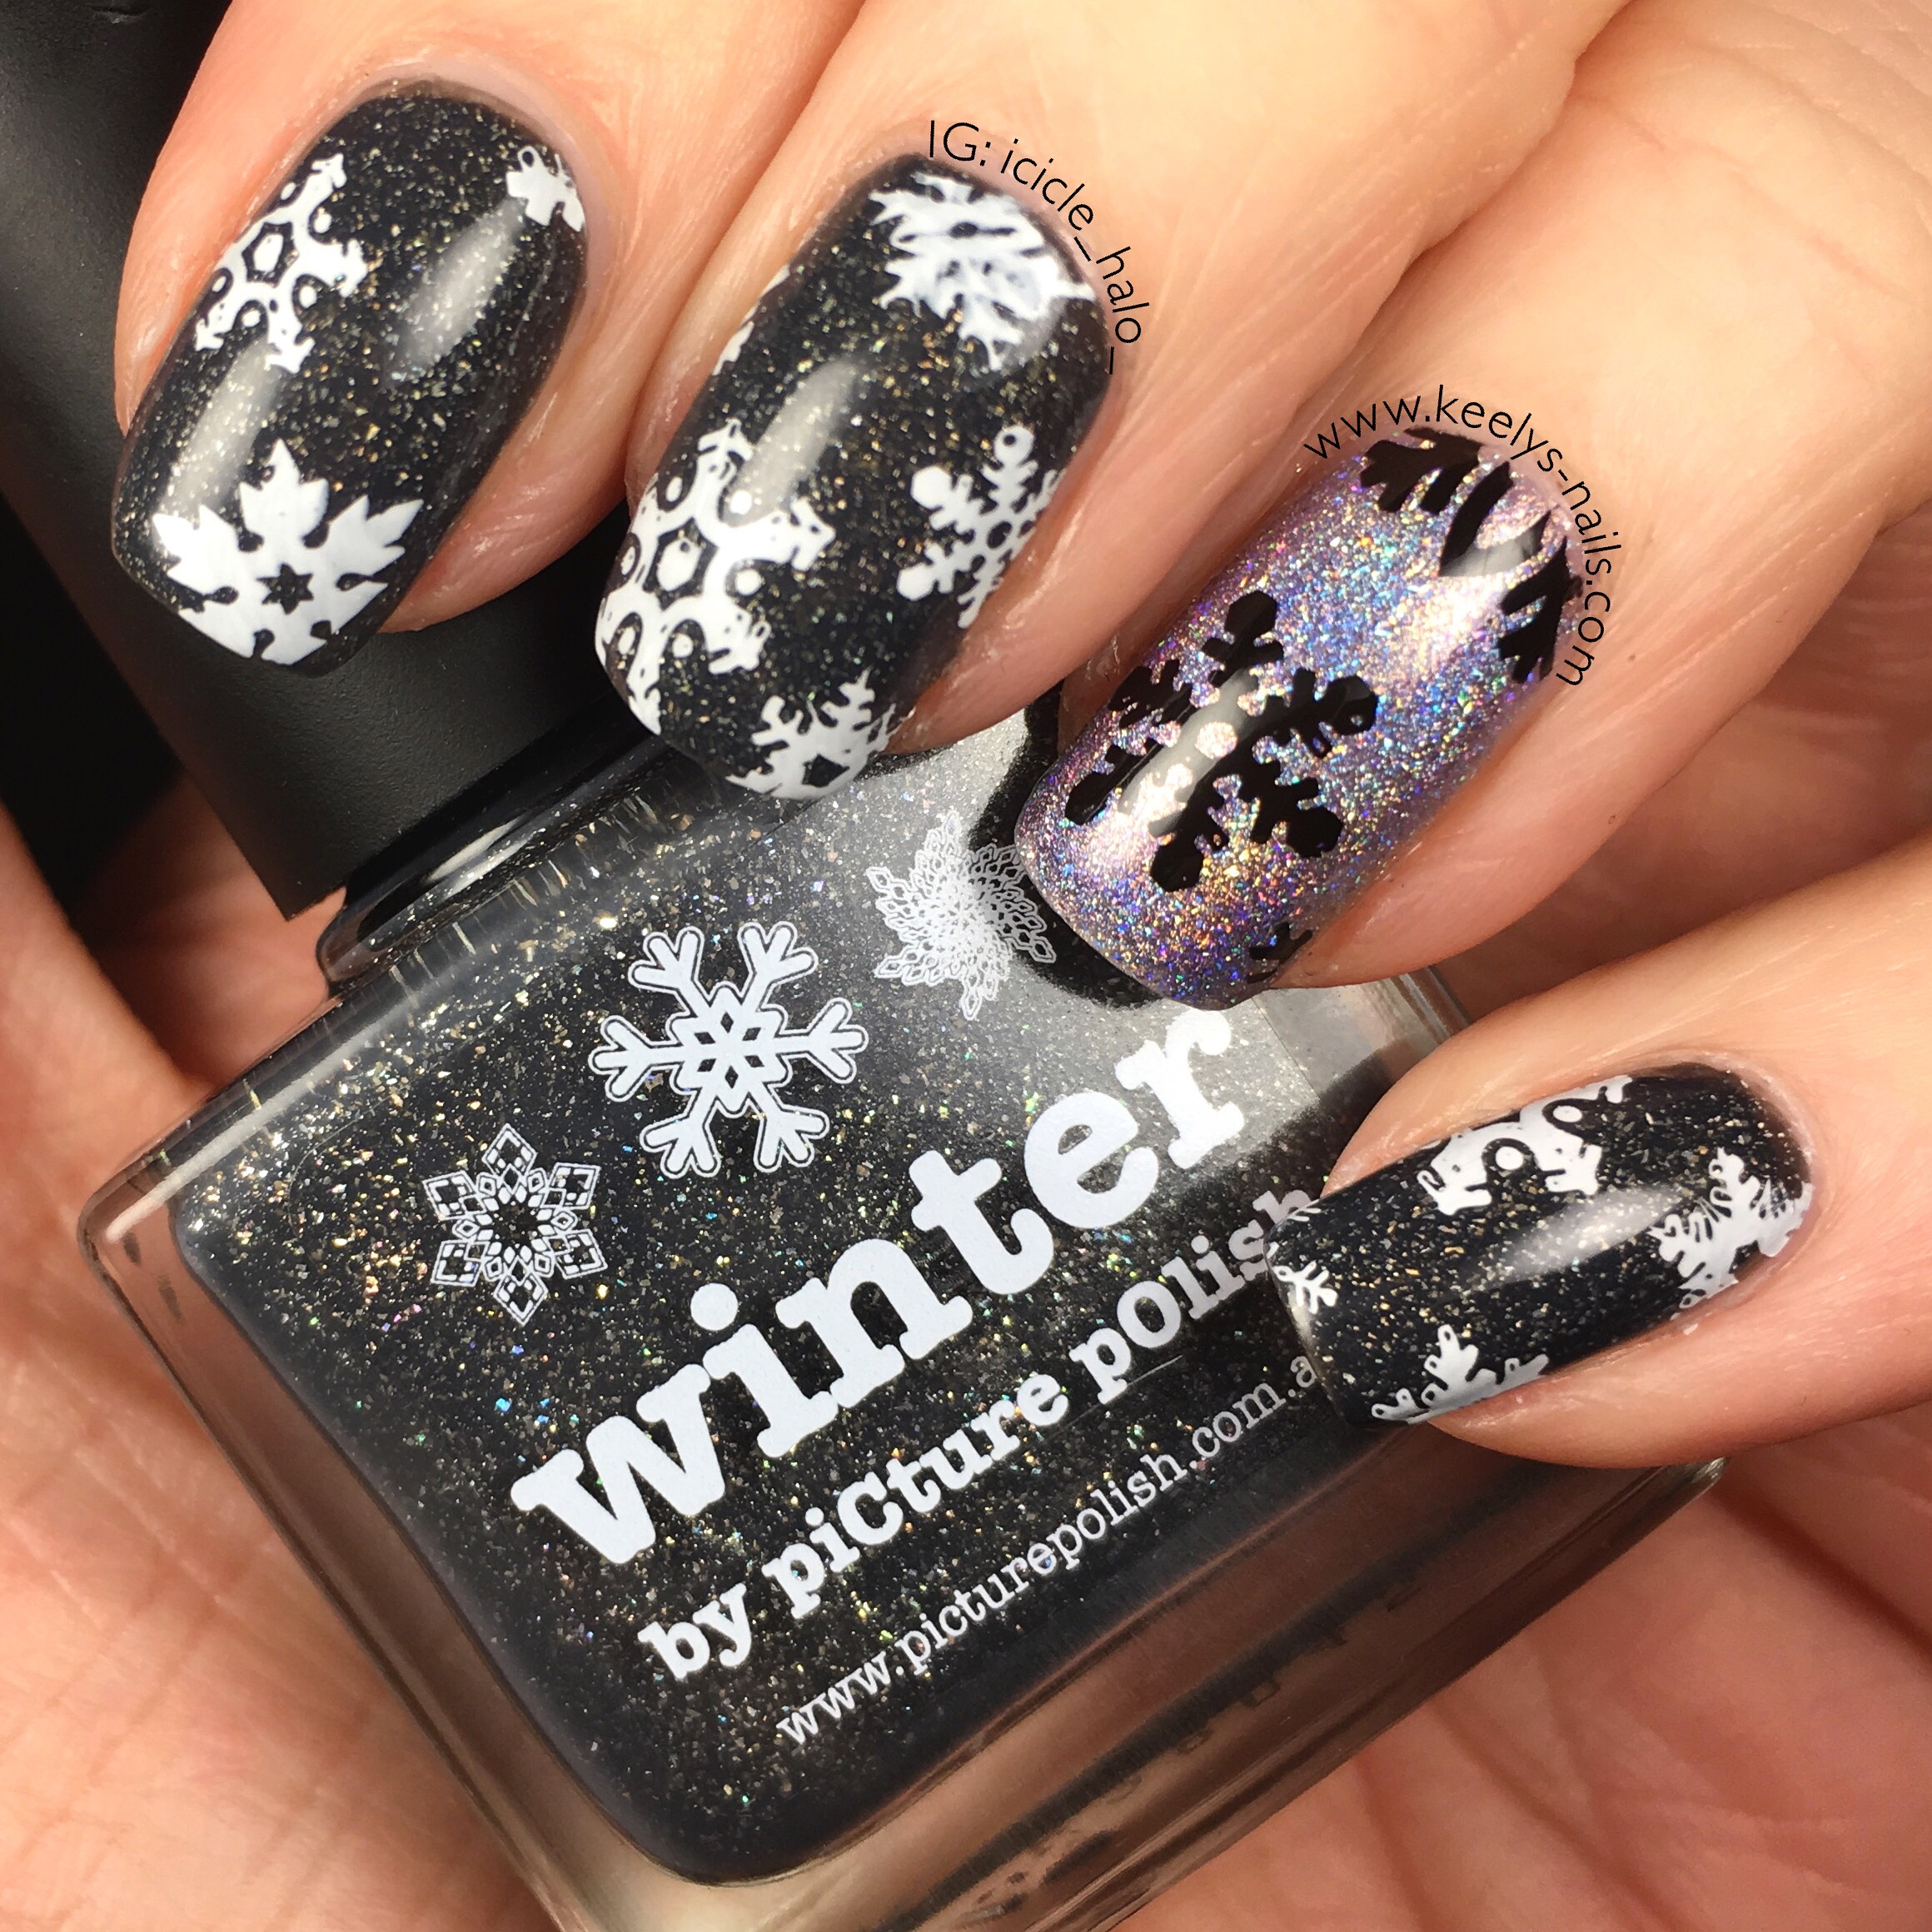
I noticed something about decals after a week of typing and hand-washing: they hold better than hand-painted snowflakes. This medium square uses white snowflake decals on every nail, a clean black base with holographic glitter piled on the ring finger. The decals sit flat under the top coat, no raised edges to catch on sweater cuffs.
What you trade is the first three days of perfection. By day four, the glitter on the ring finger starts to dull from hand lotion and general friction. A generous top coat at application buys you two more days, and removal is standard soak-off with no stubborn glitter residue. These are black snowflake glitter nails that actually survive a commute.
Black French Tips with Silver Glitter Outline
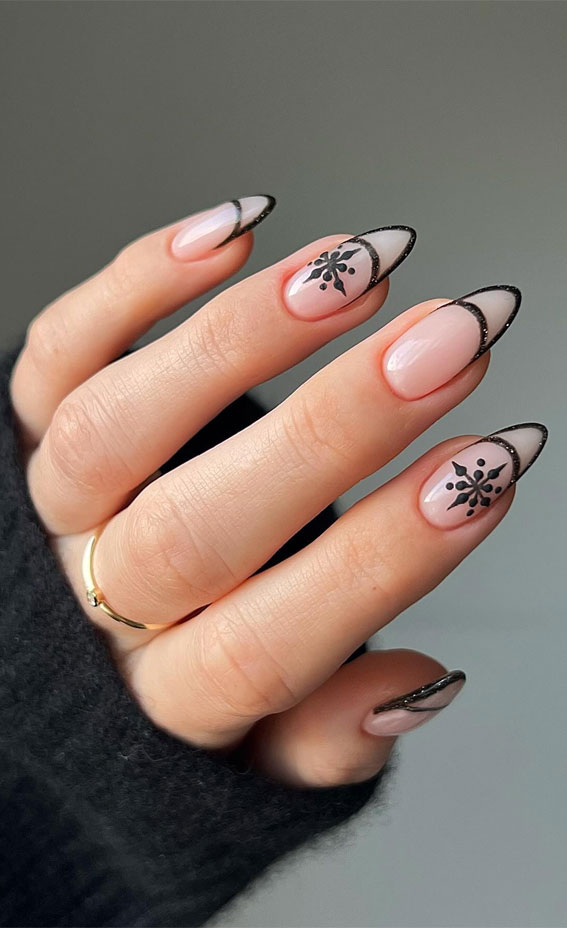
A Friday night, a salon chair, and a design that says you meant business. The black french tip nails with a silver glitter outline is not a quick lunch break job. You are looking at a solid 90 minutes in the chair, maybe more if the technician is meticulous with the glitter line. The base is a sheer pink, barely there, letting the black tip and the silver outline do the work. That outline is the star: a thin line of silver glitter tracing the curve of the smile line. This is a splurge for a winter gala or a holiday party, not for a casual Tuesday. The silver glitter outline requires a steady hand and a top coat that seals every particle. DIY is possible but expect a learning curve and a bottle of patience. The occasion justifies the time.
Black French Tips with Delicate Snowflakes
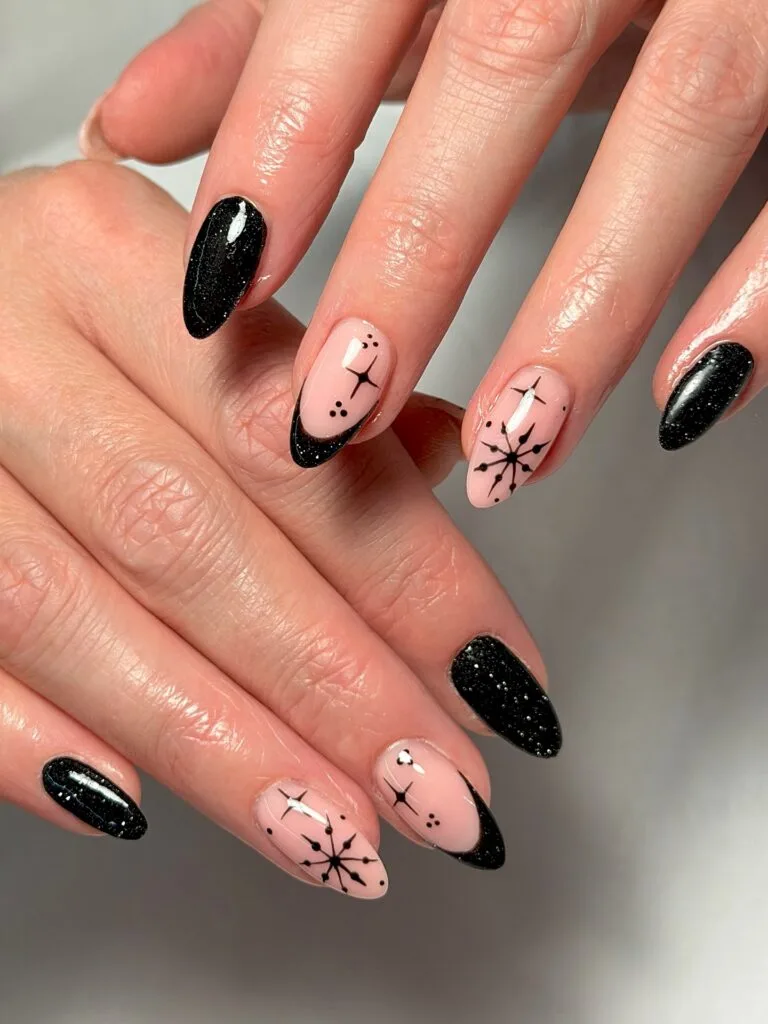
You see these and think: too much. But then the snowflakes settle into something delicate. The black french tip is sharp, but the white snowflake decals soften it. The base is a pale pink, almost nude, so the contrast is clean. Each snowflake is a tiny, precise shape. The placement varies across nails, some with a single snowflake, others with two. It feels custom, not stamped. The glossy finish ties it together.
Glossy Black Cat-Eye Coffin Nails
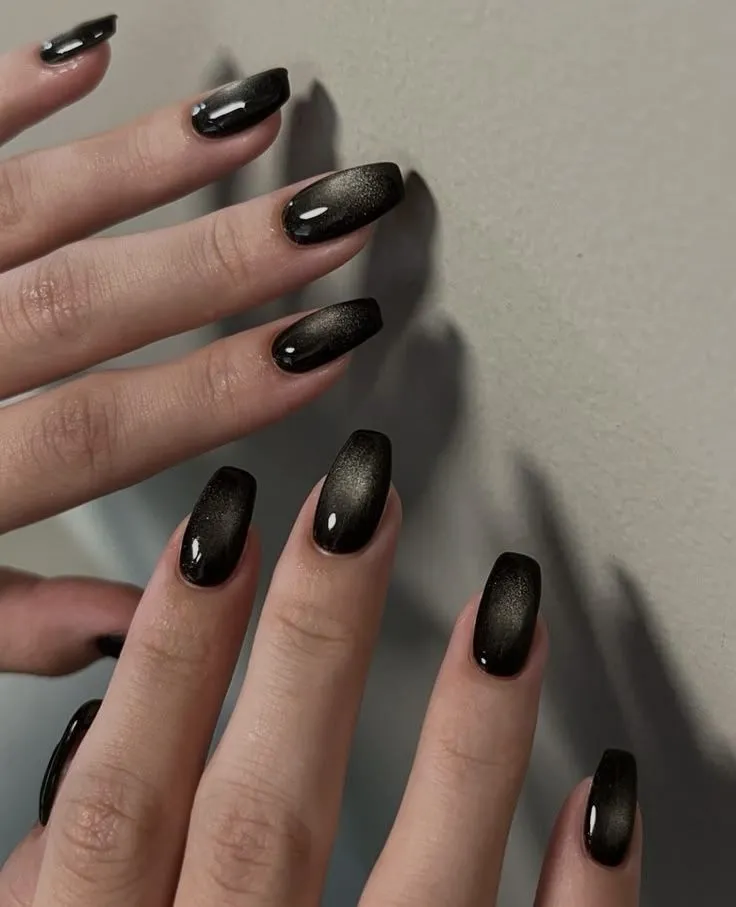
This is the one that gets the most questions at the salon. The cat-eye effect comes from a magnetic pigment in the polish. A magnet is held over the wet polish to pull the particles into a line. The result is a shifting stripe of light across the nail. On a black base, the stripe reads as a subtle green or brown sheen, like oil on water. The coffin shape elongates the effect. The glossy top coat is essential to keep the magnetic line crisp. The technique requires patience and a steady hand, but the result is worth the precision.
Matte Black with Glossy Black Flames
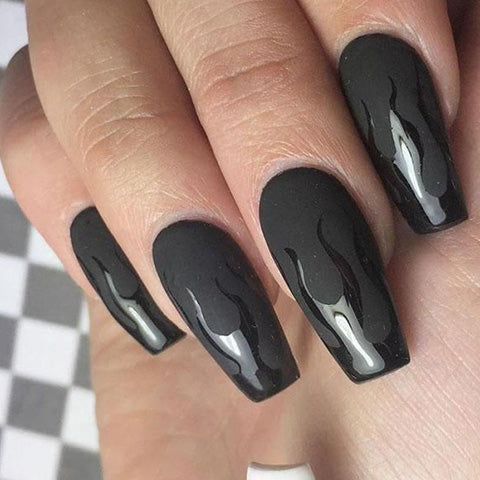
The contrast between matte and glossy black is more about texture than color. The flames are painted in a high-shine black over a matte black base. The matte base absorbs light, the glossy flames reflect it. The effect is subtle in dim light, stark in direct light.
To get close at home, start with a matte black polish on all nails. Let it dry completely. Then use a thin brush and a glossy black polish to paint the flame shapes. The key is a steady hand and a very thin layer of glossy polish. Too thick and it will bleed into the matte. Seal with a no-wipe top coat over the entire nail to lock the contrast. The matte base will show fingerprints, so apply a matte top coat after the base color. Practice on a nail wheel first. The flames can be as simple or as intricate as you like. A simple swoop works. If you make a mistake, a clean-up brush with acetone can fix it before the glossy polish dries. The result is a custom look that feels high-end.
Matte Black with Thin Gold Geometric Lines
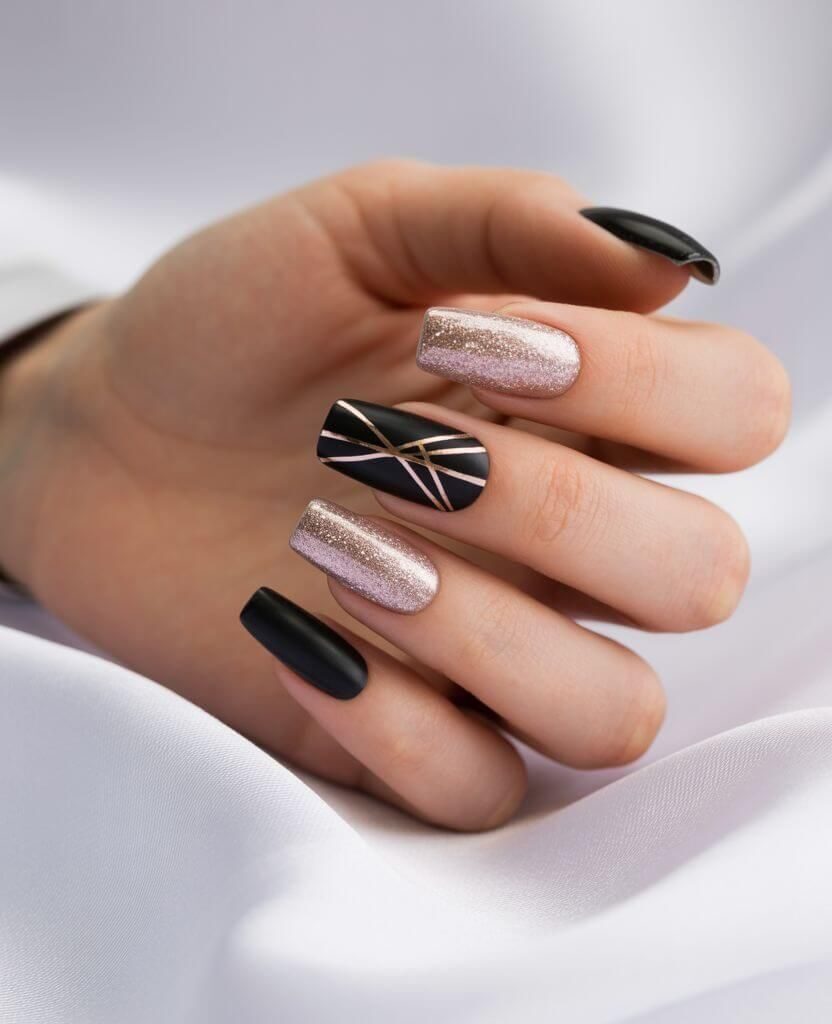
How much gold is too much gold? These thin gold lines on matte black are precise, but they demand a certain confidence. The geometric pattern is clean, almost architectural. But the gold is a champagne glitter, not a solid metallic. That glitter can look dull in low light. The matte black base is forgiving, but the gold lines will show every imperfection in application. It is a look that works best when the lines are perfectly straight, which is harder than it looks.
Matte Black with Crisp White Snowflake Art
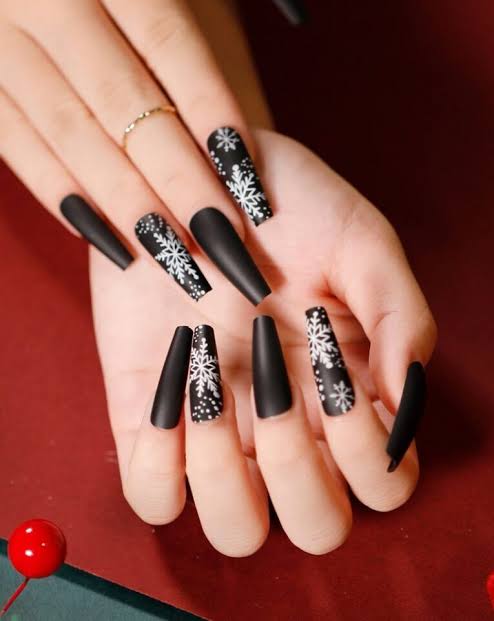
I’ll admit I walked in ready to roll my eyes at snowflake nails. Then I saw this execution on a long coffin shape and the matte finish sinks the black so deep the white snowflakes feel like they’re floating on velvet. The crispness of each line is what sells it: no bleeding, no uneven spacing, just precise hand-painted geometry that reads as winter without tipping into holiday kitsch. It’s the contrast that does the work, matte black white snowflakes don’t need glitter or foil to feel finished, they just need a steady hand and a topcoat that doesn’t dull the art.
Matte Black with Delicate Floral Art
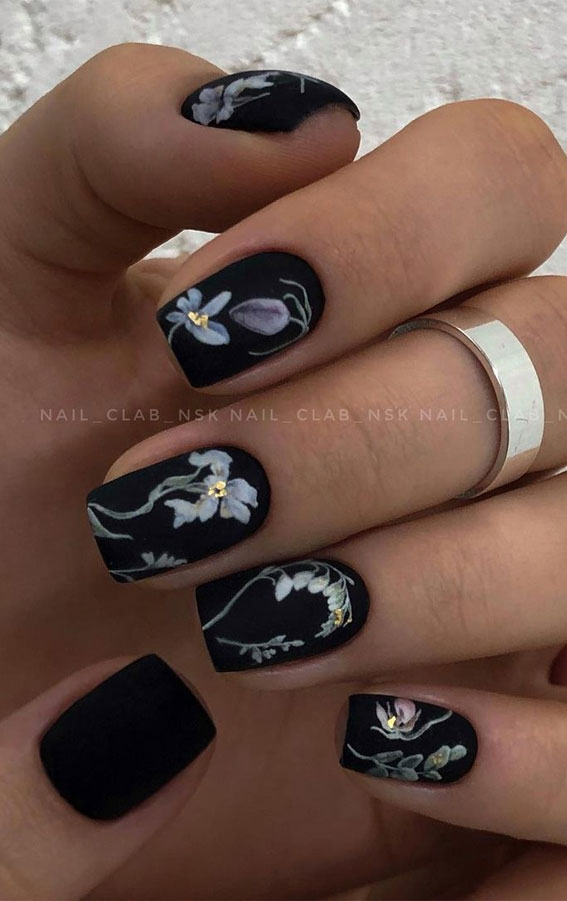
I sat down and said “I want flowers on black, but make it not grandmotherly.” The tech raised an eyebrow and then produced this on short square nails: tiny pale blue roses, pink buds, and gold leaf tucked into the petals. The matte background stops the gold from screaming; instead it catches light when you turn your hand, like finding an unexpected detail.
The floral motifs stay delicate because they’re not packed in. One or two blooms per nail, stems that curve with the nail’s natural edge, none of that overcrowded wallpaper look. Black floral nails work when the art breathes, and this is exactly that balance.
Matte Black with White Graphic Accents
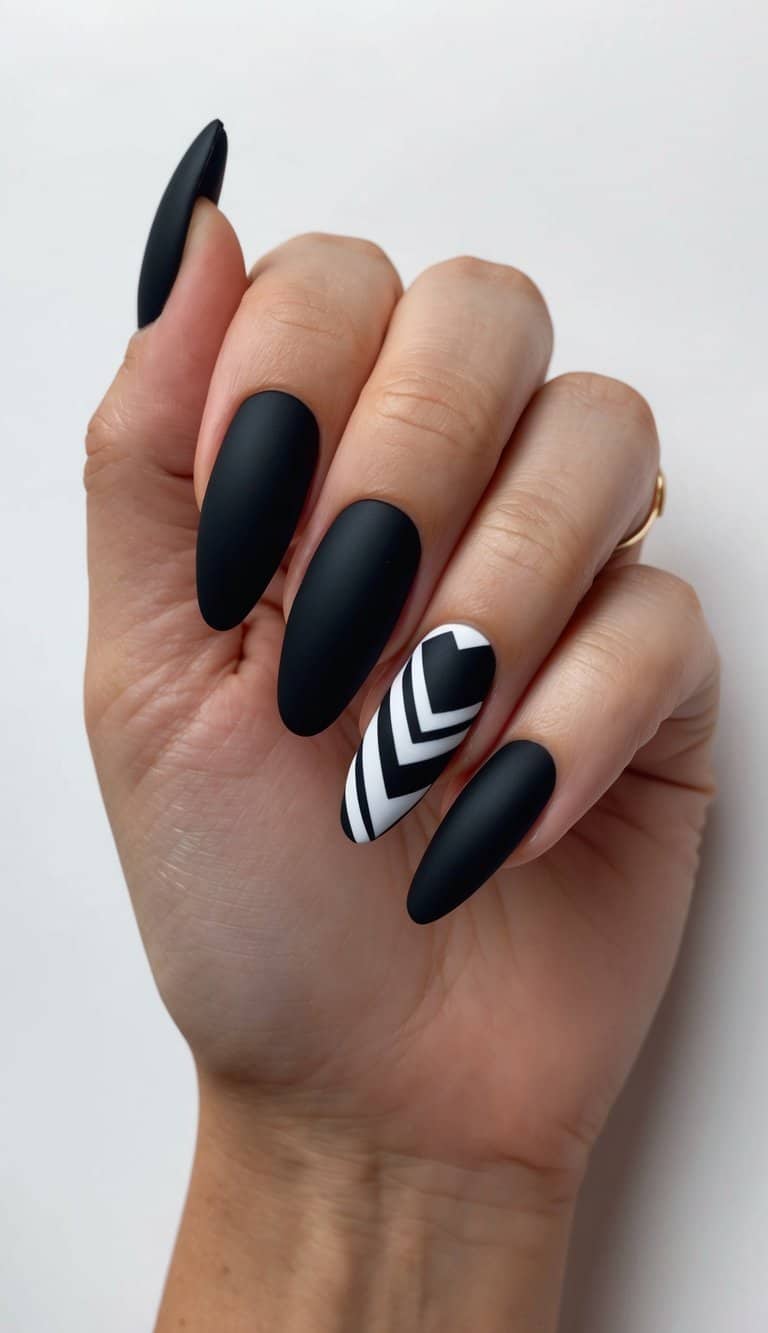
My gut said this would look like a failed art project. But on medium almond nails the chevron and geometric lines sit dead center, sharp and even. The mistake people make is thinking graphic design on nails is just drawing a line. It’s not. You have to account for the curve of the nail or that straight line bends. The fix? A steady hand and a fine brush that doesn’t flood the edge. Black white graphic nails reward precision and punish rushing.
Matte Black with White Starburst and Snowflakes
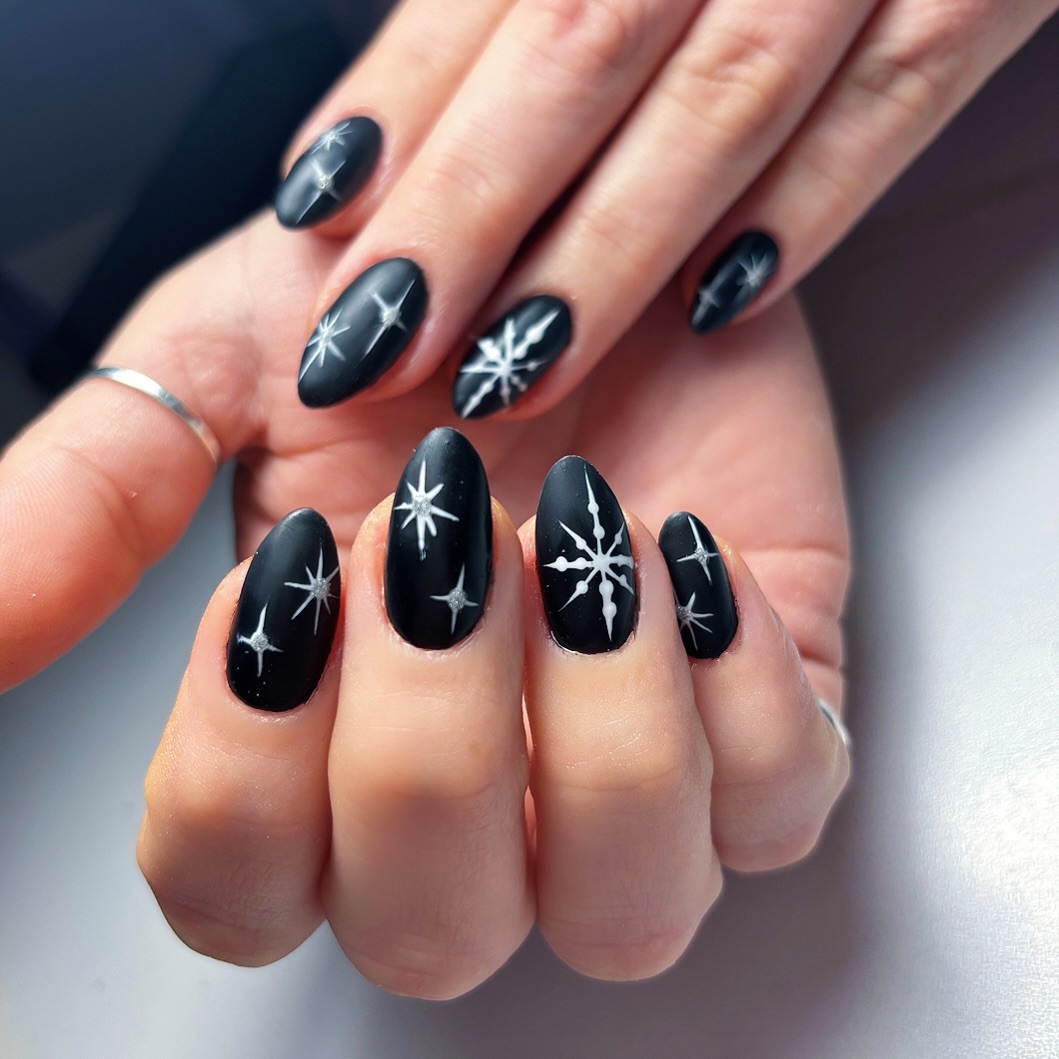
If you’re torn between snowflake details and something more graphic, this design picks a side. The starburst motifs are what make it: they spread across the nail in clean white rays that feel architectural, not whimsical. On medium oval nails the shape mirrors the burst, which is a smart trick. Compared to plain snowflake nails, black white starburst nails have more movement. The snowflakes sit still; the starburst looks like it’s expanding. Both are winter, but this one has an energy that keeps me looking at my hands.
Matte Black and Beige with Cable Knit Texture
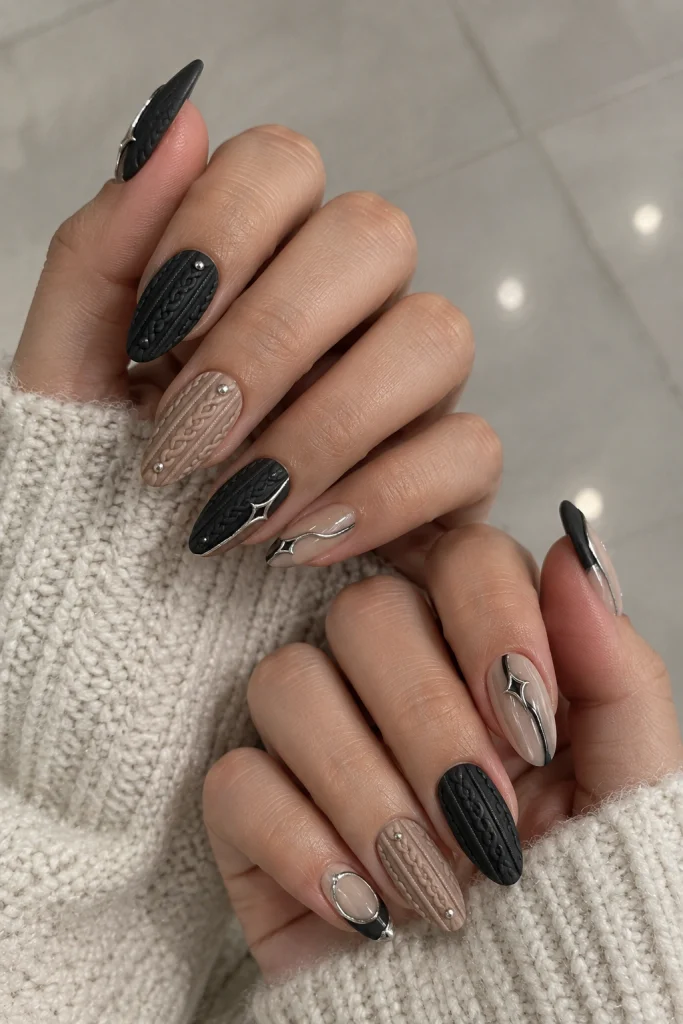
This is not a nail for people who hate texture. The raised cable knit ridges on a beige base alternated with matte black nails create a literal landscape on your fingers. It flatters anyone who wants their nail art to feel tactile, especially during winter when sweaters are the mood. The silver metallic accents add a cold flash that plays off the glossy black on the accent nails.
Who should pass? Anyone who types all day or reaches into tight pockets. The raised pattern catches fabric and, honestly, a strand of hair once got stuck under mine. But if you love the look and don’t mind being a little careful, black beige cable knit nails are genuinely cozy. Just don’t wear them to a knitwear store.
Dark Green with Cable Knit and Snowflakes
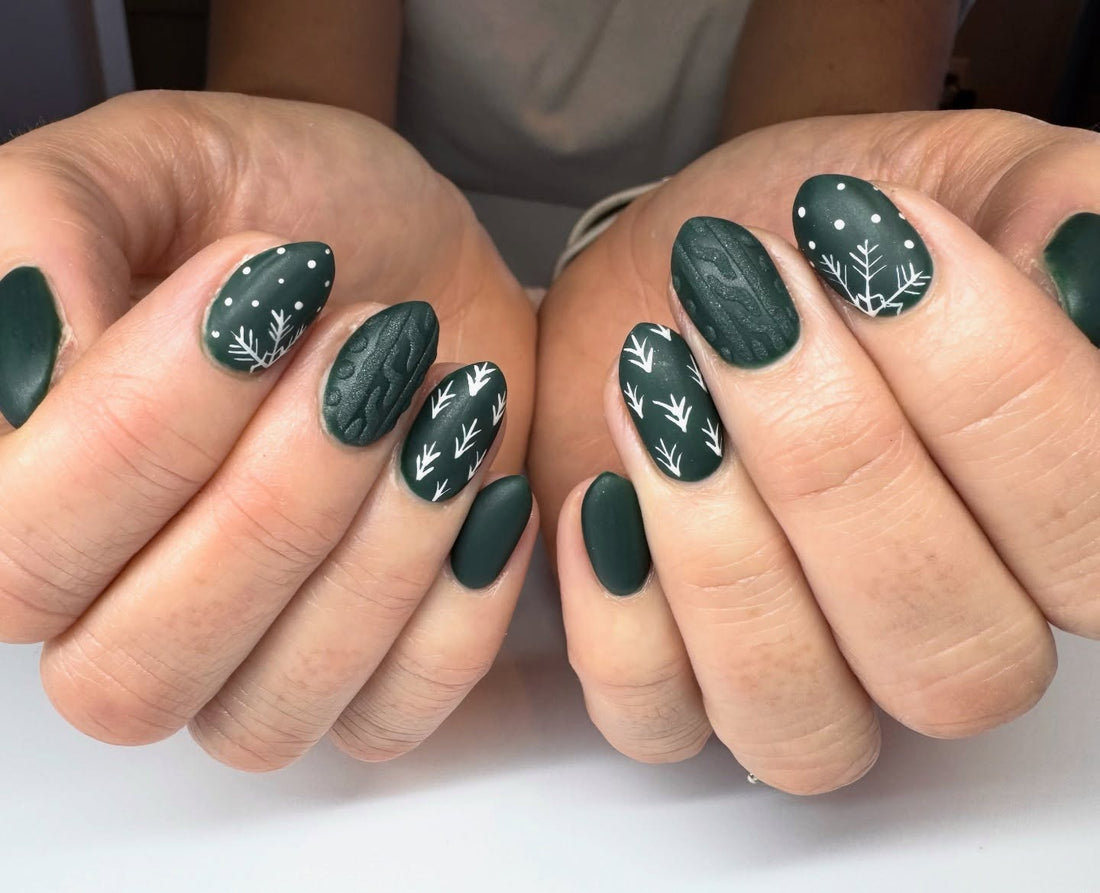
When did a sweater start looking this good on my nails? The matte finish on a medium oval keeps the cable knit texture from feeling like a craft project, and the snowflake and pine tree motifs land somewhere between cabin and elegant. I wore these through a week of typing and sweater season, and the raised texture held. No snagging, no dulling. The matte finish does show cuticle oil smudges by day five, but that is a quick wipe fix. These dark green winter nails read warm on olive skin and stay festive without screaming December.
Glossy Black with Gold Foil and White Lines
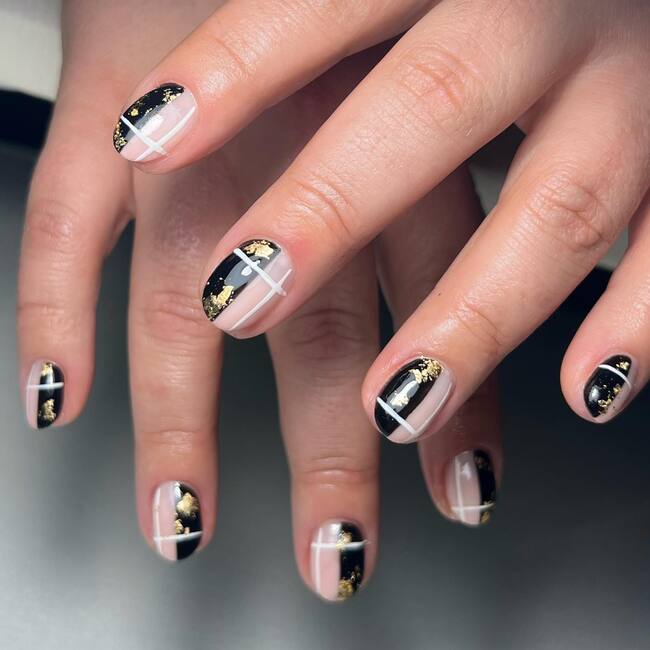
I will admit I was skeptical about mixing pale pink with black and gold. But the short oval shape keeps it grounded, and the glossy finish makes the gold foil accents pop without looking like a party leftover. The white lines on some nails give it structure, like a blueprint for something expensive. This design costs about 90 minutes in the chair, mostly because the foil placement is fiddly. The tech has to burnish each piece flat, or it lifts by day three. Ask for a thin layer of foil, not a thick chunk. Black gold white nails with a pale pink base read modern, not bridal.
Black with Intricate Gold Foil Patterns
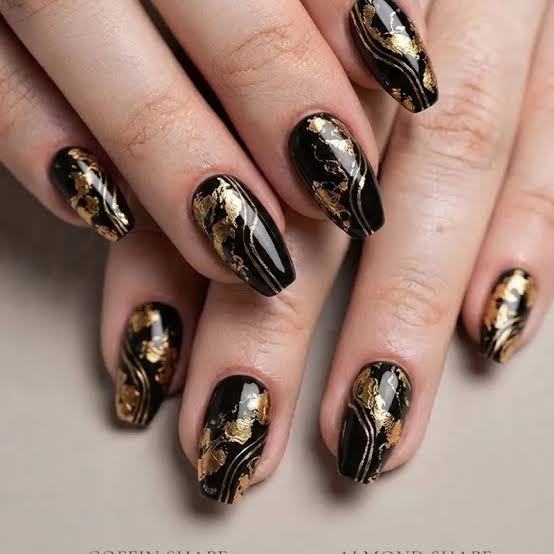
The room goes quiet when these hit the table. Medium almond and medium coffin shapes share the same hand, and somehow it works. The glossy black base is a backdrop for gold foil patterns that look like they were pressed from an old book. Thin stripes, leaf shapes, no two nails repeat.
This is an evening design that earns its keep through a full dinner and a party. The foil sits flat under a good topcoat, so no catching on napkins or sleeves. Black gold leaf nails need a tech who understands negative space, or the pattern reads as clutter. Book someone who does foil regularly, not as a side skill.
Black to Pink Ombre with Celestial Foil
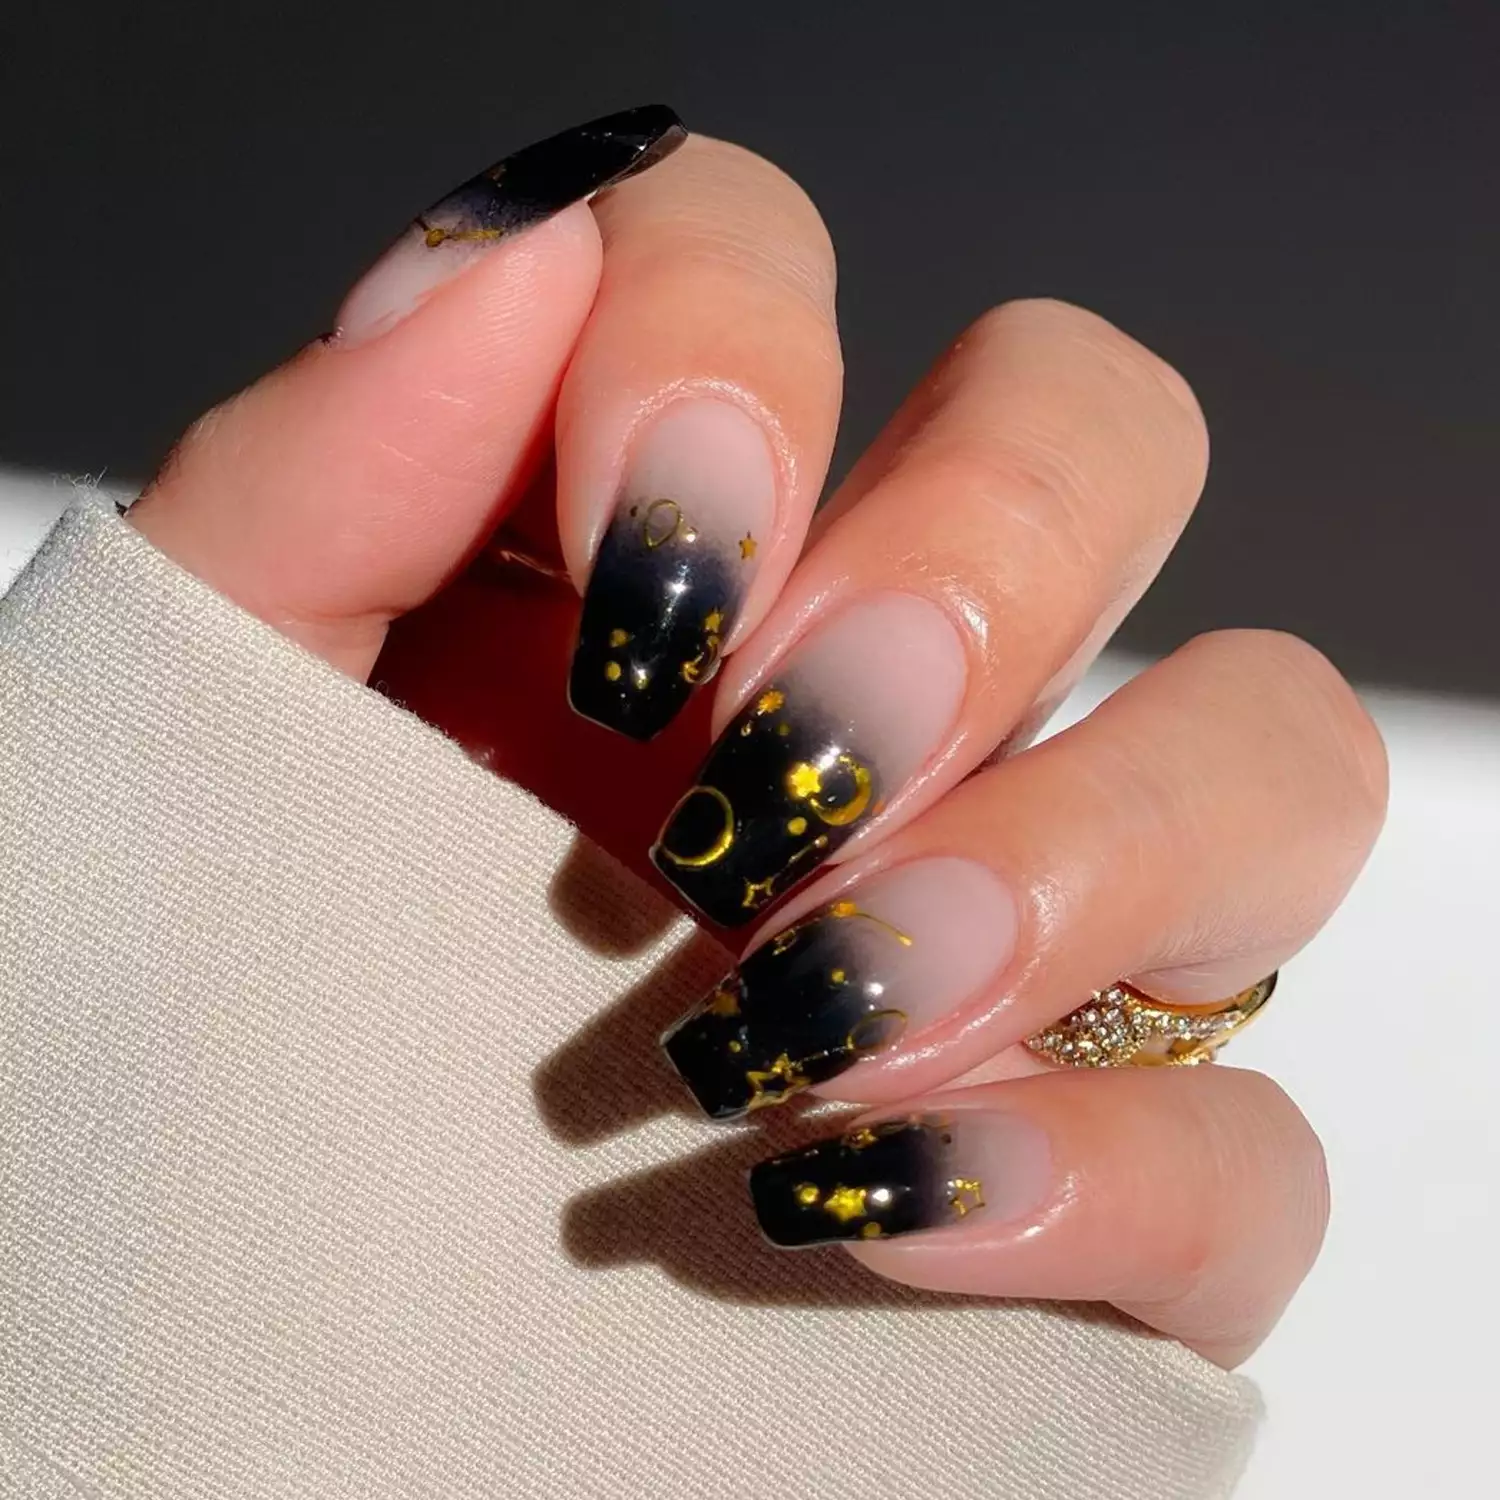
I stared at this for a full minute before I could form a sentence. The gradient from black at the cuticle to sheer pink at the tip is airbrushed, not sponged, which means no texture bumps under the gold stars and moons. The long coffin shape gives the celestial motifs room to breathe without crowding. These black pink ombre nails read night sky, not costume. The celestial motifs need a thin layer of no-wipe top coat pressed over each piece, or the foil edges catch on hair. Worth the extra 15 minutes at the end of the appointment.
Glossy Black with Detailed Snowflakes and Gold Glitter
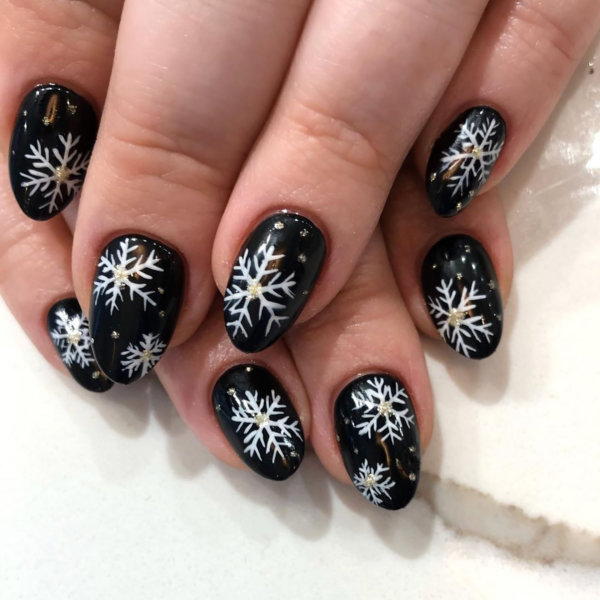
Best DIY attempt in this roundup, but only if you own a stamping plate and a steady hand. The short oval shape is forgiving, and the glossy black base hides any minor smudges at the cuticle. White snowflake art goes on first, then tiny gold dots and glitter accents over the top. The trick is to seal each snowflake with a drop of top coat before adding the glitter, or the gold bleeds into the white. Black white snowflake glitter nails need a no-wipe top coat at the end, or the glitter texture stays gritty. These snowflake designs last about a week before the white starts to yellow on the edges.
Visual Idea
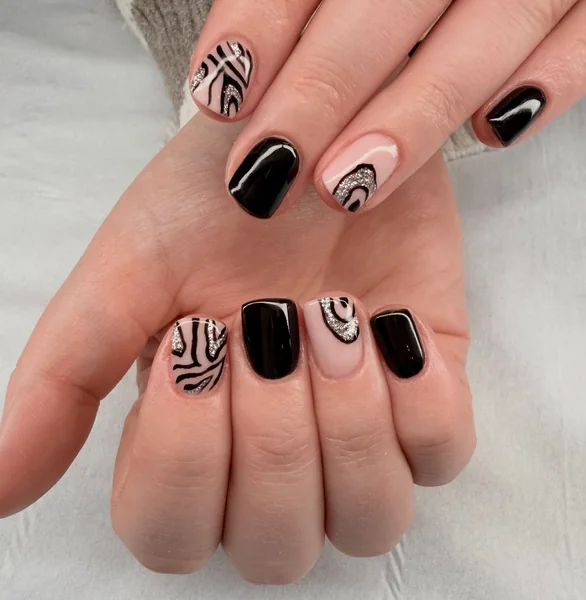
Zebra print on short square nails is a gamble. The pattern can tip into costume territory if the lines are too thick or the contrast too harsh. But here, the pale pink base with silver glitter accents keeps it from feeling literal, and the glossy finish adds a polish that animal print often lacks. The silver glitter catches the light in a way that feels intentional rather than accidental, elevating the design above a simple animal print.
The solid black nails on the other hand ground the whole set, giving the zebra nails room to be the focal point without overwhelming. It’s a look that could easily go wrong, but the balance of busy and bare, glossy and glitter, makes it work. I’m still not fully sold on animal print for winter, but this version has me reconsidering. The short square shape helps too — it keeps the print from stretching into something cartoonish, and the glossy finish ties the two textures together.
Matte Glitter Visual Idea
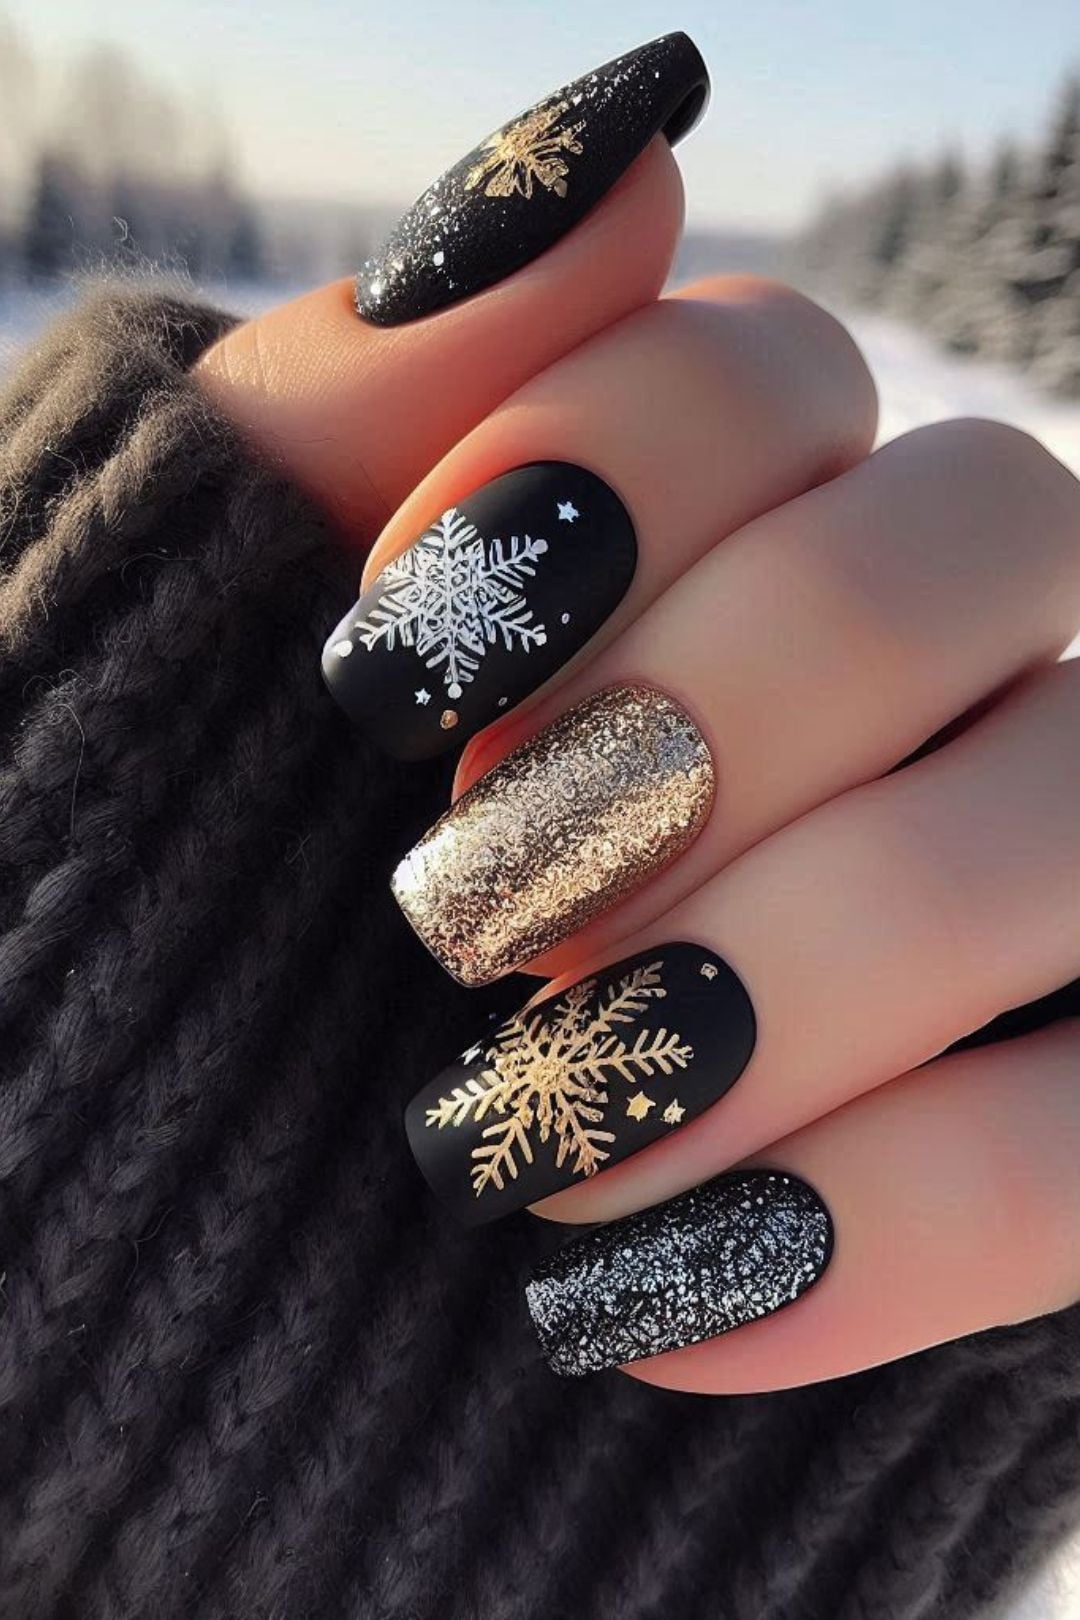
What makes a matte glitter nail work? It’s the contrast between the flat matte black base and the reflective glitter accents. Here, the large silver snowflake on the accent nail draws the eye, while the gold dots and champagne glitter add warmth without competing. The clean lines and precise application keep it from looking messy. It’s a study in restraint — the glitter is present but not overwhelming, and the matte finish gives it a modern edge.
Winter Visual Idea
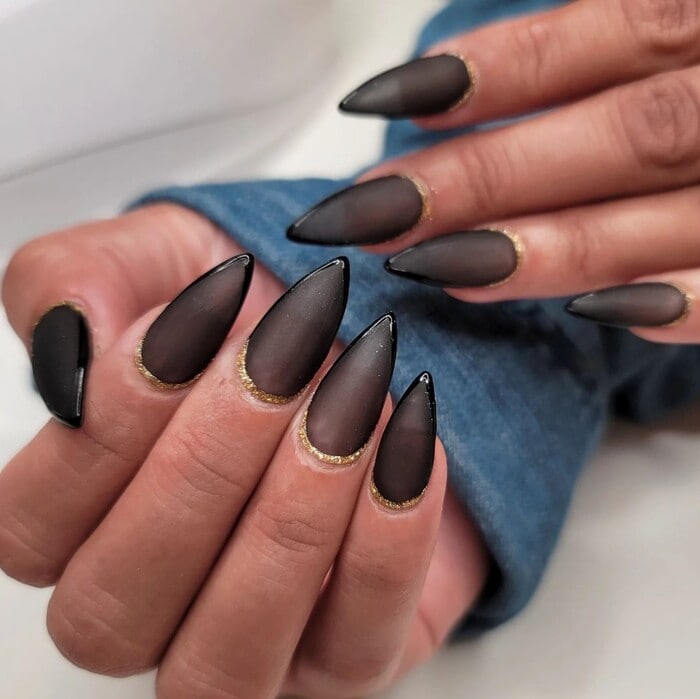
I never thought sheer black would work on long stiletto nails. It seemed like a contradiction — sheer implies delicacy, stiletto implies drama. But then I saw this set: a matte sheer black overlay that lets the natural nail peek through, with a thin line of gold glitter at the cuticle. The effect is subtle but striking. The long shape becomes elegant rather than aggressive, and the gold glitter catches the light without overpowering the sheer base. It’s the kind of look that makes you do a double-take, and I found myself staring at my own nails for days after trying it.
Glossy Holographic Glitter Visual Idea
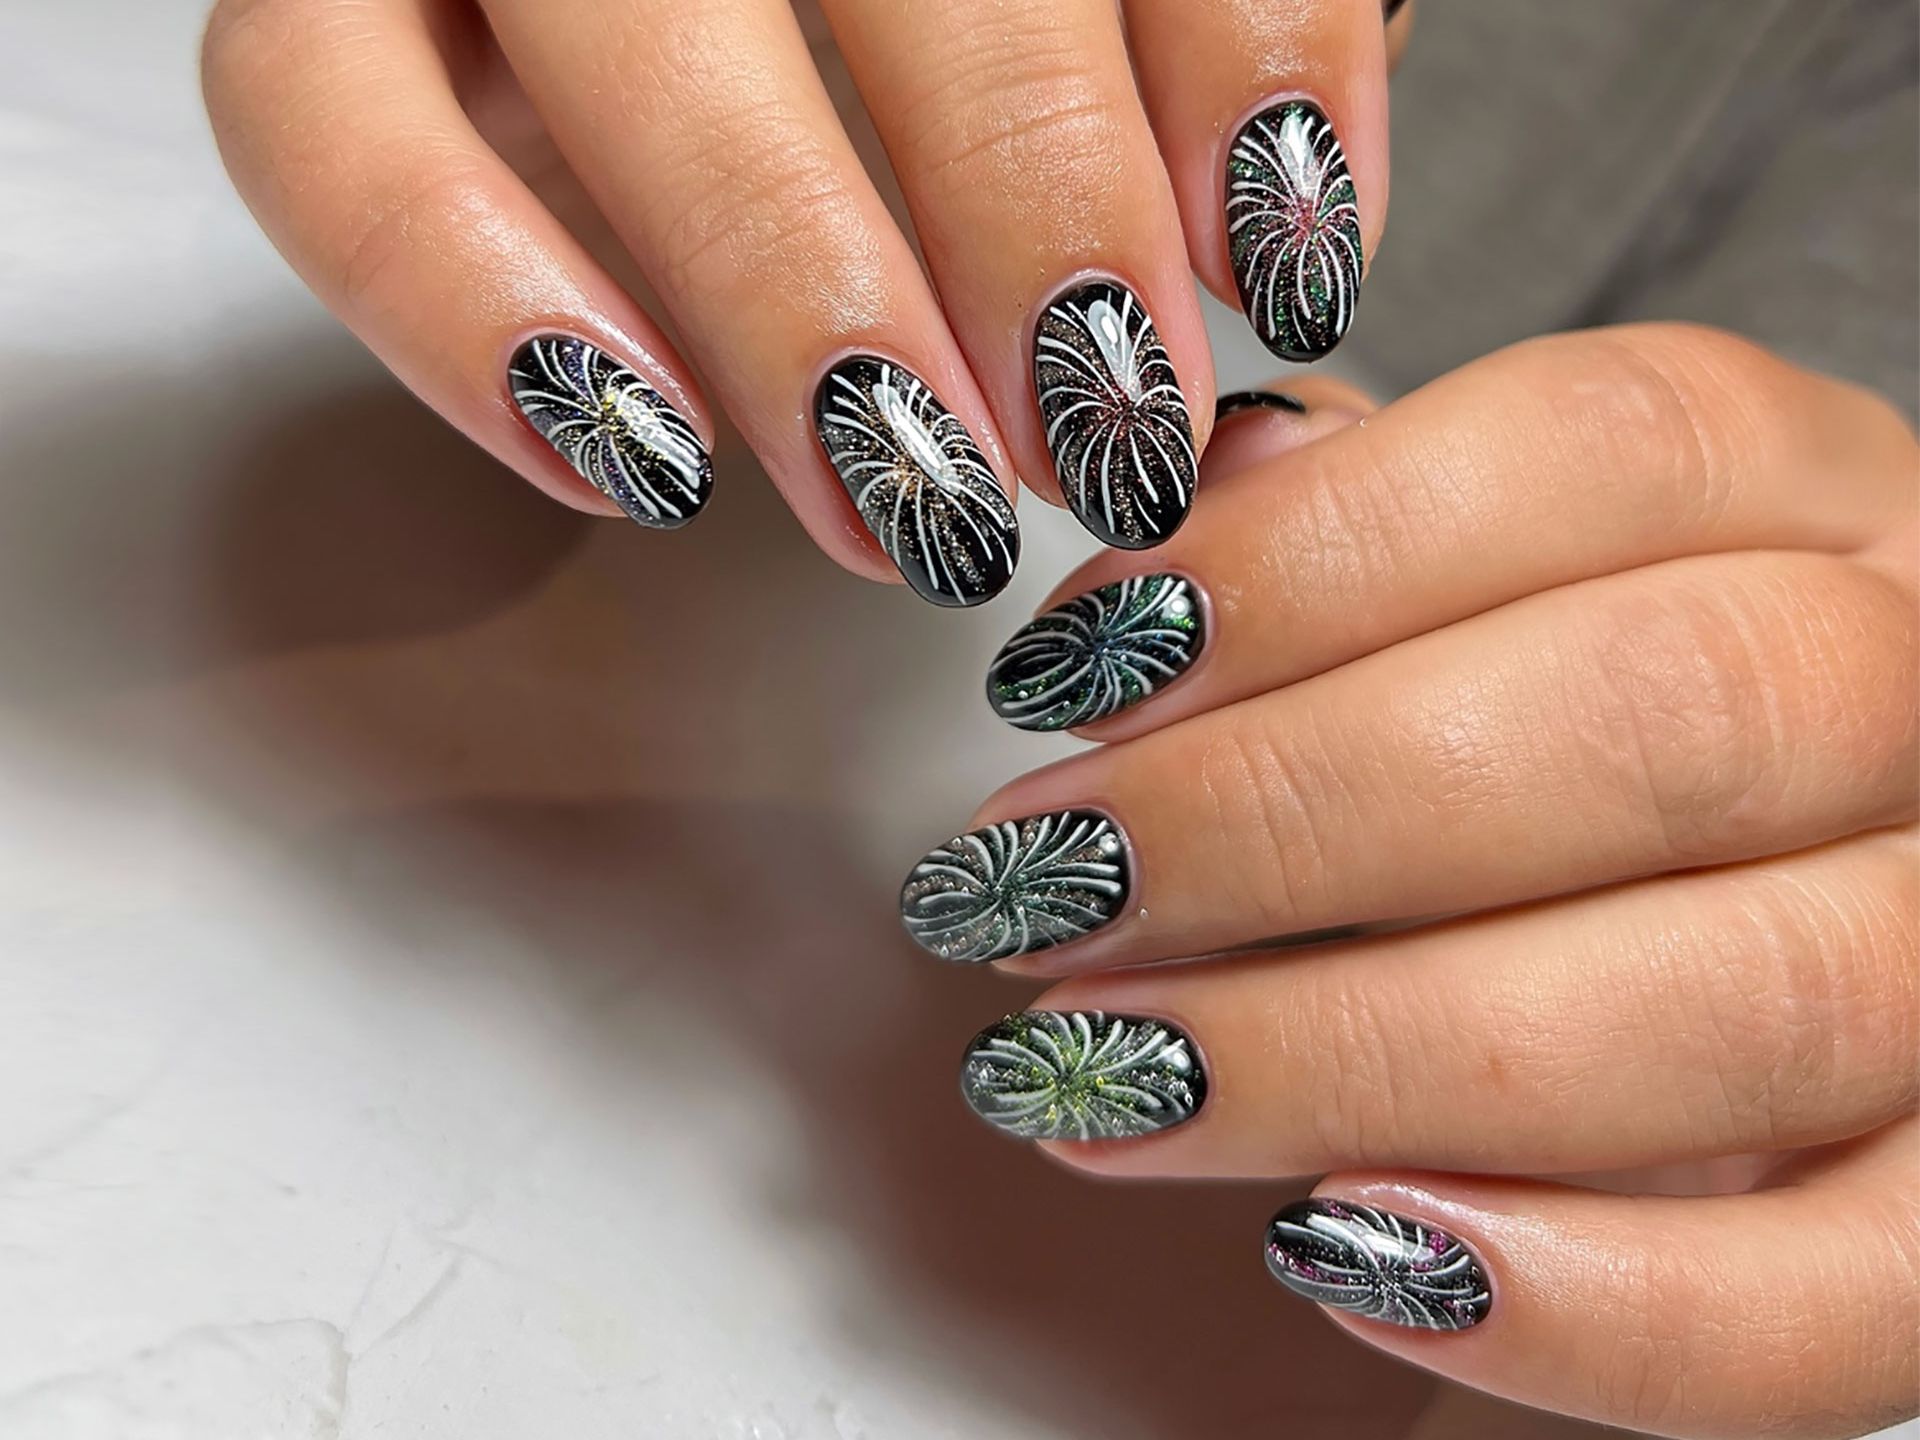
The common mistake with holographic glitter is applying it too thickly, which muddles the iridescent effect and turns the nails into a glittery mess. The key is a thin layer over a solid black base, allowing the holographic particles to catch the light without overwhelming the design. Here, the firework motif on each nail benefits from that restraint — the bursts read clearly against the dark background, each line distinct and deliberate, avoiding the splatter effect that ruins the illusion. The holographic particles catch the light from every angle, creating a firework effect that feels dynamic rather than static.
Each firework needs space to breathe, so the medium oval shape provides enough canvas without the lines feeling cramped. The glossy finish ties it together, making the glitter look like wet glass rather than craft store sparkle. It’s a look that requires a steady hand, but the result is a cohesive, celebratory set that doesn’t scream “I tried too hard.” The iridescent glitter shifts color in different light, adding depth without extra effort, and the black base anchors the whole design, preventing the glitter from feeling chaotic.
Winter Festive Visual Idea
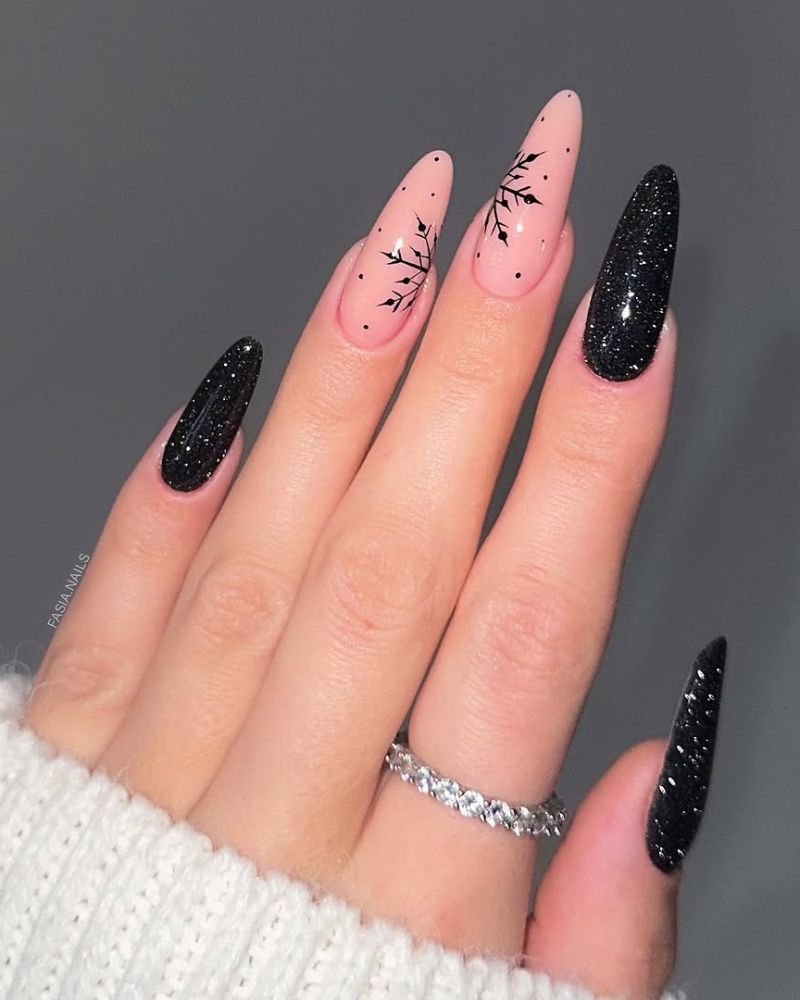
The dense black glitter base is the star here. Compared to a matte black with white snowflakes, this version feels more cohesive — the black snowflake decals blend into the glitter rather than standing apart. The light pink accent nails offer a breath of fresh air without breaking the monochrome mood. It’s a winter festive look that doesn’t rely on red or green, and the long stiletto shape adds a touch of drama that keeps it from feeling too sweet.
Glossy Visual Idea
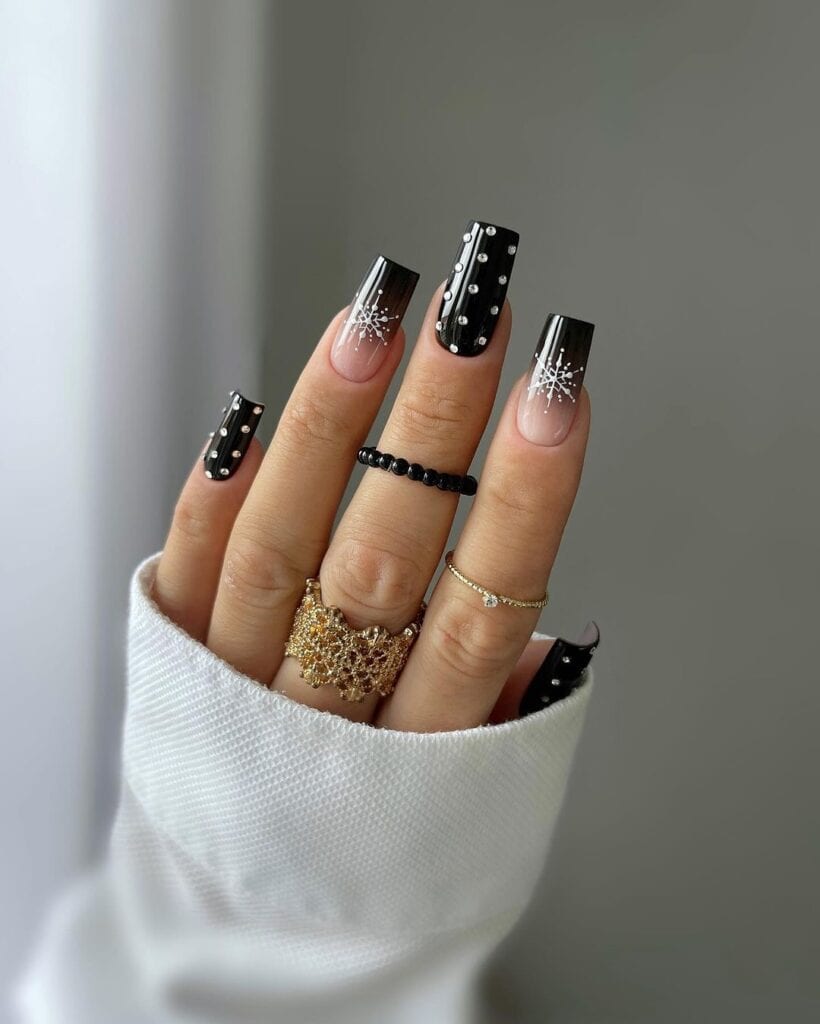
This is the Winter Black Nails design that doesn’t wash out pale skin. The sheer pink ombre base adds warmth, so it flatters cool and neutral undertones equally. The long square shape gives length without the drama of stiletto. The white dots and snowflakes read crisp against the black, making it a good match for those with medium to long nail beds. The glossy finish reflects light, so it works well on oval or squoval shapes too. Better suited for narrow nail beds, as the horizontal elements can broaden the visual field. Skip this if you prefer a single color: the ombre requires precise placement to look smooth.
Not Specified Visual Idea
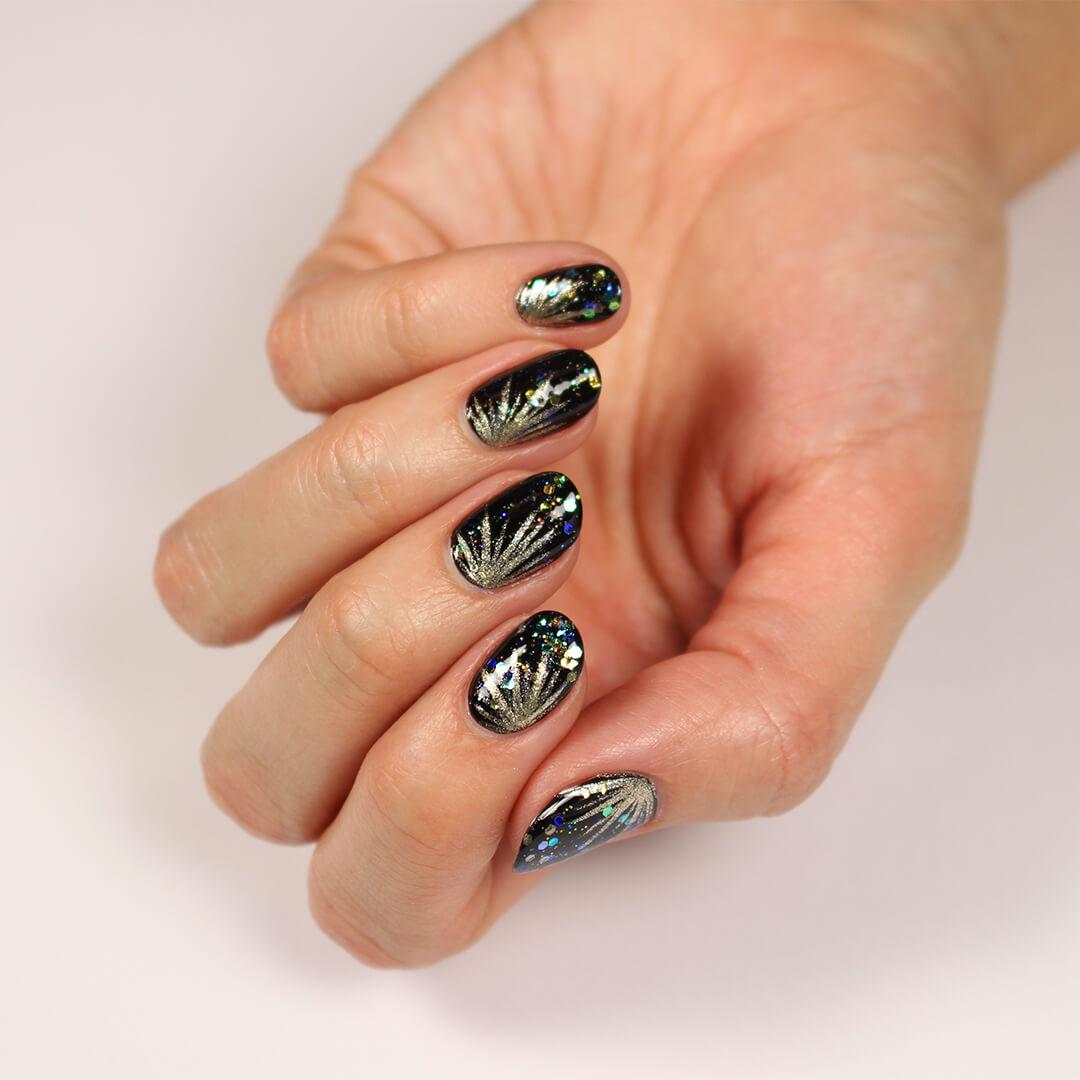
The foil starts lifting by day three. The abstract fan shapes catch on everything: sweater sleeves, scarf threads, even the inside of gloves. The glitter holds better, but the green and blue tones fade faster than the gold.
The short oval shape helps prevent snagging, but the foil pieces on the edges are the first to go. By day five, the foil on the index finger is completely gone. The black base stays glossy, so the overall look remains intact even as the accents wear. This is not a design for a long vacation; it’s for a weekend event.
Winter Holiday Visual Idea
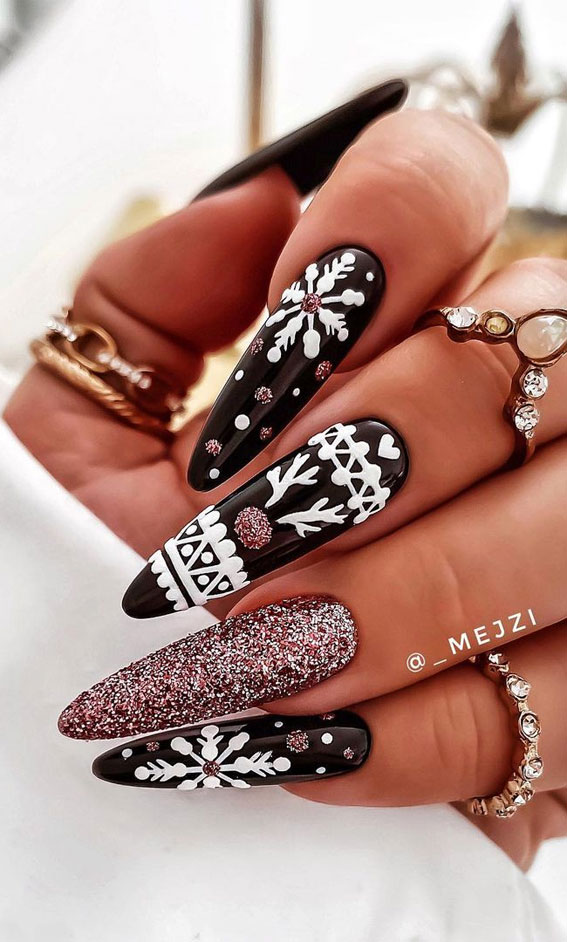
How much time are you willing to spend on a single nail art session? This design requires a steady hand and at least two hours in the chair. The stiletto shape adds extra time for filing and shaping. The hand-painted snowflakes and geometric lines demand precision, so expect a longer appointment. The rose gold glitter accents require multiple layers to achieve opacity. This is not a quick lunch break manicure; it’s a dedicated afternoon. The payoff is a detailed, unique look that lasts the week.
Black Glitter With White Details Visual Idea
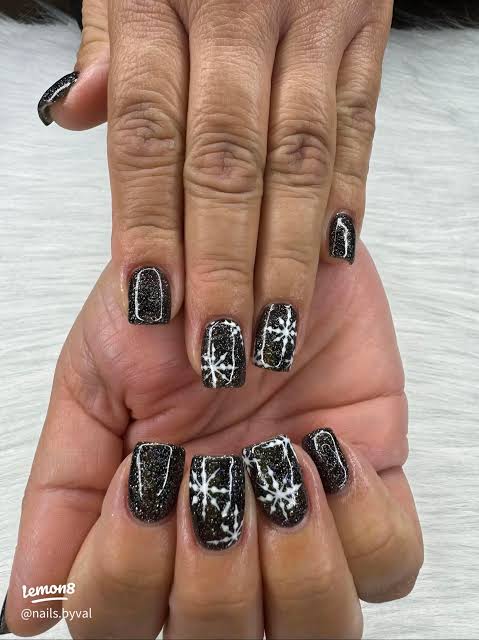
I wasn’t sure about black glitter for winter, but the white snowflakes change everything. The black glitter base catches light like fresh snow at night, and the white snowflakes ground it in winter imagery. It’s festive without being literal, and the short square shape keeps it practical for everyday wear. The contrast between the sparkly base and the matte white details reads cozy, not flashy. This is the design that makes you want to wear glitter all season. The white snowflakes are hand-painted, so each nail feels unique. The short length makes it easy to wear with gloves.
Glitter Gradient On All Nails Visual Idea
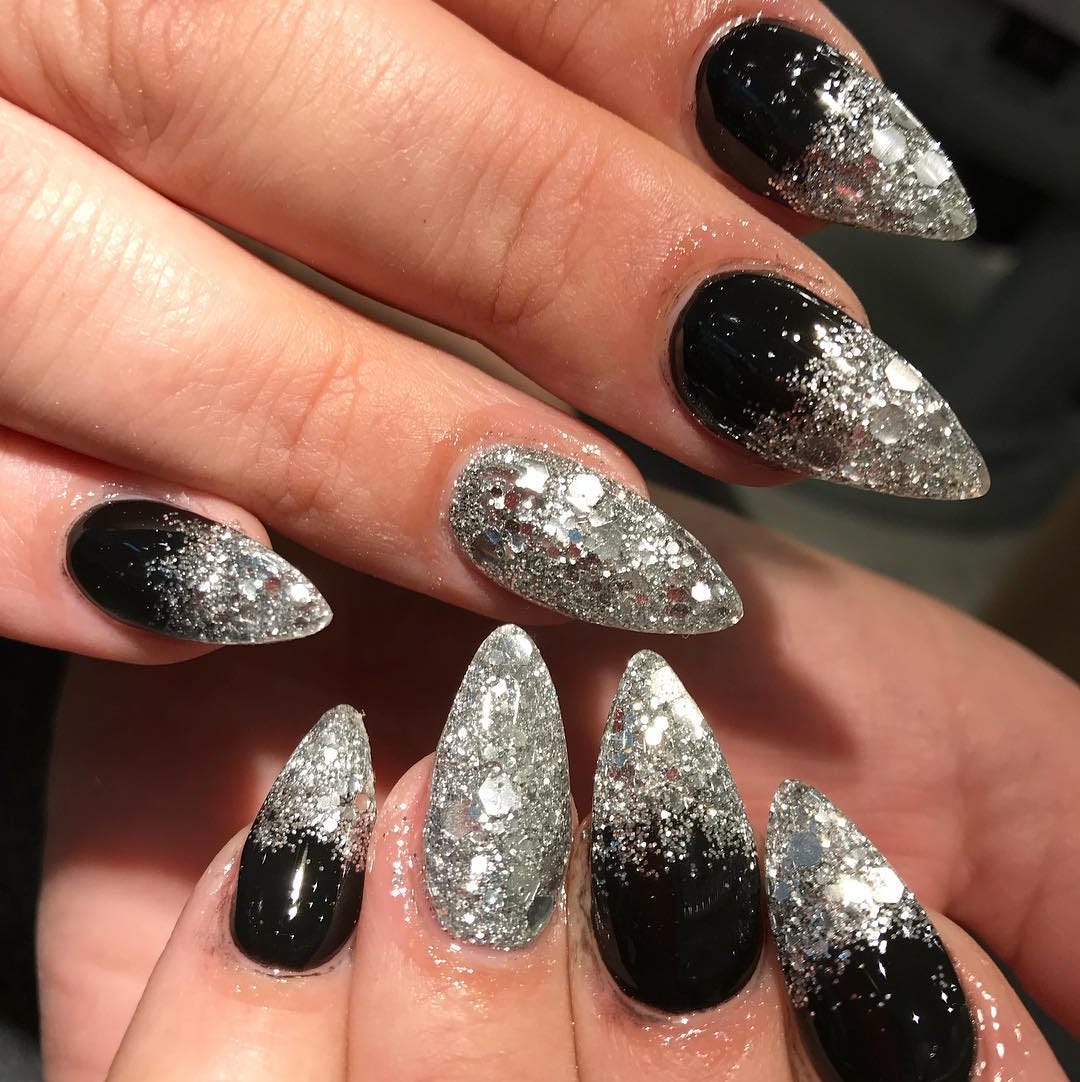
The technician starts with a black base, then applies silver glitter in layers from the cuticle up. The gradient is built with three to four layers, each getting denser toward the tip. The key is to use a sponge or brush to blend the glitter into the black base for a smooth transition.
The stiletto shape provides a long canvas that shows off the gradient. The silver glitter catches light at every angle, creating a multidimensional effect. The technique requires patience, as each layer needs to dry before the next is applied. The result is a smooth gradient that looks like a single color shift. The black base ensures the glitter pops, and the silver tones work with any skin undertone.
Matte Textured Metallic Visual Idea
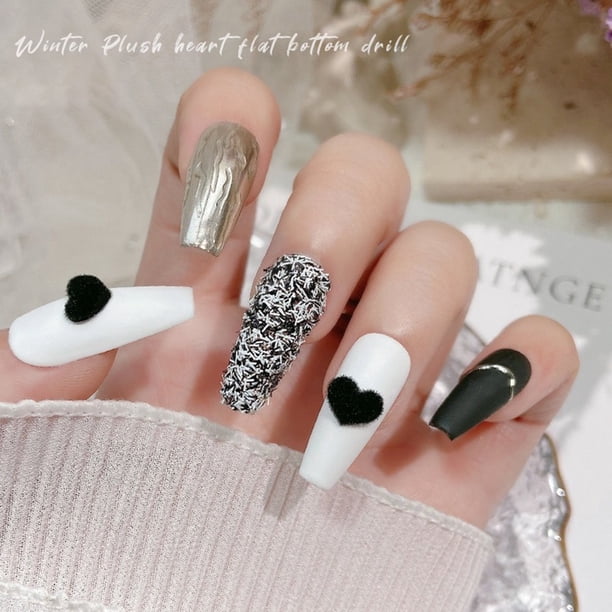
This is not a five-minute nail. Start with a matte black base, then add a metallic silver stripe down the center. For the fluffy hearts, use flocking powder over wet polish on a small brush. The textured black and white pattern comes from a dotting tool and thin acrylic paint. Layer a matte top coat over everything except the metallic stripe. Keep the rest of the nails simple to let the textures breathe.
Winter Mystical Visual Idea
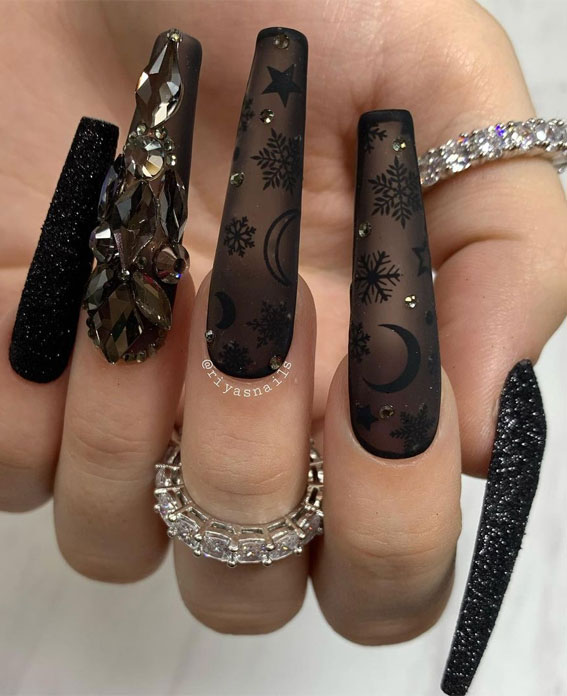
I respect the ambition, but this one is for the patient. The matte finish softens the dark grey decals of snowflakes, moons, and stars to the point where they almost disappear. The accent nail with large rhinestones catches the light, but the overall effect is more muted than mystical. On extra long coffin nails, the decals need a glossy top coat to pop. Without it, the design reads as a subtle texture rather than a celestial scene. It is a mood, not a statement.
Rhinestones And Glitter On Accent Nails Visual Idea
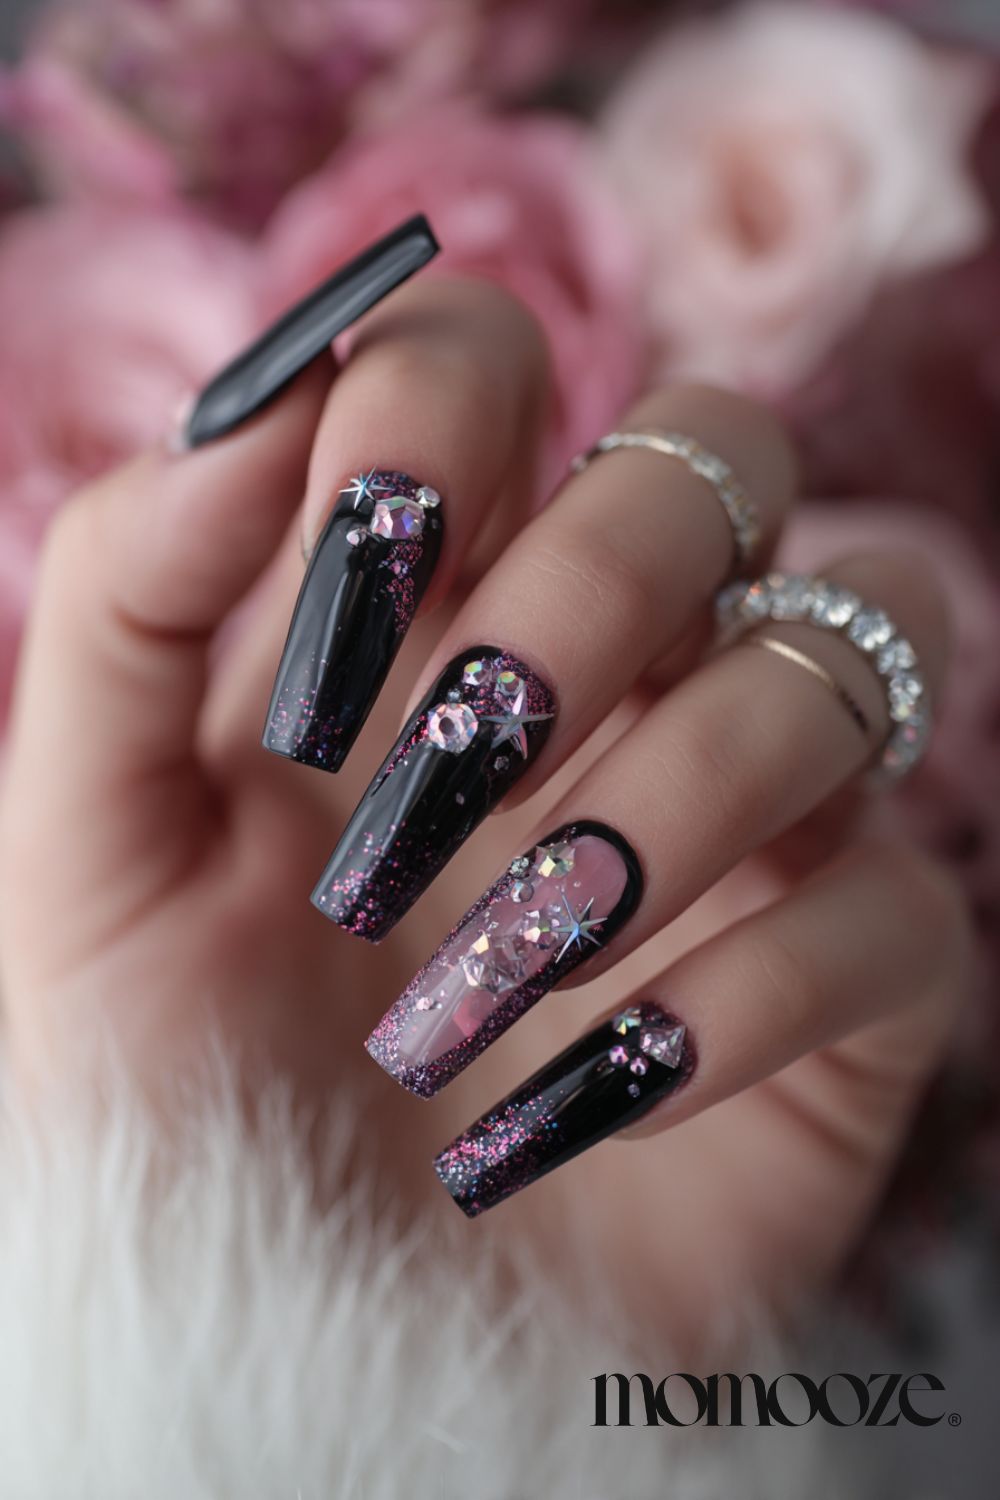
The glitter gradient on the accent nails is the real star here. On a long coffin shape, the black base fades into pink and purple glitter from cuticle to tip. Rhinestones cluster on one accent nail, catching light from every angle. The rest of the nails stay glossy black, letting the sparkle breathe.
What makes it work is the balance. The black grounds the glitter, preventing it from looking chaotic. The gradient keeps the intensity from being overwhelming, and the rhinestones are confined to a single nail. It is festive without being costume.
Final Thoughts
After all 33 designs, the quiet invitation still pulls me to the classic glossy short square. But the matte black with thin gold geometry? That’s my next appointment. What surprised me most is how black isn’t just a background here — it’s the whole story, and it wears differently in every finish. No regrets, no red polish in sight.