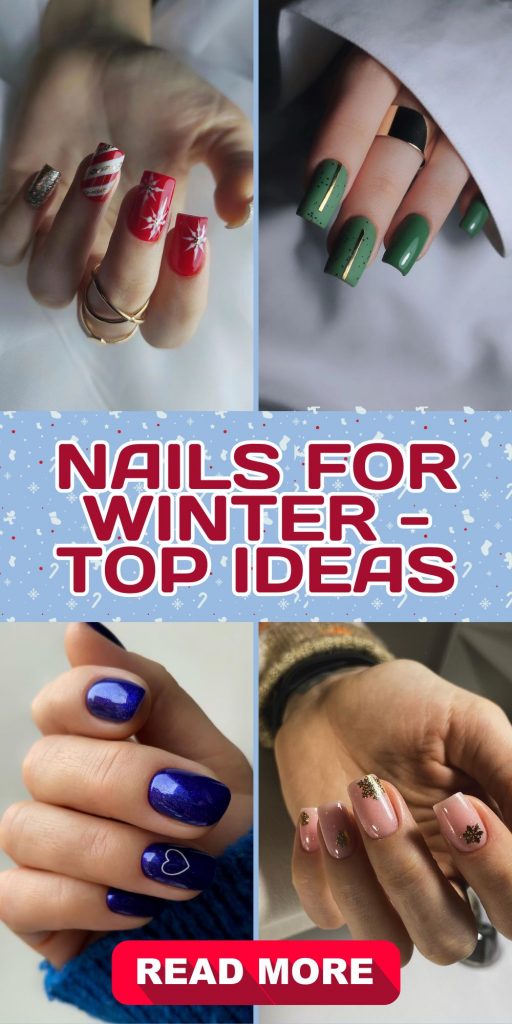
Winter Nails Ideas for the Season
Winter is the perfect season to experiment with nail designs that bring a sense of warmth and style to your look. Whether you prefer simple, gel, or acrylic nails, there are plenty of options that can suit both formal occasions and everyday wear. In this article, we’ll explore the top nails for winter – top ideas, showcasing beautiful colors and styles that you can recreate at home. Get ready for some truly cute and trendy nails that will be perfect for the colder months!
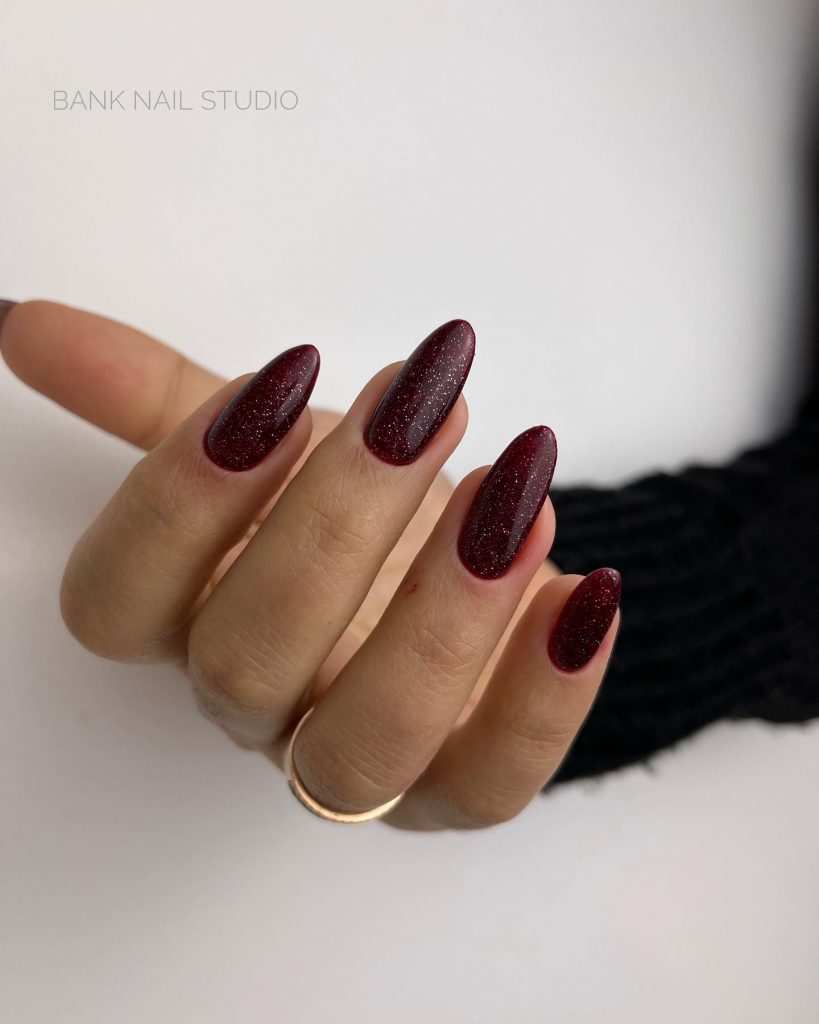
Deep Burgundy Glitter for a Classic Winter Look
These dark, glittery burgundy nails are an elegant and sophisticated choice for the winter season. The rich color gives off a pretty yet dramatic vibe that is ideal for any formal occasion. The nail shape is almond, elongating the fingers while the glitter accentuates the color, creating a beautiful shimmer under the winter lights. The gel polish adds a sleek, shiny finish, making the manicure both durable and chic. This color fits well for the wedding guest looking to make a bold statement.
Consumables:
-
- Burgundy gel polish (e.g., OPI “Malaga Wine”)
- Fine glitter powder (try Born Pretty Glitter Dust)
- UV or LED Lamp for curing gel polish
- Base coat and top coat (CND Shellac recommended)
How to recreate:
-
- Start with a clean, buffed nail surface and apply a base coat.
- Apply two coats of the burgundy gel polish, curing each layer under a UV/LED lamp.
- Gently dab the fine glitter onto the wet polish for a sparkly effect and cure again.
- Seal the look with a high-shine top coat and cure for a long-lasting finish.
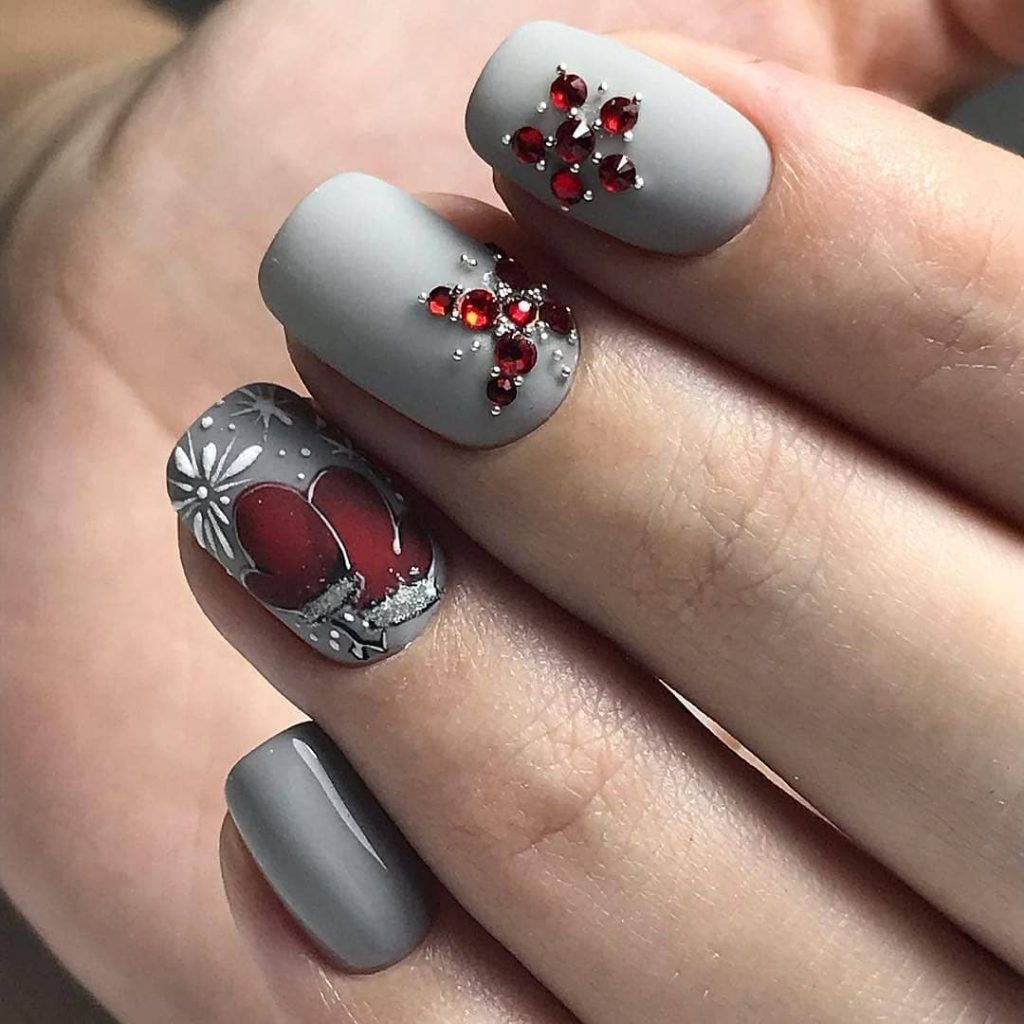
Festive Gray Matte with Red Accents
This nail type showcases a festive mix of matte gray paired with red accents, offering a chic winter look. The design features tiny red rhinestones arranged in floral shapes and an adorable mitten motif on one nail, making it perfect for the holiday season. The combination of matte gray and pretty red gems creates a visually appealing contrast, while the short, square nail shape keeps it subtle and cute for winter gatherings or casual outings. This look balances elegance with a touch of fun.
Consumables
- Matte gray gel polish (Zoya “Dove” is a great option)
- Red rhinestones or studs (Swarovski crystals)
- Detailing brush for the mitten design
- Matte top coat to seal the design
How to recreate
- Prep your nails by buffing the surface and applying a base coat.
- Apply two coats of the matte gray gel polish and cure under a UV/LED lamp.
- Use a fine detailing brush to paint the mitten design and place the rhinestones in your desired pattern, securing them with a top coat before curing.
- Finish with a matte top coat to lock in the design and keep it durable for the season.
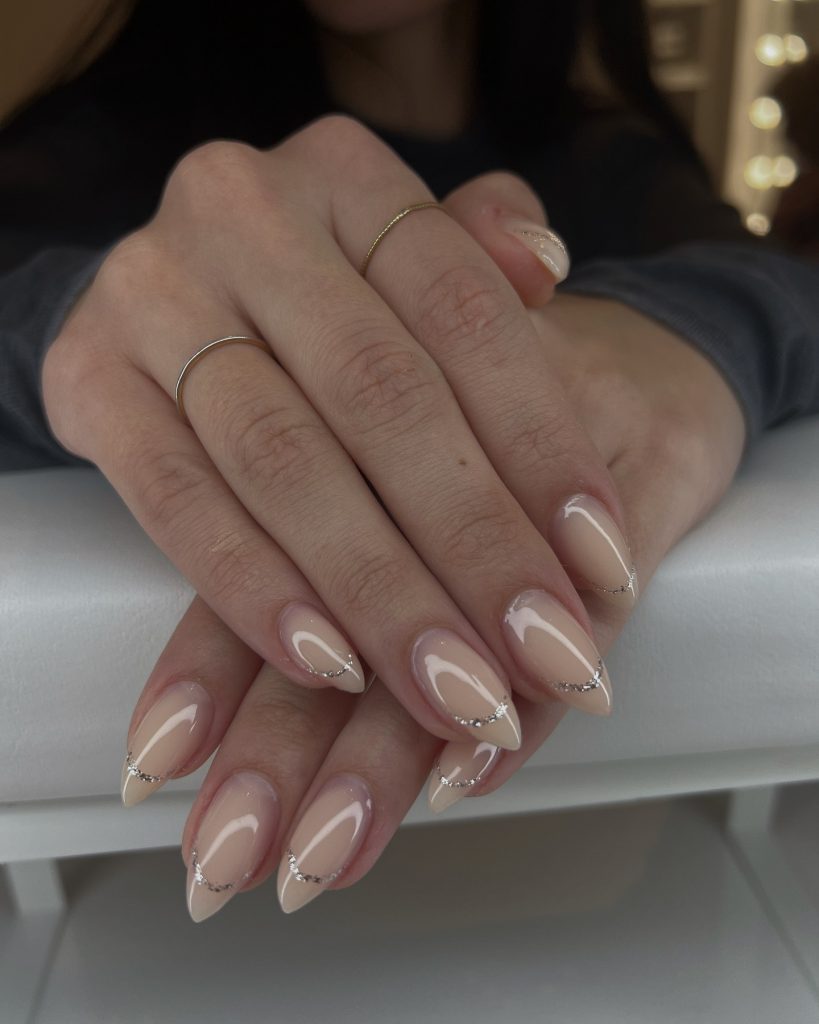
Elegant Nude French with Delicate Silver Accents
This trendy nail shape, a pointed almond, features a delicate nude base with a subtle French tip and silver accents that provide a classy, understated winter look. The simplicity of the short gel nails makes them versatile for both formal events and everyday wear. The silver stripe detail adds just enough sparkle to keep the design pretty without being too flashy. Perfect for those who love simple yet beautiful designs for the winter season.
Consumables
- Nude gel polish (Essie “Ballet Slippers” is a popular choice)
- Silver nail striping tape or silver glitter liner
- Gel top coat for durability
How to recreate
- Start with a clear base coat and cure under a UV/LED lamp.
- Apply two coats of nude gel polish, curing each layer.
- Carefully place the silver striping tape at the base of the French tip, or use a glitter liner for a more subtle look, then cure again.
- Finish with a top coat to seal the design and give it a glossy, long-lasting finish.
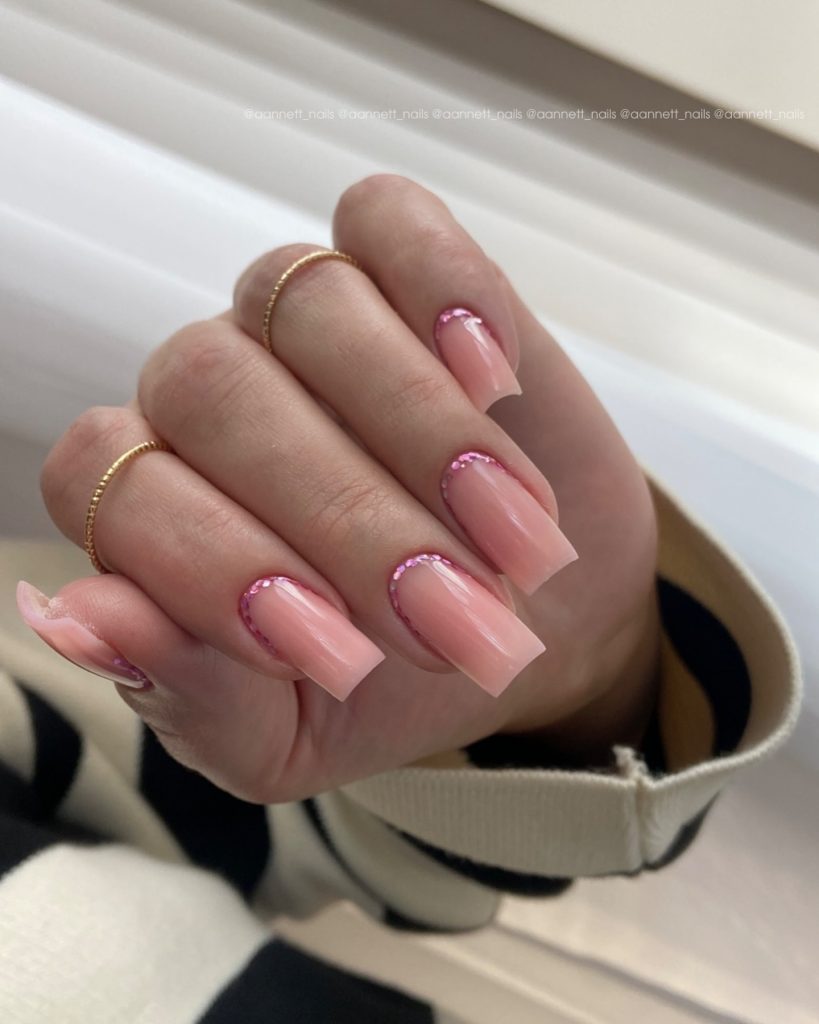
Baby Pink with Sparkly Cuticle Accents
This soft, baby blue-toned pink manicure is perfect for winter with its natural and pretty vibe. The cuticle area is adorned with pink rhinestones, adding a cute sparkle that elevates the otherwise minimal look. The nail shape is square, giving it a trendy and modern edge, while the overall design remains simple and elegant, making it perfect for both formal events and everyday wear.
Consumables
- Light pink gel polish (try OPI “Bubble Bath”)
- Pink rhinestones for the cuticle area
- Rhinestone applicator and gel top coat for securing stones
How to recreate
- Begin by applying a base coat and curing under the UV/LED lamp.
- Apply two coats of light pink gel polish, curing each layer.
- Use a rhinestone applicator to place the stones around the cuticle area and secure them with top coat before curing.
- Finish with a glossy top coat for a shiny, long-lasting finish.
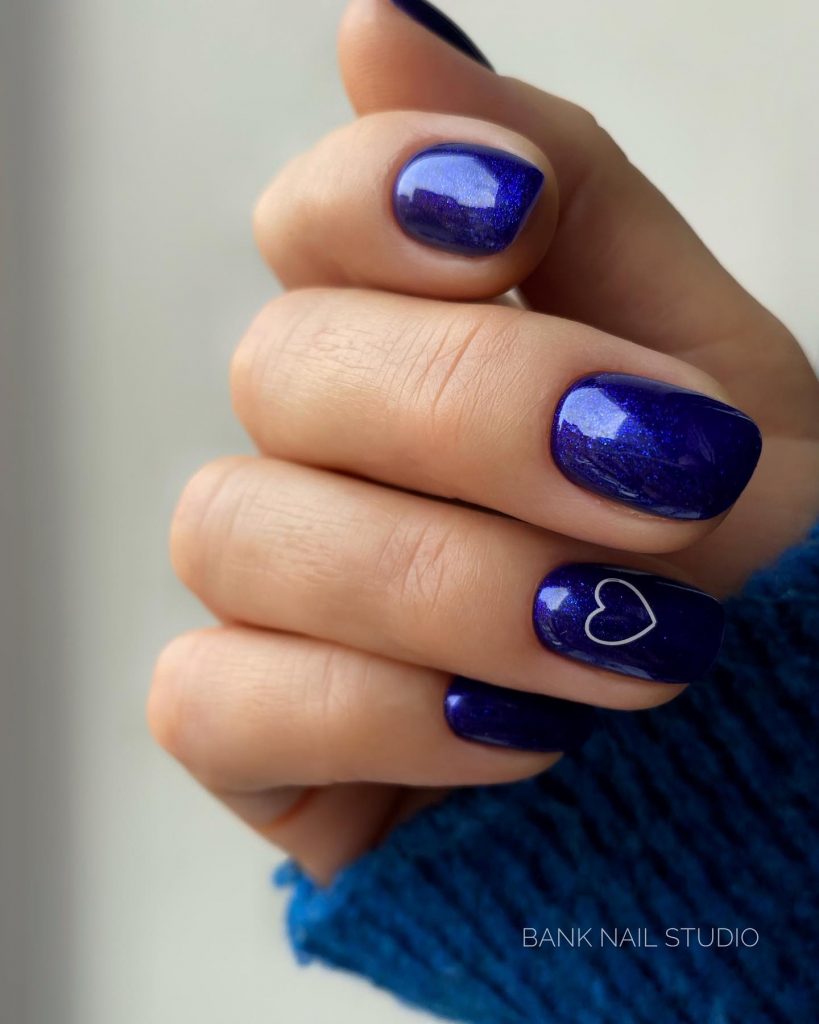
Midnight Blue with Minimalist Heart Accent
For a bolder winter look, this midnight blue gel manicure is a stunning option. The deep dark blue color, combined with a minimalist heart accent, offers a beautiful and trendy winter vibe. The nail type is short, which makes it more practical for daily wear while still maintaining a pretty and chic appearance. This design is perfect for those looking for something a bit more unique during the winter months.
Consumables
- Midnight blue gel polish (try Essie “Aruba Blue”)
- Fine detailing brush for the heart accent
- Glossy top coat for sealing the design
How to recreate
- Prep your nails with a base coat and cure under a UV/LED lamp.
- Apply two coats of midnight blue gel polish, curing each coat under the lamp.
- Use a fine brush to paint the heart detail on the accent nail, then cure again.
- Seal the design with a glossy top coat to ensure durability throughout the winter.
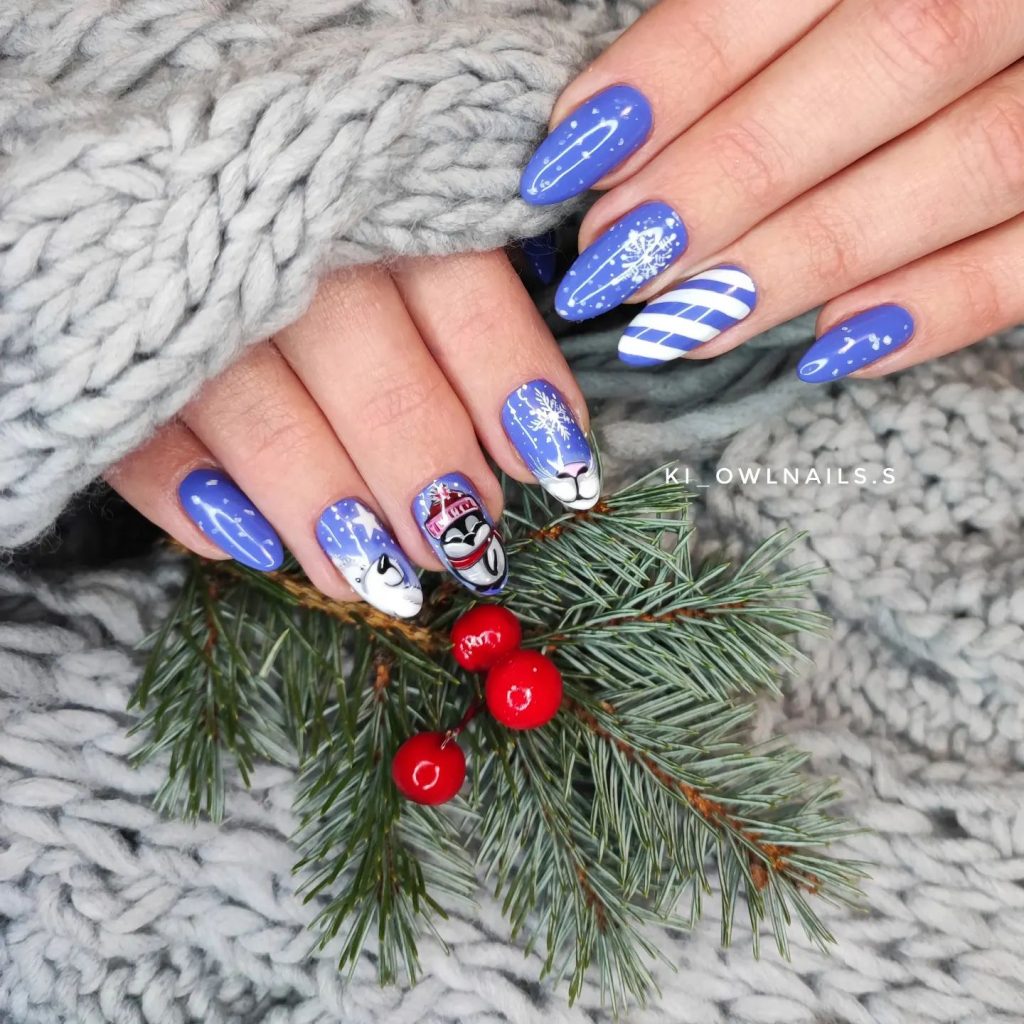
Fun Winter Blue Nail Art with Reindeer Accents
This cute and festive winter nail design features a vibrant blue base with a mix of snowflakes, reindeer accents, and candy cane-inspired stripes. The nail shape is almond, which adds elegance while allowing room for playful details. The design is perfect for the winter season and holiday celebrations, adding a fun and whimsical touch.
Consumables
- Blue gel polish (try OPI “My Favorite Galaxie”)
- White gel polish for snowflakes and stripes
- Black and red polishes for reindeer details
- Detailing brush for intricate designs
- Gel top coat for a glossy finish
How to recreate
- Start by applying a blue gel base and curing under the UV/LED lamp.
- Use a detailing brush to paint snowflakes, reindeer, and candy cane stripes in white and red, then cure each layer.
- Finish with a top coat to seal in the design and provide long-lasting shine.
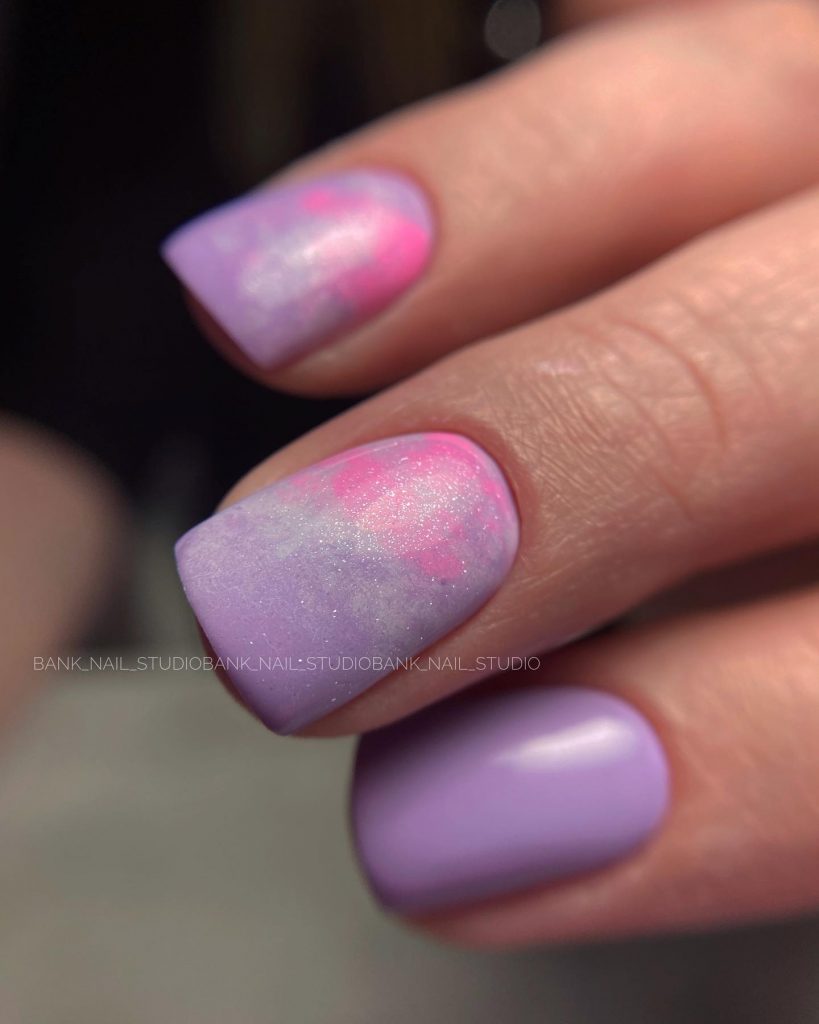
Lavender and Pink Marble Effect
This pretty lavender and pink marble effect is a trendy design that’s both soft and elegant. The nail shape is short and rounded, making it perfect for everyday wear while still offering a touch of creativity. The marble effect blends pastel colors beautifully, giving a subtle artistic flair to your nails.
Consumables
- Light lavender gel polish (try OPI “Do You Lilac It?”)
- Pink and white polishes for the marble effect
- Small sponge for blending
- Gel top coat for a glossy finish
How to recreate
- Start with a lavender base and cure under the UV/LED lamp.
- Dab pink and white polishes on a sponge and gently apply them to create the marble effect, then cure.
- Seal the design with a gel top coat for a glossy, smooth look.
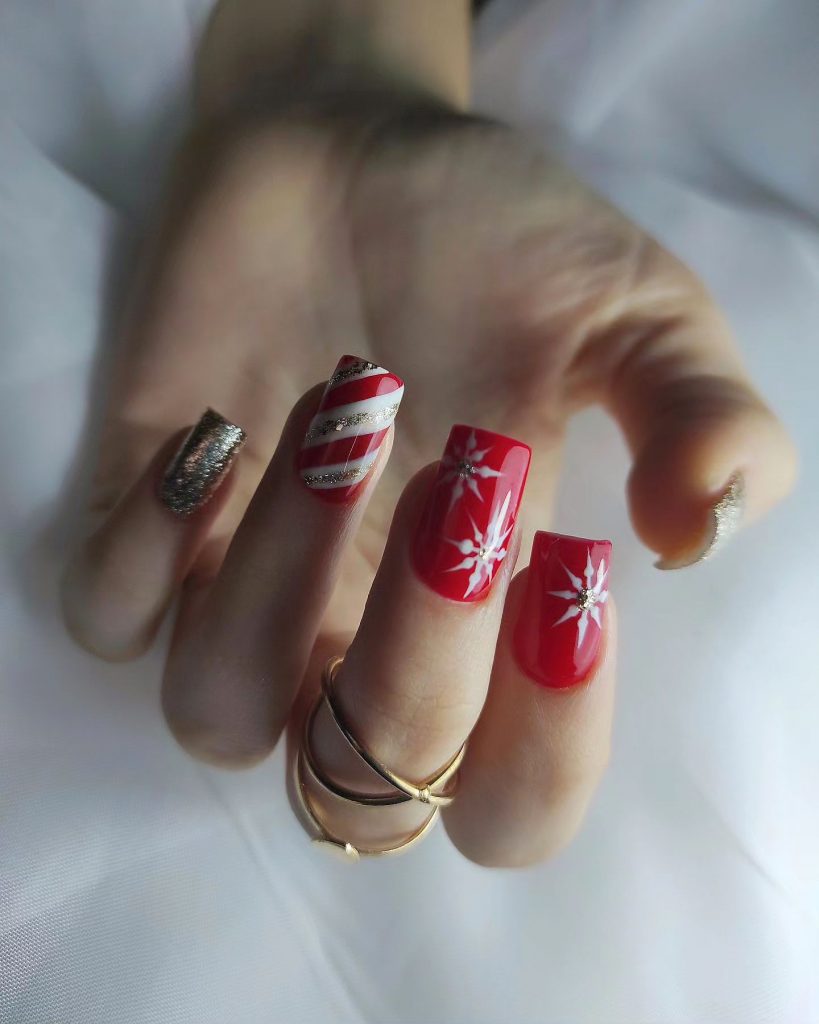
Classic Red and Candy Cane Stripes
This festive red manicure features candy cane stripes and snowflake accents, perfect for the holiday season. The nail shape is squared, giving the look a bold edge while still staying cute and pretty. The red base is vibrant and traditional, making it ideal for Christmas-themed nails.
Consumables
- Bright red gel polish (try Essie “Forever Yummy”)
- White gel polish for the candy cane stripes
- Glitter polish for added shine
- Detailing brush for precise lines
- Gel top coat for long-lasting shine
How to recreate
- Apply a bright red gel base and cure under the UV/LED lamp.
- Use a thin brush to paint candy cane stripes and snowflakes on the accent nails, curing after each detail.
- Finish with a gel top coat to keep the design durable and glossy.
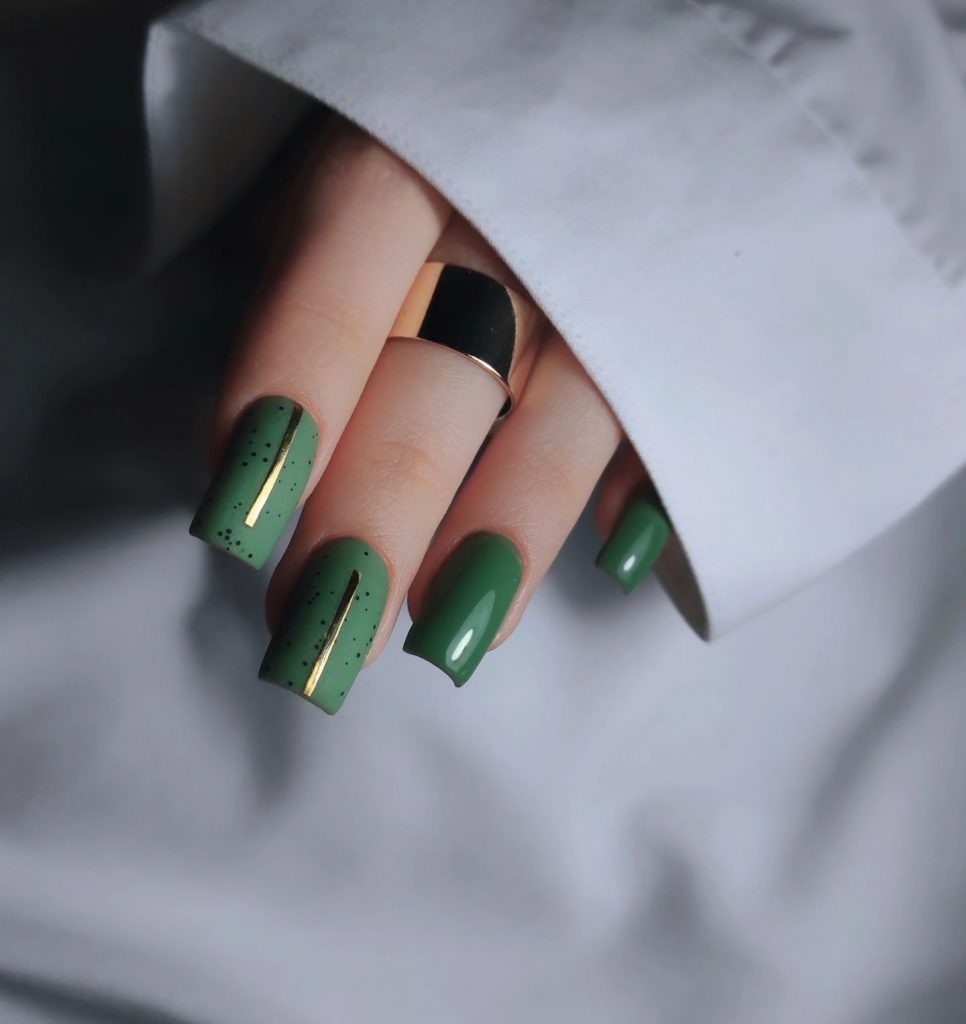
Elegant Green with Gold Accents
This trendy dark green manicure features minimalist gold details, offering a sleek and elegant look. The nail shape is square, giving it a modern edge. The combination of the dark green base and gold strip creates a beautiful yet understated design, perfect for both casual wear and formal winter occasions.
Consumables
- Dark green gel polish (try OPI “Stay Off the Lawn”)
- Gold foil or striping tape for the accent
- Fine brush for precision
- Gel top coat for a glossy finish
How to recreate
- Apply a dark green gel base and cure under the UV/LED lamp.
- Use gold striping tape or foil to create a minimal line down the center of one or two nails, then cure again.
- Finish with a gel top coat to lock in the design and give it a smooth finish.
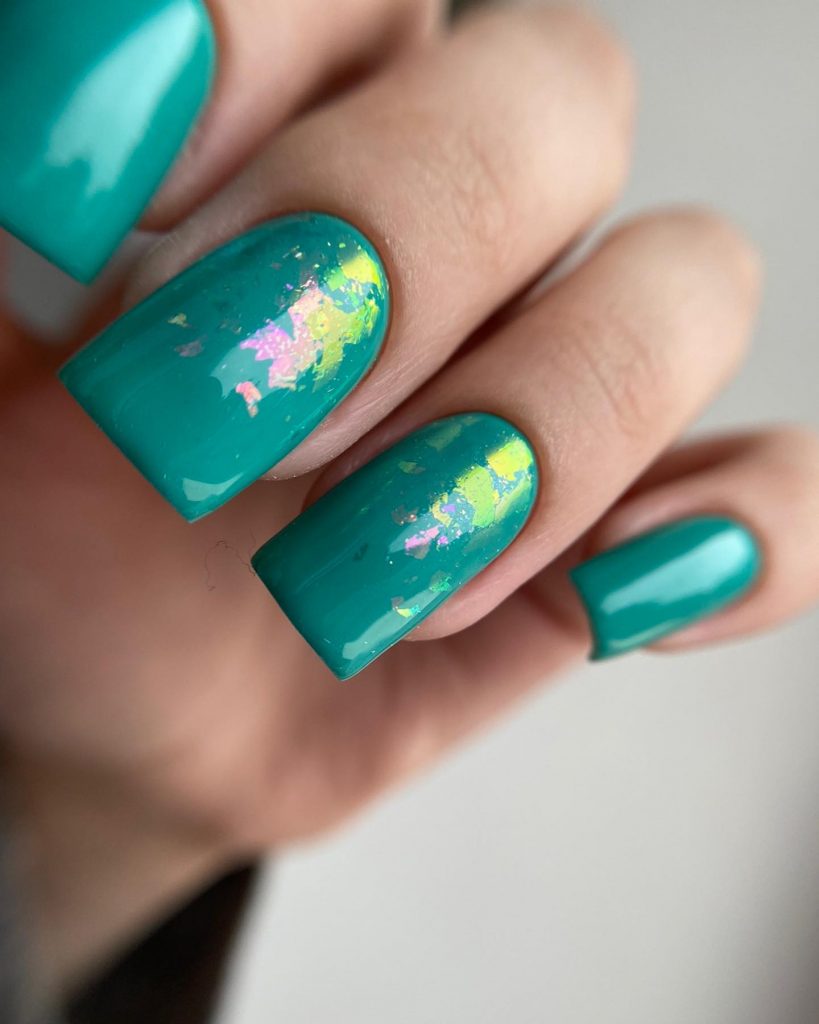
Teal with Iridescent Foil Accents
This beautiful teal manicure with iridescent foil accents is perfect for a trendy and eye-catching winter look. The nail shape is squared, giving it a strong and bold aesthetic. The iridescent foil adds a pop of sparkle, making the teal base stand out even more, creating a design that is both playful and elegant.
Consumables
- Teal gel polish (try OPI “Is That a Spear in Your Pocket?”)
- Iridescent foil for accents
- Gel top coat for shine and protection
How to recreate
- Start by applying a teal gel base and curing under a UV/LED lamp.
- Apply small pieces of iridescent foil to accent nails, curing after each application.
- Finish with a gel top coat to seal in the design and add extra shine.
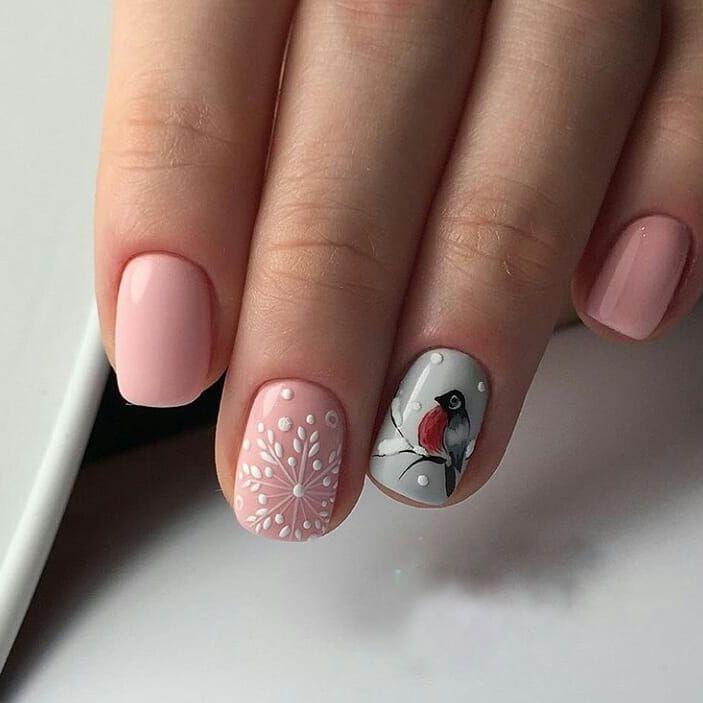
Soft Pink with Bird and Snowflake Accents
This cute winter design features a soft pink base on short, rounded nails, accented with a delicate bird and snowflake. The nail shape is practical and pretty, making this a perfect everyday winter look. The subtle snowflake pattern adds a festive touch, while the hand-painted bird gives it a unique and personal feel, making it ideal for someone who enjoys nature-inspired designs during the season.
Consumables
- Light pink gel polish (try OPI “Mod About You”)
- White gel polish for the snowflake design
- Black, red, and gray polishes for the bird
- Detailing brush for intricate work
- Glossy gel top coat for protection
How to recreate
- Apply a base coat and cure it under a UV/LED lamp.
- Paint two coats of soft pink gel polish and cure after each layer.
- Using a fine detailing brush, paint the snowflake and bird on two accent nails, and cure.
- Finish with a glossy top coat to lock in the design and ensure durability.
Classic Glitter French Tips
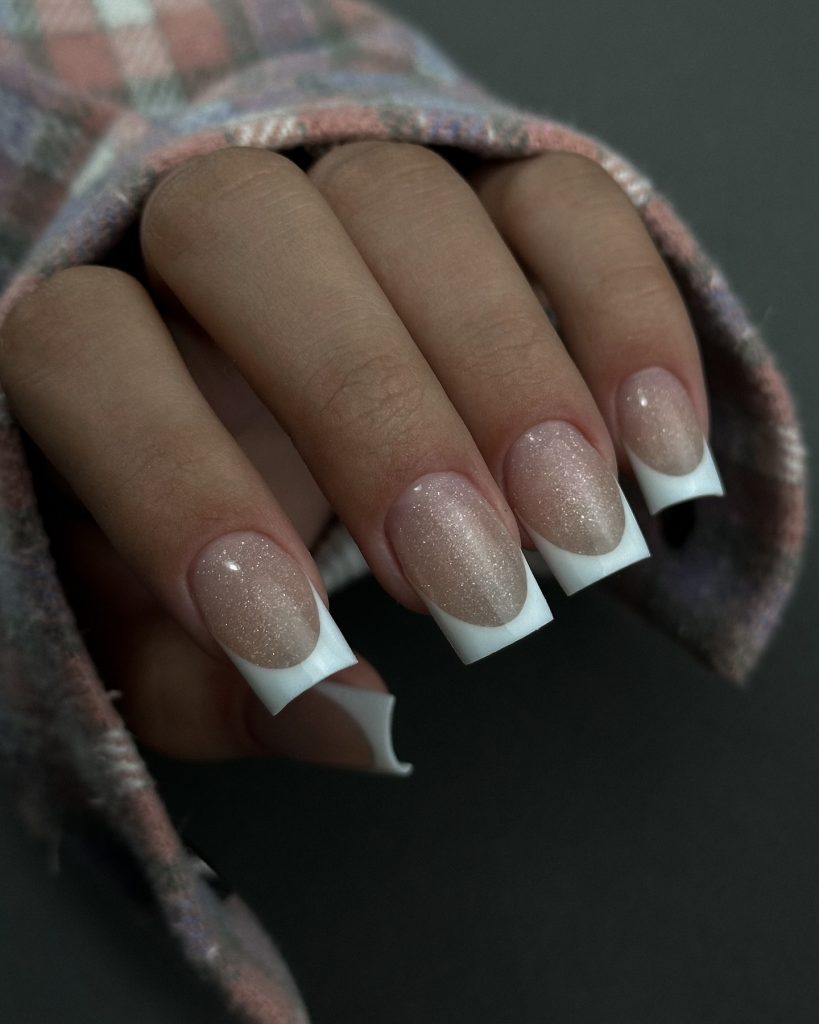
This classic French manicure is elevated with a touch of glitter at the tips, adding sparkle to a natural look. The nail shape is square, giving it a clean and elegant appearance, ideal for both formal occasions and casual wear. The soft nude base enhances the simple yet beautiful design, while the glitter tips offer a festive touch perfect for winter.
Consumables
- Nude gel polish (try OPI “Bubble Bath”)
- Silver glitter polish or glitter dust for the tips
- Gel top coat for shine
How to recreate
- Start with a nude base and cure it under a UV/LED lamp.
- Apply silver glitter to the tips of your nails using a fine brush or sponge, and cure.
- Finish with a top coat to seal in the glitter and add extra shine, curing once more for a long-lasting look.
Christmas Tree Green with Gold Leaf Accents
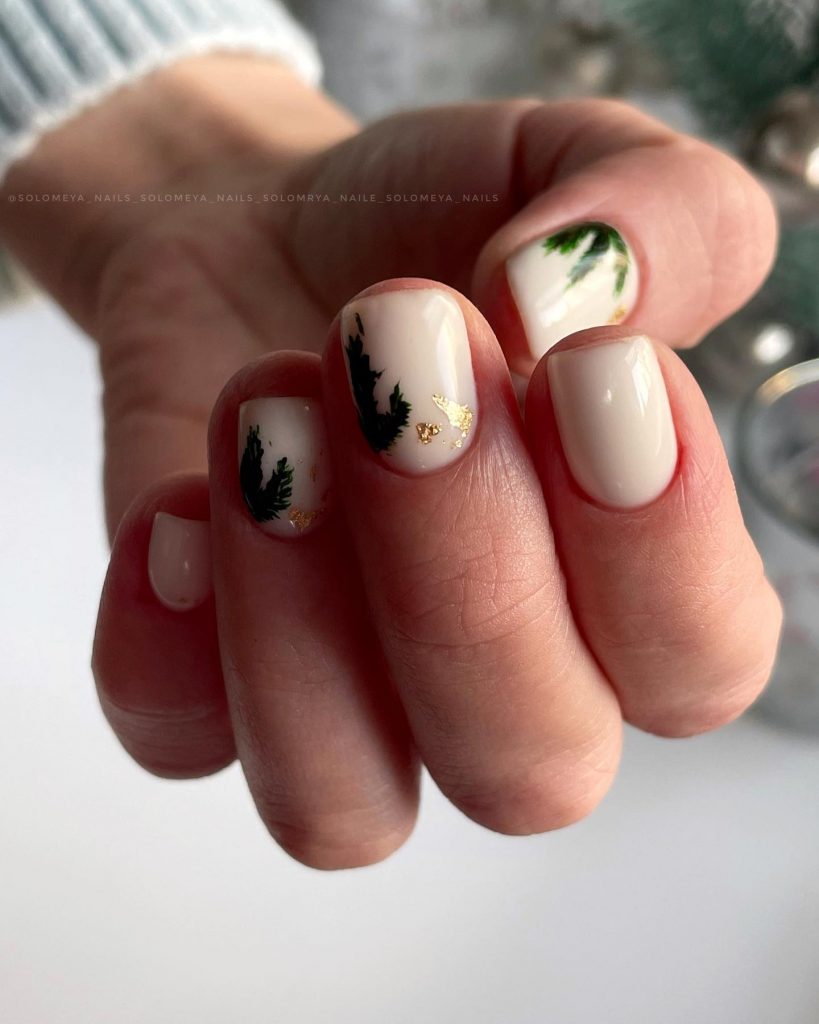
This trendy winter look features short, rounded nails with a soft cream base and green pine branches painted as accents. The design is completed with small touches of gold leaf, giving it a luxurious holiday feel. This nail shape is practical yet stylish, offering a balance between natural and festive, perfect for embracing the holiday season with elegance.
Consumables
- Cream gel polish (Essie “Blanc”)
- Green gel polish for the pine branches
- Gold foil or gold leaf for accents
- Detailing brush for painting designs
- Gel top coat for protection and shine
How to recreate
- Apply a cream-colored base and cure it under a UV/LED lamp.
- Using a fine brush, paint the green pine branch accents on a few nails and cure.
- Apply small pieces of gold foil to the design and secure it with a top coat, then cure again for long-lasting wear.
Glitter-Tipped French Manicure
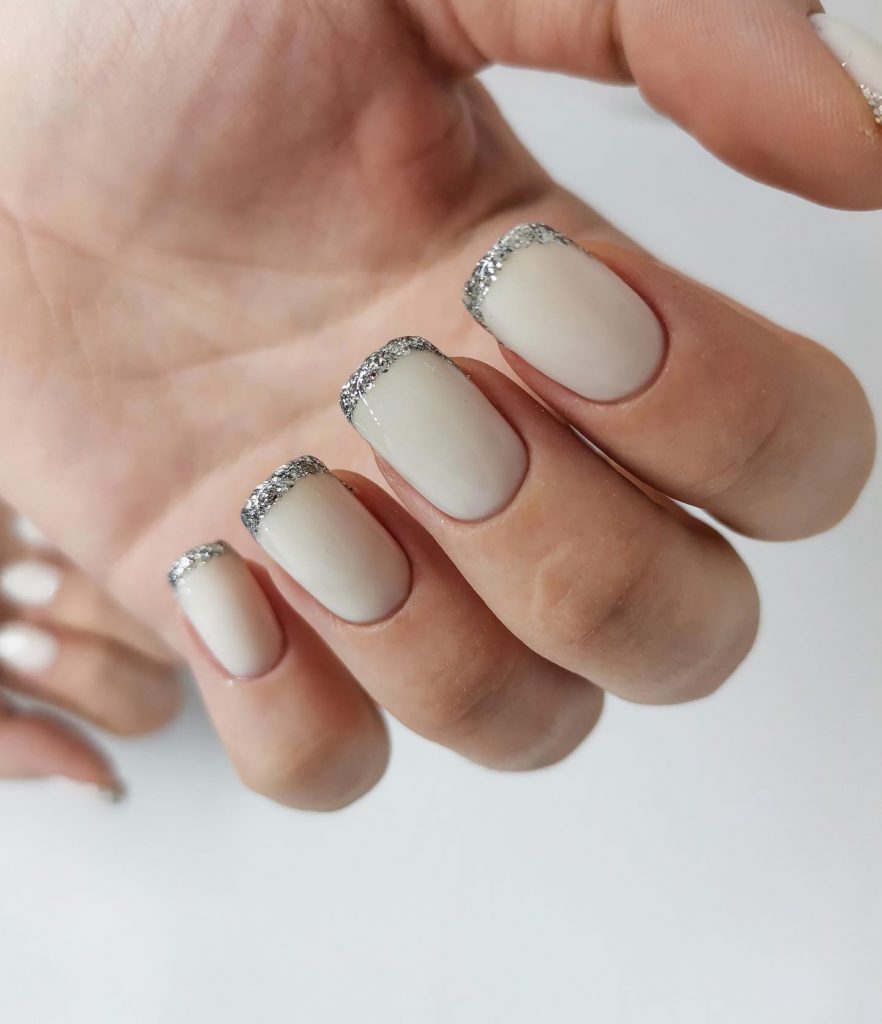
This elegant French manicure with a modern twist uses silver glitter at the tips, adding a festive sparkle to a simple and beautiful design. The nail shape is square, keeping the look clean and formal, while the glitter tips make this style perfect for the holiday season. It’s ideal for those who want a classic design with a bit of winter charm.
Consumables
- Nude gel polish (try OPI “Samoan Sand”)
- Silver glitter polish for the tips
- Detailing brush for precision
- Gel top coat for a smooth, glossy finish
How to recreate
- Start by applying a nude gel base and cure under the UV/LED lamp.
- Apply silver glitter to the tips using a thin brush, cure after applying the glitter.
- Finish with a top coat to seal the glitter and give it a long-lasting shine, curing once more for durability.
Beige and Glitter with Reindeer Accent
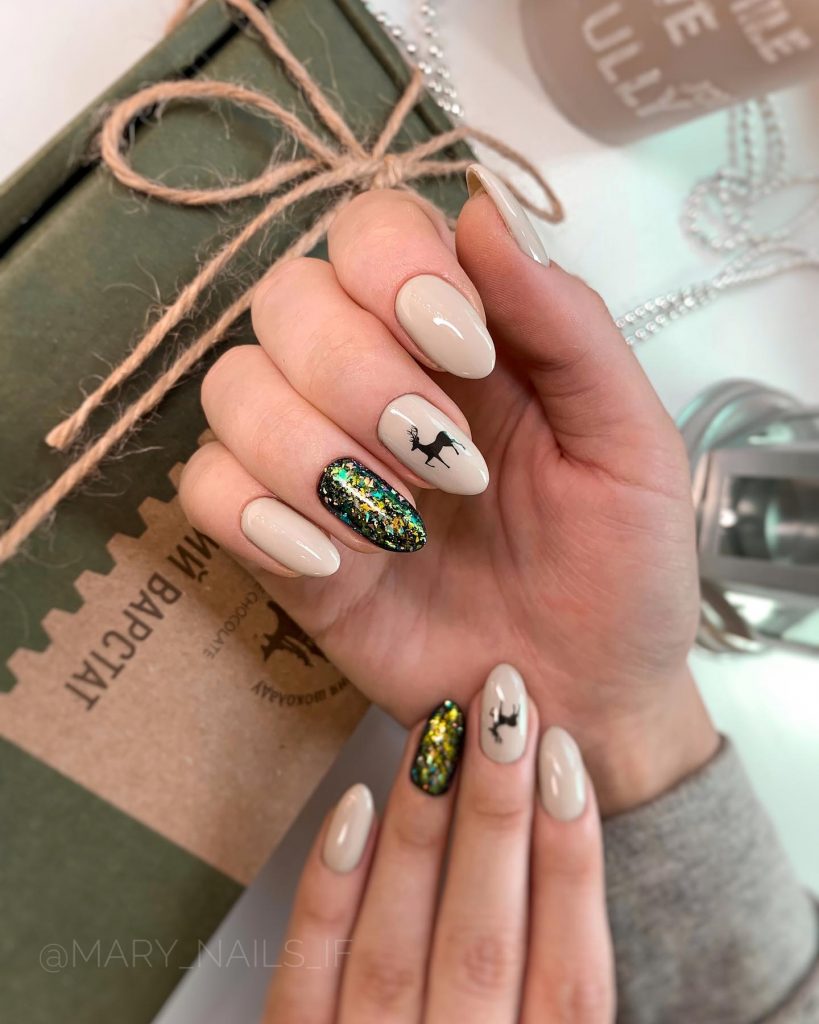
This trendy winter look features beige nails with one accent nail showcasing a reindeer silhouette and another covered in glitter. The nail shape is almond, making it elegant and chic. The glitter and reindeer detail add a festive touch to the design, perfect for the holiday season or any winter event. It’s a pretty look that balances cute with sophisticated.
Consumables
- Beige gel polish (try OPI “Icelanded a Bottle of OPI”)
- Black gel polish for the reindeer silhouette
- Glitter polish or glitter powder for the accent nail
- Detailing brush for fine work
- Gel top coat for sealing the design
How to recreate
- Apply a base coat and two layers of beige gel polish, curing after each layer.
- Use a fine brush to paint the reindeer silhouette on one accent nail and cover another nail with glitter, curing both.
- Finish with a top coat to lock in the design and ensure a long-lasting, shiny finish.
Matte Winter Blues with Snowflake Accent
This stunning matte winter look features a gradient of soft blues with an accent snowflake, making it perfect for the colder season. The nail shape is almond, which elongates the fingers and gives a chic, elegant feel. The combination of the muted blue tones with a delicate white snowflake adds a pretty and serene winter vibe, ideal for both casual and formal occasions.
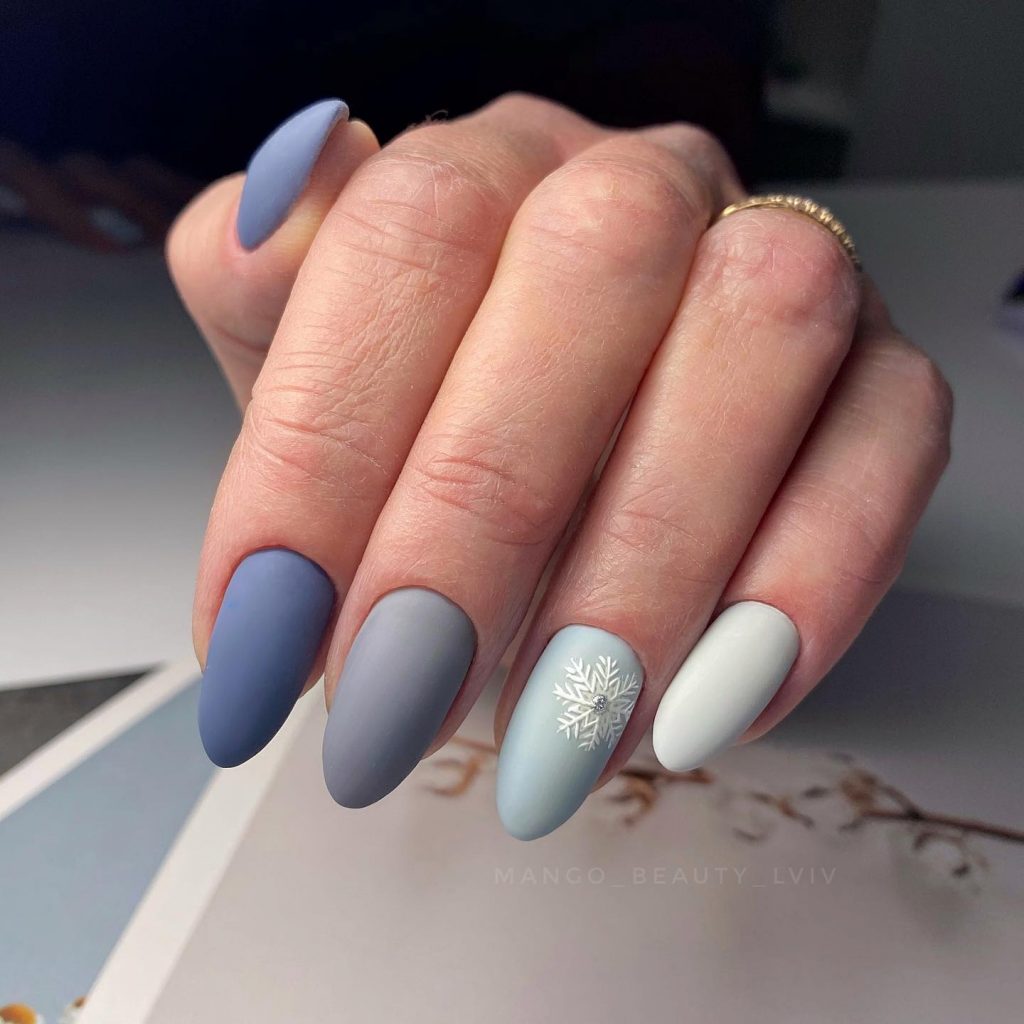
Consumables
- Matte blue gel polish (try Essie “Bobbing for Baubles”)
- White gel polish for snowflake design
- Detailing brush for creating the snowflake
- Matte top coat for a smooth finish
How to recreate
- Apply a base coat and cure under a UV/LED lamp.
- Use different shades of blue gel polish to create a gradient effect on each nail, curing each layer.
- Paint a snowflake on one accent nail using a fine detailing brush, then cure again.
- Finish with a matte top coat to seal the look and cure once more.
Festive Red and Silver Bow Design
This trendy holiday design features vibrant red nails with a silver bow accent, combining both cute and classy elements. The nail shape is almond, making the look both practical and elegant. The silver glitter and white bow add festive charm, making this design perfect for holiday parties or any winter event.
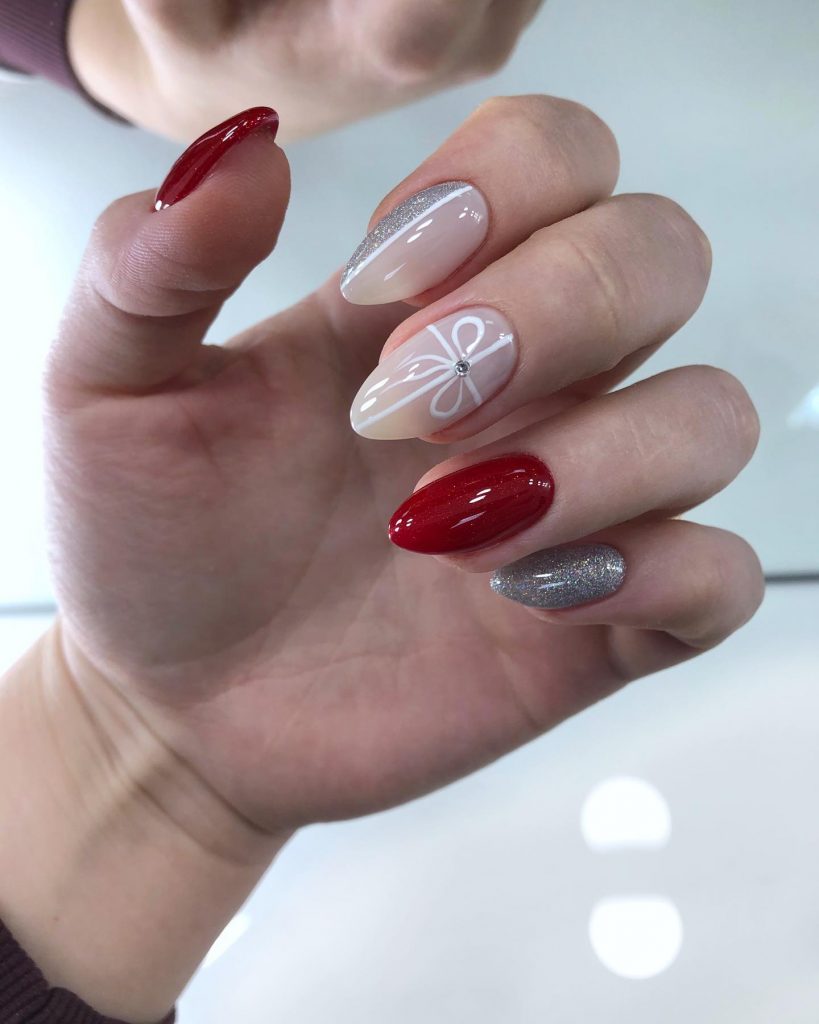
Consumables
- Red gel polish (try OPI “Big Apple Red”)
- Silver glitter polish for accents
- White gel polish for the bow design
- Small rhinestone for the center of the bow
- Gel top coat for shine
How to recreate
- Start with a base coat and cure under a UV/LED lamp.
- Apply two coats of red gel polish to the nails, curing each layer.
- Use a fine brush to paint the bow design with white polish, adding a small rhinestone in the center. Cure after detailing.
- Finish with a gel top coat for extra shine and durability, then cure again.
Soft Pink with Gold Snowflake Accents
This beautiful and soft pink design with gold snowflakes is perfect for winter wedding guest nails or any holiday party. The short, square nail shape keeps the look sophisticated yet playful, while the gold snowflakes give it a festive and elegant feel. The subtle glitter within the pink polish adds dimension, making the nails sparkle in the winter light.
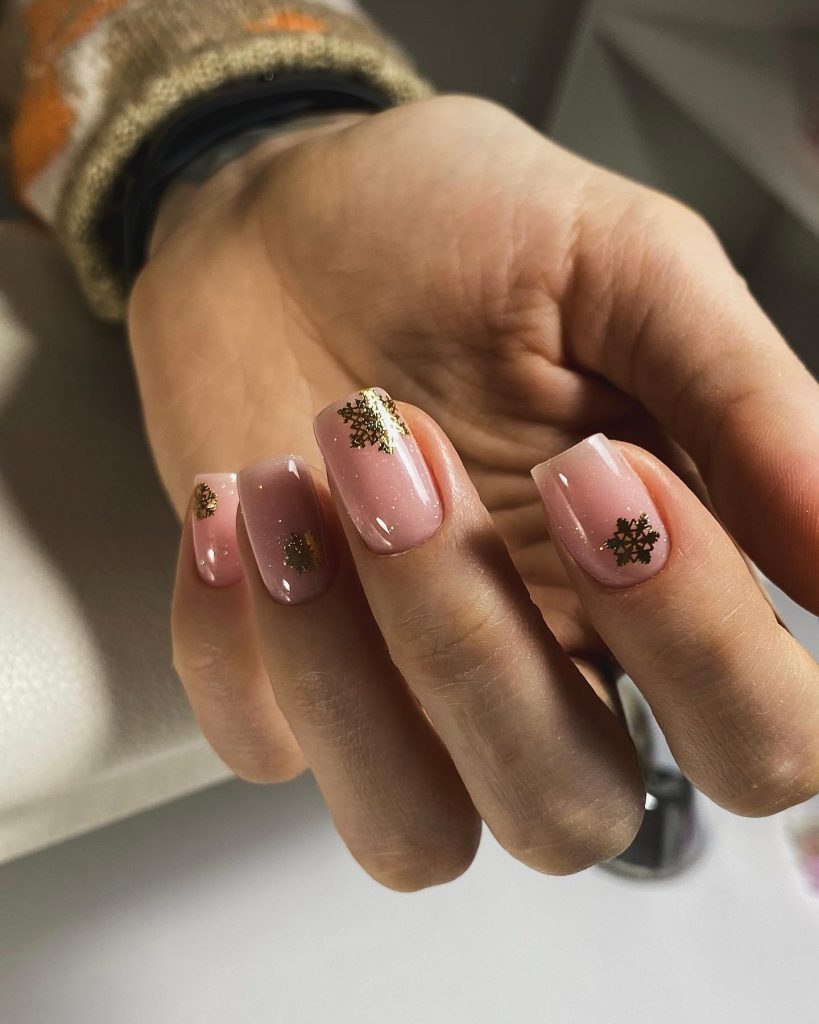
Consumables
- Light pink gel polish (try Essie “Ballet Slippers”)
- Gold snowflake decals or glitter
- Fine brush for detailing
- Gel top coat to seal the design
How to recreate
- Apply a light pink gel base and cure under the UV/LED lamp.
- Add gold snowflake accents on select nails using either decals or by hand-painting them with gold glitter. Cure after applying the details.
- Seal the design with a glossy top coat and cure for a long-lasting, sparkling finish.
Midnight Blue with Snowflakes
This dark midnight blue manicure is a trendy and beautiful winter look, featuring hand-painted white snowflakes on a deep blue base. The nail shape is almond, giving the design an elegant edge while the pretty snowflakes add a playful, seasonal touch. This design is perfect for both formal winter events or just embracing the winter chill with a festive nail art statement.
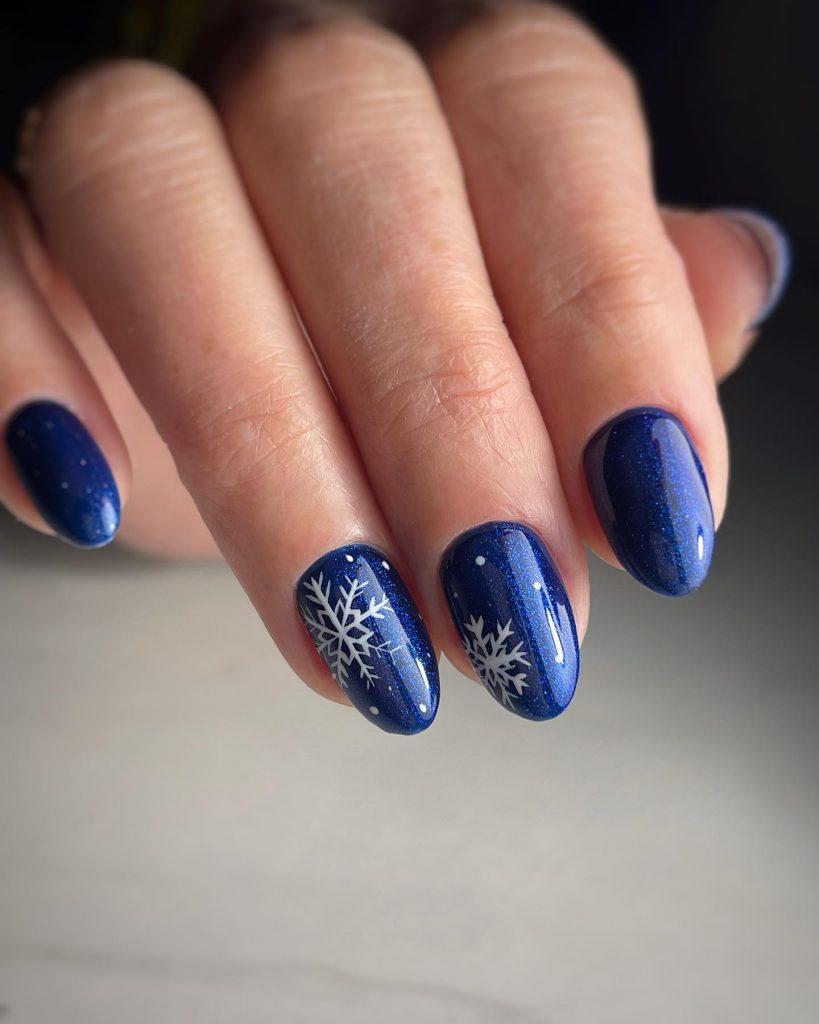
Consumables
- Midnight blue gel polish (try Essie “Aruba Blue”)
- White gel polish for snowflakes
- Detailing brush for fine lines
- Gel top coat for a glossy finish
How to recreate
- Begin by applying a base coat and curing under a UV/LED lamp.
- Apply two coats of midnight blue gel polish and cure after each layer.
- Using a fine brush, paint detailed white snowflakes on two accent nails, then cure again.
- Finish with a gel top coat for a glossy finish and long-lasting wear.
Elegant Nude with Glitter Tips
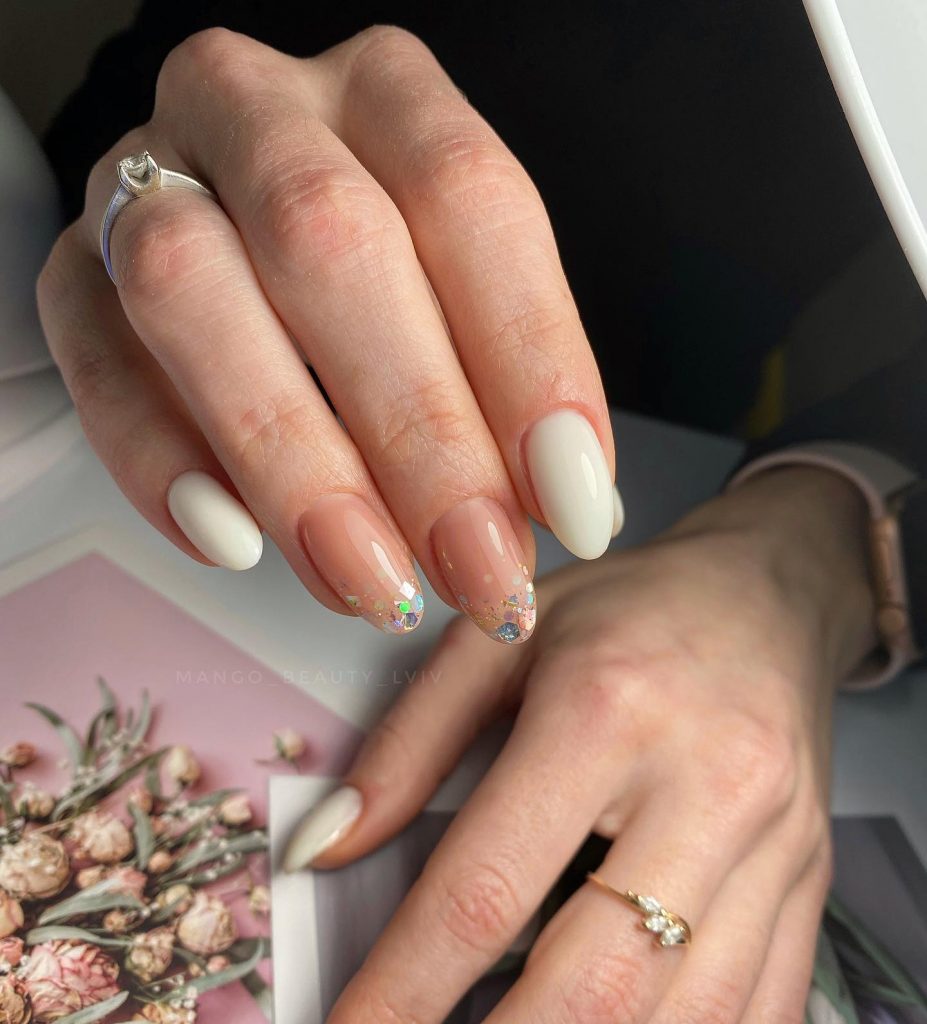
This chic nude design features glittery tips, adding just the right amount of sparkle to a simple and sophisticated look. The nail shape is almond, making the nails appear longer and more elegant, perfect for both formal events and casual outings. The glitter at the tips gives the design a festive touch, while the nude base keeps it natural and beautiful.
Consumables
- Nude gel polish (try OPI “Samoan Sand”)
- Silver glitter for tips
- Gel top coat for shine
How to recreate
- Start with a nude gel base, applying two coats and curing after each layer.
- Apply silver glitter to the tips of the nails, blending it slightly into the nude base, and cure.
- Seal the design with a gel top coat for a glossy, long-lasting finish and cure again.
Soft Nude with Iridescent Foil Accents
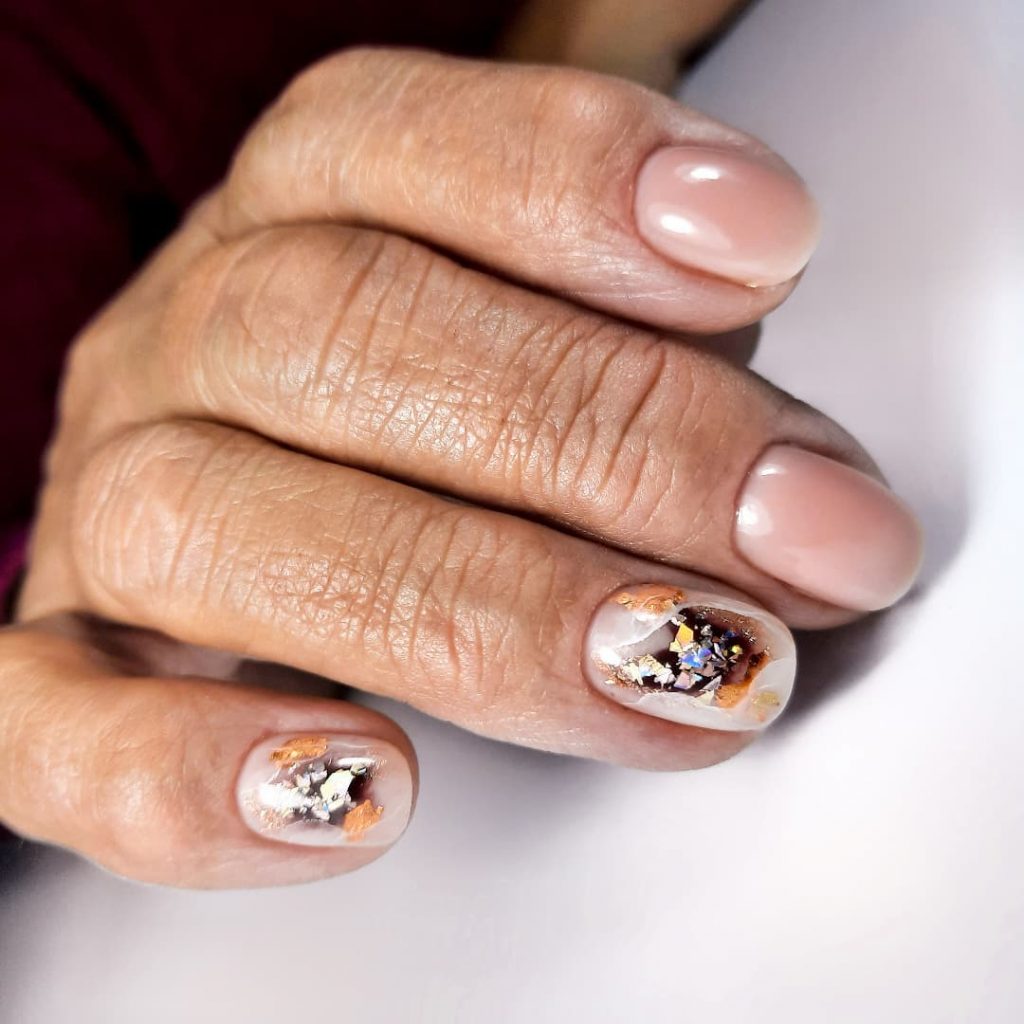
This natural nude manicure with iridescent foil accents brings a touch of trendy and unique detail to an otherwise minimal design. The nail shape is short and rounded, making it both practical and elegant. The iridescent foil adds a beautiful and unexpected shimmer, perfect for someone who wants a subtle yet striking look this winter.
Consumables
- Nude gel polish (try OPI “Bare My Soul”)
- Iridescent foil or flakes
- Glossy gel top coat for a smooth finish
How to recreate
- Apply a base coat and cure under a UV/LED lamp.
- Apply two coats of nude gel polish, curing after each layer.
- Place small pieces of iridescent foil on select nails for accent, and cure.
- Finish with a gel top coat for a smooth, glossy finish and long-lasting shine.
Save Pin
