
Halloween Pumpkin Nails for 2026 With Playful Detail
Seasonal nail art becomes more convincing when the design knows what to leave alone. In a Halloween nail with pumpkin, the orange shape does not need to explain the whole mood; it can be a quiet point against a sheer base, a darker outline, or a single reflective finish. The tension is between recognizability and breathing room, and the most wearable sets usually protect the empty space around the smallest mark.
Decide first whether the eye should notice color, outline, or finish, then let only one of those lead. A bright tip can carry the warmth, a dark border can supply the structure, and a small motif can remain the surprise rather than the entire surface. If a detail is difficult to read from a normal distance, simplify its placement before adding more polish or another character to compensate.
Nude Almonds With Gold and Fine Pumpkin Lines
The nude almond base leaves generous open space around the small orange line art, while one gold-glitter nail supplies a warmer reflective accent. Fine floral marks keep the pumpkin detail from feeling isolated, yet the set remains restrained because most of the surface stays pale and glossy. The curved almond outline supports the tiny designs without making them look lost at the tip.
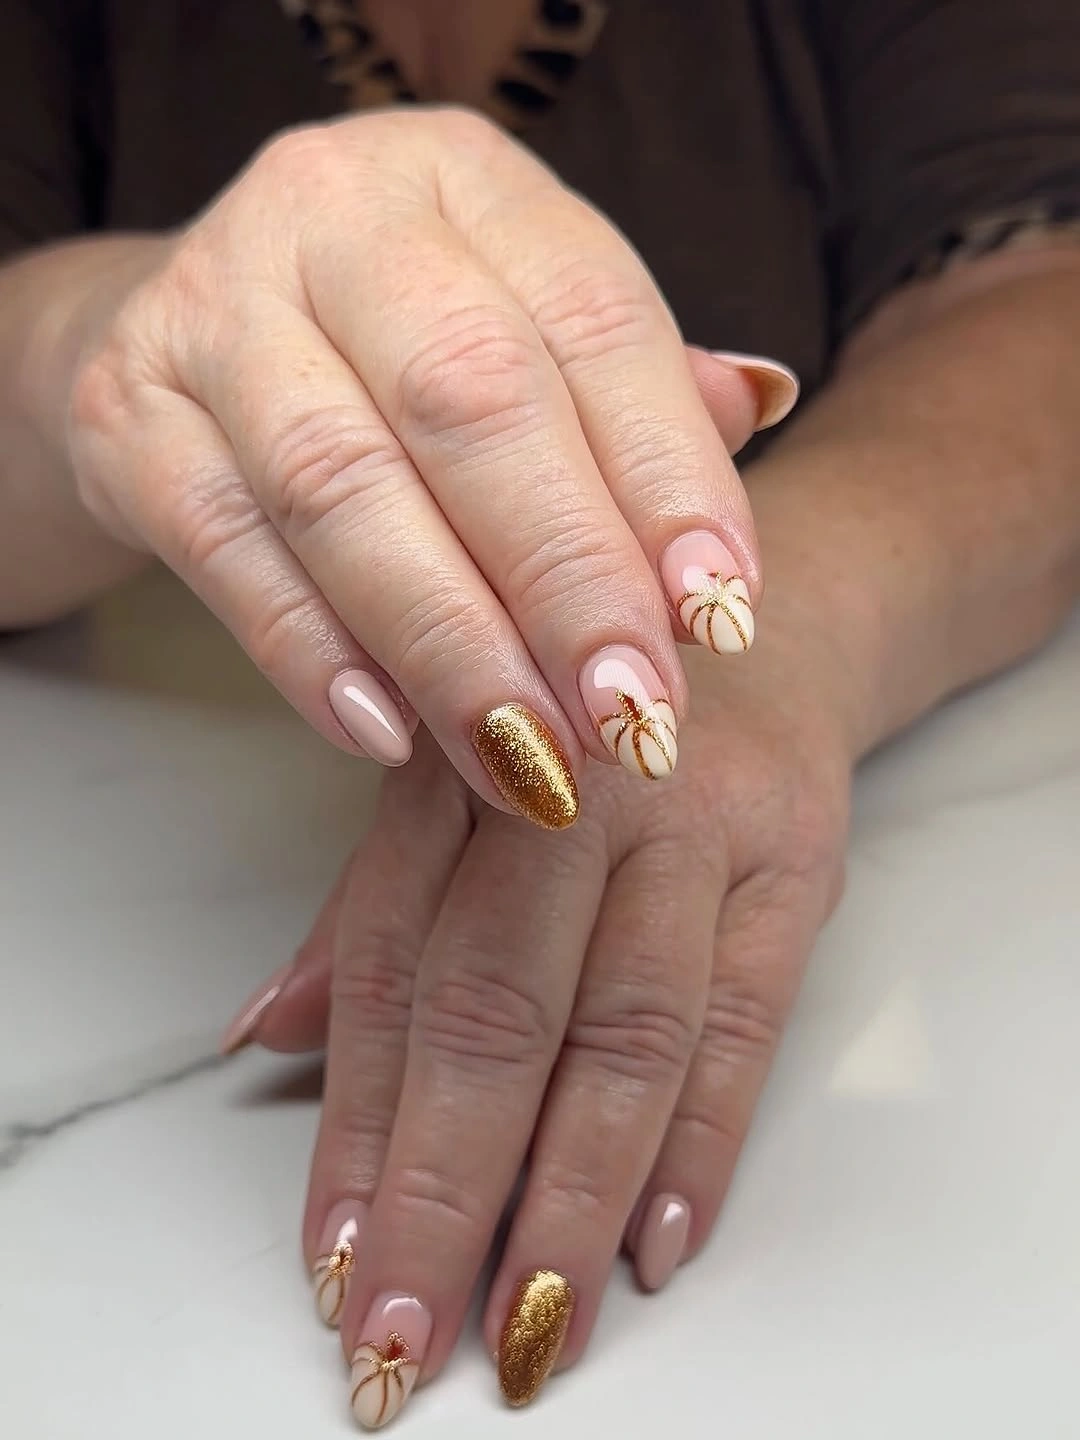
Gold works best here as a single interruption rather than a finish repeated across every finger. If the line art feels too delicate for daily wear, reduce the number of illustrated nails and keep one pumpkin on each hand as the focal point. The pale base will show chips near the free edge more quickly than a darker color, so a clean narrow tip is the practical place to simplify.
This design shows how a Halloween nail with pumpkin can stay light without relying on black. Keep the orange muted and the surrounding lines fine, then add a darker ring or bracelet only if you want the gold accent to feel more intentional. Adding more glitter would remove the quiet spacing that currently lets the small drawings remain the most interesting detail.
Orange Tips With Butterflies and White Contrast
Sheer pink nails receive bright orange French edges, but the white accent and small butterfly details stop the color from becoming a uniform band. The curved tips follow the rounded shape closely, giving the set a soft rhythm even where the orange is strongest. This is a mixed design that stays coherent because the base color and thin edge repeat while the illustrations remain selective.
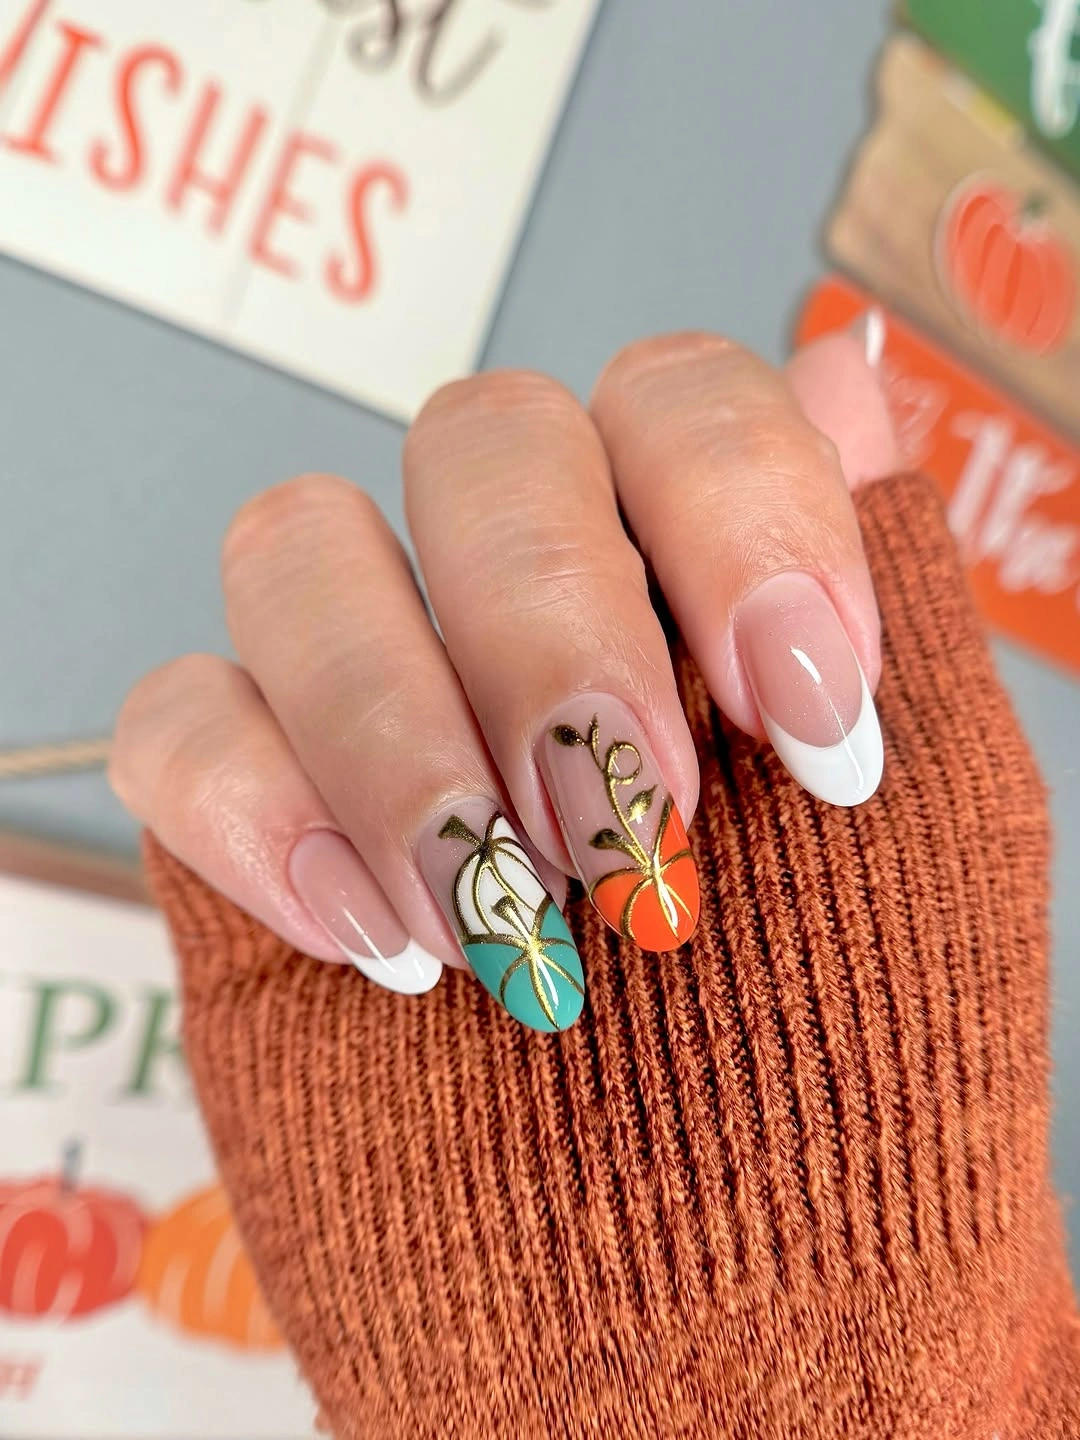
A shorter version could place orange on only two or three tips and move the butterfly to a single pale nail. That keeps the look readable when there is less surface area, while preserving the contrast between translucent pink, white, and orange. The main tradeoff is that fine wing lines need enough space; on very short nails, a simple leaf or dot cluster may be more reliable.
The white nail has an important compositional role because it gives the orange and pink a bright reset. Keep any additional black linework minimal, otherwise the airy quality shifts toward something heavier than the palette suggests. If you prefer a less decorative finish, remove the butterflies first and let the orange French edge carry the seasonal warmth on its own. For more line-led variations, browse these fall nail art ideas.
Orange Plaid Across a Sheer Base
Orange tips, thin black lines, and plaid panels create a sharper, more graphic pumpkin direction on a nude base. The plaid is concentrated on selected nails, which lets the orange remain vivid without turning every finger into the same pattern. Small outlined pumpkin details connect the set to Halloween, but the structure comes from the repeated horizontal and vertical marks.
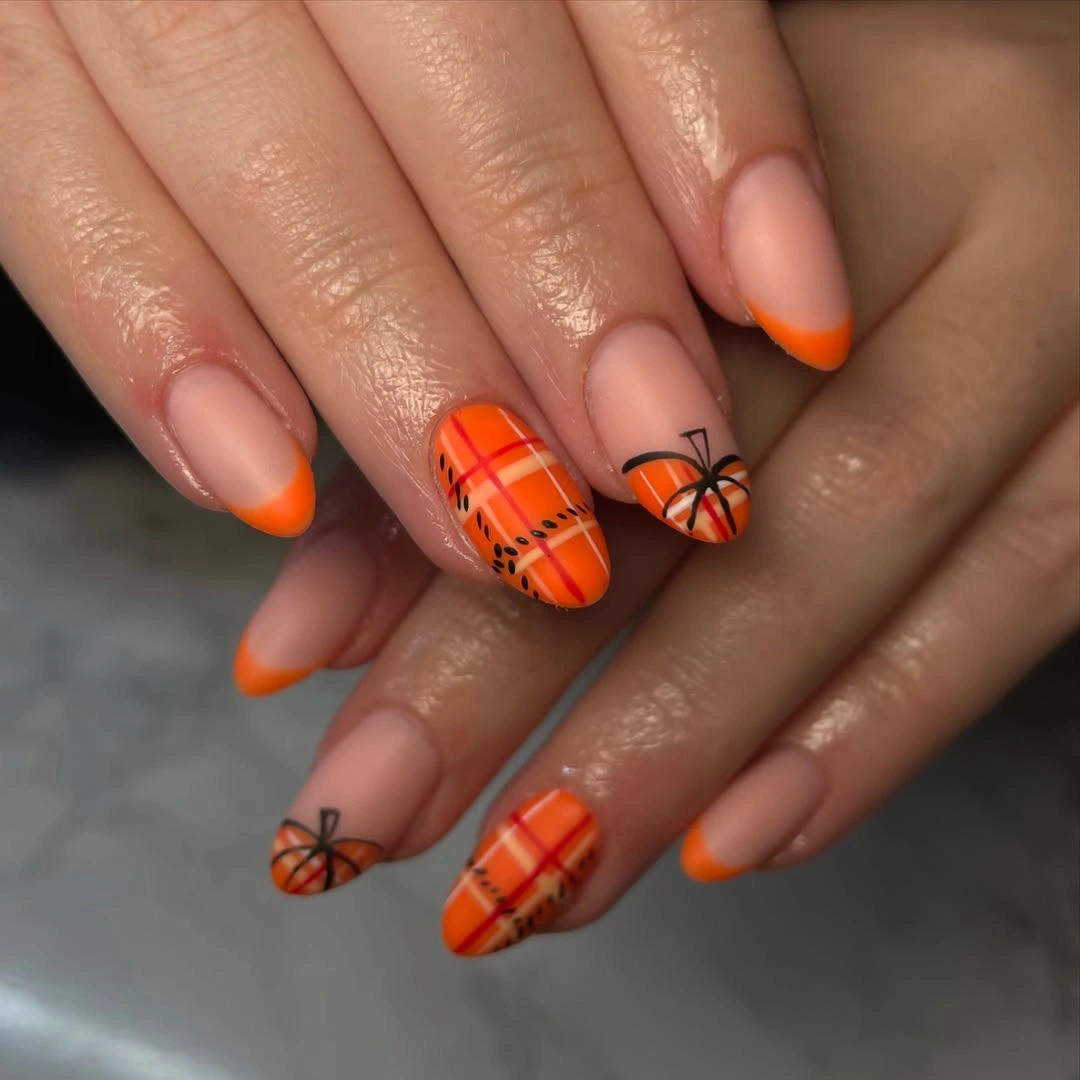
For a quieter version, keep plaid on one nail per hand and use solid orange tips everywhere else. The contrast will still read because the black linework supplies definition, yet the manicure will feel easier to pair with patterned clothing. Long nails provide room for the grid, while medium length nails may need wider, fewer lines so the plaid does not blur together.
The strongest choice is the orange-and-black relationship, not the number of motifs included. A small pumpkin on a pale background acts as a pause between the busier panels and makes the pattern look considered. If the plaid starts to dominate, remove a black cross line rather than adding more decoration, since negative space is what keeps the orange from feeling dense.
Burgundy Gloss With Cream Pumpkin Accents
Glossy burgundy nails create a deep frame around cream accents decorated with small orange pumpkins. The dark color is concentrated rather than scattered, so the pale nails become clear resting points between the richer surfaces. Their rounded almond shape softens the contrast and keeps the palette closer to warm fall color than a severe black-and-orange treatment.
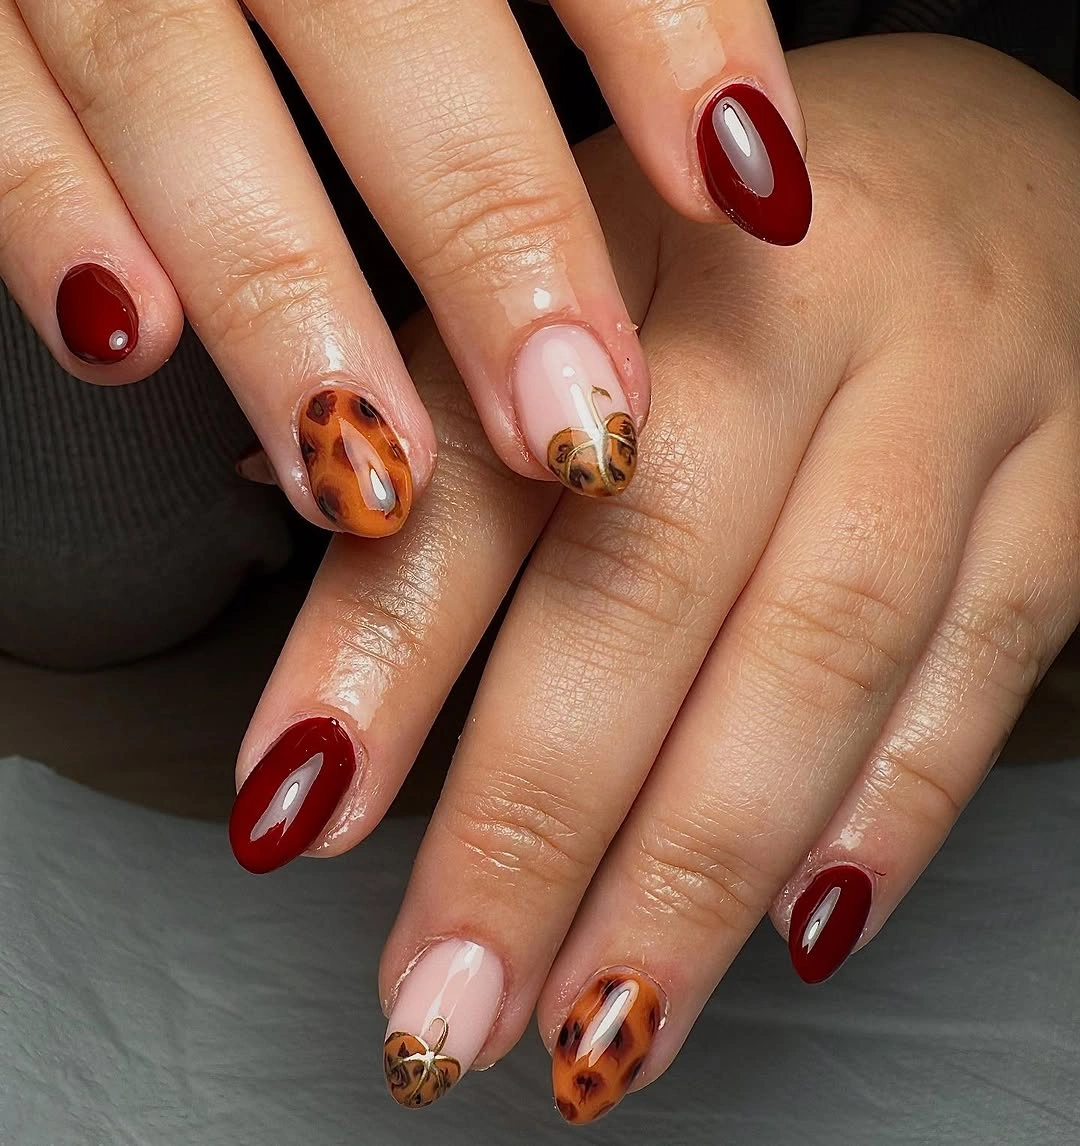
Use burgundy as the dominant color when you want the pumpkins to feel like highlights rather than a repeated all-over theme. A shorter shape can keep the cream accents practical, but leave enough width for the orange motif to retain its round silhouette. Dark glossy color is forgiving near the edge, while the cream nails may need more careful touch-ups if they are worn for several weeks.
The cream-and-burgundy split works because each color has a separate territory. Add a thin gold line only if the set needs more light, since another saturated orange nail would dilute the focal point. The design becomes especially balanced when the pumpkin accent appears on a different finger on each hand, creating variation without abandoning the palette’s orderly dark-light rhythm.
Gold Edges Around Tiny Orange Pumpkins
Sheer nude nails, gold-glitter borders, and very small orange pumpkins create a decorative look that still leaves the center of each nail open. The glitter follows the edge rather than covering the whole surface, so it catches light without obscuring the fine leaves and floral marks. That placement gives the manicure a delicate outline and makes the orange details feel carefully placed rather than crowded.
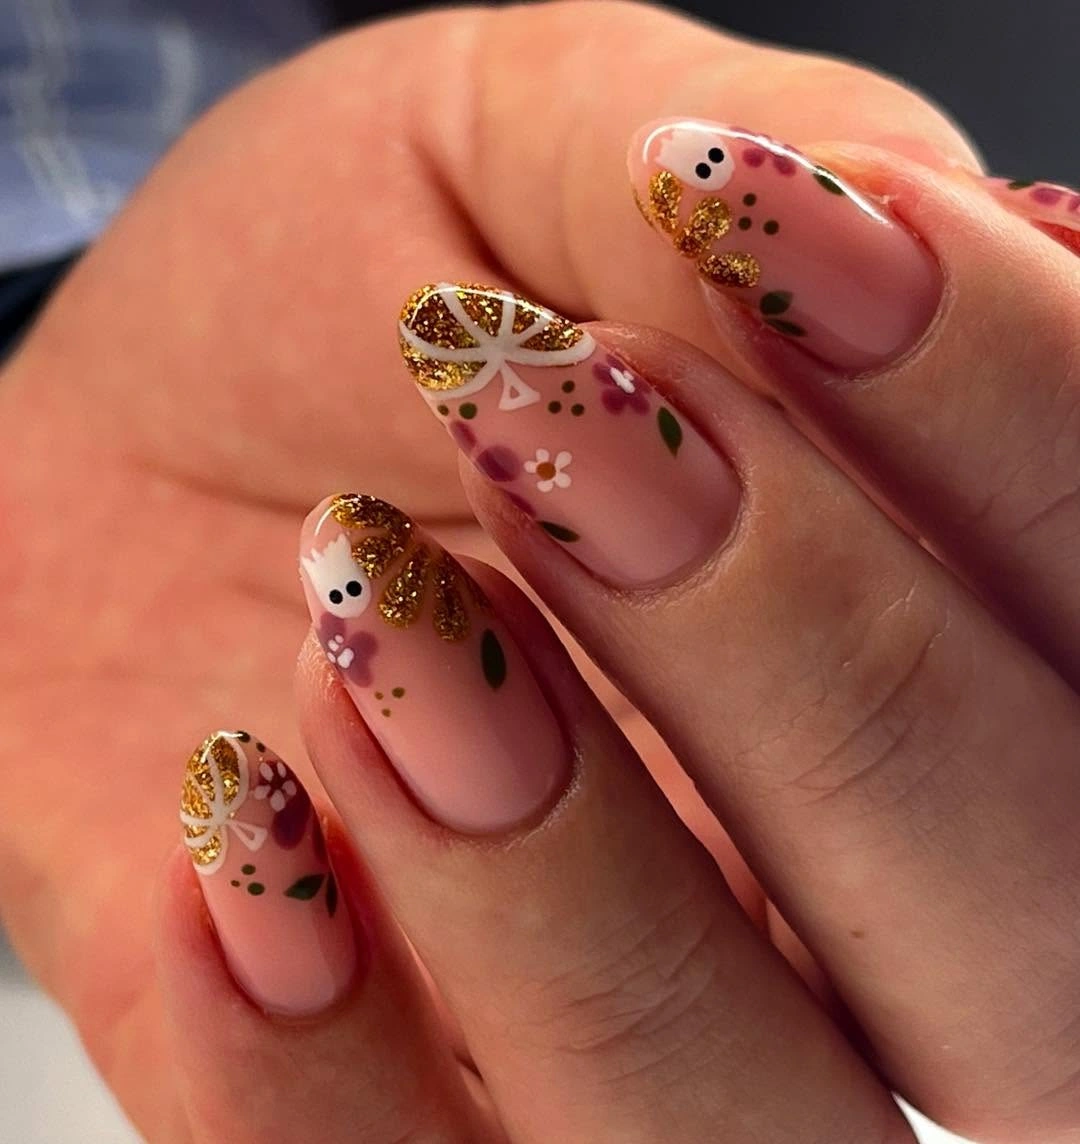
Keep the glitter concentrated at the tip or side edge if you want the pumpkin motifs to remain readable from a normal viewing distance. A solid glitter accent would make the whole set more festive, but it would also pull attention away from the illustrated details. Fine metallic edges can show uneven growth more noticeably, so a softly faded border is kinder to a longer wear cycle.
This is a good option for someone who likes ornate seasonal art but does not want a dark base. The pale center acts as a quiet field, while gold and orange form two small warm notes around it. If the flowers feel too much for your usual style, remove them and retain only a pumpkin and curved gold edge; the composition will still have enough character.
Pink, Red, and Leopard Accent Balance
Pink and red French details sit beside leopard-print accents, creating a Halloween set that leans playful rather than literal. The warm red tips establish a strong edge, while the animal pattern breaks the color story into smaller moments of texture. Because the shapes are short and rounded, the mix feels compact and graphic instead of overly elaborate.
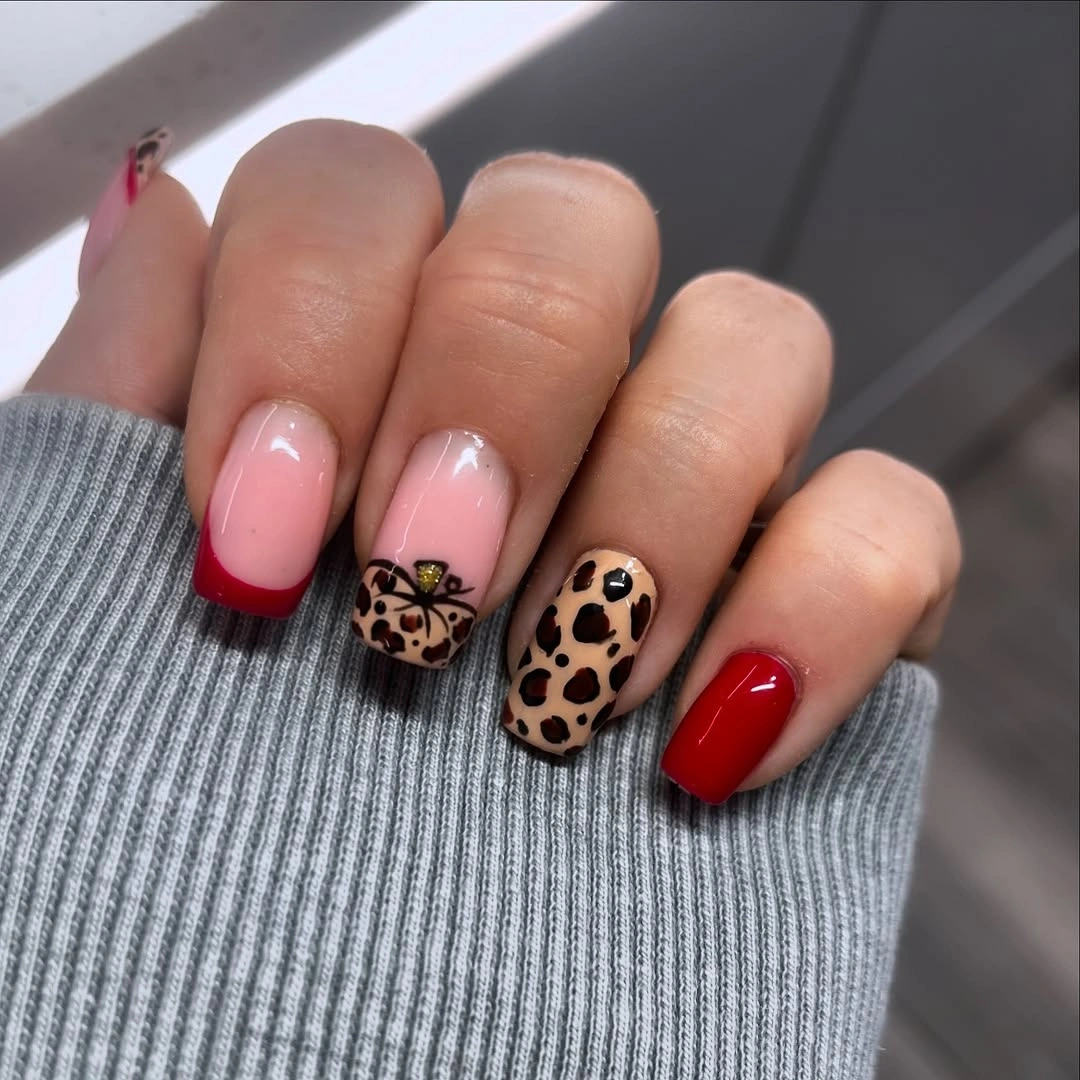
To make this direction more seasonal, add one tiny orange dot or miniature pumpkin rather than replacing the entire palette with black and orange. The leopard print already provides visual activity, so a second dense motif would make the short nails feel busy. Keep the red on tips or one solid accent, which gives the eye a predictable structure around the scattered spots.
The useful lesson is that a pumpkin theme can be suggested through color and one focused symbol instead of a full character illustration. A neutral pink base makes the red feel fresh, but a deeper berry version would create a moodier alternative. If the animal print is not your style, substitute simple brown dots and retain the same small-scale contrast without the full pattern.
Matte Rust With Plaid Pumpkin Detail
Long matte rust nails make the white plaid lines and small pumpkin motif look especially crisp, while the darker ribbon-like detail adds a narrow dramatic break. The design uses broad color fields first and illustration second, which gives it more structure than a collection of tiny icons. The matte surface also keeps the warm orange from reflecting too much light across the long shape.
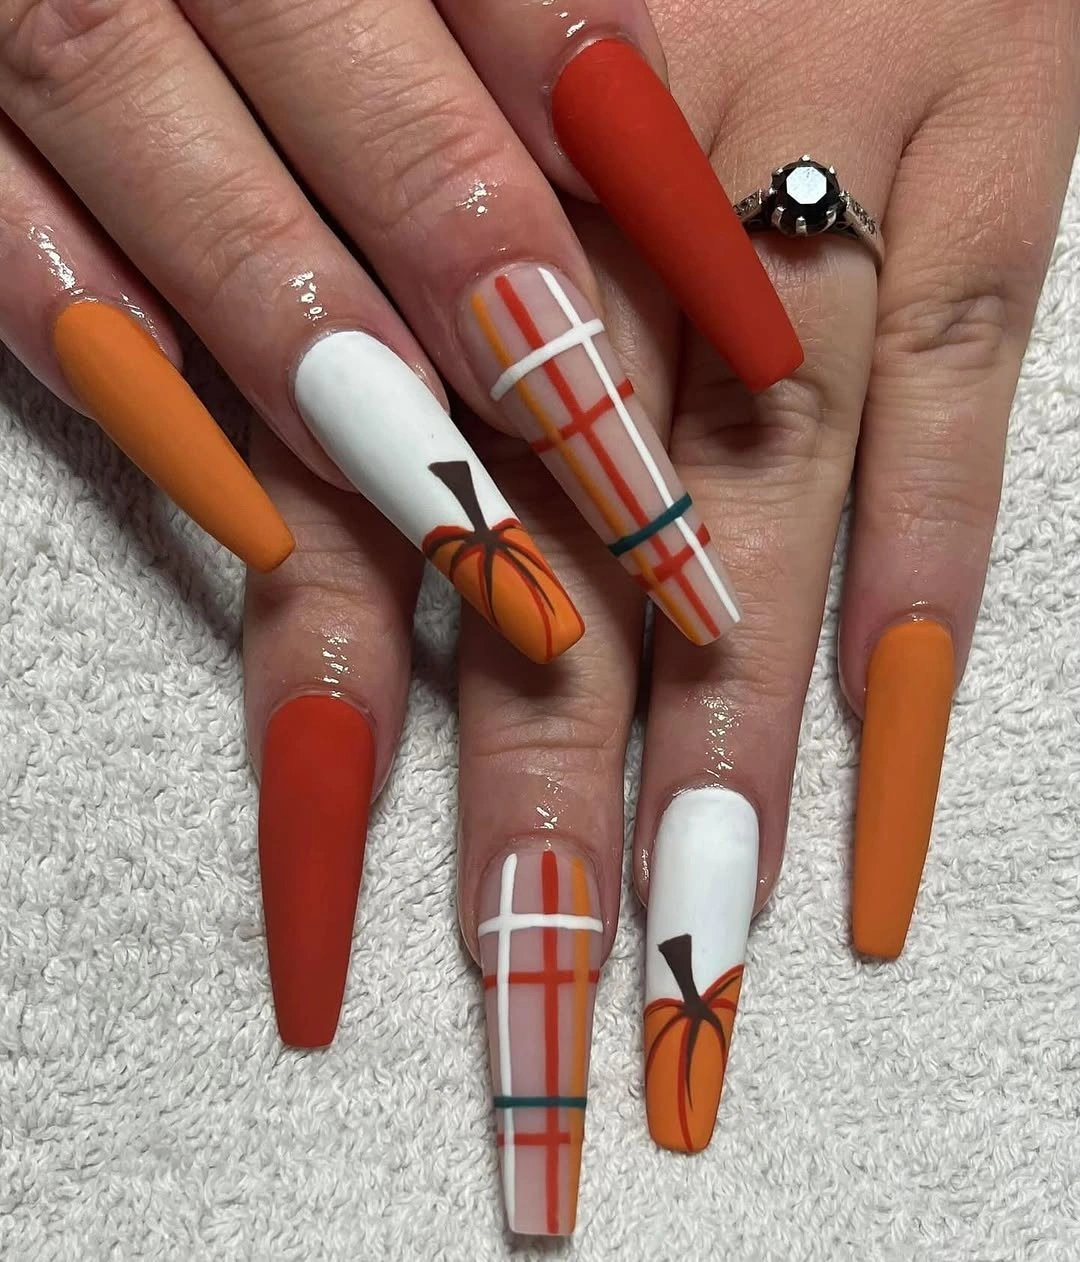
A medium almond can carry the same idea if the plaid becomes simpler: two white lines and one pumpkin accent are enough. The long version has room for several panels, but it also asks for more maintenance because any chipped matte edge becomes noticeable. Keep the darker detail confined to one or two nails so it frames the rust rather than turning the palette into equal blocks of color.
The visual tension comes from soft matte color against precise white lines. If you want more shine, add one glossy top-coated accent nail instead of changing the whole finish, because a full glossy surface would alter the design’s quiet, velvety depth. Orange works here as an autumnal field, while the pumpkin motif confirms the seasonal direction without needing to take over.
Pink Glitter Skeleton Lines and Red Bows
Pink glitter creates a luminous base for white skeleton-inspired outlines and small red bow accents, making the seasonal references feel more playful than eerie. The long nails give each illustrated element enough room to stay separate, so the sparkly surface does not erase the linework. Red appears in tiny concentrated points, which prevents the palette from drifting into a uniform pink-and-white finish.
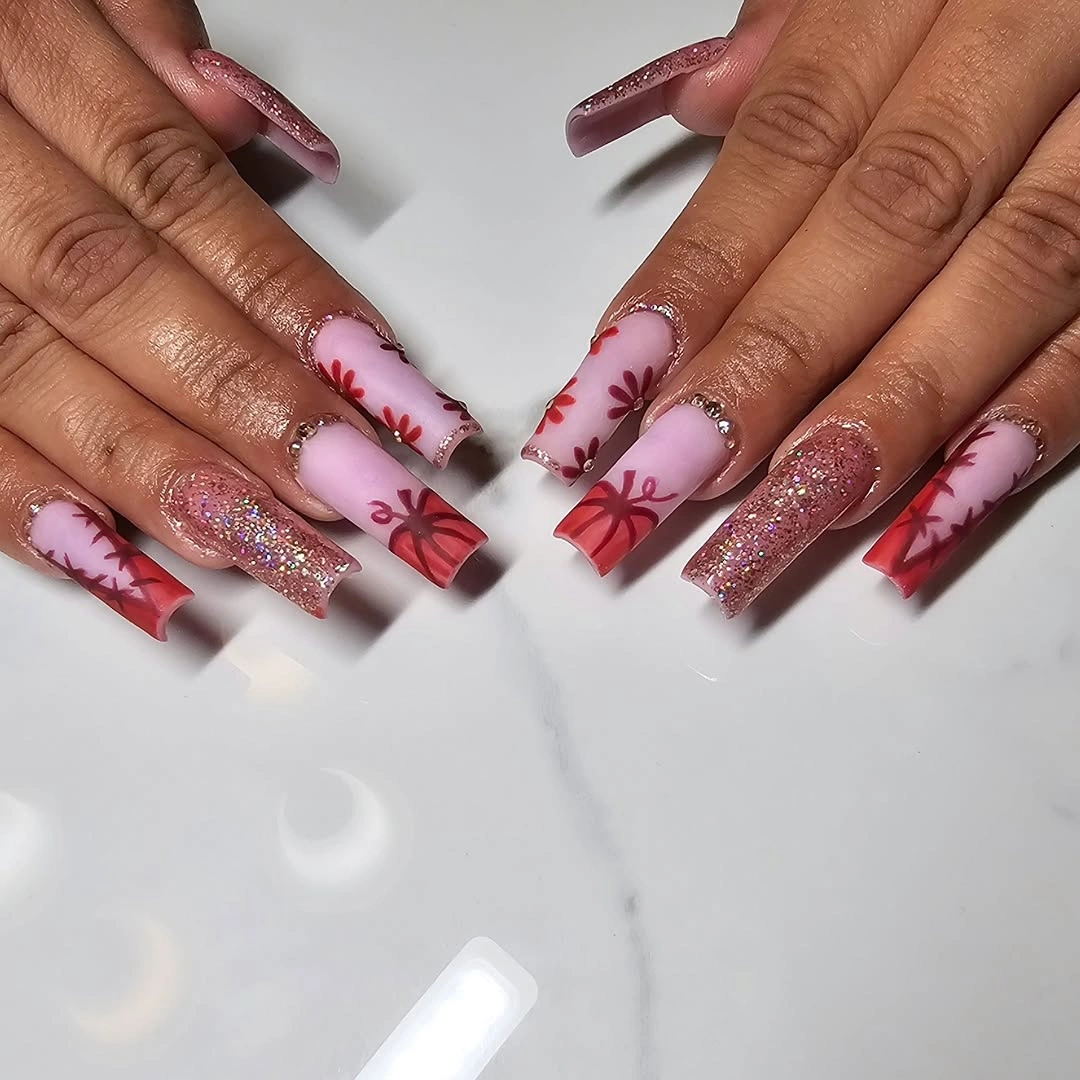
Keep the bow detail on one or two nails if you want the skeletal lines to remain the main story. A shorter version should use a single white outline or bone-like mark rather than full figures, because the glitter already provides texture. The practical limitation is density: sparkle, white drawing, and red accents all compete for attention if they are repeated at the same size across every finger.
Pink allows this design to stay sweet while the white outlines add a clear seasonal edge. A black accessory can echo the contrast without requiring black polish, which would make the set heavier. If the red feels too bright, swap it for burgundy and preserve the same small accent role; the long glitter surface will still provide the light-catching element that defines the look.
Orange French Edges With Tiny Night Motifs
Sheer pink nails use orange French edges as a warm frame for a small witch hat, bat, and orange details placed near the center. The art is scattered with purpose rather than evenly repeated, which gives the set a conversational rhythm across the hand. The pink base keeps the black marks light enough that the manicure reads as seasonal and playful, not purely dark.
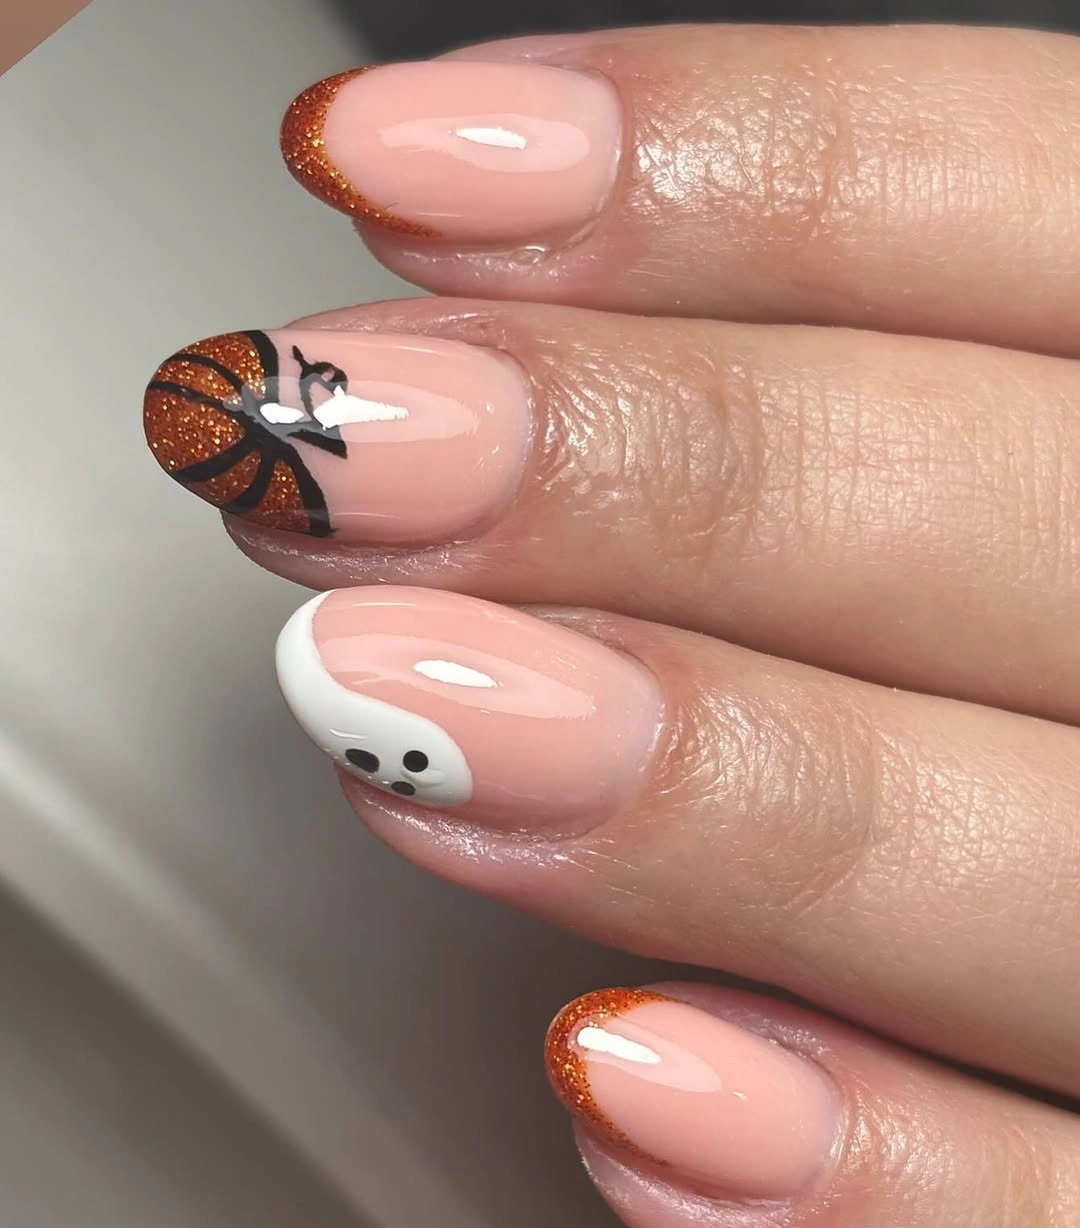
For more wearability, choose one illustrated nail on each hand and let the remaining tips stay clean orange. The thin French line is doing much of the work already, so every nail does not need a different symbol. Fine black motifs need a pale field around them; if the tip becomes too wide, the drawings lose the open space that makes their shapes easy to recognize.
Place the darkest design away from the darkest edge when possible, allowing the eye to move between tip and center rather than reading one solid patch. A small bat or hat works better than a large filled illustration on this transparent base. The design can become more subtle by replacing orange with muted terracotta, while retaining the same airy balance of pale surface and pinpoint detail.
Short Nude Nails With Ghosts and Stars
The short nude shape makes tiny pumpkins, a white ghost, and black stars feel especially approachable because the motifs sit close together without needing a dramatic canvas. Orange appears only where it matters, while the transparent-looking base lets each small graphic remain separate. This is a practical example of simple Halloween nail ideas pumpkin fans can adapt without committing to long length or heavy color. Readers who prefer a warmer seasonal direction can also compare fall nails with pumpkins.
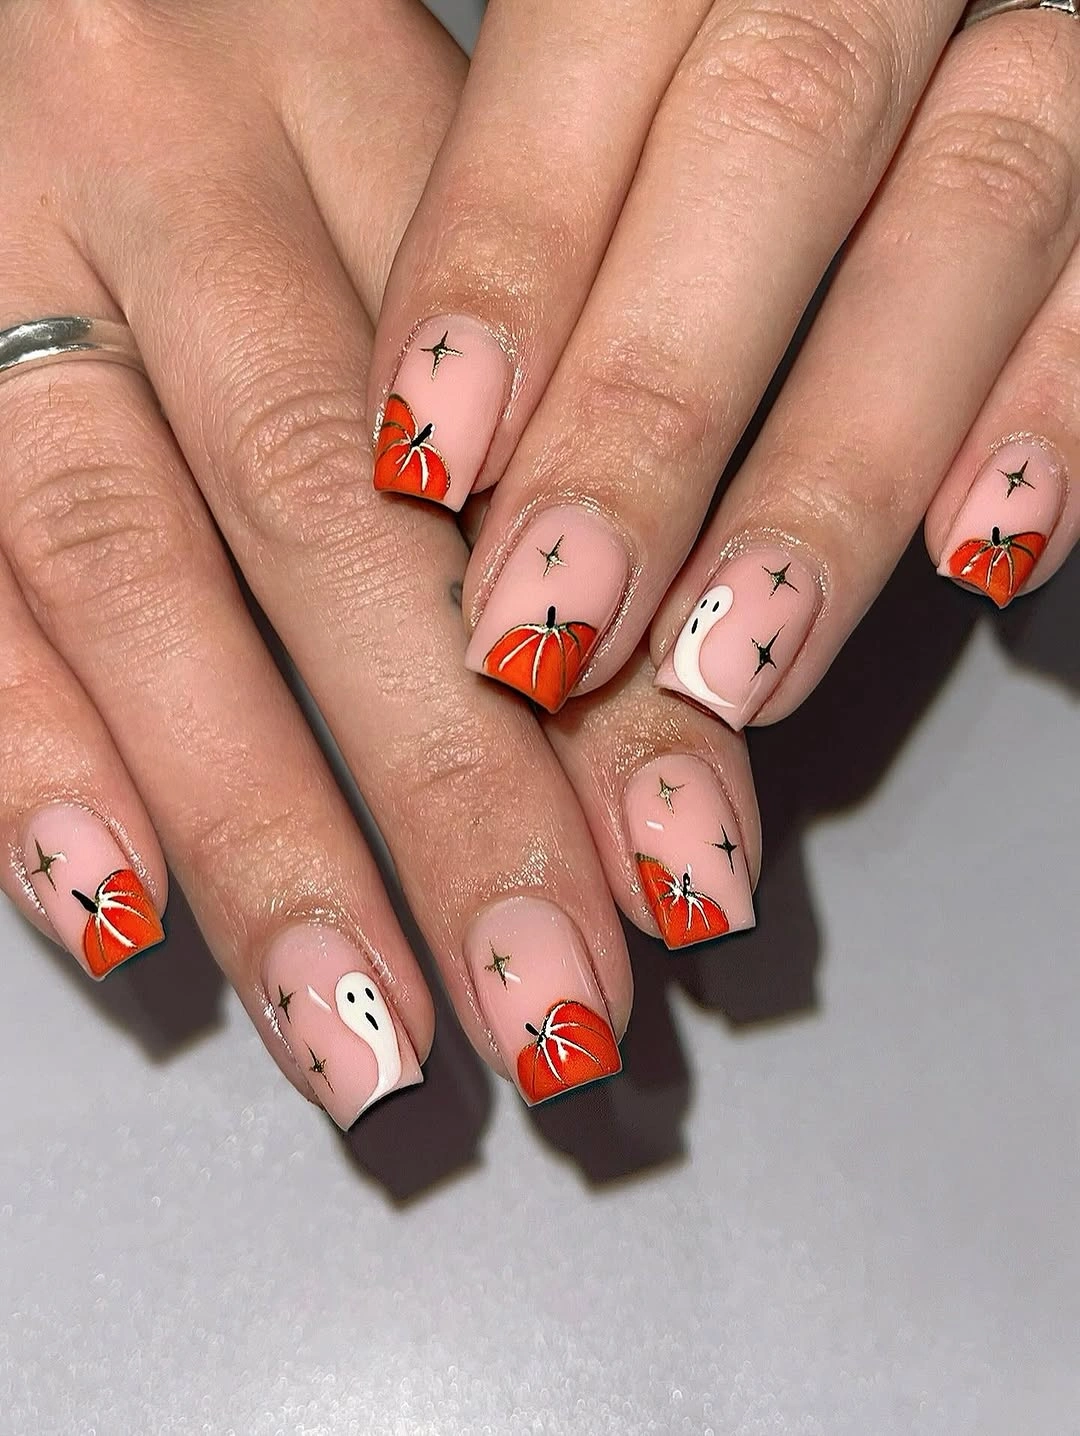
Use a ghost on one nail and reserve the stars for another if you want an even cleaner version. Short nails benefit from small, high-contrast marks, yet too many characters can make the surface look compressed. A narrow orange curve near the tip can substitute for a full pumpkin when quick upkeep and low visual density are more important than a detailed illustration.
The nude base is forgiving because it keeps regrowth less obvious than a solid dark color, but the small art still needs careful placement close to the center. Keep the stars sparse so they operate as punctuation around the pumpkin and ghost rather than a background pattern. That restraint is what lets the design feel cheerful and readable from both close up and arm’s length.
White and Orange Candy-Stripe Pumpkin Mix
White nails, orange candy stripes, small pumpkins, and a ghost use a bright background to keep several motifs from becoming too heavy. The black dots are tiny enough to connect the illustrations without turning into a full dark pattern. Orange provides the main seasonal warmth, while white supplies the open space that lets each mark have its own outline.
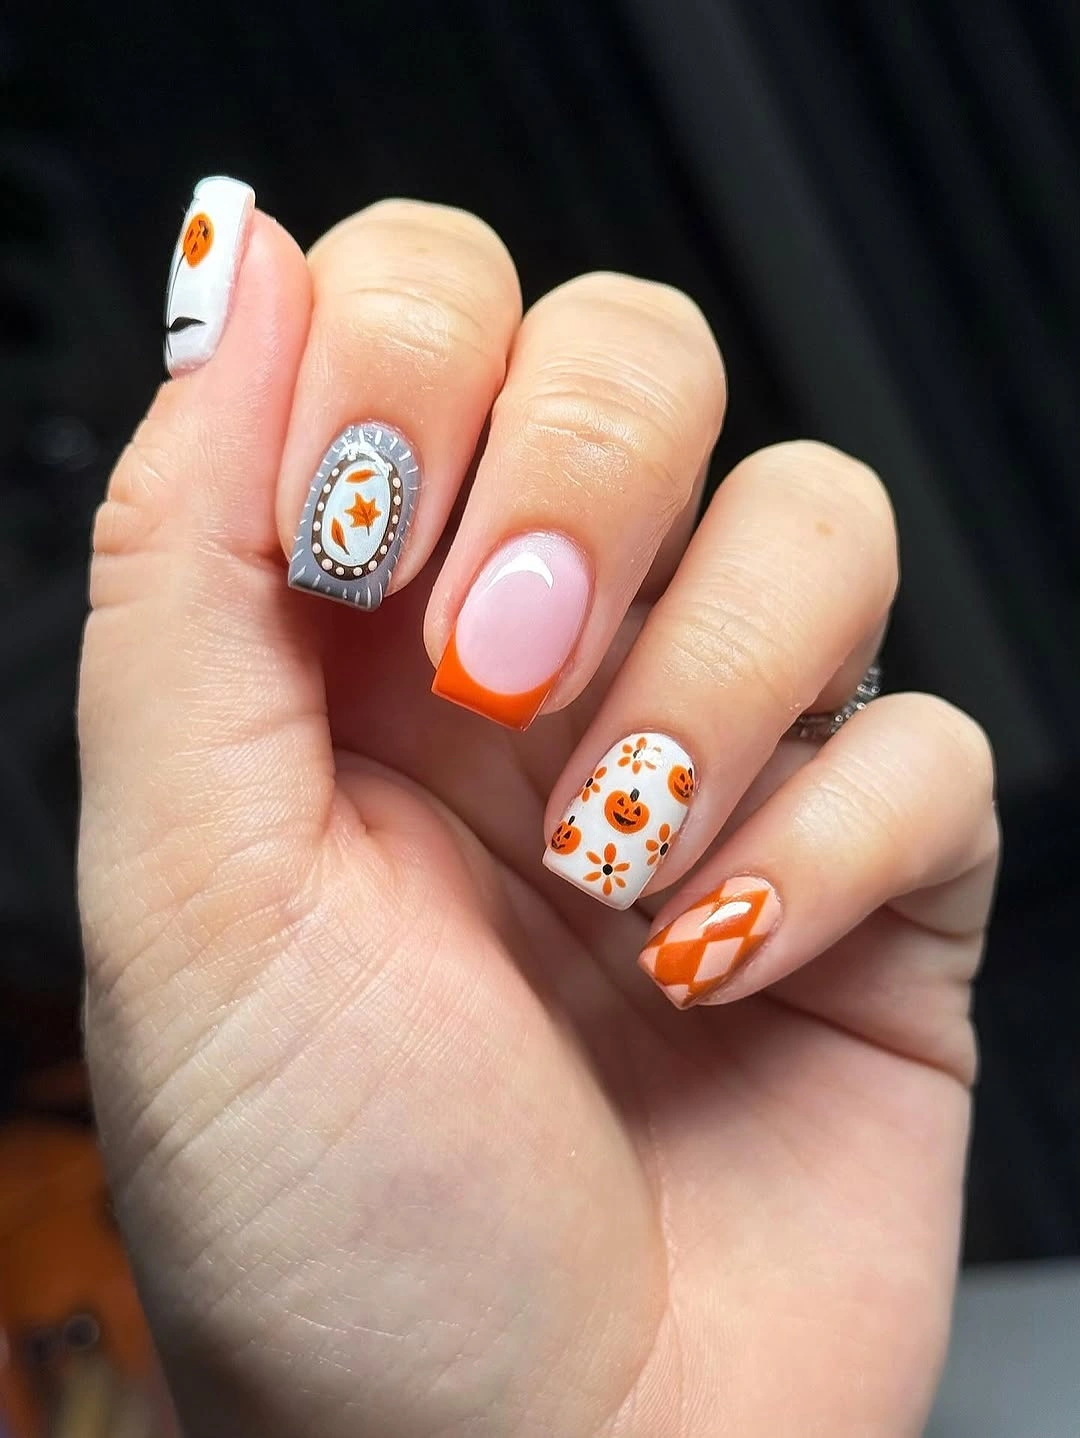
Choose either stripes or pumpkins as the main repeated feature, then let the ghost appear only once. That edit makes the design easier to read on a shorter shape and preserves the lively white-orange contrast. A bright white base can show stains or dullness sooner than a darker polish, so it is best for a fresh, clean look rather than a long stretch between appointments.
The black dots should stay sparse because they act as punctuation, not a third major pattern. If you want the set to feel softer, replace the black with a warm brown line and keep the orange dominant. The crisp result depends on white space, so resist filling every open nail with another symbol just because the palette has room for it.
Cool Gray With Pumpkins and Graphic Faces
Cool gray changes the temperature of the usual orange-and-black Halloween combination, making the pumpkins and small face-like motifs look more graphic than rustic. Black-and-white details move across several nails, but the gray base holds them together with a quieter value. This direction is useful when you want the seasonal symbols to feel modern and less tied to a warm traditional palette.
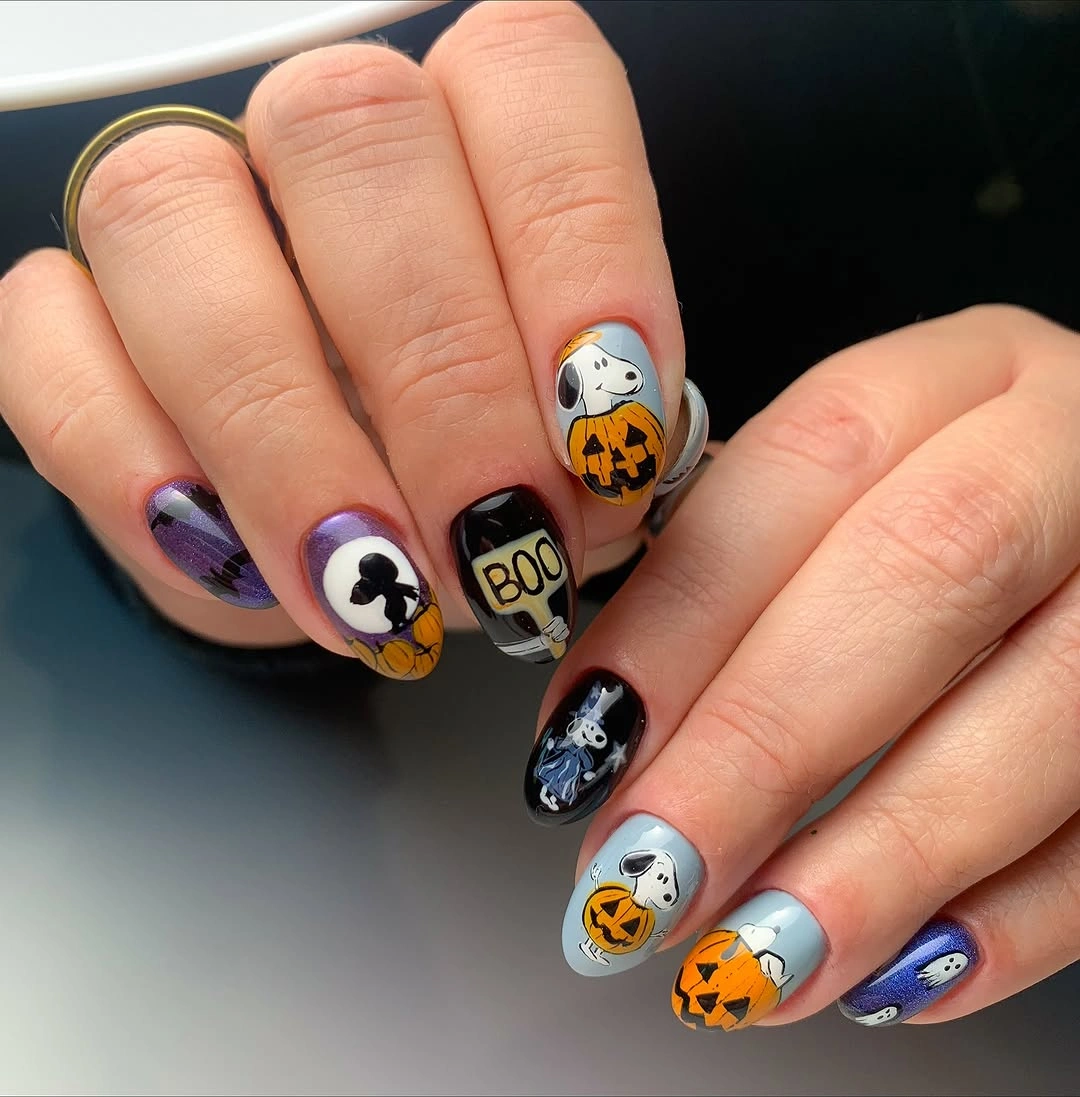
Keep orange limited to the pumpkin details so the gray remains the largest color field. A short square or rounded shape would make the graphic faces look even more compact, while longer nails allow more space between elements. The main maintenance concern is contrast: pale gray can reveal dark scuffs near the edges, so a clean tip line is worth protecting.
Gray works as a visual bridge between black outlines and white accents, which is why the set does not need glitter or extra color. If the face art feels too illustrative for your style, replace it with dots or small stars and preserve the pumpkin as the only literal symbol. The composition will still carry a cooler Halloween mood through value rather than through sheer motif count.
Warm Red With Candy-Cane Ghost Detail
Warm red nails provide a confident background for white candy-cane tips and one tiny white ghost, turning a very small illustration into a noticeable accent. The red is glossy and continuous, while the pale detail interrupts it at precise points rather than covering broad panels. That contrast gives the manicure a festive rhythm without relying on a full black Halloween palette.
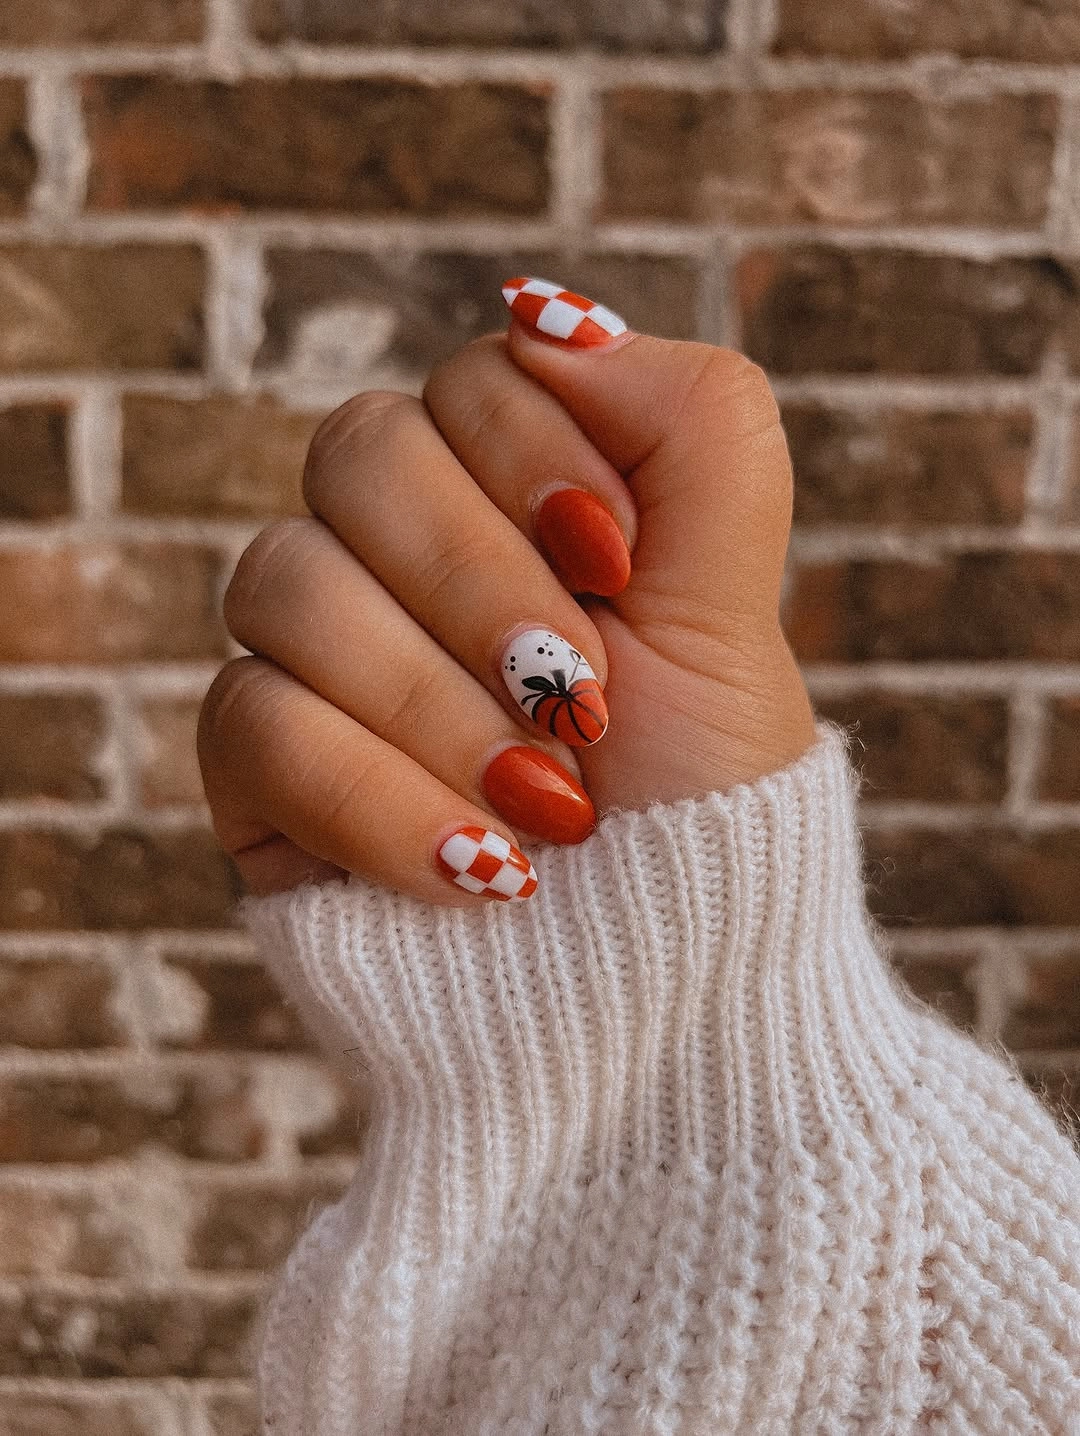
Let the white tips remain narrow if you want the red to stay dominant, then reserve the ghost for an accent nail where it can be read clearly. On a shorter length, the candy stripe can become a simple curved white line instead of several tiny bands. Red polish tends to make the edge obvious as it grows out, so a soft sheer base near the cuticle can reduce that maintenance contrast.
The ghost is most effective because it is surrounded by solid red rather than several other figures. Add a small orange detail only if you want a stronger pumpkin connection, but keep it smaller than the white illustration. The look remains polished when the stripes follow the nail curve and the seasonal art has room to appear as a surprise instead of a crowded theme.
Black Length With Orange Jack-O-Lantern Tips
Long black nails give the orange jack-o-lantern French tips a sharp stage, while small cat faces add an extra illustrated note without changing the limited palette. The orange is concentrated at the ends, making the silhouette feel deliberate and slightly theatrical. Because the dark base occupies so much space, the smaller orange details need clean outlines to avoid disappearing into the contrast.
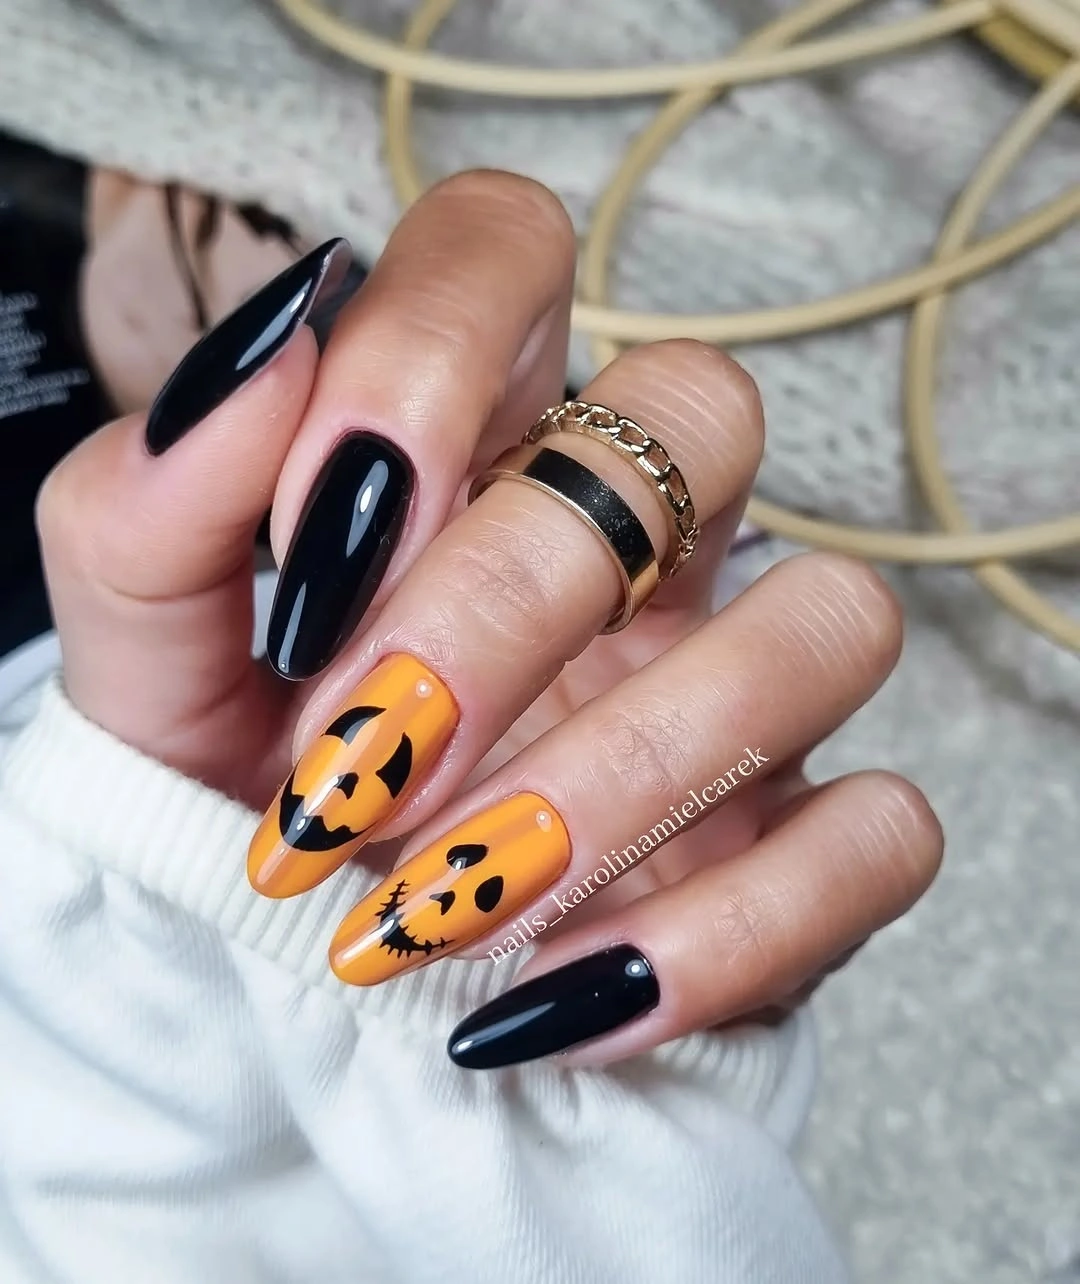
For a more wearable version, use black on only a few nails and replace the remaining bases with nude or smoky gray. That adjustment keeps the orange tips visible while reducing the visual weight across both hands. Long dark polish can show scratches and growth clearly, so a medium length or a gradient near the cuticle may be a better choice for anyone who prefers easier maintenance.
The cat faces work as supporting characters because the French tips already establish the central pumpkin idea. If you add another motif, keep it in orange or white rather than introducing green or purple. The most successful part of the set is the repeated orange edge, which turns a familiar tip placement into a seasonal detail with more discipline than a fully illustrated black surface. More dark, graphic references are collected in Halloween nail designs.
Gray Ghost Repetition Over a Dark Base
Repeated white ghosts across gray and black nails create a pattern-led look in which the individual faces become more effective through rhythm. The long shape makes the dark base feel sleek, while the lighter figures prevent it from becoming a single heavy field. Each ghost is simple, allowing the repetition to become the feature rather than asking one nail to carry all the detail.
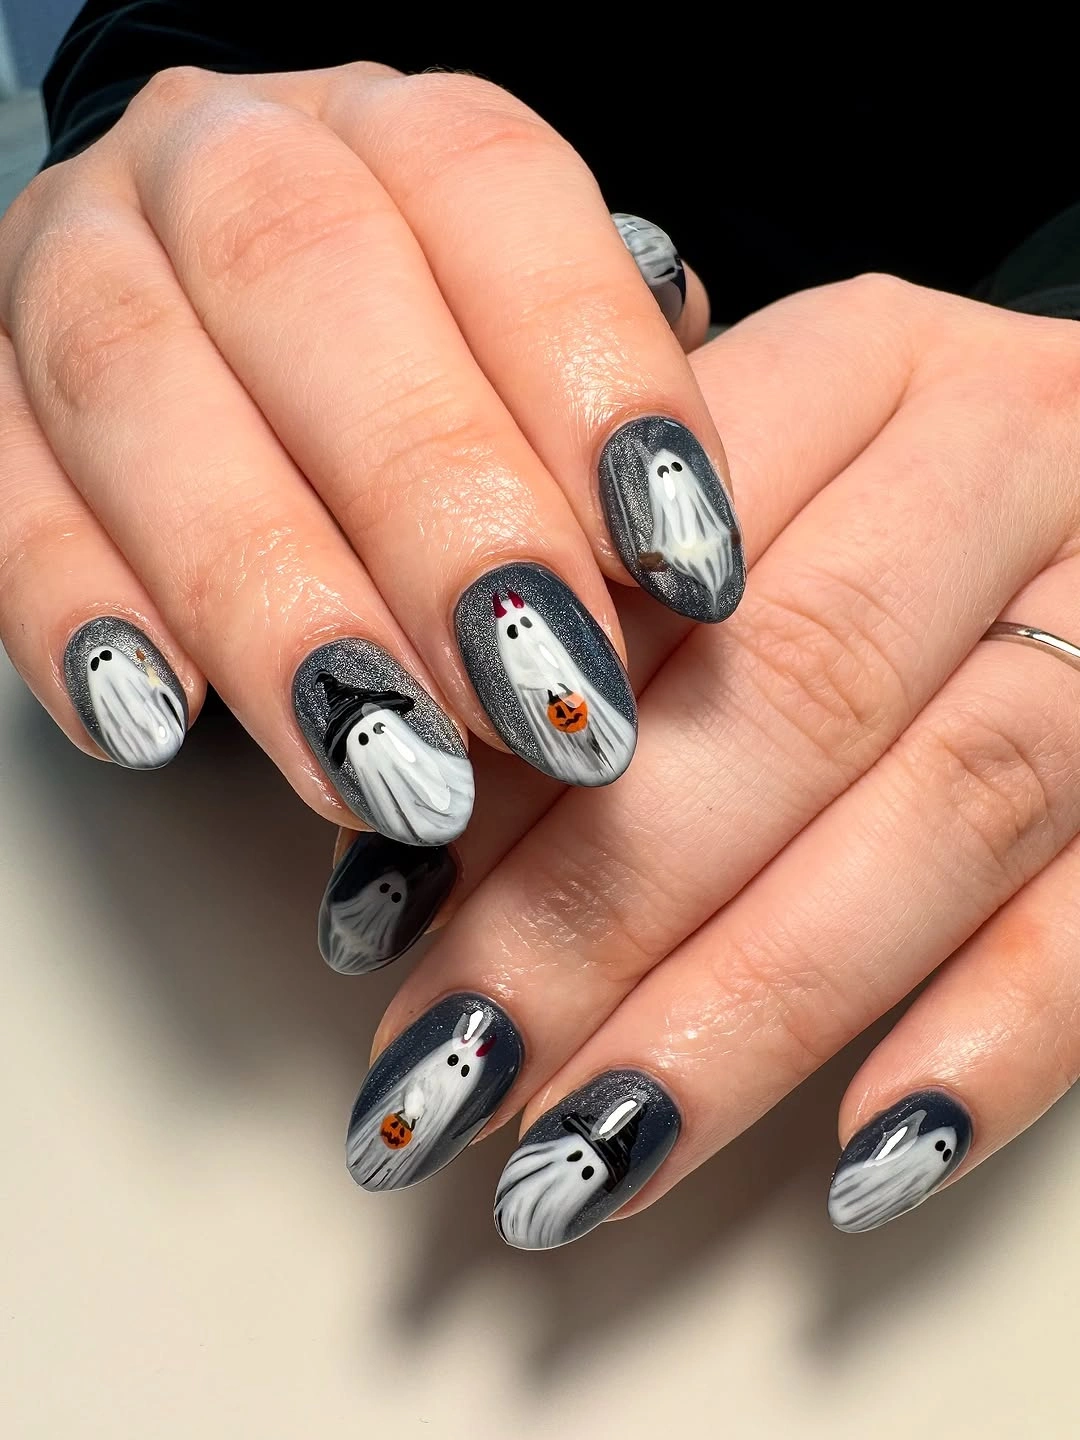
Keep the ghost shapes similar in size but vary their placement slightly so the manicure feels intentional instead of stamped. A medium almond would soften the dark palette, while a shorter square could make the repeated faces look more graphic. The design’s limitation is obvious: if every ghost has too many lines, the repeat loses clarity and the black background begins to feel visually crowded.
A small silver accent could add light without breaking the grayscale logic, but it should remain subtle. The white ghosts already provide the strongest contrast and need open gray or black space around them to stay readable. If you want a pumpkin reference, use one tiny orange accent nail only; placing orange everywhere would interrupt the calm, monochrome repetition that defines this set.
Peach Base With a Dark Pumpkin Border
Soft peach nails use a thin dark French edge to give a detailed orange pumpkin accent a firm outline without turning the entire set black. The color relationship is gentle but still seasonal: peach keeps the surface light, while the dark edge and pumpkin create two concentrated points of contrast. The short-to-medium shape makes the illustration feel close and personal rather than oversized.
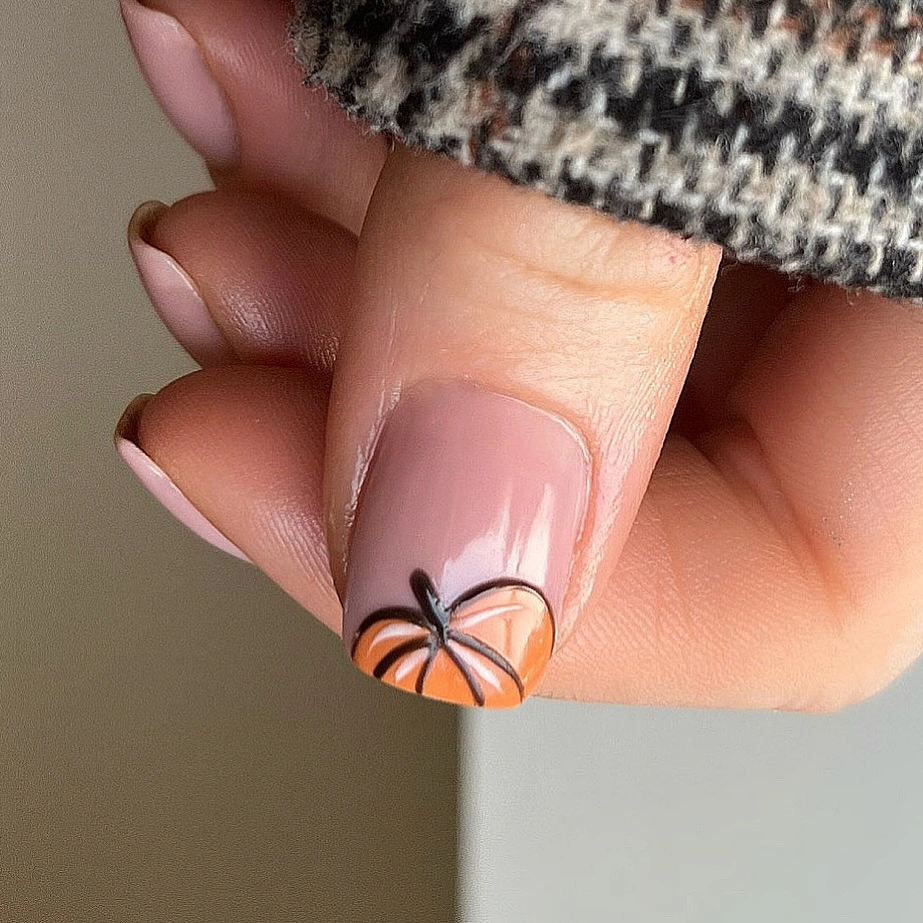
Keep the dark tip narrow so it frames the peach instead of swallowing it, especially if the nail length is modest. The pumpkin can sit on one accent nail while the remaining fingers repeat the dark edge for continuity. Fine dark borders may need refreshing as they grow out, but the soft base makes the transition less severe than a full black manicure would.
This palette is a thoughtful alternative to orange nails because it lets the pumpkin remain the warmest point in the design. Add a small black leaf or curved stem only if the accent needs more definition; another large illustration would weaken the quiet balance. The result is best when the eye notices the soft peach first and discovers the pumpkin and border on a second look.
Peach Pink Mix With Ghosts and Leopard Marks
Peach and pink nails hold ghosts, orange details, leopard spots, and thin spider-like lines without collapsing into one motif because the colors remain close and the black marks are fine. The longer shape gives the individual accents room to travel in different directions. This is a deliberately mixed manicure, yet the pale base keeps its several ideas from becoming too loud.
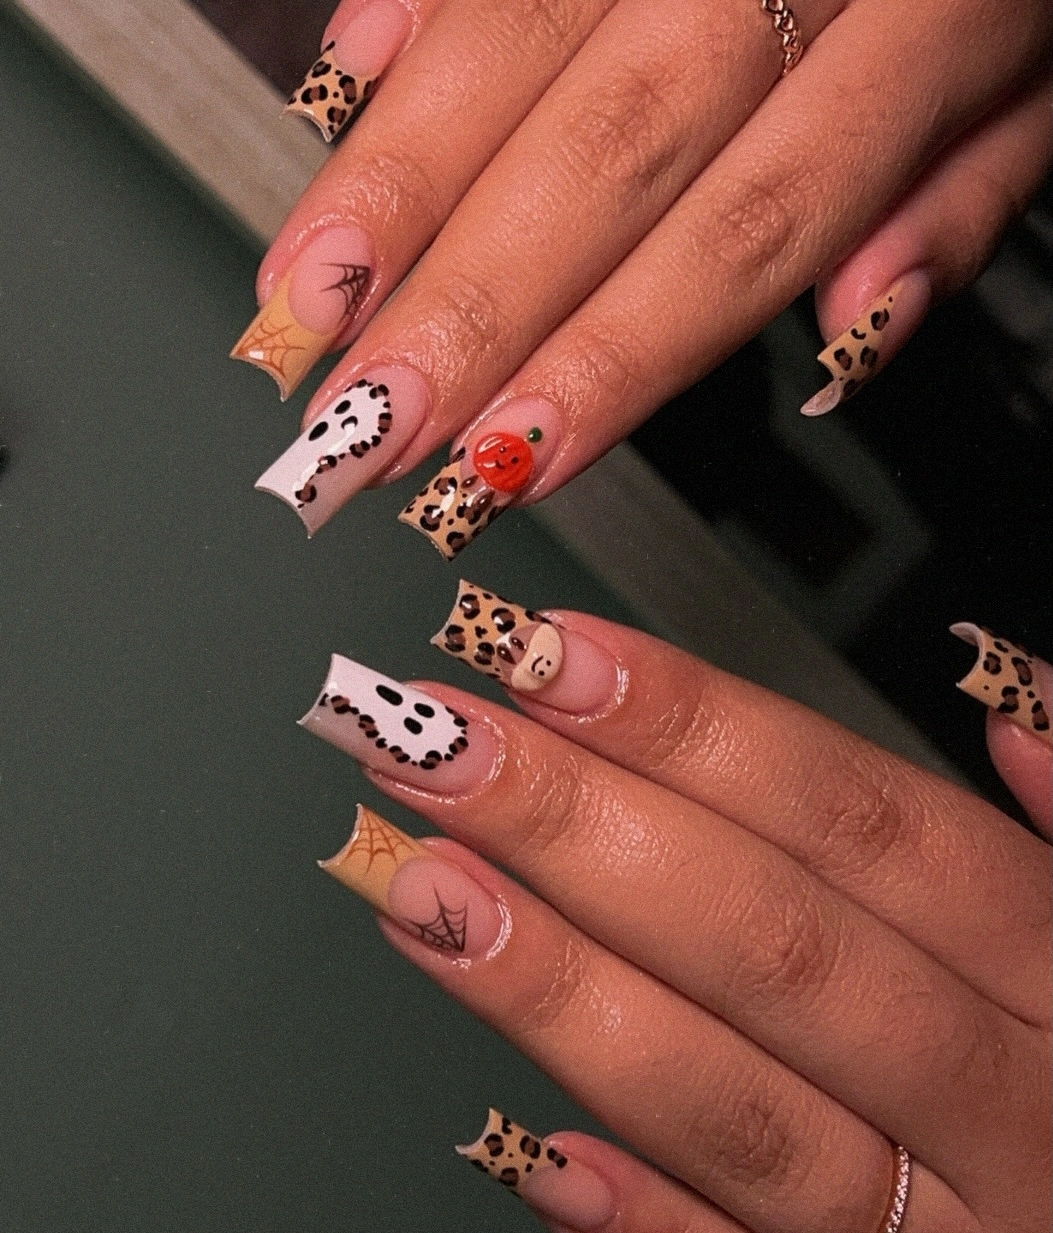
Choose two motif families to emphasize and let the others appear as tiny supporting notes. For example, ghosts and leopard spots can lead while the orange marks stay small, or the linework can frame a single pumpkin. Long nails invite layering, but shorter nails need a stricter edit so the playful details do not merge into one indistinct surface.
The pale colors make black linework look lighter than it would on a dark base, which is why the set can handle a little more drawing. Still, leave at least one mostly clear nail on each hand to give the composition relief. If you want a more polished finish, remove the leopard pattern first and keep the ghosts and orange accents as the narrower seasonal story.
Short Nude Nails With Fine Black Linework
Short nude nails use black line art, pale ghosts, orange details, and a small pumpkin to create a compact Halloween set that looks intentional rather than crowded. The matte-looking neutral surface gives every motif a clean field, while the limited orange accents prevent the design from becoming too busy. Small art works here because the shape does not pretend to be a large canvas.
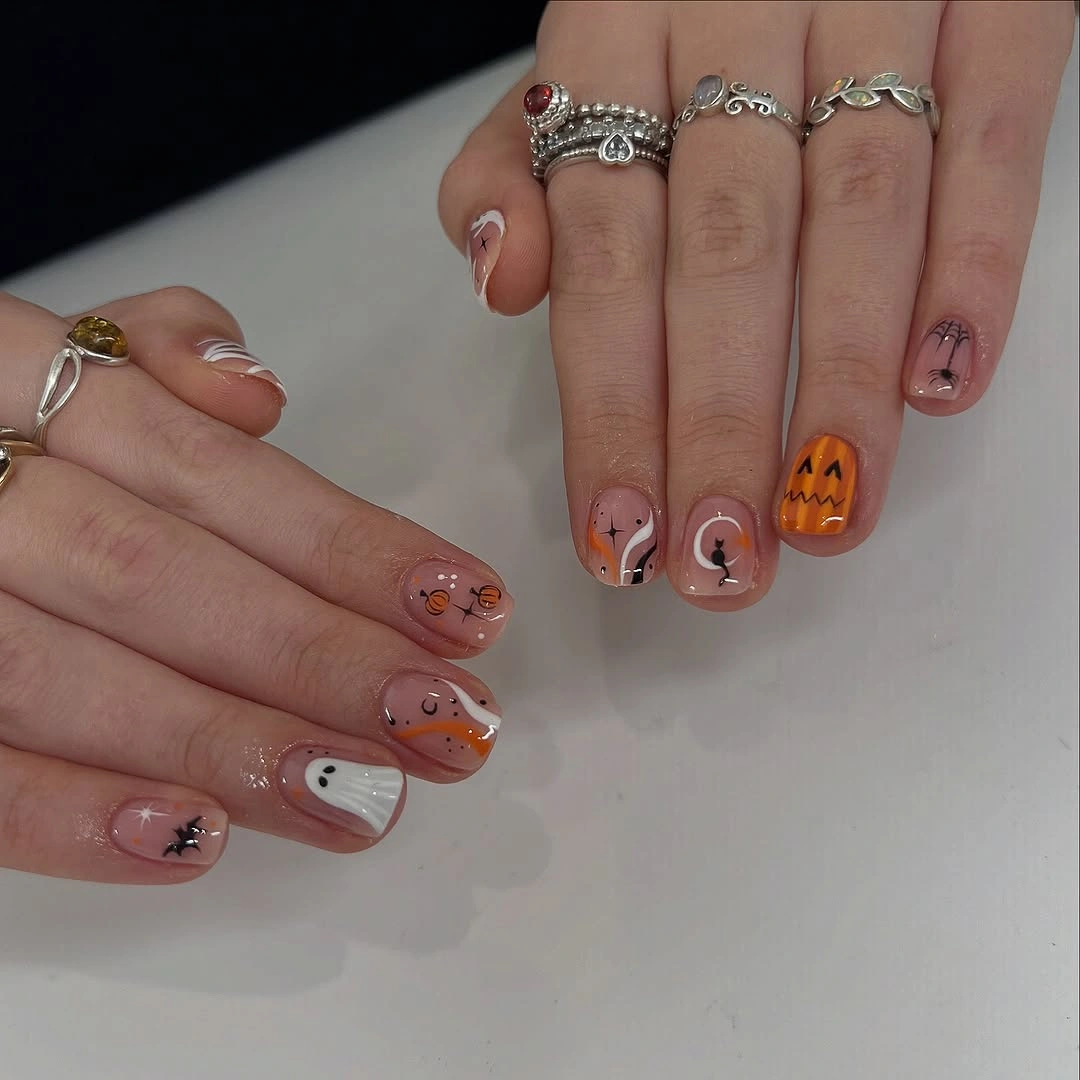
Place one motif close to the center of each accent nail and avoid extending black lines all the way to every edge. That keeps the fingers looking neat and gives the illustrations room to be recognized. Short nails are practical for daily tasks, but their limited space means details should be simplified before more colors or symbols are added.
The quiet nude background is the key to the set’s wearability. A thin black French edge could make the design sharper, while a soft brown outline would keep it more understated. Preserve the small pumpkin as the warm focal point and let the ghosts remain pale; their contrast relies on surrounding space rather than on additional glitter or dense pattern.
Pink Character Art With Bold Accent Shapes
Pink nails carry cartoon-style ghosts, pumpkin forms, hearts, and bold graphic accents, giving the manicure a cheerful illustrated direction. The bright base makes the dark details look playful instead of severe, while the varied motifs keep the set from reading as one repeated stamp. Because the characters are large relative to the nail surface, the surrounding colors must stay organized and limited.
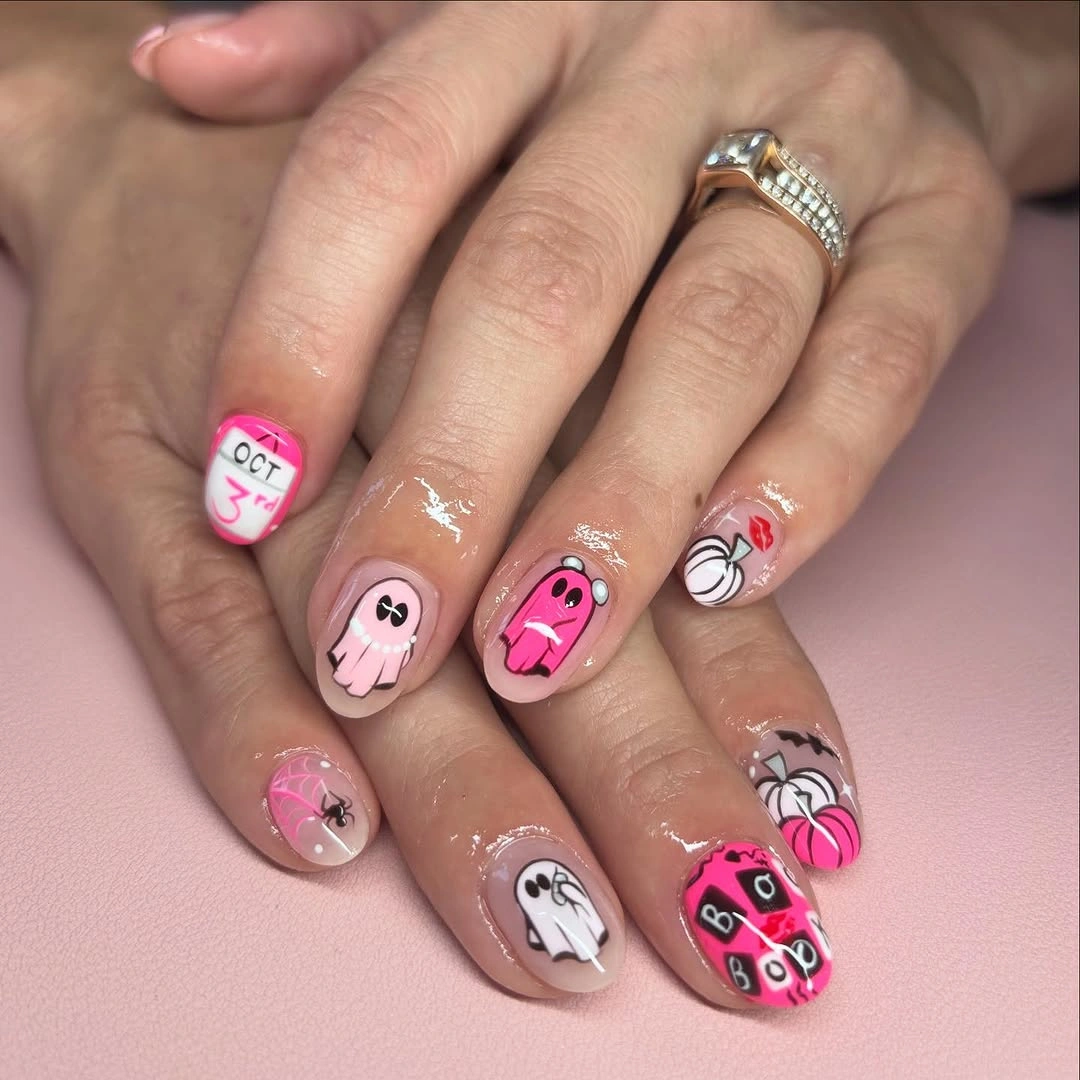
Use one character per accent nail and keep the remaining fingers in solid pink, black, or orange if you want a more edited version. A crowded cartoon set can lose its charm when every nail contains a separate story. The practical tradeoff is that large faces and outlines show wear near the tip, so choose placement that remains visible even when the edge begins to grow out.
Hearts are useful here because they soften the pumpkins and ghosts without adding another complex figure. If the pink feels too bright, move toward muted rose and let orange become the stronger accent. The manicure keeps its personality when the black outlines remain clean and the largest character appears only once or twice rather than competing from every direction.
Black French Edges With Skeleton and Ghost Details
Nude nails with black French edges use the dark tip as a stable frame for skeletal details, pale ghosts, and a small pumpkin accent. The contrast is sharper than in the peach versions, but the neutral center prevents the set from becoming a solid black mass. Each illustration sits inside a recognizable border, which makes the mixed imagery look more controlled and deliberate.
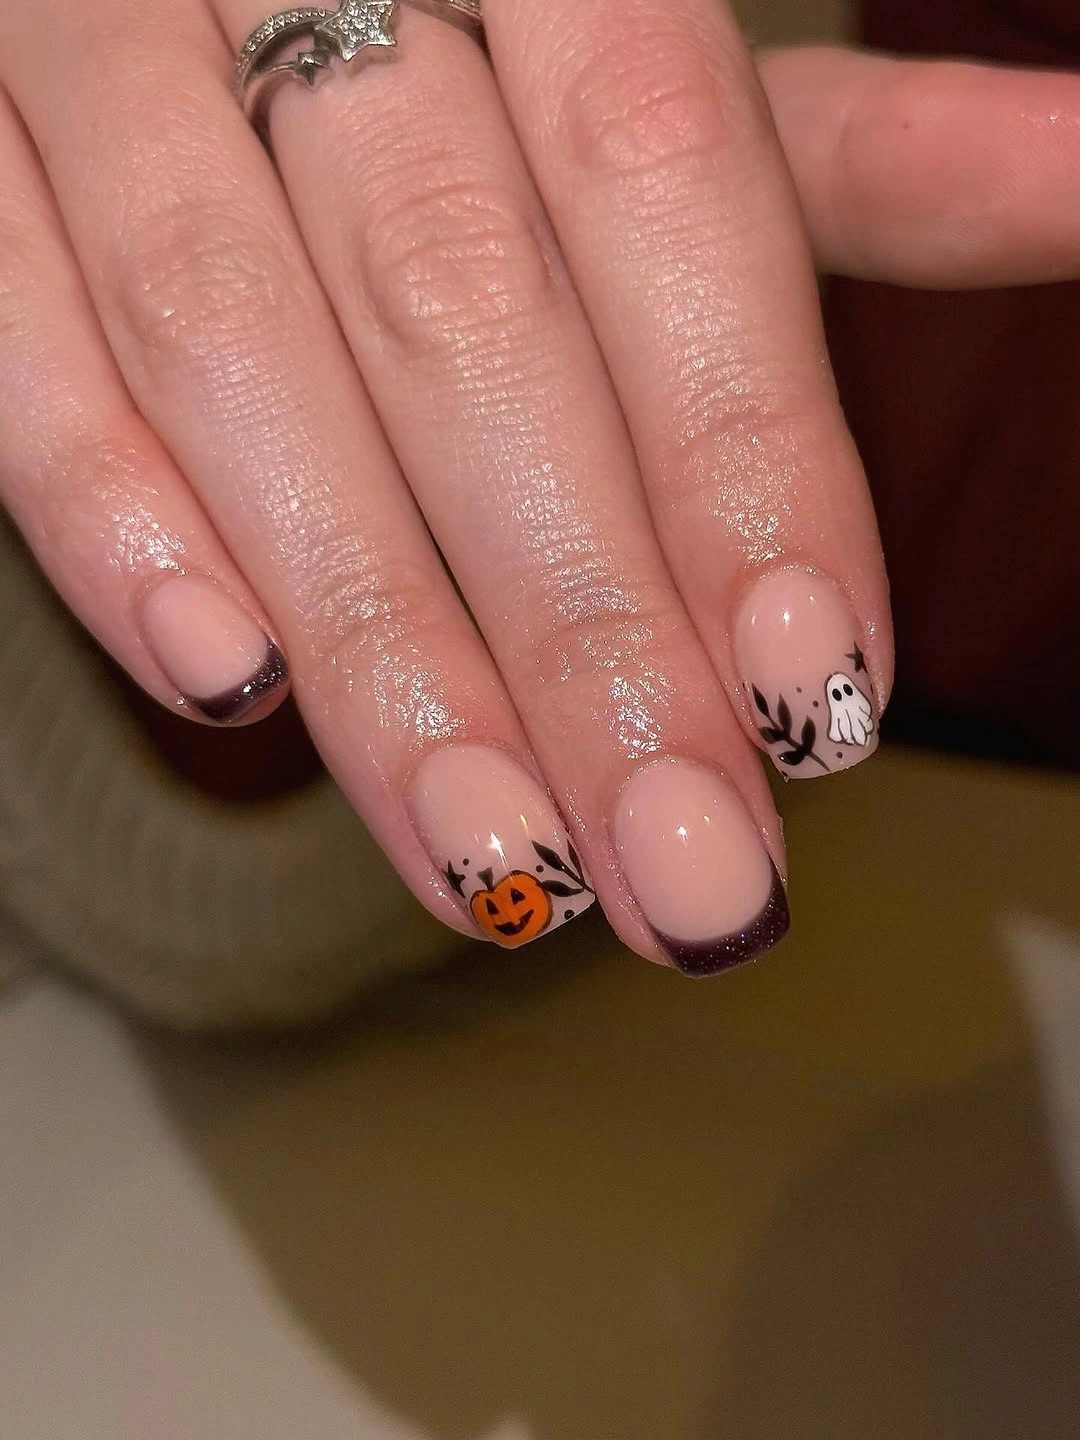
Keep the black edge consistent in thickness so the different illustrations have a common visual language. A shorter almond can preserve the same effect with only one ghost and one pumpkin, while the skeletal detail can become a simple white line. Dark tips are more forgiving than light ones at the free edge, though the nude base still benefits from a soft transition near the cuticle.
The ghost and skeleton shapes should not be the same size or placement, otherwise the set begins to look mechanically repeated. Use the pumpkin as the only warm interruption, and let its orange sit against the pale center rather than the black tip. That contrast keeps the seasonal symbol clear and allows the French frame to remain the first structural decision the eye notices.
Copper Shimmer With Small Pumpkin Accents
Copper shimmer covers most of the long almond surface, while two small orange pumpkin designs introduce a more literal seasonal cue. The reflective brown-copper finish already carries depth, so the pumpkin details do not need many surrounding lines or colors. This is a stronger choice for someone who wants the manicure to feel rich and warm before it reads as a themed illustration.
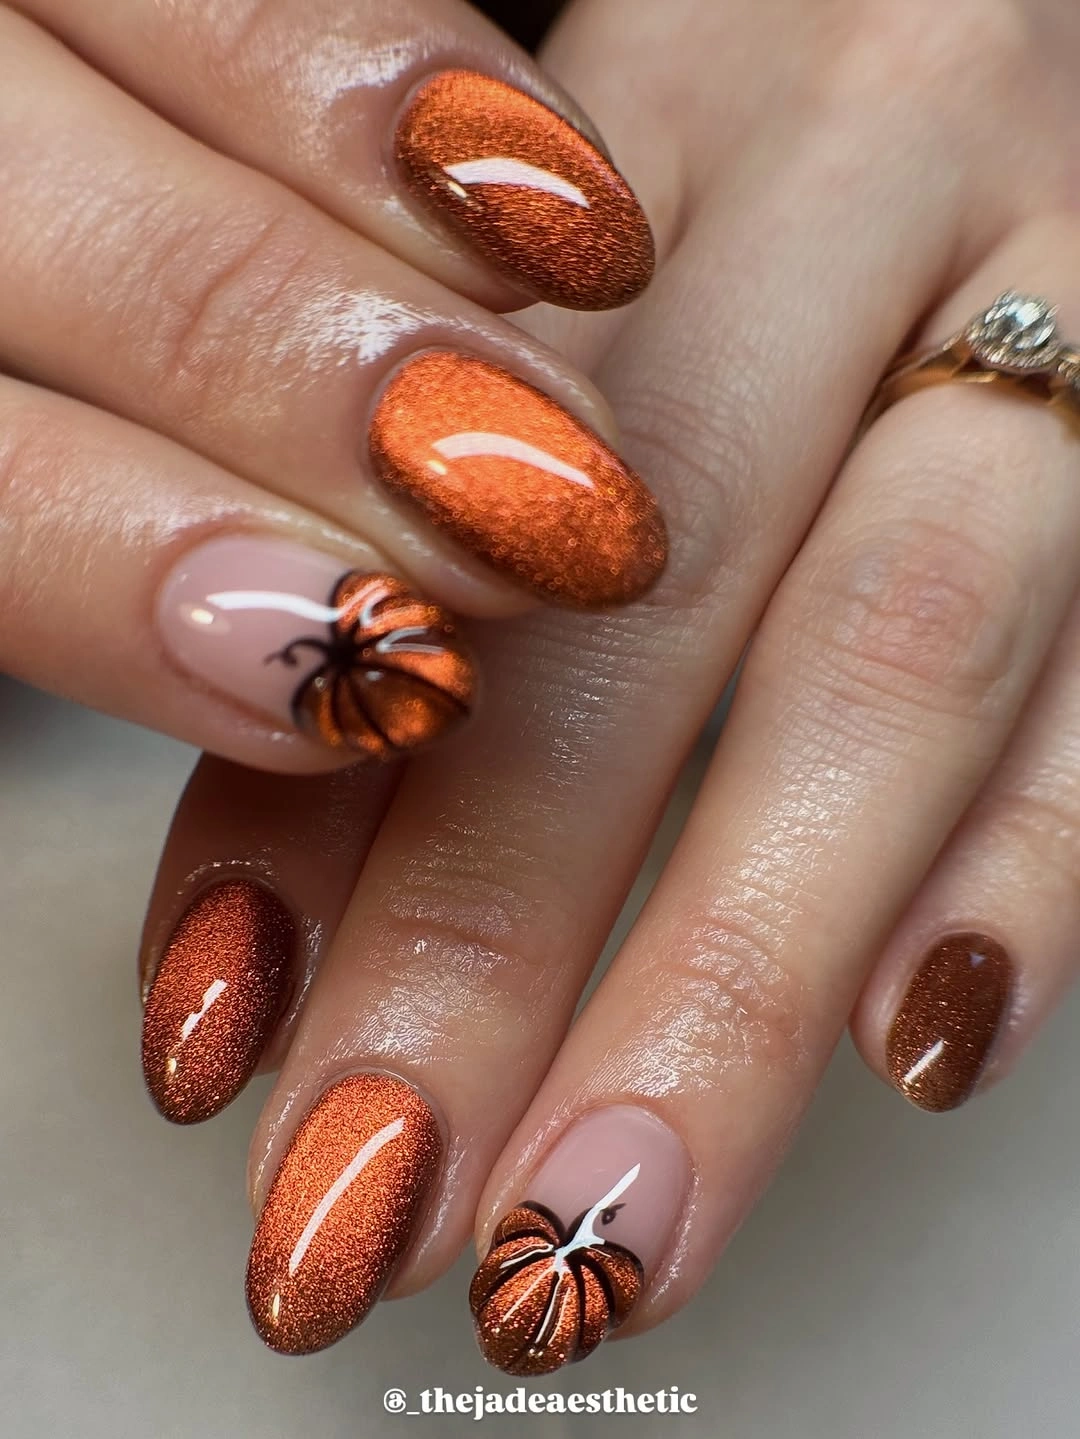
Keep the pumpkins on a pale or slightly less reflective accent area if you want their outlines to remain visible. A full shimmer base can make fine drawing disappear under changing light, so contrast matters more here than extra detail. Long almond nails emphasize the reflective surface, but a medium length can offer the same color story with fewer maintenance concerns at the tip.
Brown-copper works with orange because the two shades share warmth without becoming identical. Add black only as a very thin outline or stem; a large dark section would interrupt the smooth metallic field. The visual payoff comes from letting shimmer do the broad work and allowing the pumpkins to appear as small, carefully positioned notes near it.
Bright Red With Pink Ghost Pumpkin Accents
Bright red nails contrast with pale accent nails carrying pumpkins, ghosts, tiny hearts, and small black marks. The red provides immediate energy, while the softer pink and white areas keep the illustrated motifs from feeling too intense. This layout has a clear order: solid color establishes the outer rhythm, and the lighter nails hold the more detailed seasonal conversation.
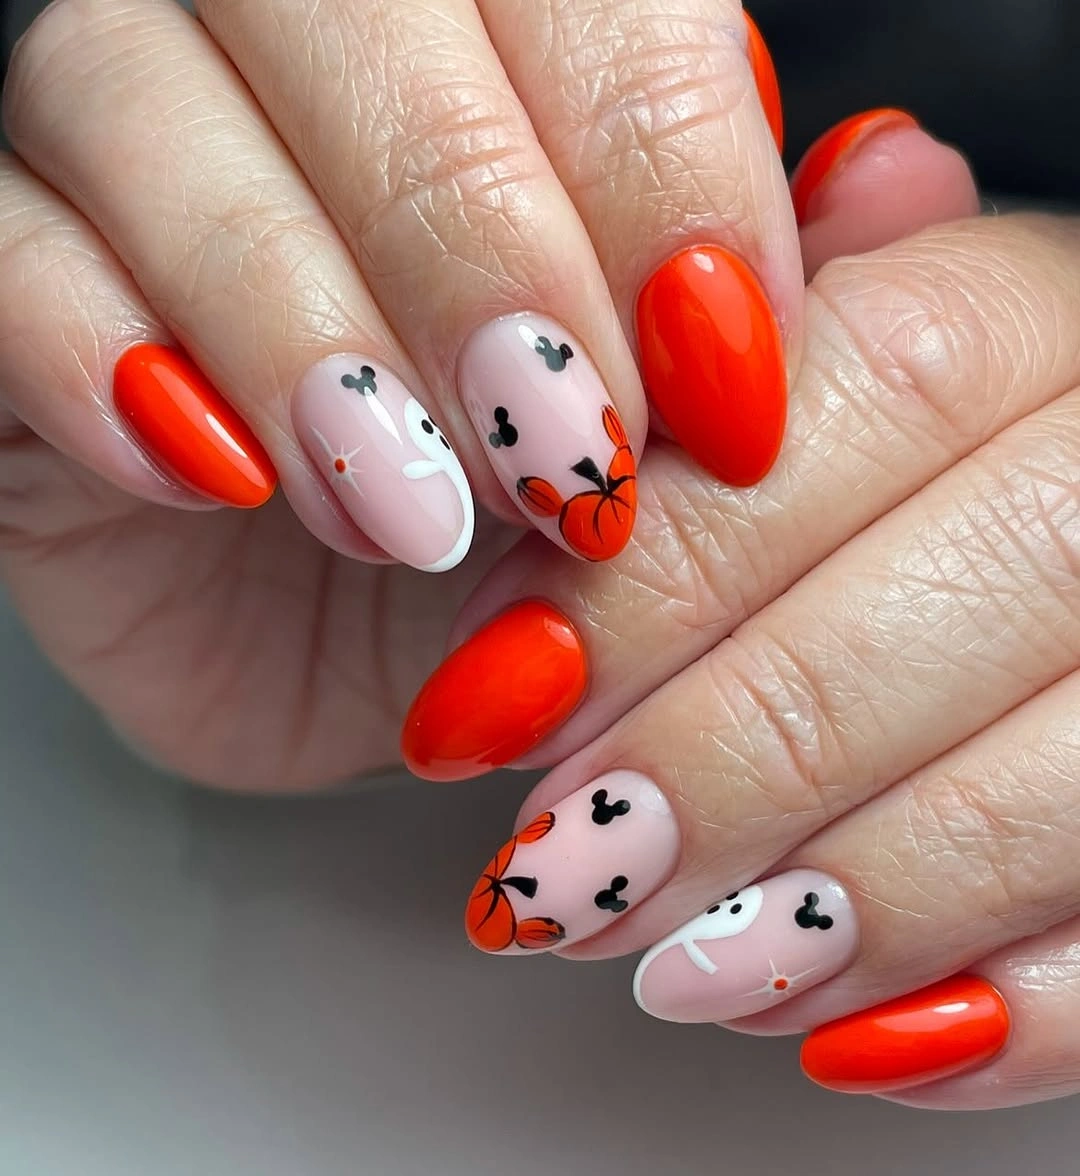
Reserve the light accent nails for the drawings and keep the red fingers nearly plain so the composition does not lose its hierarchy. A softer cherry or berry red can make the transition into everyday wear easier, while a true bright red keeps the contrast sharper. The main limitation is color saturation: adding another strong hue beyond orange may make the small motifs difficult to isolate.
Hearts introduce a playful curve that links the ghosts and pumpkins without needing more characters. If you prefer a cleaner result, remove the hearts and repeat one small orange pumpkin instead. The pale accents should remain visibly lighter than the red, because their contrast is what allows the tiny art to function as a focal detail rather than disappear into a broad color field.
Blue and Black Cartoon Halloween Mix
Blue and black nails combine orange swirls, stars, and colorful cartoon-style Halloween art into the most graphic set in this group. Blue provides a cool, night-like base that makes the orange look brighter, while black sections supply depth around the small figures. The varied colors are held together by strong outlines and the repeated movement of curved orange shapes across the hand.
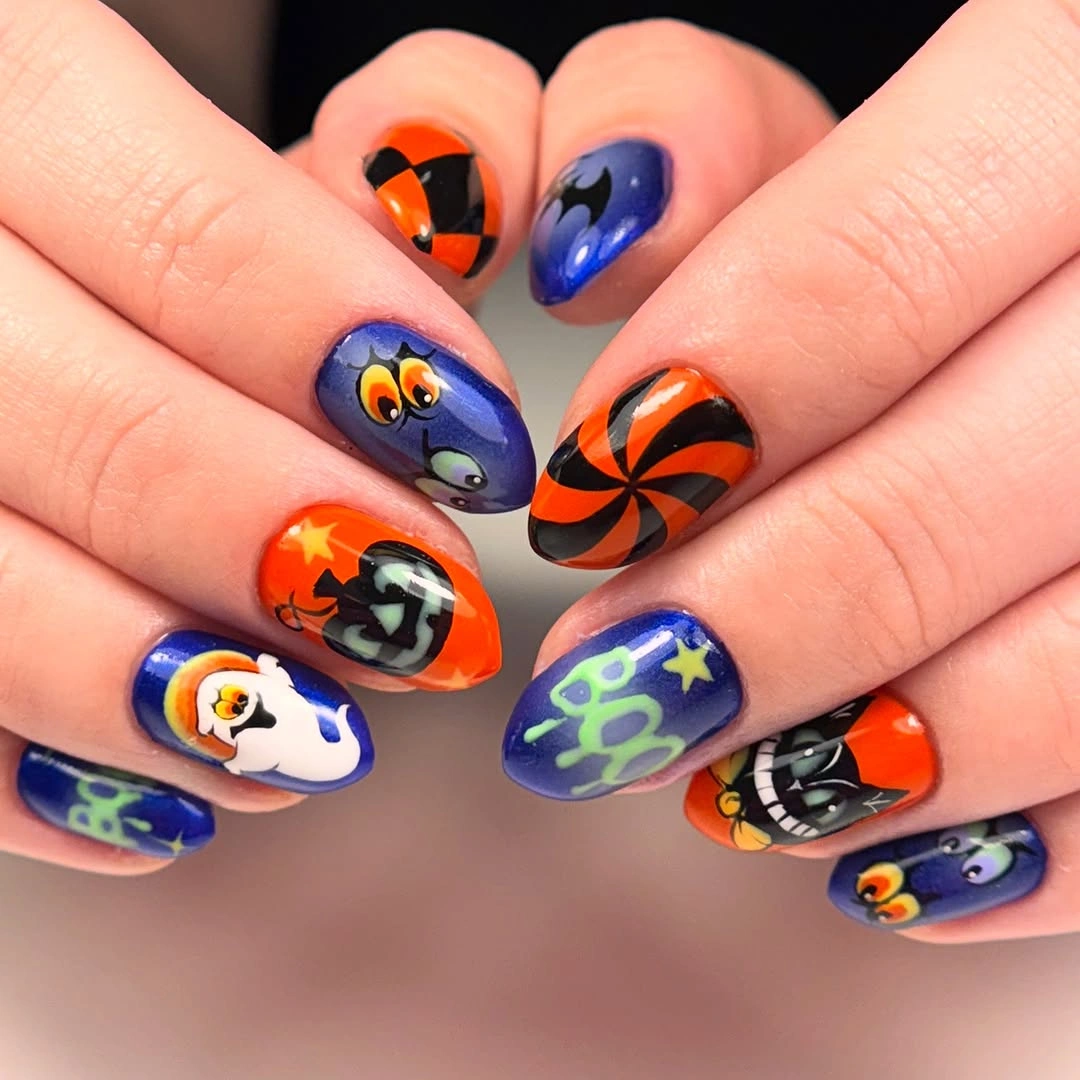
Choose blue as the main field and limit orange to swirls or one small character detail if you want the design to remain readable. The black areas should function as frames, not as additional canvases filled with more drawings. A shorter shape can preserve the palette with stars and a single orange curve, while long nails can hold the fuller illustrated approach shown here.
The cool-warm contrast is what makes this set feel energetic, so a silver ring or dark accessory can complement it without adding another polish color. If the cartoon details feel too busy, remove the figures and keep blue, black, orange, and stars as an abstract seasonal mix. That edit retains the night-sky feeling while giving the nail surface more room to breathe.