
Crafting Joy: The Complete Guide to DIY Sensory Walls
Creating a sensory wall is not just an art project; it’s a bridge to a world of textures, colors, and experiences. These walls are more than decorations; they are interactive canvases that stimulate the senses, engage the mind, and provide endless entertainment and educational opportunities for children and adults alike. In this guide, we’ll dive into everything you need to know about DIY sensory walls, from the concept behind them to a step-by-step guide on creating one in your home or educational space.
Understanding Sensory Walls
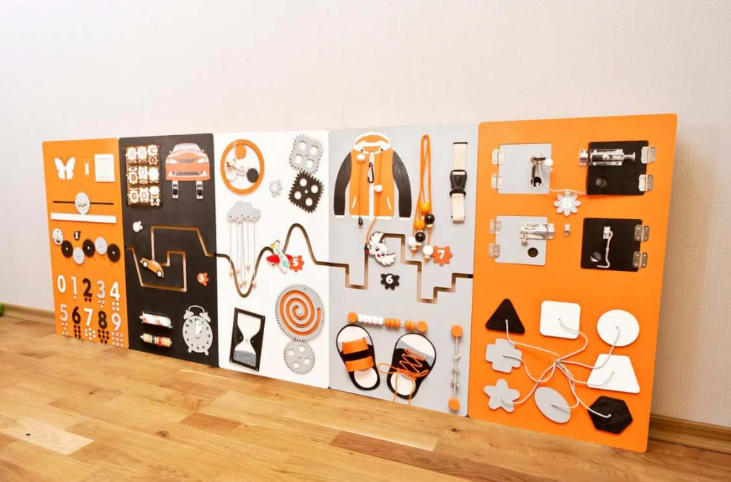
A sensory wall is a dedicated area filled with a variety of objects and materials that stimulate the senses. They’re particularly beneficial for children, including those with sensory processing disorders, autism, and ADHD, as they offer tactile, visual, auditory, and even olfactory experiences in a controlled environment. However, their appeal is not limited to the young ones; sensory walls can also be a calming and therapeutic presence for adults.
Planning Your DIY Sensory Wall
Before diving into the creation of your sensory wall, planning is crucial. Consider the age range and the needs of the individuals who will be using it. For younger children, focus on bright colors and simple, safe textures. Older users might appreciate more complex interactive elements, like puzzles or themed areas.
Materials You’ll Need
Gather a variety of materials that cover different sensory experiences:
- Textures: Look for items like fabric swatches, foam shapes, rubber mats, or textured wallpapers.
- Visuals: Include items with vibrant colors, patterns, or light-up elements.
- Auditory: Consider adding elements that make sound, like bells, musical instruments, or items that can be struck to produce noise.
- Interactive Components: Think about incorporating parts that can be moved, turned, or manipulated in some way.
Remember, the goal is to stimulate the senses, so be creative and think outside the box when selecting your materials.
Step-by-Step Guide to Creating Your Sensory Wall
- Select Your Space: A sensory wall can be as large or as small as you like. Choose a wall or a portion of a wall that’s easily accessible.
- Prepare the Base: If necessary, paint your wall or attach a large plywood board as the base for your materials.
- Layout Your Design: Before attaching anything, lay out your materials on the floor to get a sense of how they will look together. This step allows you to adjust your design as needed.
- Attach Your Materials: Secure your items to the wall or board. Depending on the material, you may need to use screws, adhesive, velcro, or other fasteners. Make sure that everything is securely attached to prevent any accidents.
- Add Interactive Elements: Incorporate elements that can be manipulated—knobs, levers, buttons, etc. These components should encourage interaction and exploration.
- Safety Check: Once everything is in place, do a thorough safety check. Ensure that all items are securely attached and that there are no sharp edges or small parts that could be a choking hazard.
Maintenance and Rotation
To keep the sensory wall interesting and engaging, consider rotating elements every few months. This change not only renews interest but also offers new sensory experiences. Regularly check the wall for any wear and tear or loose elements to maintain a safe environment.
DIY sensory walls are a fantastic way to bring sensory experiences into any environment. They offer a unique opportunity for exploration and learning, tailored to the specific needs and interests of the users. By following the steps outlined in this guide, you can create a sensory wall that will provide joy and stimulation for years to come. Whether for educational purposes, therapeutic benefits, or simply as a fun project, sensory walls DIY is a rewarding endeavor that brings a multitude of benefits.